Showing posts with label gift bag. Show all posts

Sunday, December 3, 2017

Sweet Floral Holiday Bags

Howdy! I wanted to share with you a project I did.  I made a paper tote and gift bag.  But, I used non-holiday pattern paper, to make holiday themed bags.  Because like a lot of us can't always afford to purchase another collection of pattern paper.  And lets face it, I really need to start using the paper I have, and not keep adding to my collection {smile}.  I am entering the current challenge over @ A Snowflakes Promise Challenge - Anything Goes.


and here are my projects
the paper tote:
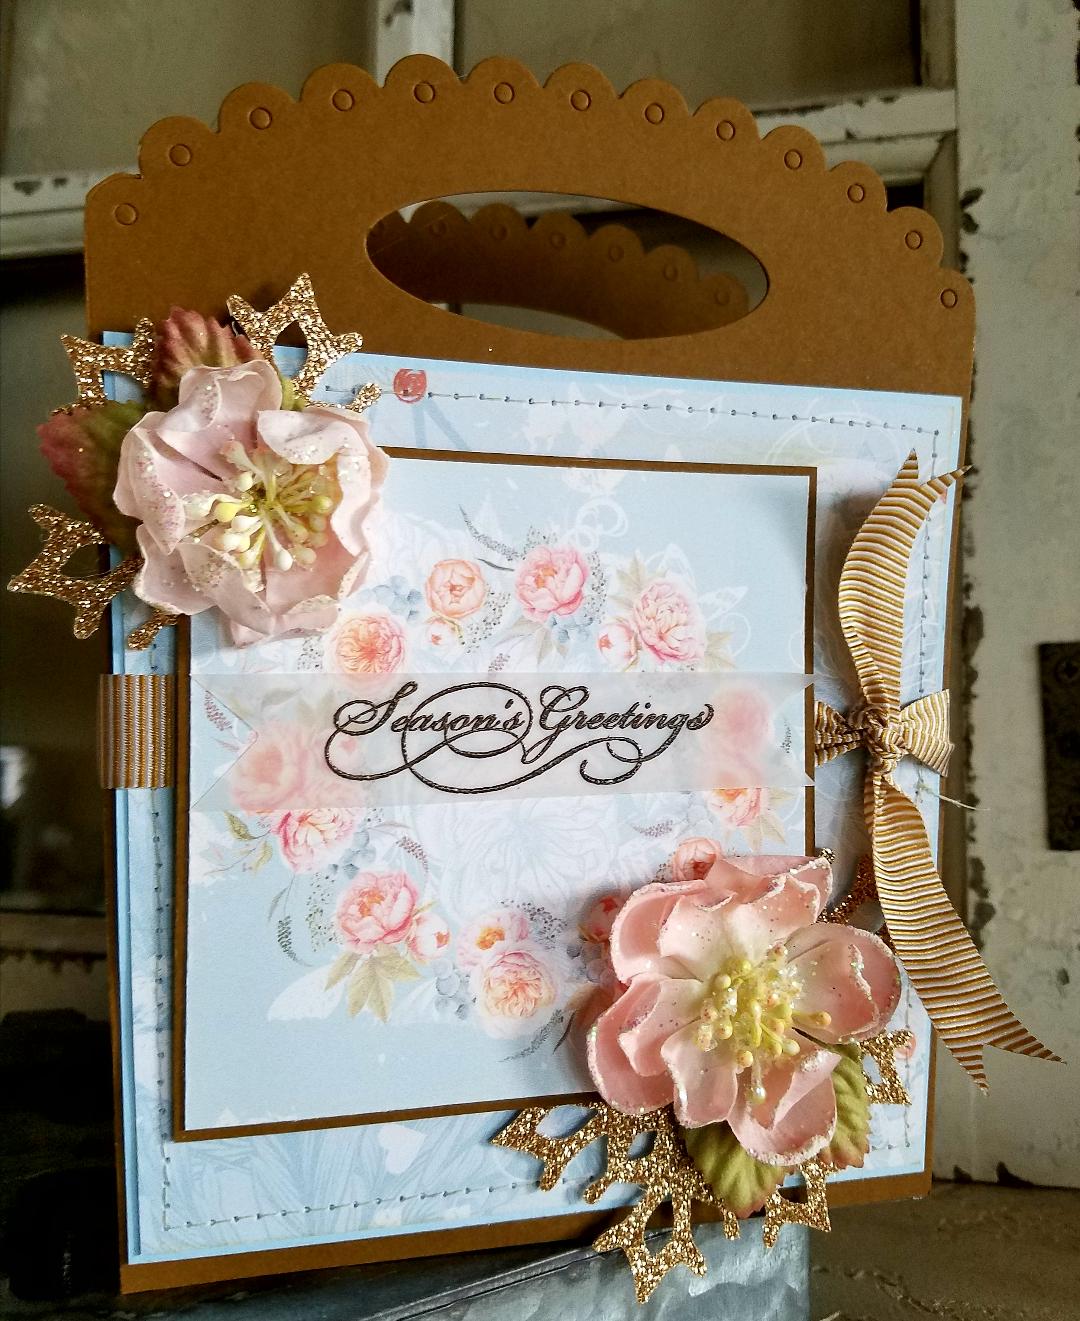

and here is my gift bag:


~ disclaimer:  I was crafting late into the evening, and lighting was scarce. ~

Recipe:  I used Cocoa Bean card stock, and snowflake die, are by Paper Trey Ink.  The pattern papers I have used are digital papers.  The sentiment is a stamp.  The vellum card stock, Early Espresso embossing powder, seam binding, ribbon, and champagne glitter paper are by Stampin' Up!.  The tulle trim is Mellissa Frances.    The two peach blossoms (on the tote) are from Recollections.  The beige blossom (on the bag) is from Prima.  The tiny pink ornament bulb is from a big box store.
The Tote:  I used a die from Paper Trey Ink to die cut the tote.  I layered the pattern paper onto solid card stock, and added some machine stitching.  I adhered the floral circle paper to the front of the tote with foam tape.  I tucked the snowflakes between these two layers.  I hot glued the blossoms to the corners.  To create the sentiment piece, I heat embossed the sentiment onto vellum and adhered it off center of the blossom circle.  And lastly, wrapped the ribbon around the tote, to help give it a finished look.
The Gift Bag:  I only had scraps of this pattern paper, so I wanted to use them up, before I started printing again.  The large floral pattern was a 6" x 6" piece.  So, I cut my piece 4 1/2" x 6", to use more of what I had.  I added two different polka dot papers, both of which were scraps.  I added some machine stitching to give it a homespun look.  I added the tulle trim and seam binding to help hide the seam where the two papers meet.  I tied the seam binding into a multiple loop bow, attached a bulb, and tucked in a paper blossom.  I created the sentiment piece, just like I did for the tote (heat embossing).  To hide the seam, at the top, where the two pattern papers joined, I added a scallop trimmed pattern paper.  I adhered the card stock panel to a paper bag.
These two types of bags were for sale at yesterdays craft fair.  I hope these two samples have given you some inspiration to use the non-holiday themed pattern paper for your next holiday paper craft.  {smile}

Wednesday, November 2, 2016

Clear Box - Gift Bag

Howdy!  I wanted to share with you a new gift bag that I am making for my Craft Fairs this year.  Typically, I add a decorative panel to a brown paper bag.  But, I wanted to add a new dimension to my gift bags.  So, I have added my decorative panel to a clear box, and made it a tote.  


Recipe:  The solid red card stock is Riding Hood Red card stock from Stampin' Up!  It is retired for a few years now.  But I just love the vintage faded red color.  The pattern paper is 25th and Pine by Basic Grey.  I matted the floral pattern paper onto a scrap piece of mint macaroon card stock by Stampin' Up!.  I added a single border stitch with my sewing machine.  The sentiment 'label' is actually cut from a sheet of pattern paper.  I added some sweet blush stitched ribbon from Paper Trey Ink.  I liked how this color of pink complimented the pink in the pattern papers.  I attached the sentiment 'label' with a pair of antique pearl brads from recollections.  And to add a little sparkle, I added a retro silver star mini ornament.


The clear boxes are 5" x 5", and 2" deep.  I left the top flap in tack.  That way, there is a way to 'close' the bag/tote so items don't fall out {smile}.  At first, I was struggling a bit, with how to 'package' these clear box gift bags/totes.  The clear boxes unfold, to lay flat.  Ta Da!  Now, all I have to do is slide these gift totes into a clear bag.  I need to figure out a price.  Don't fret, I will still have my typical paper gift bags {smile}.   Thank you for stopping by, to see what I have been working on.  Now, it's time to bleach some bottle brush trees!

Saturday, September 10, 2016

Hello Santa Gift Bag

Howdy.  and welcome.  For those of you who are following me, I thank you for your patience.  Life has gotten in the way of me crafting.  Super sad, right?  Yeah.  But, I believe that I have a handle on this.  And hopefully my posts keep coming, and I can share with you what I have created.  {smile}
I know that Christmas is only 15 weeks away.  Wow, can you believe it?  I have decided to start crafting, to get my inventory up.  I have two craft fairs on my books, and I am looking into adding one more.  So, let's get started.  {smile}
I like to use non traditional holiday colors; so anything other than red and green.   And I prefer to use retro or vintage style.  And I am pretty happy with what I came up with.  
gift bag:


The 'bag' is 4 1/2" x 8", so it will hold a fair amount of loot!  {smile} 
Recipe:  The red (pure poppy) and black (true black) card stock are both from PaperTreyInk.  The 'red' has an orange undertone, to coordinate better with the vintage red images.   The pattern papers are 'Hello Santa', that I purchased from a big box store.
I matted each of the pattern papers with solid card stock.  Just to help define the papers.  
I added a simple border stitch around the main panel and the polka dot pattern paper.  I felt that the machine stitching added a 'homespun' look & feel to my project.
I machine sewn a scrap piece of cream cotton trim to the focal panel.  I wrapped some black, cream, and metallic bakers twine around this piece.  I tied a snowflake 'charm' to the bakers twine.
I purchased this fun font 'Merry Christmas' stamp at the same big box store I pirated the pattern paper from.  I stamped the sentiment in basic black classic ink, onto white linen card stock from PaperTreyInk.  I hand cut the ovals.  I used a piece of sand paper to help keep the edges clean and neat.
I added a 'Santa Delivery' tag to the top of the bag.  I tied on a scrap piece of real red pom pom trim with the same back, cream, and metallic bakers twine.  I added a scrap piece of the polka dot paper to the clothes pin.
Thank you for looking.  I hope I have inspired you to use some of your new or old crafting supplies to create something pretty!


Sunday, December 6, 2015

Craft Fair

Howdy!  WOW!  The turn out and response to my booth yesterday was fabulous!  A huge Thank You to everyone who took a moment and stopped by to have a 'look-see' at what I created and had for sale yesterday!  And another huge Thank You to everyone who came out and made a purchase or two {wink}.  LOvEd the response and the many, many compliments!  My heart is over joyed!  


I stayed home last night to craft a few more items.  If you stopped by yesterday, you know that I 'ran out' of several items.  And I didn't want to open the craft show today empty handed.  So, if you didn't make it out yesterday, please come by today!

my 'small' gift bag, but don't forget about my fabric scrap large gift bags!

I have gift bags (small and large) and gift card holders (small and large) ready for sale!  So, take a moment to get all your gift 'wrapped up' and take a little stress out of the holiday giving!  These little paper gems, are sure to add that little bit of sparkle and homespun feeling to this joyous holiday!

a gift card holder

Need to add an unique gift under the tree?  Why not pick up (or special order) a magnetic monogram?  I have most letters, so stop by and have a peek.  These letters measure approximately 4 inches square.


Don't see what you are looking for? contact me (email, phone, or convo thur Etsy) and make a special order request.  There is no additional fee for special orders, so give the gift you really want to give!

I'm off to get a few more crafts done this morning before I head out the door to the last day of this craft fair!  Enjoy your Sunday! and hopefully I see you there!


Sunday, November 29, 2015

Green & Red Poinsettia Gift Bag

Howdy.  I have been having such a great time making these little fabric scrap Christmas 'trees' that I just had to make another. {smile}.  And today, I am on my second post of these gift bags.  I used the same fabric as the previous post, but this time I created a 'green' bag.
I am entering this bag into these three challenges:  Die Cuttin DivasInky Impressions Challenge, and Crafting By Desings.   
The wonderfully talented ladies over @ Die Cutting Divas have a great holiday preparations challenge:  Tag, Bag, or Box.  Sounds perfect! and let's just admit it, something we need to get crafting, anyways.  {smile}
I am playing along with the creative design team over @ Inky Impressions Challenge.   Their current challenge is to use: Traditional Christmas Colors: Red, Green, and Kraft.  I believe this is right up my alley, so to speak.  The design team has done a wonderful job at providing us with some inspiration.  
I am also playing along with the ever inspiring design team over @ Crafting By Designs.   Their current challenge is themed: getting ready for Christmas.  I think all of us can create something beautiful to play along with their challenge, too. {smile}
Finally, I am using the inspirational photo from the card Concept.  I am not 'playing' along with their challenge, due to the fact, that their challenge site is for cards, and not projects.  But their inspirational photo is very beautiful, home-y, and a bit vintage-country. {smile}

and here is my Green version of my holiday gift bag:


a close-up of the 'tree'
Recipe:  I used green card stock to create the bag shape.  It measures 4 3/4" x 12".  A nice size for that special holiday gift.  {smile}
To create the 'tree' I tied on strips of fabric from a fat quarter set by Stampin' Up!.  It is retired.  But I love the red blossoms, the green accents and the brown patterns.  Very pretty, vintage-y, and a bit country.
I also added some crochet trims, tree tinsel, green velvet ribbon with red satin backing, and a brown gingham ribbon.
The fabric, trims, and ribbons are tied to a kraft striped paper straw.  I topped my 'tree' with a single red paper rose.
I tied on a trio of vintage buttons with kraft twine.
The background and sentiment are hand-stamped using crumb cake classic ink.  I just love how soft and 'innocent' this color looks on vanilla card stock.
I love to add some machine stitching to my hand-crafted cards and projects.  I think it 'finish'es a project, and adds that special homemade touch.  {smile}  I also added some machine stitching to the sentiment rectangle.  
I hope you create something beautiful and holiday inspired, so you can play along with these challenges, too!

Enjoy the rest of your weekend.   And yeah, I have a few more gift bags to share with you.  But, I'll leave those for another post.


Christmas Roses Gift Bags

Howdy.  I hope this post finds you all well, and busy making stuff {smile}.  Me, of course!  I had such a great time making my previously posted fabric scrap 'trees' that I decided to make several more, using various fabric scraps.  Today, I want to share a new red gift bag.
I am entering this bag into these three challenges:  Die Cuttin Divas, Inky Impressions Challenge, and Crafting By Desings.   
The wonderfully talented ladies over @ Die Cutting Divas have a great holiday preparations challenge:  Tag, Bag, or Box.  Sounds perfect! and let's just admit it, something we need to get crafting, anyways.  {smile}
I am playing along with the creative design team over @ Inky Impressions Challenge.   Their current challenge is to use: Traditional Christmas Colors: Red, Green, and Kraft.  I believe this is right up my alley, so to speak.  The design team has done a wonderful job at providing us with some inspiration.  
I am also playing along with the ever inspiring design team over @ Crafting By Designs.   Their current challenge is themed: getting ready for Christmas.  I think all of us can create something beautiful to play along with their challenge, too. {smile}
Finally, I am using the inspirational photo from the card Concept.  I am not 'playing' along with their challenge, due to the fact, that their challenge site is for cards, and not projects.  But their inspirational photo is very beautiful, home-y, and a bit vintage-country. {smile}


and here is my Red Holiday bag:


close-up of the 'tree'
Recipe:  The outside of the bag measures 4 3/4" x 12" .  The 'bag' itself measure 4 1/2" x 9 1/2".  For the base of the gift bag, I used a rich, dark red card stock, very similar to Cherry Cobbler card stock by Stampin' Up!.
I used very vanilla card stock for the main panel, and matted that with my favorite Kraft card shock by Paper Studios.  I used a snowflake stamp set to hand-stamp the snowflake background in crumb cake classic ink.  I just love how 'soft' this color is on vanilla.  {smile}  I added a single border stitch with my sewing machine.  I think it really adds a 'finished' and homespun touch to my projects.
I used a kraft striped paper straw as my tree trunk/branch.  And then I just tied various fabrics, crochet trims, ribbons and trims to the straw.  I then added my tree topper (red velvet bow), and vintage buttons tied with kraft twine.
I trimmed the fabric strips in varying lengths to create the 'tree' shape.  I used hot glue to adhere the 'tree' to the snowflake stamped panel.
The sentiment is from a homespun holiday stamp set by Paper Trey Ink.  And then finally, I added a wooden snowflake to the sentiment rectangle and topped it off, with a green faux half pearl.

I finished the bag with a decorated mini clothes pin, and a gift tag.
Thank you for looking.  I hope you have been inspired to craft something beautiful for your holidays.


Tuesday, November 24, 2015

Blue Fabric Scrap Holiday Tree Gift Bag

Howdy!  Oh boy!  I had so much fun making my other 'tree', that I decided to make another. {smile}  The wonderfully talented and inspirational ladies over @ the Shabby Tea Room have a current challenge O' Christmas Tree, and the inspirational photo is just to die for!  Super adorable and simply country!

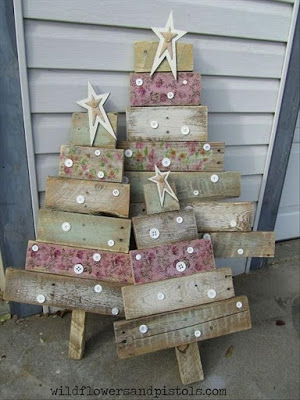
Look at these layered/stacked strips to create Christmas trees!  The distressing, the buttons, and the pretty stars make these simply beautiful!
I am also entering this holiday gift bag in the current challenge over @ Unicorn Challenge Blog.  Their current challenge:  Christmas is Coming, and I think these bags are perfect!


and here is my other fabric scrap 'tree':


I had so much fun making the first one, that I just had  to make another!  I used Pool Party, Real Red, and silver accents to create this ice-y holiday gift bag.  
I used fabric (retired) from Stampin' Up!.  The ribbons and trims are from various makers.  (notice the red velvet ribbon?  purchased that on sale!)  I tied on buttons (retired) from Stampin' Up! and Paper Trey Ink, using the current silver thin cord from Stampin' Up!.  
The snowflakes stamped on the shimmer white card stock are retired from Stampin' Up!.  I used going grey classic ink, by Stampin' Up! to create the background and sentiment piece.  
Once again, I added machine stitching.  I think it just adds that homespun look and feel.  I added a silver glitter star to the top of this tree.  And a silver tone snowflake charm to the sentiment piece.

These and many more gift bags will be for sale at my next holiday craft fair.  I hope you get a chance to stop in and pick up some wonderfully crafted homespun holiday gifts and packaging.


Thank you for stopping by.  Im heading back into my craft room to finish up on a few desk top calendars.  I love making these.  They add that special personal touch to your office space/desk.


Red Fabric Christmas Tree Bags

Howdy!  Oh, it feels good for my soul to craft, sew, and just simply create!  I saw the inspirational photo over @ the Shabby Tea Room for their current challenge, O' Christmas Tree.  and oh boy!  That photo gave me the idea of making some Christmas trees from fabric scraps.  I imagine you can do the same with strips of pattern papers.  Umm, maybe I'll create a few of those, too! {smile}


Look how super cute and country this is!  I love the buttons and the stars on top are just adorable!
I also stumbled upon a 'new' challenge site to me: Try It Tuesday.  They have a new challenge: Bags & Boxes.  So, I thought how perfect!


here is what I made:


I made a gift bag, and used the inspirational photo to create the cover.  I made a fabric scrap holiday 'tree' with traditional red and green holiday colors.  I used fabric (retired) from Stampin' Up!, ribbons  and trims from various places.  The buttons (retired) are from Stampin' Up!.  The kraft twine is from PaperTrey Ink.  The tags, and stamps are from Paper Trey Ink, as well.  
I stamped the snowflakes in kraft ink onto vanilla card stock.  Matted this stamped piece with kraft card stock.  I did a purposefully sloppy double machine stitch border.  
I tied my various fabric and trim scraps onto a kraft striped paper straw.  I hot glued the 'tree' to the card stock.  
I tied a simple bow with the red ribbon strung through a Webster's Pages chipboard button and used hot glue to adhere it to the top corner of the sentiment piece.

Thank you for stopping by.  I hope you have been inspired to play along with the talented ladies over @ the Shabby Tea Room & Try It Tuesday.  My gift bags will be for sale at my next holiday craft fair.  Hope to see you there!


Wednesday, November 11, 2015

French Holiday Set

~ photo heavy post ~
Howdy.  Welcome.  Before you asked, I haven't quite finished my trophy cups.  But, I promise, I will.  As they will be for sale at my next Craft Fair - this Friday!  I was able to work on a few other holiday projects.  For those of you who don't know, I love taking non-holiday pattern paper, and creating holiday projects.  {smile}  I do love typical holiday pattern papers, but sometimes, its fun to set out side of the box.  Exercise your creative mojo, so to speak!
A month ago, I saw quite a few wonderfully creative projects using Gilded Lily pattern paper by G45 (Graphics 45).  And let's just say that I fell in love with both the paper and the projects.  So much so that I went out and purchased a few sheets of the pattern paper.  Then, it just sat there.  (I'm sure this sounds familiar to a lot of you - smile)  This pattern paper has royal images of Marie Antoinette, crowns, lilies, script, dots, and flourishes.
I set out to start working on holiday projects to have for sale, at my next holiday craft fair.  And then, I grabbed that beautiful Gilded Lily pattern paper.  I also stopped by Mojo Monday challenge site to get a layout.  This is this week's sketch:


and here is what I did with the sketch:


Let's look at each piece separately!
First, the bag:


As you can tell, I rotate the sketch.  I also used a 'tag' for the circle piece.  The tag is heat embossed with pink embossing powder.  I used cream velvet ribbon for the top of the tag.  But I didn't want a lot of bulk with a traditional tag 'loop', so I tied the velvet ribbon with kraft twine, and added a jingle bell.  {jingle bells are fun!}  I switched out the floral accent piece with a holiday shabby chic piece.  {smile}
and a close-up:


I wanted the bulb and snowflake to move, so they are tied onto a Tim Holtz safety pin, that is secured to the front of the bag with a rhinestone floral brad.  I also added some fabulous trim in a make-shift 'junk bow': tulle, pom pom trim, crochet trim and thin ribbon.  I used kraft twine to hold everything together.

The gift card holder:


I wrapped some white cotton trim and seam binding around the top flap of the gift card holder.  I  layered a silver glitter snowflake on top of the trims.  And then added that sweet bow, with a snowflake charm tied to it.  {smile}


And the inside of the gift card holder.  Simply tuck the gift card into the bottom flap.  The sentiment is heat embossed with silver embossing powder :  Greetings of the Season.  Elegantly simple.

and now the stocking stuffer - chocolate!


I used some of the scraps of the pattern papers, and wrapped some chocolate candies.  I added a cream crochet knot, tied on a simple tag stamped with 'Noel', and tied the gold cord into a simple bow.  {smile}  Something elegantly simple.  Perfect {smile}

Well, thank you for looking.  I hope you have found some inspiration and get an opportunity to craft something fabulous, too!


Thursday, July 17, 2014

Bunco Three & Two

~ lots of photos ~

Just a quick reminder:  we are counting down backwards from eleven.  Also, with several time contra instants and missed opportunities, these photographs are less than perfect.  Please look upon this post with a kind eye.  My deepest sympathy for the crummy photos.
prize three:


here is a close-up view of the gift card: 

 I used some sweet, country charm pattern paper to create an unique gift card.  I used some of the same elements when creating the altered spiral notebook.  I did add some machine zig zag stitching to this small gift card, and a small vintage button.

and here is a photo of the gift (prize) set:


I altered the front of a spiral notebook.  I took some gorgeous vintage-y pattern paper from Authentique.  I added some coordinating tags and paper embellishments.  I added some white resin architecture pieces, a resin blossom, a hand-made paper blossom, a hand cut mannequin, and a large white satin ribbon.  There is a pink polka dot ribbon book mark that is attached to the top spiral.  

prize two:


ok, another crummy photo, but I did want to add a pic of the prize set:


about the only half decent photo of the gift card.  I wanted to keep with the blue and white color theme.  I added two different, but I believe coordinating digital paper.  I added a neutral polka dot pattern piece of digital pattern paper, and topped it off with a digital collage pattern paper for the gift card front.  I added a metal rimmed circular tag with a pearl brad.  To help add another metal accent, to add a crisp element, I stapled a piece of crochet trim and seam binding to the left side of the sentiment banner piece.


the actual prize:


I truly enjoy crafting these little cuties!  I took an over-the-top rhinestone and pearl mini photo frame (2" x 2" square) and transformed it, into a pin cushion photo frame.  Yeah, it is functional, but it is intended for decorative purposes.  I added two different stacks of button pairs.  I stuck them into the pin cushion with a tiny vintage safety pin and a butterfly stick pin.  I thought that the mix of these two pieces added an unique farmland/country charm.  To help add some glam, I added a rhinestone-pearl stick pin.  My original thought for this is to hold a ring while doing dishes (kitchen accent), or washing hands (master bath charm).
I selected a fabric that is sweet, and sorta neutral.  I know it has some hard blues, but I think that the small pattern helps hide the boldness {smile}.
Thank you for stopping by today.  Again, my apologizes for the awful photo quality.  But, please return tomorrow, for the final reveal! Prize number one!


Tuesday, July 15, 2014

Bunco Five & Four

As with some of the photography problems as stated yesterday, these crummy photography problems continue {frown}
I kept the colors of these two prizes soft, sweet, and vintage-y, that way they kept with the over-all look of vintage, shabby-chic farmland!
Prize number Five!


Ok, you have seen this prize before.  It is an altered vase (glass bottle) for the distressed hand-made paper flowers.  HERE are some previous photos of the paper flowers.


Prize number Four


This prize was shared earlier, too!  HERE is a few photographs of this altered frame with quilted insert!  For the gift card, I added a layer of vellum to the sweet floral pattern paper.  I heat embossed some doilies onto the vellum to keep a sweet, feminine look.  I added a button card label for the banner.