Friday, July 26, 2013

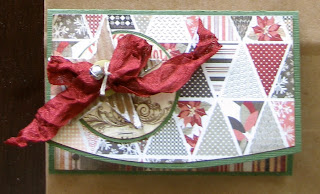
Classic Coastal

I know that i have been absent lately, and I apologize.  But, I've been busy getting some things together, and will have photos to share soon.
Patrice is the designer of this weeks sketch @ Sketch Frenzy Friday.  She makes some challenging and fun sketches.  I hope you become inspired and play along with us.


I found my inspiration from the Teen Pottery Barn catalog.  I just love how they used bold colors with black and white.  So, I ran with it, so to speak.


I used very vanilla cardstock for the base.  I took a pretty pattern piece, from the Modern Medley DSP, and used it for my main panel.  I did a thin basic black cardstock matt.  
Now for the two rectangle pieces.  I wanted something with curves, movement, and pretty.  So, I stamped the polka dot frame, from the four frames stamp set.  Inked this stamp in coastal cabana classic ink, and stamped on very vanilla cardstock.  I added an oval of Modern Medley black text papers for the center.  
I used the four frames punch to create the shape, using the tiny polka dot pattern paper from Modern Medley DSP.  
I created a single blossom using the Floral Fussion sizzlit.  I scrunched the blossoms by hand and distressed the edges with whisper white craft ink.  Applied some dazzling diamond glitter to the wet ink.  I added a lone pearl to the blossom center.
My sentiment is simple.  But lovely.  I added a clay blossom the the sentiment.  I also added the new ruffle stretch trim to the bottom of the sentiment banner piece.
Play along with us this week @ SFF!  We'd love to see what you create!


Friday, July 19, 2013

Green, the color of harmony

Happy Friday.  I have been crafting some holiday ornaments for our family reunion.  Stay tuned for a few photos of those.  But, today, I want to share a card I made for a very special friend.  I used this week's sketch from Sketch Frenzy Friday.  Tammy is this weeks designer of the sketch.  Tammy has given us a great sketch, that I am sure you will easily be able to incorporate into your crafting.


The first thing I noticed about this week's sketch, is how versatile it is.  If you follow me, you know that I am a huge fan of text paper, and those flag-ended strips.  So, I really had fun with this one.


I just loved the rectangle piece at the top, but I love portrait orientation cards.  This card was a labor of love.  Because yeah, there are quite a few steps.  But, I just love how it turned out.  I cut a piece of old olive card stock, and inked the en francias background stamp with versa mark ink.  I did that finger tap stamping.  I didn't want all the words to be stamped.  But rather a random look.  I used white embossing powder and heat set the text.  I inked the 'very vintage' wheel in old olive classic and ran along both sides of the card.  I used a kleenex to buff the old olive classic ink off the embossed text.  I did a simple machine sewn border on this main panel.  I scrunched the lower right corner of the card.  I thought it added a little visual surprise.

For my rectangle piece, I actually created a tag.  I used the Etc. DSP for the green stripe piece.  I matted very vanilla card stock.  And ran a simple machine sewn border to that piece, also.  I love repetition.  I wanted to add a doily to the tag, but I didn't want it to 'steal the show', so I used vellum card stock and the perfect pennant die.  I used crumb cake seam binding to create my multi-loop bow.  I thought the neutral color would pull your eye to the top of the card.  I created and adhered a button out of clay, using the button & blossom mold, to the center of the bow.  I also added a pearl to the button.
For the blossoms, I cut several floral pieces with the blossom die.  I bent the petals to give them some shape.  I brushed whisper white craft ink along the petal edges and sprinkled on dazzling diamond glitter.  I adhered the trio of blossoms to the lower edge of the vellum doily.
I wanted the bottom of the tag to have a bit of flair, so I added a trio of flags.  I used very vanilla card stock and the square lattice embossing folder. to give the cardstock some texture.  But I wanted to add more,.  So, I repeated the machine stitching along the middle of the banners.  I also topped their point of origin with another clay button and pearl.
For the sentiment, I stamped 'amazing you' from the Express Yourself stamp set, in basic black classic ink.  I flagged the ends and folded the long tails.  I used foam tape to lift the sentiment off the card front.
Thank you for stopping by.  Leave me a comment on your opinion of machine stitching.  I'd love to know what you think!  And break out your cardstock and favorite stamp set, and create something using our sketch.  We would really love to see what you create!


Monday, July 15, 2013

gift cards & bags

Another post from me hosting Bunco this month.  My theme was 'Christmas in July'.  I thought it would be fun to do some holiday crafting.  So, all the gifts were the same in theory:  gift card holder and matching gift bag.  I included a gift card in the holder.  But I didn't write anything inside the gift card holder.  That way, a personal hand-written message could be added.  And having a matching gift bag, will hold any other token(s) you want to add.


The postcard at the top left in these photos are my 2013 Holiday Craft Show Schedule postcards, that I created.  These holiday postcards have the arts & craft fair shows that I will be selling at this year.  I will be mailing these out around the 12th of October.  As my first Arts & Craft Fair is November 2nd.
I will be selling my hand-made, hand-stamped paper goods: cards, journals, altered magnetic letters, gift packaging, gift-card holders, food-safe goodie bags, and more.  I will also be selling some of your favorite pantry items: spoon fruits, relishes, pumpkin-cranberry bread, and special vanilla extracts. 
If you would like me to mail you one of these special postcards, please let me know.  Just email me your address.  (Please remember, these craft fairs that I am participating at are in Albuquerque, New Mexico.)
And, as usual, I will be removing all items from my Etsy shop to take to sell at the Arts & Crafts Fairs.
Thank you for stopping by today.  I will show you the zipper cards and gift card books that I made, soon.  


Saturday, July 13, 2013

Home-made Touch

Thank you for stopping by, and visiting my little piece, here in blog-land.  I just love sharing things that I have made.  And well, mostly they are paper crafts.  And almost everything has some machine sewing.  I don't know what it is about machine sewing on paper crafts, but I find the whole look, warm, cozy, and just plain crafty {smile}.
I play bunco with a super great group of ladies once a month.  This month, it was my turn to host.  So, as hostess, you provide dinner, and prizes.  Ok, I know that you have guessed it, home-made is what I made {smile} and Christmas was my theme (Christmas in July).  My theme color was red.
Today, I am sharing a few photos of the of my set-up, not the prizes.  Stay tuned, as those will be posted through out the next few weeks.
One of the 'gifts' that went into their gift bags, was a bag of Holiday Cinnamon Candied Almonds.  I know that you have seen, and smelled these little gems during your holiday shopping.  So, I made a few batches, and then packaged them in these adorable paper bags.  

bags purchased thru Amuse Studios

I folded a doily over the top, machine sewn them closed.  Added a banner piece that was hand-stamped in real red classic ink and fussy cut.  I created a oval tag with a word document and hand-punched them out, and matted the label onto a scallop oval piece that was created with a hand-held punch.

I used my white table linens for the table covers, and set each Bunco table with plates, napkins, plastic-wear, and red solo cups.  To give the tables a bit of a more class-y look, I printed a 'menu' for each place setting.  I thought that it would be a nice touch.


and here is a close-up of the printed menu strips


The only item on the menu that was not made in my kitchen, was the Rotisserie chickens.  It is more economical to purchase rotisserie chicken already prepared at our local grocery store, then purchasing whole chickens.  So, I purchased them already roasted.  It was a wonderful time saver, and it helped keep the heat down in the kitchen.  (On these hot days, the less time your oven is on, the more comfortable your home, and electric bill.)  
The 'corn pudding' is a scallop corn dish that I found in Martha Stewart Living magazine.  The recipe calls for Hatch Green Chili.  Everyone from New Mexico knows Hatch Chili.  It is the best!  Martha says to use can chili.  We all use fresh, fire-roasted green chili.  
The cranberry relish, is a Christmas Cranberry relish that I make every year, and sell at my craft fairs.  It is made with fresh whole cranberries, and cooked down to make a wonderfully smooth relish.  I also add some orange zest and a little bourbon.  To help 'stretch' this little treat, I always add a can of Ocean Spray cranberry sauce.  Ocean Spray does a fabulous job making and canning a great cranberry recipe, so why try to re-invent the wheel.
The dinner rolls were made the old fashion way, with yeast, and you let them rise.  I didn't bake mine in muffin tins, like I typically do.  My muffin tins were being utilized for the dessert.  So, I made 18 rolls in a 9" x 13" pan.  Creating 'pull-a-part' dinner rolls.  I always brush melted butter over the tops as soon as they emerge from the oven and add a tiny sprinkle of Kosher salt to their tops.
The 'cookie-brownie bites' is a creation I got from my daughter.  It is in the shape of a cupcake, but it is heaven.  In each well of a muffin tin, you place a teaspoon of your favorite chocolate chip cookie dough.  Flatten the ball.  Add 1/2 Reeses peanut butter cup in the center.  Fill each well of the muffin tin 2/3 full with your favorite brownie mix.  Bake according to the directions of the brownie mix.  And viola!  I suggest that when you bite into your first one, that you do so in private.  These little treasures will cause you to make moaning sounds, because they are so delicious!

Thank you for stopping by.  I will be sharing a few of the gifts that I made in each post, soon.  And if nothing else, it will inspire you to start on creating your holiday gift making ideas.  Take care, and do come back soon.


Friday, July 12, 2013

Create & Inspire

Happy Friday!  Whew, I got through another Bunco hosting.  So, come back this weekend, for photos of the 'gifts' I made for prizes.  Now, onto another wonderfully creative card sketch from Sketch Frenzy Friday!  Kim, was the creator of this week's sketch.  And I must admit, I love her sketches.  She gives you really great lines and alot of room for adding your own personality!  Way to go Kim!
here is this week's sketch:


So, here are a few little tidbits, to help you express your creativity and basically how I 'see' the sketch.  The scallop border creates a border, to separate two different papers.  I love mixing and matching pattern papers.  The scallop trim can be almost anything: scallop trim, ribbon, a star border, a fancy embossed border, etc. You get the idea.  Next, the matted rectangle.  This piece can be large, small, or any size in-between.  It can also not be a rectangle.  A circle, a square, very work-able.  The bow at the top corner can also be a bow, a star, a heart, a flower, a button, again, almost anything.   See what I mean about the 'work-ability' of this sketch?  This sketch will basically let you dictate what you want to create, with a few guidelines.  So, let's get started at creating something wonderfully beautiful!

my card:


Once I saw the sketch, I knew that I wanted to use two different pattern papers.  I basically love mixing and match paper from different collections.  But, I don't have alot of new products, and didn't want to use the same papers again.  So, I used a background stamp for one of my 'papers'.  I figure, use what you got, then your stamps get some mileage, ink, and love {smile}.  I inked the Ex Libris background stamp in Coastal Cabana classic ink, and stamped on very vanilla card stock.  I added a strip of small polka dot pattern paper from the Modern Medley DSP collection.  Have I mentioned my obsession LOVE for polka dots before?  Anyways.  I added a scallop trim border piece, using the silver glitter paper, to define the separation of patterns.  But, I'm not a fan of seams showing, so I added a strip of seam binding.  I dyed the seam binding with Crisp Cantaloupe classic ink.  I machine sewn the seam binding to the front of the card.

I traded my rectangle piece for a circle.  Actually a doily.  That probably isn't surprising to you either.  The doily was cut with the Perfect Pennants Die.  (But, I imagine this could easily be switched with the Delicate Doilies Sizzilits.)
I made a multi-loop bow with the dyed seam binding.  I made a blossom with the new Buttons & Blossoms Simply Pressed Clay Molds.  Another one of my favorite products.  The vanilla button is from the new Very Vintage Designer Buttons.  Just gorgeous!  I used a super thin piece of basic black card stock as my 'thread'.  
The large paper blossom is actually made with crisp cantaloupe cardstock and 2 blossoms cut from the Fun Flowers Big Die.  I cut some of the petals off to give me more layers, and formed my own blossom.  I used hot glue to hold this little beauty together.  (I have no patience for liquid glue to dry.)  I swiped my whisper white craft pad across the petal ends, and well, that wasn't really working, so I started brushing on the ink, using the re-inker.  Then, while the ink was wet, I dunked the blossom into a tub of dazzling diamond glitter.  
For my label/sentiment piece, I inked the polka dot frame, from the four frames stamp set, in basic black classic ink.  The sentiment is from the Loving Thoughts stamp set.  Also inked with basic black classic ink.  I wanted to add a bit more 'black' to the card, so I made those sweet little curly-ques out of super thin strips of basic black card stock and a wooden BBQ skewer.
I hope that you liked what I created, and you have been inspired to play along with us @ SFF.
Sometimes one of the hardest parts, is picking your color scheme, or decided what stamp set(s) to use.  I too, struggle with those exact problems.  So, I flip through the big idea book for images that I can stamp or see what colors they used together.   I'm a big fan of using what you have.  We all would love to just buy everything, but part of the fun is creating something new with something old {smile}.  And as always, have fun!  


Tuesday, July 9, 2013

Cupcakes and Card

I've been a bit busy these last few days.  My daughter gave birth to her fourth child last week, and so I've been taking care of her other children, getting things together for Bunco, and celebrating my oldest grand daughter's 7th birthday!
So, let me share with you the cupcakes and card I made for H, my oldest grand daughter.  H, takes ballet lessons and well, she is a girly-girl.  So, I wanted her cupcakes to reflect her passion for dance.
pink tutu cupcakes:


a pan of pink tutu cupcakes:


My grand daughter, H, is a very sweet girl.  I have helped take care of her since the day she was born.  I was in the delivery room for the birth of my daughter's children.  I even gave H, her first bath.  And I spend alot of time with her, and her siblings.  I taught H, how to cook, and paper craft, and encourage her to continue with ballet, and other sports.  Like, ice skating, and kick ball.  But, H, is still a sweet little girl who loves to play pretend, and has a collection of dolls.  So, when I was shopping for some new digital  papers, on Etsy, I found this sweet set! and I knew it would be perfect!

 a birthday card for a sweet young girl:

The card base is made from Latte cardstock by Amuse Studio.  I added a tiny yellow polka dot pattern paper by Carta Bella Beautiful Moments.  I just love this Valentines Day themed paper.  
I added the post card to the yellow polka dot pattern paper, and ran a simple stitch border with my sewing machine.  
I also added some spun sugar stained seam binding, and machine stitched the seam binding to the card front.  I love the fullness of multi-loop bows, so I added one.  I had made a clay rose using a mold I purchased @ Etsy.   I love how the white clay adds a bit 'shabby chic'-ness to a paper craft.  Love the look {smile}.
I punched out a heart shape from an up-cycled coffee cuff.  I painted the edges with some picket fence distressed paint, and then add some glitter.  I stamped the 'sweet' onto very vanilla cardstock and used a tag punch to create the shape.  I tied the tiny tag with cream twine to the tiny pink button.  Then adhered the pink tagged button to the center of the distressed heart. 
I added a couple of buttons to continue the 'softness' and the home-made look {smile}.
I used a retired sentiment stamp set by Stampin' Up! to stamp the sentiment onto the post card.
H, loved her card.  Which made me very happy.  And I hope you enjoyed your time spent here, and you have been inspired to try digital paper, if you don't already use any.  They are very versatile and the best part, is that you can print as much as you want/need {smile}.


Friday, July 5, 2013

Soft Wishes

I'm glad that you could stop by and see what I've been creating.  We had another grandchild born yesterday, so I'm a bit behind in some crafting.  I also didn't have the mojo or time to really create using my typical style.  So, please bear with me.
This week over @ Sketch Frenzy Friday, Jennifer is our sketch creator.  Jennifer makes some of the most 'user-friendly' sketches for you to create with.  And this week, she has done the same.


I created a 'clean and simple' card, my style, using this week's sketch.


For this card, I used some of my favorite colors of card stock:  blushing bride and soft suede.  The blushing bride has a dusty tone to the pink.  While the soft suede has a richness to it, that makes it so wonderful to work with.
The card base and stamped panel matt are soft suede.  I stamped the floral image onto very vanilla cardstock in both blushing bride and pink pirouette.  I stamped the blossom in opposite corners with both pinks in classic ink.  The sentiment was stamped in soft suede classic ink.  I used my stamp-a-ma-jig, to help with the positioning of the sentiment.
I created a multi-loop bow from crumb cake seam binding and a new vanilla button.  This card isn't technically 'CAS', but it is for me.
I hope the design team has given you some inspiration to play along with us this week, with our sketch from Jennifer @ SFF.  We would love to see what you create!

Wednesday, July 3, 2013

Photo Center

I wanted to share a little project I have been working on.  I'm make a few refrigerator magnets for some girlfriends.  I used some vintage pattern papers I had on hand.  The kraft piece will matt a wallet size photo.


I started with the sketch @ Mojo Monday.  But, I made a few adjustments to their sketch.  unfortunately I don't believe that the original sketch is recognizable.    I didn't create a card, so I'm not working with a rectangle.  I altered a chipboard square.  
I used a pink music sheet for the base.  I added a floral pattern paper to the left.  I added a pink polka dot pattern paper and cut banner end.  I overlapped a 1 1/2" floral circle.  I stamped onto the circle pattern paper.  I added a scallop trim silver glitter paper across the top.  I added a piece of pink seam bining and machine stitched, the trim.  I created a multi-loop bow, and tied a cream vintage button to it's center.  I add a kraft rectangle to matt a wallet size photo.
Thank you for stopping by.


Tuesday, July 2, 2013

Bunco in July

A new week, a new set of crafting.  The ladies over @ NAC, are taking the summer off.  A bit of a break.
So, I went surfing the internet to find some inspiration.  And I found some! The super talented ladies over @ Mojo Monday, have this week's sketch up.  And, it's their 300th sketch!  Yahoo!

When I first started blogging, I would play along in the Mojo Monday challenges almost every week.  I love how their sketches allow you to get creative, and help  nudge you along.  And, well, I still love using their sketches!  I may not participate every week, but I always look, and find inspiration from their design team.
here is their sketch, #300:

when I saw this sketch, I fell in love.  You can do so many different theme/style cards, with this sketch, aka: very user friendly {smile}.
I am sending my Bunco group their reminder cards this week, and I'm using this sketch!


I used Stella Rose pattern paper, for this card.  I used sage shadow card stock from Stampin' Up! (retired) for the card base, and for the matt for the circle.  I used early espresso cardstock from Stampin' Up! for the main panel matt, and for the text pattern paper matt.  I used the You're Cherished (retired) stamp set for the sentiment.  I stapled a scrap piece of crochet trim to the banner, instead of the flower.
I really like how these cards turned out.  They aren't my typical style.  I'm more of a shabby-chic style, instead of a bohemian style.  But, I think these cards look pretty good.  This card is my 'sample' for the rest of the set.  I need to make 11 more and get them out in the mail.
If you get a chance to play along with the wonderfully talented ladies over @ Mojo Monday, please do.
They are celebrating their #300 sketch, and they are giving away quite a few prizes!

If we play Bunco together, look for this reminder card in the mail {smile}.


this card is now for sale in my Etsy shop, here