Friday, November 29, 2013

Sweet & Simple

Whew, where has this year gone?  I can't believe that we are already nearing the end of November!  I hope you had a wonderful day yesterday, celebrating Thanksgiving.  We had family over, and did the traditional cooking.  Smoked a brine prepped Turkey, candied yams, mashed potatoes, corn pudding, cranberry relish, stuffing, and of course, my yummy dinner rolls.  The dessert table was well stocked: pumpkin pie, pecan tart, and apple pie, all served with fresh whipped cream.
So, on to todays challenge from Sketch Frenzy Friday.  As usual, the sketch is wonderfully adaptive.  I sound like I'm tooting my own horn.  Only because I designed the sketch!  It has my signature colors: pink and brown.  Hope you get a chance to play along.  I know this time of year is spent shopping, visiting, baking, and decorating.  But if you get a chance to play along, please do.  We would love to see what you create!


a quick card I made


The card base is made from Midnight Muse card stock.  For the card front, I used a bright floral pattern from Gingham Garden DSP and matted it onto a piece of Melon Mambo card stock.  For the long banner pieces, I used scrap pieces from Gingham Garden & Sweater Weather DSPs.  I inked the sentiment in Midnight Muse classic ink, and then colored the blossoms with Melon Mambo  and Old Olive markers.  The sentiment piece is actually shimmer white card stock.  Just to give it a bit of shimmer.  I used the Labels Collection of dies to cut the shape.  I wrapped white taffeta ribbon around the top portion of the card, and tied a simple bow.  I wanted to add some more sparkle, so I added three random rhinestone jewels to the card front.
Please stop by the SFF site, and see what the rest of the design team has created! And play along with us!  We would love to see what you create!  A holiday card, a birthday card, or anything your heart desires.  {smile}

Thursday, November 28, 2013

Happy Thanksgiving

I want to extend a warm and heart felt  Happy Thanksgiving  to everyone one of you!  I hope you spend time with those who mean the most to you: family and friends.
I didn't get a chance to create a new Thanksgiving card this year.  But, here is one of my favorites from a few years ago.


This card actually went with a magnetic message board I had made.  I love the lay-out, the festive holiday paper, and that adorable deer!  The sentiment is from Paper Trey Ink.  I just love the words!

Happy Thanksgiving


Sunday, November 24, 2013

Black and Tan

First let me thank all of those who have sent warm wishes to a speedy recovery. Thank you! your thoughtfulness has really touched my heart {smile}.  
I did get a chance to finish my card for uhm, last week's color challenge over @ Nacho Average Challenge.   Basic Black, Crumb Cake, and Soft Suede.


If nothing else, that mishap in my life has really made me thankful for what I have: family, friends, and a desire to get back on my feet, as well as a well stocked craft room.  So, without further ado, here is last weeks card.  My apologizes for the tardiness.


I finished my card yesterday.  But, I can't get my photoshop program to open, so I can't add a water mark.  So, this image is 'naked'. heehee.
I hope everyone has been inspired by the super talented team @ NAC.

And on another note, my Etsy shop is now open!  I have added several clear mount and wood mount stamp sets!  If ordering between 11/24 and 12/24, and you purchase $25/+ in products, use coupon code: BLACKFRIDAY, to receive free shipping!


Saturday, November 23, 2013

Ouch!

A long over due Howdy! to all you lovely folks out in blog-land {smile}.  Sorry for the absence.
I was in a car accident late last week, and having a few medical problems.  But, I am doing better now. I wanted to pop-in real quick, to let everyone know that I am still 'here'.  Just a little banged-up, and not doing too much {frown}.
My re-opening of my Etsy shop has been seriously delayed, also.  But, I am in hopes of having it re-open by Monday.  We'll see how I feel.  To help defer the inconvenience I will start my Black Friday sale as soon as it's open (fingers crossed: Monday).
Thank you for stopping by.  Hope all of you are well, in good spirits, and healthy.

Monday, November 18, 2013

A Merry Season


Whew, time does fly!  The latest edition of Paper Crafters Sampler e-magazine is out!  Actually, it has been out for 8 days, now.  (Sorry about the delay in notice.)  As you may know, and if not sorry about the assumption, but I am a monthly contributor to this very creative and inspiring e-magazine.  This publication is available monthly, and is an electronic format.  So, you can't purchase a 'hard copy' at a store, but you can purchase an e-copy, and print it, to have a 'hard copy'.  This months publication has Christmas paper crafts (cards and 3-D items) that you can create with current Stampin' Up! supplies!  Each craft has a complete instruction sheet, along with a list of supplies used for each project.  How super wonderful is that?  This is a great 'tool' if you are a Stampin' Up! demonstrator, and you need some creative, new classes.  Or you are a Stampin' Up! loyal customer/hobbist.
Here is a sneak peek at the Christmas Card I created!


This publication contains projects with a variety of styles, and wonderfully creative projects!  Purchase your today @ Paper Crafters Sampler for $12.99.  Don't forget to check out the other sneak peeks.  You will be inspired!


Sunday, November 17, 2013

Tramway Community Church Craft Fair

Howdy! and welcome to my little piece of blog-land.  I enjoy making paper crafts.  Very much enjoy it.  I love the whole process of creating and altering.  I also find encouragement from the positive feedback I get from folks who have seen my creations, and from those who have purchased my creations.  I have an Etsy shop, here.  But, I also sell my creations at holiday Arts and Craft Shows in Albuquerque, NM.  

This past weekend, I was at the Tramway Community Church, selling at their annual holiday Arts and Craft Fair.  I really do enjoy their show.  The folks there are just so nice, helpful, and polite.  The other crafters there are just as personable.  Well, I didn't go home with empty boxes, but, I did get quite a few of my crafts into shoppers hands.  
I changed the way I arranged my tables early yesterday morning, before the shoppers came-in.  I think that helped.  (I sat/stood, behind the tables)


My home-made food table: (left to right) on the cake stand, I have my home-made Vanilla.  In front of that, I have my home-made Pumpkin-Cranberry Bread.  The middle cream-painted tray, I have my Cinnamon-Spice Nuts, and Double-Chocolate Brownies.  The third cream-painted tray on the right, has my Vanilla, and Chocolate Cupcakes.


My craft table:  left to right, back row - I have my hand-made cards in the card carousel, and in the wicker basket, right next to the carousel.  I gave a price break (discount) if you purchased 6, and then another one if you purchased 10.   I had my magnetic letters on a framed metal sheet.
On top of the white shelf: I had my snowman poop, Santa's magic key, and some magic Reindeer food.  In the white shelf:  decorated Gift Boxes, Gift Card holders, and Food-Safe gift bags.
Left to right, front row - decorated gift bags, covered notepads, and altered mini notebooks.

So today I will be unloading the car, and taking photos of everything I haven't sold, and get those uploaded into my Etsy shop, here.
At this moment, I haven't heard back, if I have a space @ Eisenhower School, for their Arts and Craft Show, Dec. 14th.  If I don't have a booth there, I am planning on having an Open House Dec. 7th, at my daughter's house.  I will keep you all posted.


Saturday, November 16, 2013

. . . little things . . .

It's the little things, that matter most.


One of the hot selling items at my booth, at this years holiday arts and craft fairs, are these cute little altered notebooks.  I have added my own personal style and touch to these little cuties!  They have 80 pages of lined paper inside.  I have also added pattern papers to the inside covers (front and back).  The mini black gel pen that comes with it, writes wonderfully without smudging.  A super big plus to me!
I made another 8 this week, and they are available for sale at my booth:  Designs by Sharon
I am at the Tramway Community Church, in Albuquerque, New Mexico this weekend.  Friday 10a to 5p, and Saturday 9a to 4p.  Please stop by, I am sure you will be able to find a gift for just about everyone on your list!


Friday, November 15, 2013

Happy Friday!  I am off today, to another arts and craft fair @ Tramway Community Church, in Albuquerque, New Mexico.  I will be selling my hand-crafted paper goods: greeting cards, gift card holders, gift bags, gift boxes, covered notepads, altered notebooks, and more!  My paper crafting style has a shabby chic/vintage feel to it.  If you are in the area, please stop by and say hello!
But, before, I get preoccupied with all of that, I took time out of my schedule to play along with the talented ladies over @ Sketch Frenzy Friday.  Patrice is the designer of this weeks sketch.


I have to admit, when I first saw this sketch, I was stumped.  But, don't fret.  Just see the 'objects' as that.  I took a little creative freedom.  but, here is what I did!


I used a half tea doily for the partial top note die.  I inked the Ex Libris background stamp with baked brown sugar classic ink, for the main panel.  I used the Flower Shop stamp set for the blossoms.  I stamped three blossoms in cantaloupe classic ink, and used the matching punch to 'cut out' the blossoms.  I added a half pearl to the center of each blossom, to give them a more feminine look.  I used the leaves die for the leaves, using soft suede card stock for the them.  I matted the main panel onto soft suede card stock.  The card base is cantaloupe card stock. 
For my sentiment, I used a hostess stamp set for the words; Express Yourself.  I just love this font.  It's pretty without being too flamboyant.  I added a very vanilla button to one side, to help give the sentiment banner a bit of flair.
Thank you for stopping by.  We sure do hope you find time to play along with us @ SFF.  
I'm off to Tramway Community Church, for todays arts and craft fair.


Tuesday, November 12, 2013

Post Card Christmas

Howdy.  Hope this post finds you well.  It's hard to believe that we are already into double digits of November.  Where has the time gone?  And before you know it, I fret that I will be scrambling for that last minute Christmas gift.  You?
Well, before I get too carried away, I wanted to share a card I made.  The wonderfully talented ladies over @ Nacho Average Challenge have this fun sketch for you to play with.


It looks pretty plain and simple, right?  Well, it actually lends itself to a lot of potential of creating an absolutely gorgeous card!  The simplicity of the sketch is actually a creative license.


I used the large 'empty' space to my advantage.  One of my favorite stamps is this 'postcard' stamp.  I don't really know why, but it calls to me.  And it was very easy to use it with this sketch.  {smile}.
I stamped the postcard in crumb cake classic ink, onto very vanilla card stock, and then cut close to the lines with my scissors.  I used my distressing tool, to rough up the edges.  
I stamped the winter tree in always artichoke classic ink.  Then I stamped the snowflakes randomly over the tree.  I stamped the little pinecone branch in crumb cake classic ink, on two opposite corners of the address side.  To 'decorate' the tree, I added three rhinestones and three pearls.


For my sentiment, I used the new holiday clear stamp set.  I stamped the 'christmas'  in always artichoke classic ink, and the other words in crumb cake classic ink.  Instead of adding a postage stamp, I added some seam binding.  The center of the bow, looked a bit bare, for me, so I tied some linen thread to the bow and created another bow.
I matted my post card onto always artichoke card stock.  Then added a sparkle-y border with champagne glitter paper.  Finally, matting this whole piece onto soft suede card stock.  The card base in crumb cake card stock.

Well, thank you for stopping by to see what I have created.  It's always nice to have company.  I hope you get a chance to create something with this sketch, and play along with us!  We'd love to see what you create for the NAC!


Sunday, November 10, 2013

Pretty as a Cupcake

Welcome.  I've been a bit busy, and so this post will be short, but oh so sweet {smile}.  Sorry, I just couldn't resist.  Anyways, I finished another arts and craft fair, in Albuquerque, New Mexico, yesterday (Nov. 9, 2013).  I really love doing these little venues.  It's really nice to chat with other crafters, and to meet folks who can appreciate hand-made items.
I was able to sell some home-made baked goods at this craft fair, and of course I took a picture.  However, once again it was with my phone, and well, it was with my phone.


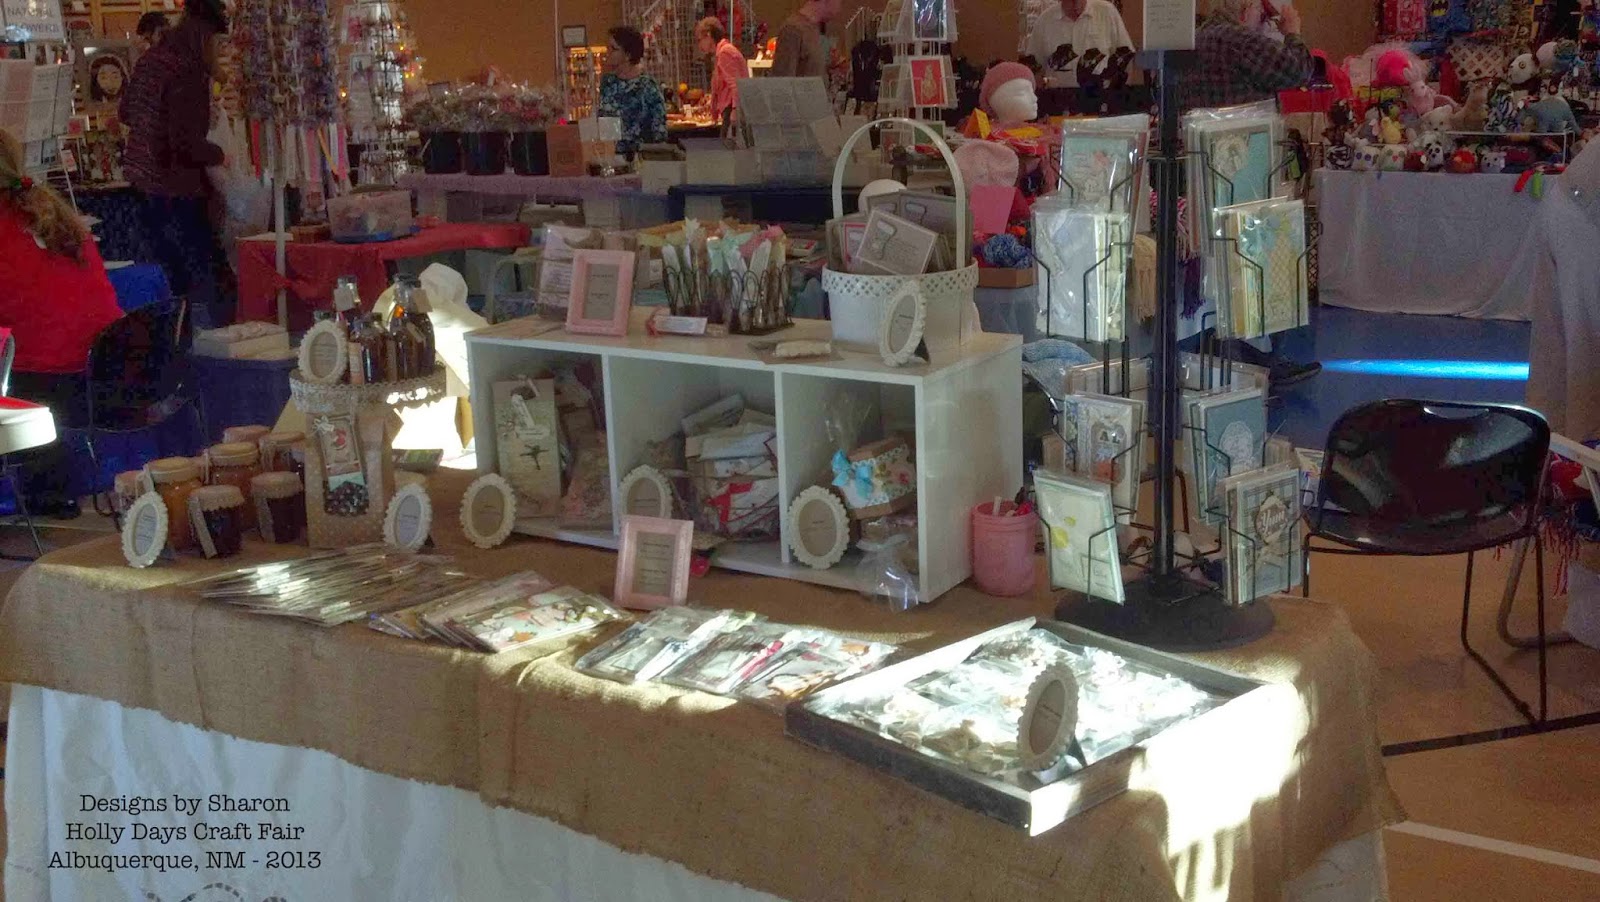
I kept my table coverings the same: white table cloth with burlap overlays.  I also kept all my display trays white.  I changed my signs from pink and white, to this fabulous soft pale blue.  I changed the color to blue, to give some separation.  (Separation from home-made baked goods and home-made paper crafts.)
Before you ask, those trays holding the food, were actually purchased at a big box store (W*mart).  They were those cheap-o, flimsy cookie sheets that you can buy a three pack for like $4.  I purchased a can of cream spray paint from a big box craft store (H*Lobby).  Spray painted them, so they would match my shabby chic/country look.  Easy peasy.  However, it did take 3 coats of paint.  But trust me, I didn't stand there watching the paint dry.  I used that time, to keep crafting! {smile}

So, from left to right: the kraft bags, have cinnamon-spiced mixed nuts (almonds and pecans).  I added a pink gingham bow, along with a label in kraft, black and white.
The 3 loafs in front of them, are Pumpkin-Cranberry bread.  I tied the tins closed with white curly ribbon, and added a soft orange label.
The middle tray holds Double Chocolate Brownies.  I added a strip of parchment paper cut with peeking sheers over the saran wrap.  To help secure the parchment paper strip, I added a white and silver ribbon, and a green label.
And the tray with the puffy packaging are Vanilla Cupcakes.  The cupcakes have pink icing and edible glitter.  Because don't pink cupcakes need glitter?  I think it is actually a culinary rule {smile}.  Each cupcake is in a clear 9oz beverage cup, inside a clear cello bag, tied with gold and white curly ribbon.  I affixed a blue-ish green label to the outside of the bag.

I had several folks stop by, just to see my display, and comment on how pretty everything was.  (very sweet to hear - no pun intended).  Some folks thought the cupcakes were soap, candles, or bath bombs.
Comments I heard, were that they were too pretty to eat!  How sweet, but no, these cuties actually taste as fabulous as they look!

My next location:  Tramway Community Church, Albuquerque, New Mexico.  November 15th (Friday) and 16th (Saturday), 2013.  So, please stop by, if you haven't' already.  It will be great to see folks!  Remember, when you purchase a hand-made item, you support the artist by allowing them to continue to create what they love!


Saturday, November 9, 2013

Arts and Craft Baazar

my booth, is in this gym

The Arts and Craft Bazaar held at Cleveland Middle School, in Albuquerque, NM, is today!  The Baazar is from 9a to 4p.  I'll be here selling my paper crafts and a few pantry items:  Vanilla Cupcakes, Double Chocolate Brownies, Cinnamon Spiced Nuts, and Pumpkin Cranberry Bread.  All fresh baked and packaged yesterday!
I won't have my vanilla or canned fruits with me today {frown}.  But, I have increased my paper craft inventory.
I have made a few more (4) magnetic letters: M, J, G, and A.   I have made some more altered covered notebooks (with 80 pages of lined paper).  These little cuties were a big hit at the Craft Fair @ Grace Church, last weekend.  I also have added a few more (4) decorated gift boxes.
So, if you are in the area, please stop by!  Even if it is to say 'howdy'!

Friday, November 8, 2013

As I am preparing for this weekends upcoming arts and craft fair, I stopped for a bit, to create a card for the current sketch challenge @ Sketch Frenzy Challenge.  The talented Kim, is the designer of this week's sketch.


This sketch has a lot of potential.  I think the rectangle on the left side of the main square, could easily be an object.  A star.  A snowflake.  A multi-loop bow.  A sentiment square/circle.  The multi-colored banners along the bottom main square could be scallop border.  Be creative, and lets see what you craft!


I used the ledger paper from the Etc DSP collection.  I wanted a subtle pattern, but not too distracting.  I added a scallop trim border, in place of my banner edge.  Another piece of pattern paper from the Ets DSP collection.  
I just love the blossom and font with this stamp set.  So, I included these two items, and added another sentiment from the Teeny Tiny Wishes stamp set.  I kept the card front clean and simple, but while I was creating, I almost started over.   While crafting I started to see the abundance of possibilities of this sketch.
Well, I'm back into my craft room, trying to get a few more altered notebooks done before Saturday.  And I also need to get started on my baked goods: cupcakes, brownies, and bread.  Craft Baazar @ Cleveland Middle School, Saturday Nov. 9th.


Thursday, November 7, 2013

Christmas Box

Silver and Gold.  Isn't that what the song the snowman sings in the animated show Rudolph?  I made a Christmas box in those colors: silver and gold {smile}.
I'm a paper hoarder collector.  I love paper.  I love paper crafts.  I love creating beautiful things with paper.  My name is Sharon.  
They say the first step to healing/recovery, is admitting that you have a problem.  Paper, is my problem.

I purchase this beautiful silver and gold holiday pattern paper by Anna Griffin about 5/+ years ago.  Saving it, for the perfect paper craft.  And today, I made that perfect paper craft. . .  a decorated gift box!  I am selling these at my craft fair shows, again this year.


I stamped and heat embossed the kraft boxes, with a variety of images: polka dots, doilies, text, and vintage wall paper.  (Just a lovely little addition.)  I wrapped each box with a different mix of pattern papers.  I added a 'bow' and a 'tag' (space to write the recipients name).  Complete!
So, all you have to do, is slide off the pattern paper (belly band), fold the pattern paper flat, and write a name/message, place the gift inside the box, and then slide the pattern paper back on.  Viola! This present is wrapped!
I'll be selling this gift box, as well as others that I have made, at this Saturday's Arts and Craft Fair @ Cleveland Middle School, in Albuquerque, New Mexico.  Hope to see you there!


Wednesday, November 6, 2013

Mailing List = Free Tags

Howdy!  I hope this post finds you well.  Me, busy as a little bee! trying to get more crafts made for my next upcoming Arts and Craft Fair show.  I'll be at Cleveland Middle School, in Albuquerque, NM.  I haven't participated in this craft fair before, so I hope to meet some new folks, and share my paper crafts with them.
Each year, around the summer time, I try to get my schedule of Arts and Craft Fairs together, so I know which venues I'm at, and give my customers a heads up.  Then in October, I mail out my Craft Fair Schedule postcard, to anyone who has requested to be on my mailing list.  
This year, I wanted to add something to the whole process.  So, when I created my post cards, I added a little blurb at the top, letting the recipient know, that if they bring my postcard, to any of the craft shows I am at, they will get an 'exclusive gift'.  It is basically a way for me to thank my past customers.  And here is a look, at their 'exclusive gift'.  
a pair of holiday gift tags:


As you can see, it is a matching duo of tags.  But, before someone gets the wrong idea, or I don't make it clear, the gift is one decorated glassine bag with the two coordinating tags (not both tag collections).
For the tags in the top row, uses my favorite rustic holiday paper: Rustic Snowflakes.  The bottom row, used my favorite traditional holiday paper: Holiday Flourishes & Swirls.  I stamped the 'to' and 'from' onto the tags themselves, using the Holiday Fillers Friendship Jar stamp set.  That font just has a country charm to it.  For the middle sentiment, I used two different stamps.  The 'Merry Christmas' is from the Come to Bethlaham stamp set.  The 'Holiday Cheer' is from a decade old Anna Griffith holiday stamp set.
As for the decorated glassine bags, I simple wrapped a piece of coordinating pattern paper around the middle of the bag, and then I wrapped a piece of ribbon around the pattern paper.  To create the 'label' I  stamped a polka dot frame, using the Four Frames stamp set.  Then I stamped a sentiment inside.  I used the Berry Christmas and Heritage Holiday stamp sets.  I added a vintage button to the front of each bag, just to give it that home-made feel.
I had a few folks ask how much the tag sets are, and well, they aren't for sale.  They are my exclusive 'gift' for those folks who have come to my booth at various craft shows, and have asked to be on my mailing list.
At this point in time, I haven't decided yet, if this will continue to next years Craft show tour, so this may be your only chance to receive this little 'gift'.  I only have two crafts shows left this holiday season!
I want to Thank all the nice, lovely folks who have taken the time, to stop by booth, and take a look at what I have created.  I know that my 'style' is not everyone's favorite.  But, I do appreciate the lovely compliments, and the chance to get my paper crafts into your hands.


Tuesday, November 5, 2013

Dash of Cheer

Whew, this week, is almost as busy as last week.  But, I'm grateful for the work, and the paper craft requests.  But, before I go back into my craft room, I played along with the lovely ladies over @ Nacho Average Challenge.  They have a color challenge this week, and I struggle with those.  So, I kept my card 'clean and simple' (CAS).
here is this week's colors

here is my card:


I used Marina Mist as my main color.  Then added splashes of Melon Mambo and Early Espresso.  The card base is marina mist.  I added a panel of marina mist dsp.  I used my scallop trim border punch to create the decorative border out of early espresso card stock.  I added a strip of plain melon mambo card stock across the front of the card.  
I hand dyed some very vanilla seam binding with my marina mist re inker.  To add a little pizzazz, I tied a vintage faucet button onto the seam binding bow with some thin silver ribbon.
I created my sentiment label with the four frames in marina mist classic ink.  I stamp the sentiment in both early espresso and melon mambo classic inks.  I adhered the frame onto the card front with dimensionals.  But, I felt the card was missing a little something, so I added a trio of half pearls along the right lower edge of the melon mambo card stock strip.
I hope you have been inspired to play along with us @ NAC.  We would love to see what you create.
Now, I need to get back to some chores and crafts.  I'll post a photo of these sweet little gift tags I have made for my 'exclusive' gift for folks who received my holiday craft fair schedule.
Take care, and take some time out of your busy schedule to create something beautiful!


Monday, November 4, 2013

'N' is for . . .

I wanted to share a quirky little side note with you.  But, before we get to that, a little back story.
I am a fan of monograms.  I actually do like them.  Not the weird, misplaced ones of yester-year.  The one's of today.  With scrolling beautiful fonts, and clever ways of incorporating them into our everyday lives.  And with this notion, I started altering chipboards letters.  I adhered strong magnets to the backs, and use them for decoration.  Ok, so the first one I made was for my locker at work.  But, I digress.  I loved the whole process, picking out the papers, collecting little embellishments, and decorating these stark, life-less letters into works of art.  My friends loved them, too.  So, I started making some for the various craft shows I sell my products at.  And what a hit!  These little gems do take quite a bit of time. But, they sure do end up very pretty to look at.  
Anyways, one of my good friends, Nichole, just loved the first 'N' that I ever made.  And boy, does she have an eye for pretty.  That letter 'N' was the first altered monogram magnet I ever sold.  And Nichole has loved every 'N' I have made since.  I typically create 'N's in black and white color combos with splashes of bright yellow.  But this year, I went another route. Cream and black with a pop of lavender. And it sold at my first arts and craft fair this holiday season!

packaged, and displayed on a framed metal sheet

So, my quirky little side note is this:  out of all the altered magnetic monograms I have created, the letter 'N' is my top seller!  I have sold more 'N's than any other letter, I have created.  Isn't that just funny?  And do you wanna guess what letter I am crafting again this week, for the upcoming craft fair?  Ding, ding, ding! We have a winner!  'N'
Thank you, Nichole for all your love, support, and encouragement!


Sunday, November 3, 2013

Holly Days

Whew, what a busy weekend.  I am spending today getting caught up on chores, and carving out an hour to 'put my feet up' {smile}.  I spent a lot of time last week paper crafting, to increase my inventory of products to sell at some up-coming arts and craft fairs.  I know that my husband has 'missed' me, seeing as all my waking time was spent in my craft room.  Poor man.  But, that commitment and focus hasn't changed.  I have another arts and craft fair this next weekend, and I need to make some more items that sold out yesterday.
On a bright and cheery note, the folks who did stop-by my booth and take a look, did say how pretty my things were (smile).  I even have a few special orders that I need to start working on, too.  Busy little bee, I am.  But I do enjoy the whole process of paper crafting {smile}.
I took a photo of my booth just before the start of the 18th Annual Holly Days Arts and Craft Fair, this year.  However, the photo was taken with my phone, so it isn't the best, and the morning sun was shining right onto my display booth {frown}.  But, all in all, it was good.


Right to Left and Top to Bottom:  the carousel holds hand-made cards that I have made this year.  Just in front of that, is a gray wooden frame that is holding magnetic letters.  On top of the white shelves, is a white 'basket' that is holding snowman poop, in the black wire 'basket' is tubes of magic reindeer food, and the last wire basket holds magic Santa keys.  In the cubbies of the white shelves are (right to left) gift boxes, then gift card holders, and small gift bags.  In front of the white shelves (right to left), are altered mini note books, then covered note pads and then food-safe bags with vintage/shabby tags.
At the end of the table, I have 3 rows of canning jars with Blueberry Spoon Fruit, Vanilla Spiced Peaches, and Cranberry Relish.  On the vintage white cake stand, I have my home-made pure Vanilla extracts made from different vanilla beans from Mexico, Indonesia, Tonga, and Uganda.  These different regions, with their different soils and climates, create unique tasting vanilla beans.
I had a sweet time talking with other crafts, and meeting folks who stopped by to chat.  If you are in the Albuquerque, New Mexico area this coming weekend, please stop by my booth @ the Cleveland Middle School.  And if you received a post card of my craft fair schedule, don't forget to bring it with you, to receive your exclusive gift {smile}.


Friday, November 1, 2013

Dots and Dots

Wow, can you believe that it is Friday, already?  Me, if I were to be completely honest, I'd like to have one more day before the weekend starts.  (and I don't want to count this day, as my 'one more day'.)  I have been busy getting some paper craft items created, and made for this holiday season's upcoming Arts and Craft Fairs.  My first fair is tomorrow - Saturday!
I am planning on using this day, to get all my crafts packaged, priced, and labeled.  I'm hoping that I will have some time to do a mock set-up of my tables and see what works for product placement.  But, we'll see.  
Then early this evening, I'm making a trip into town, to get my tables delivered and set up.  That way, all I have to do tomorrow morning, is put my product out.  And I figure that will take about 30 minutes, but I'll give myself an hour.  Just in case.  Know what I mean?  
But, before I get busy getting all of that together, I want to share a card I made, for Sketch Frenzy Friday.  The lovely Jennifer @ Sketch Frenzy Friday, has a very user friendly sketch for you to try.


here is what i created


I have been Christmas crafting my little heart out, and trying to change my gears, is a bit difficult.  I used a piece of Sweater Weather DSP (blue polka dot) as my main panel.  I wanted to accentuate the polka dots, so I matted this pattern paper onto a piece of very vanilla card stock.  
I also wanted my belly band to be in contrast to the card.  So, I used a piece of black and vanilla polka dot paper (Modern Medley DSP).  I wrapped a piece of pool party seam binding across the belly band.  But I wanted to add a homemade touch to it, so I added a machine stitch to it.  
I dry embossed the oval frame  and then tore around the shape.  I stamped the 'friends forever' button in crumb cake classic ink.  I used dimensionals to lift the button off the card front.
I created a sentiment banner using a scrap piece of very vanilla card stock.  I stamped the sentiment in basic black classic ink, and flagged the ends.
For the bow, I tied a multi-loop bow and then tied a vintage faceted button to the center of the bow with some thin silver ribbon.  I wanted to give the card a little sparkle.
I hope that you have been inspired to play along with us @ SFF.
Thank you for stopping by, and I hope that you have been inspired to create something beautiful of your own (smile).