Thursday, March 31, 2011

hope


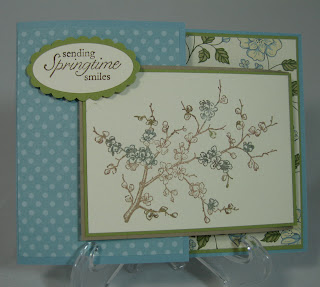
Over @ Creative Sketches they have a layout challenge this week! So, here is my take on the sketch. I used mostly Stampin' Up! products. I wanted something 'pretty', so I hope that I have achieved that.
The card base is Aqua Mist cardstock. I love the pale blue color. I used some very retired DSP to mat that. Its that pink and white swirl paper. I love it, because its the right shade of pale pink, and the design gives it some interest. I still have a weakness for the First Edition DSP, so I used my Top Note die and cut that out. I am working through my addiction of the cherry blossom stamp from Easter Wishes. I stamped that in Basic Brown classic ink. I found this wonderful word stamp at a big box craft store. I stamped that in a teal pigment ink, and used clear embossing powder on it. Heat set it, and viola! The 1/8" very vanilla taffeta ribbon looks perfect. And yes, those tiny tags have made another appearance. The flower is from a floral pick I took all the blossoms off. I added a white half pearl to the center. However, the center of the flower is pink, and gives the pearl that pretty shade of pinky rose.
Thank you for looking. Let me know what you have been using alot of. Me, the First Edition DSP. It seems to find its way on every project I create!

Wednesday, March 30, 2011

Happy Birthday!


A close girl friend, needed some cupcakes for a friends birthday. Her favorite colors are green, purple, and blue. So, here is what I made. Each cupcake has a variety of rosettes in her favorite colors! I added some edible glitter to give them some sparkle. I put each cupcake on a silver cake paper covered cake board, and placed in a clear cello bag. I tied each bag with purple and blue curly ribbon.
I heard that she loved them! I'm glad. What's your favorite cupcake?

Sunday, March 27, 2011

Chic of the Week #76!

Yahoo! I was chosen as Chic of the Week! over at Just Us GirlS! They had a color challenge that I entered, and my card won! I'm doing my happy dance! :)
Stop by their site, and take a look at the runners-up!

Saturday, March 26, 2011

Let's Make an ATC

Over @ Our Creative Corner, Rebecca, has another challenge for us this week. The challenge is to not only make an Artist Trading Card (ATC), but to use Cream/Vanilla, White, Kraft, Brown/Black, and one color of choice! Wow! That's a tall (ok, pocket size) order! So, join us in some fun! Here is my entry: (I placed the Rose Red cardstock behind my little ATC, so it would show up in the photography session.)

Rebecca, is a super talented lady, who has some wonderful eye candy on her blog: Ecletic Endeavours . So, if you have a few moments, please stop-by and visit her blog, along with the blogs of the other ladies on the Design Team. It is certain, that you will be inspired from what these talented, and clever ladies can do with paper!
So, an ATC measures 2.3" x 3.5". Its a pretty small 'canvas' to work with. Especially if you are a scrapbooker and are use to 12" x 12" of space. But, broaden your horizons and give it a whirl! I will be posting another ATC tomorrow. These little guys are super fun to work with, and they help me stretch my creativity!
I found this super cute graphic on the Internet. I think she just looks lovely. And who doesn't love a rooster? My pattern paper is from Bo Bunny. The solid card stock is Very Vanilla, Early Espresso and Crumb Cake. The ribbon is Crumb Cake seam binding. I stamped a floral background (Clearly for You, stamp set) on the First Edition DSP, and the 'Happy Easter' is from Teeny Tiny Wishes. The button is from my 'jar o'buttons', so I have no idea who made it, or where I purchased it.
Thank you for looking, and let me know what you think! Getting comments really does make my day! I just love the feedback! Enjoy the rest of your weekend!

Friday, March 25, 2011

Clear Note Pad Case

The 4th Thursday of the month is my 'Stampin' Up! Quick & Easy' class held at the Tijeras Public Library. The cost of the class differs each month, and is based on supplies used. However, there is NOT be a class that is over $10. The class size is limited to 4 due to room size.
Yesterday, my class was, 'Clear Note Pad Case'. Here is a close up of the upper left corner of the 'Clear Note Pad Case'. I even put in Stampin' Up! note pads! And it was both a big hit and a success! I don't have any class kits left! I held the class for 4, and had 3 extra kits. WOW!
So, if you would like the 'Instructional Sheet' (a PDF), you can purchase it for $2.50. The 'Instructional Sheet' has step-by-step instructions, color photos, and a supply list.
To purchase, please contact me via email, and pay thru PayPal or mail a check.
I can't believe what a big hit this class was.

Thursday, March 24, 2011

Vintage Background

Thank you for stopping by today, to see what I've been crafting. First, I want to thank my followers for their support, and all the lovely people who have posted comments on my postings. Your words of encouragement, and excitement, have really kept my spirits high, as well as my motivation. Thank You!


Ok, now on to today's card. I am on the Design Team (DT) for Creative Sketches. They are a wonderfully supportive group of ladies. Well, todays challenge is a layout. So, pop on over, and see what the other DT members have created (all of which is stunning!) and enter. Play with us! The layout is easy to use, and versatile - click here to play along.
I have seen alot of beautiful, lovely, stunning pattern paper out there. Too many companies to name. But, I don't want to run out to the store every time I need a pretty paper. So, I decided to try my hand at creating my own. I wanted to use the supplies I have already spent good money on. Make my supplies stretch, fit my needs, use what I already have! So, that's how my background paper came about. (Click on the image, so you can really see it.)
The card base is Basic Grey (SU!), the panel is Baja Breeze (SU!). I inked my french word background stamp - En Francais (SU!) in Crumb Cake classic ink (SU!) and stamped it using my finger tips. I didn't want to see all of the words, but rather a random viewing. So, it looks 'old'. Next, I inked my scratched background stamp - Sanded (SU!) in Baja Breeze classic ink (SU!) and stamped the whole panel. I used the same color ink as cardstock, because I didn't want to compete with the words, I just wanted it to look 'used'. I used the flourish stamp from Friends 24-7 (SU!), and dabbed some, almost white acrylic paint on it, and stamped the bottom of the panel. I really like the look, and how it turned out!
The Tiny Tags stamp set (SU!) was used to create the tiny tags. They say, 'hand crafted', 'friend', and 'thanks so much'. The ribbon is Stampin' Up!'s new 1/8" taffeta ribbon in Very Vanilla. I used one of the trinkets (SU!) pins, to hold my tags onto the bow. Let me just say that tie-ing that little bow on that little safety pin was a challenge. The stamped panel on the front says, 'You're a neverending song in my heart of comfort, happiness and love. I sometimes forget the words but I always remember the tune.' I stamped that in Basic Grey classic ink (SU!) and the bird is from a different stamp set, one I purchased while on vacation. I stamped the bird in Baja Breeze classic ink (SU!). I added three tiny half pearls as the embellishment for the card.
So, stop on over @ Creative Sketches, and play along with us!

Tuesday, March 22, 2011

WMSC39 & JUGs76

I was browsing the Internet on Sunday, and found these two challenges! Waltzing Mouse Sketch Challenge #39 and one of my favorite places, Just Us GirlS #76. Waltzing Mouse is doing a sketch challenge that I thought looked fun to play. Just Us GirlS is having a color challenge, that looked interesting. So, here is what I came up with. The colors are Baja Breeze, So Saffron, Soft Sky and Pink Pirouette. Now, at first I thought, oh vintage! I love to do vintage! But, this is suppose to be a challenge. So, what about a baby card? I don't really do baby cards. So, I decided my theme would be 'baby', non-gender specific. Now Waltzing Mouse has these fun pennants in the sketch. I don't have pennant dies, stamps, or punches. So, its a challenge, think sharon. What about using a word punch, with a twist? So, that's what I did. I used the modern label punch and folded one end over. Viola!
Now the hard part. Baby theme, with not too much baby stuff. So, I scrounged, and searched. I put all my baby stuff out. Ok, it consisted of three stamp sets, one package of pattern paper, and no embellishments. Pretty sad, huh. So, I used two stamp sets and one sheet from the baby paper. I found this scrap pretty floral circles, in my stash, and one lone doily tag. Viola!
I must have stamped that one-sie ten different times. Each time coloring it, a different color combination in the color scheme. Then, it struck me. What if you flocked it in white and used So Saffron to color the trim? And it worked!
I used linen thread to hang the pennants. I added those cute tiny bows by the brads to help connect it to my card. No sponging. It was hard to resist at first, but I'm really pleased with the end product.
Let me know what you think!

Monday, March 21, 2011

Best Friends

Ok, so this isn't my best photography work. And yes, its prettier in real life.
This is also posted on 'Brag Monday's' over @ the Graphics Fairy

There is a group of us (6) who have become best friends. We really enjoy each other's company, and we actually care about each other and our families. So, when we get together, we 'let our hair down' so to speak. We come from all backgrounds, different socio-economic groups, and despite our differences, we connect on a higher level. So, I consider myself blessed. Blessed to have such loving, supportive, and creative women who I consider my best friends.
One of us had a birthday last month. And, well, did I mention our crazy busy schedules? So, we all went out to dinner last week to celebrate. Her favorite colors are black & white. So, I made her card black & white (posted last month or so) and inside I put a White House Black Market gift card. Oh, it matches the theme and is one of her favorite places to shop. I gave her this incredible beautiful, funky neckalace from Premier Jewelry. And, I had to craft something. So, here it is. I purchased a frame from one of those 'big box' craft stores, and made the insert. I wanted something simply shabby chic. And I hope I pulled it off. I found this graphic art over @ the graphrics fairy and thought it was perfect! I think its hilarious! three grown women in a toy car in someone's living room. Come on, its pretty funny.
I used mostly Stampin' Up! products to complete this frame insert. The base is Soft Suede card stock. The two strips of pattern paper on the left are First Edition DSP and Grand Soiree DSP. I stamped two different flourishes (friends 24-7 & bliss) in soft suede and basic black classic inks. I added a strip of Basic Black card stock and used my scallop edge border punch. The black flourish is a retired product from last year. The flowers I made from left over scraps and various shaped floral dies and punches. I used two of the vintage brads for the flower centers. I had a left over rhinestone floral spike, so I added that and a feather spike to the larger flower The little butterfly is from the Clearly For You stamp set. The tag is from a retired stamp set, too. The sentiment is from a PaperTrey word stamp set. I found this wonderfully elegant black pleated ribbon at the 'big box' craft store, so I added that, too along the bottom edge. To give the whole piece a little more worn look and sparkle, I sprayed it with both Log Cabin & Vanilla Smooch sprays.
Thank you for looking, and I hope I have found my mojo, from being out of commission these last few weeks. Have a wonderful week, and stop by soon. I hope to have more goodies posted through out the week!

Saturday, March 19, 2011

Don't Throw That Away!

This is my finished product!

This is what the container looked like before I started.

I found these beautiful fabric flowers on sale at the local 'big box' craft store.

This is a close-up of the tag on the front.
Ok, where do I begin? The beginning. I'm not a hoarder. But, I seldom throw things away. Actually, if I can envision a future use, I save them. And, yes, my saving space is getting pretty occupied. Here's what I mean. If you purchase something, and the packaging looks like it has a potential for re-use, I save it. My husband has learned to either to not look, or accept the fact that I like to keep empty containers. Either way, what a doll.
So, several years ago (at least 3, if not more) on one of our many trips to LA, Universal Studios, my husband bought a watch. I believe at the fossil store. Well, the container was this tin box. (image #2). I kept the box. Over @ Our Creative Corner, they are having a recycle challenge! Perfect! So, I have my container. However, what am I going to put in it?
One of the local 'big box' craft stores was having a sale on their faux flower stems. Let's go see what they have. Well, I found these beautiful flowers, that are perfect for card making, scrap-booking, paper crafting, all kinds of fun, neat, and creative arts! (image #3) So, I picked some up. When I got home, I pulled all the flowers off. (Ok, not all, but most.) So, that is what's in my tin. Now I have a beautiful gift! Inside and out!
To decorate the tin, I first used acrylic paint to cover some of the original color at the top where the lid goes. I then cut a strip of pattern paper (Fancy Pants)and used sticky strip to hold the paper to the tin. I cut a square of another coordinating pattern paper (Fancy Pants). I thought the dots where cute, but it needed some pizzazz. So, I used my 2-way glue pen and got some Dazzaling Diamond glitter on the dots. I matted that piece with a scrap of Crumb Cake cardstock. I found a small scrap (in my scrap box) that matched the original pattern paper perfectly, so I used a border punch to give it some shape. I wrapped a piece of left-over crochet trim around this piece. Scrunched a long piece of Baja Breeze seam binding, and tied it around my matted piece. This ribbon was long enough to make a bow. I used white detail embossing powder, to give my angel (Clearly For You) some noticing power. Used a small oval punch, to create that piece. I had a scrap piece of white felted wool, so i used my big shot and a butterfly die to make that sweet little butterfly. I had a scrap piece of my border paper to make my rolled flower. I used another scrap to punch out the little leaves. All edges were sponged with Crumb Cake classic ink before adhering to the project. To finish the lid, I wrapped a piece of left over ribbon around the lid, using sticky strip to hold it in place. And then cut a piece of the original pattern paper to fit the lid. I used my sanding block to create the edge work, so the paper looks like it was made for the shape.
Thank you for looking, and please play along! It's fun! See what you can decorate/alter using what you already have!

Friday, March 18, 2011

Joy Fold Card


Over @ Creative Sketches, we are having a technique challenge! We want you to use your creativity to create something with fancy folds, cuts, or punches! Any color scheme, and any layout! Now, that sounds like fun! Spread your wings, and create something to post, and add your paper craft to our site and you could be our next winner!
I made a card, with the 'joy fold' technique. You basically fold a card in a card. I love this fold, because the recipient feels like they are getting a surprise!
I used all current Stampin' Up! supplies to make this card. I even used only one stamp set. Aren't you proud of me? I did, however, use designer paper from two different packs. But, I just love how it turned-out!
I'd love to hear what you thing too! I am the newest member of the design team, and they wanted to 'print' a little bio on me. So, check out my mini bio and enter our challenge!

Saturday, March 12, 2011

Challenge Themes

We have a new challenge over @ Our Creative Corner. Use fabric on your project, and ribbon doesn't count. Kristin from Lilybeth Boutique, is our hostess this week. So, here's your challenge this week: 'incorporate fabric into your creation. Use fabric as a background, use it as an embellishment. Stamp it, fold it, cut it, weave it. Use canvas, cotton, satin, silk, burlap, polyester, tulle, whatever. The only restriction - ribbon doesn't count as your fabric!'
Sounds, easy, sounds fun. So, lets play. I didn't want to create another card. Not that I'm tired of cards. I LOVE cards. Its an unique 'canvas' to work with. But, I wanted to spread my wings, so to speak. So, I went hunting in my craft room for some goodies. I saw this wonderful neutral color challenge, and I missed my entry by a few days. Ugh, life gets in the way of playing. So, why not use their colors anyway. So, I gathered my neutrals, this incredible download I printed for a card that I never made (from The Graphics Fairy), my favorite stamp sets, and this 'vintage' iron frame with a gate on the front (Pottery Barn).
For those of you who may not know, I love birds (and butterflies), don't really know, but there is just something ahh inspiring about them. So, yes, this is another million product project. I used stuff I love. Papers from two different companies, stamps from 5 different companies, and embellishments from at least six different companies. So, for a complete list of products used, please email me privately.
The picture frame is 8" x 10". So, I cut my base cardstock to that dimension, and then just played. I made sure that you can 'see' things with those 'gates' closed. That was the hard part. I wanted placement of different stuff, differently, but then you wouldn't be able to read the sentiment, or 'see' something. But, all in all, at the end, I am pretty happy with it.
My fabric, is the gray flower. I used a die and my Big Shot to cut two different size and shape flower shapes. And melted the ends with a heat gun. While heating, the pearl brad got a little scorched. But, I kinda like the look. It looks weathered, old, vintage. Perfect!
Thank you for looking. I hope you get a chance to play with us @ Our Creative Corner. I'd love to see what you come up with. I was actually surprised to see all the different takes on this weeks challenge. It should be fun. Come play along!

Thursday, March 10, 2011

Thank-You, Creative Sketches & the Sweet Stop

It's time for another challenge over @ Creative Sketches! This week, we are hosting a color challenge. Old Olive, Bashful Blue, Basic Grey, and Baja Breeze. It sounds like alot, but they actually go super well together! Here is my card, for this weeks challenge. I used mostly Stampin' Up! products. I placed tiny half pearls in the center of my little fabric flowers, so you'll have to look real close. And now that my card is done, I kinda wish I used silver brads.
Oh well, what are you going to do? Tear your card apart for one (ok, two) little embellishments? I just might!
Now that I have these super pretty colors to work with, I'm kinda stuck. So, I went over to the Sweet Stop to see what they had. And they are having another sketch challenge. It's my lucky day! So, I used their fun, creative, and lovely sketch to complete my card. Go over to the Sweet Stop and see what other folks have done with this sketch.
Join us in this fun and creative challenge. Thank you for stopping by!

Tuesday, March 8, 2011

JUGs #74 & Cupcake Creations

I haven't been 'playing' with my paper craft stuff lately. I entered the Chocolate Fantasy, again, so that took alot of my time. So, its back to my paper crafting! Yahoo!
I used two challenges to create this card. JUGs has a layout challenge this week, and cupcake creations has a color challenge this week. So, I combined them both!
I really do love the challenges over at both Internet locations. They are creative, fun, and challenging. Its good to work outside your comfort zone, sometimes.
This card was made for one of my co-workers for Chocolate Fantasy. I made this card for my daughter. She was a big help, very creative, and she did that beautiful zebra. Hand-painted with edible paint. Wasn't it beautiful?
Most of the materials to make this bright and cheerful card are from Stampin' Up! Everything except the pattern paper. The only retired product used, is the oval fancy frame stamp. But, everything else is current.

Sunday, March 6, 2011

19th Annual Chocolate Fantasy - Nada, Inc.

Hotels & Casinos
1st Place & Best in Show: Hyatt Regency Tamaya Resort & Spa - The Hunted

Restaurants & Caterers
1st Place: Theobroma Chocolatatier - African Paint

Students/Schools
1st Place: CNM Culinary Arts - Beauty of Life

People's Choice & 2nd Place
Restaurants & Caterers: Krispy Art - Pride & More Prejudice

I am not a hotel/casino. I don't have a restaurant. I have catered a private party or two. I have never attended any formal cooking/baking/chocolate schools, on-line classes, or continuing educational classes. I participate because I think its fun. And, when I win something, its super exciting! I have been competing for 6 years now. I have won (including last night) one 2nd place, and two third place. Our solid chocolate sculpture took just over 25lbs of chocolate, 2 lbs chocolate clay, 1/2 lb toasted coconut, 1/3 lb. toffee bits, and almost 50 hrs of labor. I had two wonderful helpers this year: Sharon Reese (my mom) and Tara Tafoya (my daughter) help me. We had alot of fun doing this, and I believe that we are all happy with our prize! There is alot of talent out there, and everyone did a wonderful job! Here is a photo of our creation:

Restaurants & Caterers
3rd Place: Nada, Inc. - Maelewano (Harmony)
In the African 'wild' you typically see hippos, zebras and giraffes together living in harmony, without harming each other. There is an African man sitting under the umbrella tree (opposite side of the zebra). We did everything to scale. Our conversion was 1 inch = 1 foot. The white piece of chocolate in the foreground has an elephant stamped on it. Our scene is during the dry season, that's why there aren't any grasses. We have a tiny butterfly on the hippo's nose, making him point and turn his nose upwards. Our candy was a flower-shaped dark chocolate cup, filled with a Pomegranate flavored caramel sitting on a bed of toffee bits.

Thank you for looking! We had alot of fun this year. The Natural History Museum hosts this event each year, and we love attending! Its a black-tie gala event, causing our husbands to put on at least a suit, if not a tux, and we get to wear our pretty princess ball gowns! Thank you for stopping by! Enjoy the rest of your weekend!

Saturday, March 5, 2011

OCC design Challenge

Good Morning! Alot is going on, so let me get to this week's challenge over @ Our Creative Corner. Kristin (from LilyBeth Boutique) is our hostess this month. Kristin has come up with a fabulously fun challenge. It's called '1-2-3-4 challenge', in honor of her daughter. You need to use the following required pieces on your card, layout page, 3-D project, ect paper craft: 1-pattern paper. 2-layers. 3-stamped images. 4-non-paper embellishments. So, here is my card. I wanted to make something vintage, something shabby chic, something warm and familiar.
My one piece of pattern paper is from Tres Jolie. My two layers are the doily tag from Martha Stewart and the stamped button card from Paper Trey Ink. My three stamped images are: the button card, the 'vintage style' on the button card, and my thank-you tag. My four non-paper embellishments are: seam binding from Stampin' Up!, the half pearl in my hand-rolled paper rose by Stampin' Up!, the button on my button card from my secret stash, and the tiny safety pin that holds my tag onto my seam binding by Stampin' Up!
Most of the core-products used are Stampin' Up! The solid card stocks are Crumb Cake, Always Artichoke, and Very Vanilla. I layered a scrap of First Edition DSP and Baja Breeze DSP on top of the doily. I then sponged everything with Sahara Sand classic ink. I used my 1 3/8" circle punch and scallop circle punch to create the rolled-rose. I used a scrap of DSP and my two-step bird punch to make the leaves. I sponged the rose with Pear Pizzazz classic ink.
To make the button card, I stamped the card outline in Crumb Cake classic ink and the 'vintage style' in Soft Suede classic ink. I had a scrap piece of the spring collection fabric from Stampin' Up!, so I used my picking shears to make that wonderful edge. I tied the button on with some linen thread. I wrapped some Baja Breeze seam binding around my card, and made one of those multi-bow bows to make it more feminine. I used my Crafty Style stamp set for the 'Thank You', cut around it, and punched two tiny (1/16" circle) holes to thread the tiny safety pin through.

Now, I am off to the Tamaya Resort here in New Mexico to set-up my solid chocolate sculpture, to compete in the 19th Annual Chocolate Fantasy. The theme this year is: Pride of the Serengeti. I will post a few pictures tomorrow of both my piece and my competitors. Now remember, each sculpture entered must be 100% edible, and must be at least 80% chocolate. You will be amazed at what we can do. So, please come back. I will post photos of the top three winners in each catagory (casino, artist, student) and of course mine! It's a black-tie gala event, with basically all the chocolate one can eat. There are 17 competetors this year, so you can sample the chocolates of 17 different entries and vote on your favorite!
See ya tomorrow, and wish me luck. It's an hour drive just to the Tamaya Resort, so hopefully everything makes the trip well.

Thursday, March 3, 2011

Creative Sketches #22

Over @ Creative Sketches they are having a sketch challenge! You guys already know me, I turned the sketch on its side :) I'm on my last two days to finish my chocolate sculpture and make my 400 chocolate candies, so like I said before, my posts are short and minimal.
Play along in our sketch challenge @ Creative Sketches! Its a layout this week. You can use anyone's products (I used Basic Grey & Stampin' Up!).
Stay tuned, I'll have photos of chocolate to share with you!