Saturday, July 30, 2011

Red & Aqua Color Challenge

Good Day!  It's Saturday, the beginning of a wonderful weekend, and another challenge over @ Our Creative Corner!  It's a color challenge: red and aqua, and a bit of pink if you'd like.  Sarah, over @ ThinkIng Stamps, is our hostess this month.  This is also her last week. :(  We will miss her.  She has a fabulously fun style, that is uniquely hers.  
This was a difficult color challenge for me.  I think these two colors look wonderful together, but for some reason, I couldn't get them to work together, until...
Here is the inspiration photos:

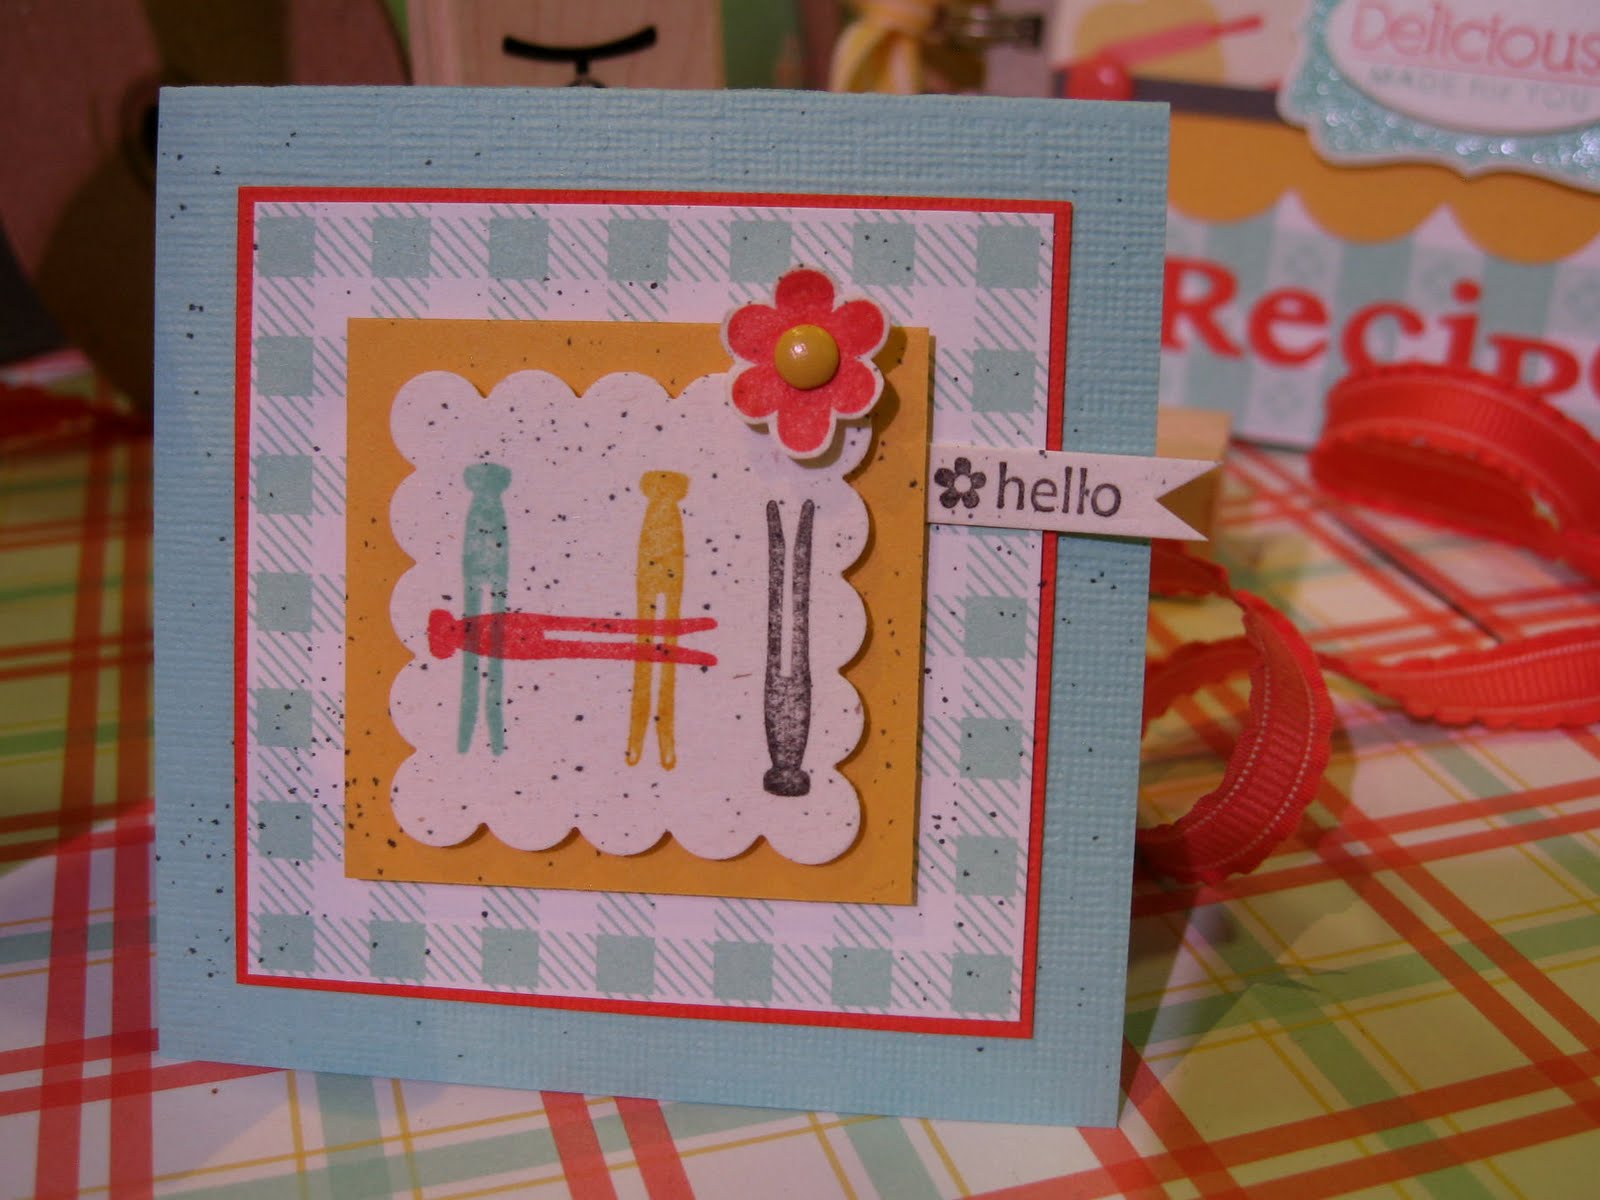
Here is the card I made:

This card was a bear to create.  But, once I got it going, it turned out to be 'fun' to make.  Christmas is not my all time favorite holiday.  But, it is a wonderful time of the year to get together with family and friends.  I used almost all non SU! products to create this card.
The card base is an aqua mist cardstock.  The pattern paper is a few years old, I believe.  I stamped the sentiment on Vellum cardstock with a Recollections stamp.  I really do love the font of this stamp.  The snowman is a big box holiday find.  I think the snowman and pattern paper work nicely together.  I wanted to add some sparkle to some of the snowflakes, so I added some clear rhinestones randomly.
Now, it's your turn!  Take a look at what the Design Team has created, and play along with us!  You could be our next Top Talent Winner!  (you can't win, if you don't play!)

Friday, July 29, 2011

Sketch Frenz

Its Friday!  Yahoo! and that means that it's time for another sketch challenge over @ Sketch Frenzy Friday Challenge.  This weeks sketch challenge is brought to us by Tammy F., and is very easy to work with, and fun to play with.  When you are done, please visit the next stop on our Blog Tour with Tammy B.'s blog.        
here is the sketch:
here is my card:
At first, I was going to rotate the sketch, but take just a minute to look at the sketch.  It's very user friendly in its original orientation and look at the embellishment used.  Very each to adapt.  
So, if you aren't familiar with my style, I have an infinity towards shabby-chic.  And I 'see' shabby-chic as vintage with some sparkle.  You know, something old, weathered, or worn, and something modern new added to it.  My favorite addition is sparkle.  
The only company I used for this creation is Stampin' Up!  If you haven't ever used their products, I can't stress enough to give them a try.  They are one of the leaders in paper crafting for a reason.  They make wonderfully heavy cardstock.  They color match their inks, ribbon, and paper.  So, there is no more guessing that everything will coordinate.  If you spend less time searching for stuff, you spend more time creating!
For the card base, I used chocolate chip cardstock.  I used a scrap piece of Beau Chateau DSP to help ground my card.  I love the curves of the top note die, so I die cut two pieces.  One in chocolate chip and other in very vanilla.  I trimmed the very vanilla along the perferated edge and used the chocolate chip piece as a mat.  I stamped the floral image from 'elements of style' in crumb cake classic ink, and used my soft subtles water coloring crayons to color the image.  (I used my aqua painter to blend the color.)  I just the Eiffel tower image from 'artistic etchings' and so I stamped over the the floral image.  I love to added ribbon and a button or two, but I didn't want just a line of ribbon, so I put some sticky strip across the lower third of the stamped panel, and did a free hand pleat with some crochet trim.  I didn't want to wrap the ribbon, so I cut the ends, and used one blade of the scissors to fray the ends and left those just hanging.  I thought it help soften the card.  I wanted some 'thing' on the ribbon, so I put a button.  But, i couldn't just put on a button.  So, I tied some linen thread through the button holes and made a bow, and added a faux half-pearl to secure the bow and add a girly touch.  The three tags are strung through the linen thread.  They are stamped with 'Mr & Mrs' '{love}', and 'hand crafted'.  'AMOUR' was stamped last.  To make sure the placement was right.  I needed to add some sparkle, so I sprayed it first with the vanilla smooch, and then the left side with log cabin smooch.
Thank you for taking the time to have a look.  I appreciate the visit.  But, leave me a comment.  Let me know what you think!  

Thursday, July 28, 2011

Simply Pretty

It's Thursday, and that means its time for another challenge from Creative Sketches Challenge Blog!  And today, they have a wonderfully cute 'sketch only' challenge!  Easy Peasy, huh?  
Here is their sketch:

And here is my version of this sketch:
The card base is Pink Pirouette cardstock.  The two pattern papers are from the Tea Time Scrappin Kit.  I used the Creative Elements stamp set for the added images (border trim, flower, 'create', flourish, and butterfly).  The flower is stamped in Old Olive classic ink.  The flourish is stamped in Versa Mark and white embossing powder was then poured on the center piece.  The 'create' was stamped in chocolate chip classic ink, onto a tag that was in the scrappin' kit.  The butterfly was stamped in Versa Mark, on a scrap piece of Pool Party cardstock and heat embossed.
When I sat down to create this card, I wanted something that used product I already had on hand, followed the sketch, and was pleasing to the eye.  This card has a lot going on, but it doesn't hurt your eyes.  I really wanted to add some ribbon, to soften the crisp edges, but didn't see any that looked 'good'.  
Thank you for looking!  And come back soon!

Monday, July 25, 2011

Antique Marina Florals

Howdy! and thanks for stopping by to see what I've been crafting!  Today, I have a card I demonstrated at my downline meeting, 'Hoot's Got Stamps?' this month.  I was a card that Robin Merriman had posted on July 19th, 2011, and fell in love with it!  I used this CAS'd card to show my downline how the introduction of one new, inexpensive item could really inspire their folks in their workshops and clubs. 
Here's my card:
One of the main reasons that I just love this card, is the simplicity and elegance of it.  You use a little product.  Marina Mist cardstock for the base.  A quarter sheet of very vanilla cardstock for the main image.  I stamped the floral image from Elements of Style in Marina Mist classic ink.  Then I stamped the Wonderfully Worn background stamp in Sahara Sand.  I then took a 2 1/2" x 4 1/4" First Edition  and ripped the two long ends, crumpled the DSP an sponged with Crumb Cake classic ink.  .  Then I wrapped the seam binding around the card.  The fancy oval, is actually a new embossing folder from Stampin' Up! - Designer Frames, I embossed the piece of very vanilla cardstock first, then added the monogram and faux half-pearls. I used foam tape to elevate the oval off the card, to help give this vintage simple card some charm.
Thank you for looking!  Please leave me your thoughts/ideas about this card or other things you see that catches your eye

Saturday, July 23, 2011

Mojo & B's

Its Saturday! and that means that its time for another challenge over @ Our Creative Corner!  And this weeks challenge is hosted by Sarah Gough.  And our challenge is to use all B's : buttons, black, bling and a bow!  Doesn't this sound super fun?  
Well, I needed to get my Mojo working, so I went over to Mojo Monday's challenge for a layout to help me with this weeks Our Creative Corner challenge.


So, if you need a little priming to get your creative juices flowing, like I did, check out what the rest of the design team has come up with!  They are pretty talented and have very different, beautiful cards to share with you!
Here is my card:

For this card I used grey, daffodil delight, basic black, and whisper white cardstock to pull this together.  I also used one of my all-time favorite retired stamp sets: Friends 24-7, some going grey and basic black classic inks.  The flower I made with some sheer yellow organza and yellow tulle.  The pattern paper is from Authentique, and the black pearl and rhinestone swirls are from my stash, but everything else is Stampin' Up!  Thank you for looking!  And I hope that you join us in this weeks challenge to use all B's!

Friday, July 22, 2011

sketch Frenzy

Happy Friday!  I have some wonderful news that I just couldn't wait to share with all of you.  I have been selected to be on the Sketch Frenzy Friday design team!  How exciting! I know!  So, I want to invite all of you to join the challenge this week!  

Todays Sketch is brought to us by Tammy Baldwin:


Here is my card:


For my card, I used Berry Blossoms DSP, the perfect pennant die, and some of the new Wisteria Ruffle ribbon.  I kept my card pretty simple.  I was having a bit of a struggle with this weeks challenges.  My mind is busy with work, and trying to get everything done.  
Please use this as some creative inspiration, so you can join us in this weeks challenge.  So, go creative something wonderful and upload it to the Sketch Frenzy Friday blog.  Now, on to the next blog on the tour, Tammy B.

Blog-iversary & Blog Candy Winners!

Happy Friday, and Happy Blog-iversary to me!  I have been blogging for 2 years now, and time really does fly when you're having fun!
I want to celebrate this mile-stone for me, with all of you! my followers!  So, the drawing for the Blog Candy is officially closed.  To select the winners for this give-a-way, I put everyone's name on a list in the order in which you commented.  So, if you commented on more than one post, you increased your chances of winning.  On my very first post, dated June 8th, the firs person to comment (Kris Sobolik) was #1, and then everyone followed.  Then on my last post, dated July 20th,  last person to comment (Carol) was #53.  I used the Random number Generator, made my number selection from 0 to 53, with three winners, and the numbers are: #43, #8,  #27.  
The first $25 winner is #43: Jennifer Rzasa!  
The second $25 winner is #8: Beth! 
And the $50 winner is: #27: B Nguyen!
Congratulation Ladies!
I will contact you individually to get your mailing addresses, and get your prizes out in the mail!  I want to thank everyone who played along!  I think it was fun, and it gave everyone a chance to voice their paper crafting likes! 

Wednesday, July 20, 2011

The Last Blog-iversary & Blog Candy Question!

Howdy peeps!  This is your last chance to enter my Blog-iversary Blog Candy Give-a-way!  So, the rules are super simple!  #1 - follow me.  If you are already a follower, thank you for your support!  And if you're not, it's not too late!  #2 - answer the paper crafting question.  Easy Peasy!  I will add everyone's name into the proverbial hat, and select names.  The first two winners will receive $25 in paper crafting supplies.  And the last name drawn will be my $50 in paper crafting supplies winner.  Who could ask for more!  I will draw the names and announce the winners on Friday!  Because that's my Blog-iversary!  A whole 2 years!  Time really does fly when you're having fun!
So, without further ado, here is the last paper crafting question for this Blog-iversary Blog Candy Give-a-way:

If you were chosen as my $50 in paper crafting supplies winner, would you rather win product or a gift certificate, or half n half?

My answer:  I would rather win half n half.  I would love the thrill of opening a package, but also the excitement that comes with shopping for free stuff.
Now, its your turn.  Remember, you can only comment today, and then it's 'closed'.  Let's see what your answer is!

Tuesday, July 19, 2011

Mixing Pattern Papers

Hello!  A quick house keeping note: tomorrow, is your last chance to enter my drawing for some free Blog Candy!  So, please make sure that you stop by tomorrow.  All you have to do is sign-up as a follower, and if you already are - Thank You.  Then answer the last paper crafting question.  Your name is then entered into the virtual 'pot' and I will select 3 winners.  There are two $25 winners and one $50 winner.
Ok, now back to the business at hand.  I have a girl friend who ask me if I could help her with mixing pattern papers.   She likes some of the things I have done, and wants a few pointers.  
The first and easiest way to mix pattern papers, is to use products from the same company (i.e. Stampin' Up!, Basic Grey, Paper Trey Ink, etc.).  That way your colors will match.  Then, if you use pattern papers from the same collection (Tea Time, Sweet Threads, etc.) they all coordinate.  The company has basically taken the guess work out of the equation, and simplified it.  But, you can take papers from various companies and achieve this same effect, it's just a little trickier.  The other pointer I have is that the busier/large pattern papers tend to be the 'heaviest', and so these should be used on larger scale items.  To bring out a 'less used' color, repeat it (i.e. if you love the yellow used in a floral pattern, use that color on the mat).  


You can also use a repeating color.  My first card illustrates this tip.  The brown and vanilla are repeated, but they are also paired with different patterns.  The main pattern has the brown, and pink.  To introduce the vanilla, I added a brown and vanilla polka dot paper.   But this also repeats the brown, so it looks like it 'belongs'.   To 'anchor' the brown, I added a solid piece of brown.  I did the same for the vanilla by adding an accent piece in just vanilla, the crochet trim.  To give the card some visual interest, I added a paper flower made from a text pattern. 


You can also repeat a shape.  My second card is the perfect example of that.  There are circles in the main pattern paper, both accent pieces used at the top, the top layer of the butterfly, the doily, and the button.  
There you have it!  My quick and easy lesson on Mixing Pattern Papers!  I hope this helped, and Thank You for visiting today!  Don't forget to come back tomorrow for your last chance to enter my Blog Candy give-a-way!

Saturday, July 16, 2011

Copenhagen Inspiration

It's Saturday!  That means it's time for another challenge from Our Creative Corner!  This challenge is fun and pretty easy to work with.  Here are your inspiration photos, and the twist?  

You can't use any printed paper.  Easy peasy!  This is your chance to make your own background.  So, either stamp, emboss, paint, whatever tickles your fancy.
Here is what I created:
I used Crumb Cake cardstock as my base.  I didn't want the depressed side of the paper to be on the inside of my card, or have ribbon on the inside of my card.  So, I cut a smaller piece of cardstock, and ran it through the embossing folder.  I was able to keep the inside of the card clean, add some texture and visual interest to the outside!  How fabulous, huh?  
The photos have alot of bicycles in them.  The area looks very artsy, pedestrian friendly, and the colors aren't the sunniest.  So, I added little pops of color with the Wisteria Wonder ruffle ribbon.  I also added hand-made flowers with the same color.  I first die cut the floral items and then fan those through an embossing folder to help soften them, too.  I wanted to add to the delicate touch of the ruffle ribbon, and so that is also why I added faux half-pearl centers to the flowers.
I kept the card clean and simple.  Not alot of clutter, but with some pretty visual interest.  So, now it's your turn.  Take a look at what the rest of the design team has created.  They are super talented, and full of some inspiration!

Friday, July 15, 2011

Christmas Box

                                                  
Two previous posts today
*photo rich*
(click on any image to enlarge, to see the beauty on a larger scale)

What a wonderfully creative Christmas Gift Box!  And you can get it FREE!  Yes, free!  Sign-up this month, as a demonstrator with Stampin' Up! and not only purchase the starter kit @ $99, but also receive the supplies to make this fabulous Christmas Gift Box, FREE!  That's a $40 value!
Join my team, 'Hoot's Got Stamps?' and let me work with you in growing your own home-based business! and nurture your creative style!
We meet monthly to provide you with the latest Stampin' Up! news, share tips & ideas, give each other moral support, and of course STAMP!
I provide my downline with a special gift when you reach your first promotion of Senior Associate (a free die valued up to $22) and then again when you get your first 2 recruits (a free stamp set valued up to $35)!
Don't think your creative?  You don't have to be.  Stampin' Up! has literally hundreds of ideas.  Don't have a money tree in your backyard?  Don't need one.  Stampin' Up! has tons of money saving ideas on how to cut costs for holding your own workshops and provide you with a constant coupon.  Don't have hours of free time?  You don't need to.  You work Stampin' Up! on your schedule.  Make it fit your lifestyle and your priorities!
So, what are you waiting for?  Have more questions?  Contact me @ bachnucmed@excite.com concerning my next Opportunity Night and I'll answer all your questions. So let's work together, to make this a wonderfully creative business for you! and your family! Don't forget,  you will also get the supplies to make your very own Christmas Gift Box!
So, start today and be prepared to hold your own holiday stamp camp, workshop, or just make those wonderful holiday home-made gifts at a discount!  Either way, you win!  Contact me today!

Doilies Everywhere!

This is the second post for today.  Please scroll down for this morning's post 'Kitchen Diva'.
 *CAUTION PHOTO RICH POST*
(please click on each photo to enlarge the photo, so you can really see the detail)

As most of you have seen on the internet, Doilies have really made an impact this year in paper crafting.  I don't really know why.  But, just take a look around, and they are everywhere!  I don't mean that in a bad way.  I have been using them, or their likeness on my paper crafting items myself.   I just want to emphasise their popularity!

The creative folks are Stampin' Up! have come up with some super fun projects and cards!  And here are a few photos of those items!

The first photo is a simple holiday gift box.  The large stamp is heat embossed on the top of the package and tied with some crochet trim.  Not alot of work, and not alot of product, but just look at the visual impact!  WOW!  The next 3 photos are cards.  They all use a various sized doily stamps, but they all have their own creative style!  So, no matter what your style is, you can surely use a doily stamp!  Even if you stamp the doily and use a circle punch to punch out the image and use it as a tag!

The collection is called, 'Flirtatious' and I think it is just that!  Very fun, fresh, and flirty!  This collection has two stamp sets in it, also.  The large doily stamp is actually one of the background stamp sets, called, 'Hello, Doily'.  There is another stamp set, that has 4 various smaller doily stamps in it, called, 'Delicate Doilies'.  The wonderfully creative folks @ Stampin' Up! have also created a matching specialty pattern paper, Flirtatious Designer Series Paper.  The colors used in this collection are: Pumpkin Pie, Melon Mambo, Pretty in Pink, Wisteria Wonder and Whisper White.  These totally girly colors are crisp, and clean.  You also get two sheets of laser cut doilies!  How fabulous is that?
 
But that's not all!  The folks @ Stampin' Up! have also designed some fabulous fabric by the same name (Flirtatious).  Here are two photos that showcase their fabric.  This first fabric photo, uses the Flirtatious fabric that is sewn onto flour sack towels as ruffles!  The last photo, is of a toddlers cardigan sweater with the fabric used as ruffle accents (again) sewn to the front.  (this item is also showcased in the Big Idea & Catalog, page 127)  Thank you for looking!  I hope these photos have given you some fabulous ideas! and have gotten your creative juices flowing!
Please contact me to place any size order for any of these wonderfully new items, or some of your other favorite items! @ bachnucmed@excite.com

Kitchen Diva

(click on the photos to enlarge, to really see the detail)


Good Morning! and happy Friday!  I'm still @ Convention, so there should be several posts today.  Hopefully 3, but I'm pretty sure I can squeeze two in.  So, for my first:

 Domestic Goddess

Stampin' Up! has a wonderful line called, 'Domestic Goddess' (pg. 52-53, in the Big Idea & Catalog) and I just love this one too!  I love to cook, and I make cakes only for folks I know.  So, I just love the papers and stamps that go in this collection.  So, without any further ado, here is a creative look, at what the design team over @ Stampin' Up! have done with these products!

There are two stamp sets in this collection, Now You're Cooking, and House & Home.  Both of these sets have that 50's feel with their graphics and imagery.  The Designer Series Paper that is in this collection is, 'Domestic Goddess'.  (I know, not a surprise on the name.)  But the colors in this collection really have that vintage 50's feel!  Daffodil Delight, Basic Gray, Pool Party and Calypso Coral.  There are table-cloth-like pattern papers, and various 'cooking' motifs on some of the other pattern papers.  The whole collection has a funky, fabulous 50's feel to it! and I think its totally fresh and fun! 
I think this line is appealing to all ages, even if you weren't around in the 50's, it has that 'grandma' feel to it.  A sense of 'home', 'comfort' and simpler times.


This portable ironing board is actually featured in the Big Idea & Catalog, on page 52.  It's totally cute and funky fun!


Thank you for looking, and stay tuned for some other fabulous Convention photos!

Thursday, July 14, 2011

Vintage, Shabby, & Birds

this is not the only post today.  please scroll down for this morning's post.

 (If you click on an image, it will enlarge, so you can see the detail!)


 For those who know me, know that I have an infinity for vintage/shabby-chic,  birds & butterflies.  Stampin' Up! has a new section in this year's Big Idea & Catalog named, 'elements'.  This section has dollies, borders, backgrounds, frames, labels, memorabilia, textures, flourishes, and tags.  Within these pages are four different product suites:  Flirtatious, Beau Chateau, Pocketful of Posies, and Well Worn.  All of these different product lines are fabulous and individually beautiful!  However, my new favorite: Beau Chateau!  And those who know me, are not surprised by this.  Here is what the super clever, creative design team of Stampin' Up! has done with this paper.
This section has wonderful graphics, pretty colors, delicate touches, and a sense of 'home'; comforting, and familiar.  If you own the new Stampin' Up! Big Idea & Catalog this year, please take a second look at this section.  If not, contact me and with any $30 order, I will send you a Big Idea & Catalog for free!

I am now off to meet with Lynn Pratt's group for the 3-D tutorial swap.  Have a wonderful day!  And I will post again later today!  Enjoy!

Martha's Vintage Swap

Good Day! and thank you for coming back for another peak into my crafting world.  I have signed-up for  a Vintage swap, and we are swapping today.  The 'rules' were simple, make 16 vintage cards using current SU! supplies and swap with the others in your group.  The order in which you signed up, determined the order you were put into 'groups'.   So, I am in group 2, #10.


So, here is my swap!  I'm pretty happy with it.  I have to say that I really am loving this Beau Chateau DSP! And you should see some of the wonderfully creative things the folks @ Stampin' Up! have made with this vintage DSP!  Thanks for looking!

Wednesday, July 13, 2011

Convention Artisan Awards

** for the blog candy post, please scroll down.  This is NOT the only post for today!

Artisan Awards - Each year, every Stampin' Up! demonstrator is encouraged to submit their work, to be considered for this award.  And basically, folks who really are super creative win this award.  There are 10 winners this year.  And there are over 10,000 demonstrators.  So, you have to be super (and I mean 's u p e r') creative to win this award.  Here are three of my favorites:

Heidi Kink, California

Sandra Farrell, Canada

Cheryl LeFore, California


Thank you for looking.  I will be posting more photos from Convention tomorrow.  See ya then!

Convention 3-D swaps

please scroll down to todays blog candy post


It's Stampin' Up!s yearly convention here in Salt Lake City, Utah.  I had such a wonderful time last year, I have made the trek to come back.  :D  Last year, I went to a few (ok, 2) Late Night Stampers events and just attended the convention.  So, this year, I have signed up for 6 Late Night Stampers events, 2 invitation only events, and of course, the CONVENTION!  Woow, wooh!  Talk about crafting till you drop!  but, hey, that's what I'm here for!
I have joined two different 3-D swaps, but I wanted to keep my costs down.  You know, to help my crafting dollar stretch!  So, I have used the Tea Time scrappin' kit to complete both projects.

This first project, is for today, @ LNS 3-D shoe box swap:
covered post-it note holder

This next project is for tomorrow, Lynn Pratts 3-D Tutorial Swap:
covered note pad holder

There are a few ladies who are in both swaps, so I wanted to make something 'new' for the repeat participants.  And, if nothing else, it's a matching set!  These two 3-D projects are super quick and easy! and would make a wonderful Hostess gift!  Interested in receiving a Hostess gift?  Book a workshop or a party!  A 'workshop', allows you to invite your friends to make a wonderfully designed card.   A 'party', allows you to invite your friends to make a wonderfully creative project.  We collect orders from your attendees, and you receive all the hostess benefits!  Including FREE stamp set(s)!   How fun is that?  Just contact me to set a date for your friends to join us to create something fabulous!
I'm off to attend the first official day of Convention, collect my Convention exclusive bag, pick-up my 4 free stamp sets, my Convention exclusive day planner, and shop at the wonderfully exciting Momento Mall!  Enjoy your day, and happy crafting!

Blog-iversary & Blog Candy! #6

Happy Wednesday!  It's a wonderful day for two reasons!  One, you're here to enter a chance at winning some blog candy.  Two, I'm in Salt Lake City attending the Stampin' Up! convention!

As our nation continues to struggle with economic short falls, some of us have had to take a second job, to help supplement our family income.  And as these economic struggles continue, people have had to cut back on 'luxuries' or even eliminated them all together.  With any extra time spent 'working' to make a buck, we have less time for ourselves and that translates to less time to dedicate to our hobbies.

Question:  As the economic struggles affect us all, have you cut out any paper crafting supplies, or products?  If so, what.

My Answer:  I have definitely cut back on my paper crafting purchases.  I now really question what I purchase.  This has caused me to select only high-quality products, and really make those purchases stretch.  The one item I have eliminated are pre-made embellishments, mostly flowers.  So, I have had to learn to make some embellishments myself.  This whole movement of creating hand-made embellishments, has been very rewarding in itself!

Now, it's your turn.  Remember, answer the question in the comments, and your name is entered in the drawing for 3 (yes, three) blog candies.  One valued @ $50, and two valued @ $25 each.  Best of luck to all of you!  Oh, and don't forget, you only have today to answer.  Comments will be closed Wednesday night.

Tuesday, July 12, 2011

Buttons in Salt Lake City

Good Day! and welcome to my creative blog.  I arrived in Salt Lake City yesterday.  (Ok, after two delayed flights, it was technically last night.)  I have come for the Stampin' Up! convention! Yahoo! I belong to a SU! group: Late Night Stampers, and they throw quite a wonderfully creative and fun-filled pre-convention event.  So, after I checked into my hotel, I headed for their first event.  It's called a 'WOW' event.  Different demonstrators from this group volunteer to teach you a technique, that will make you say, 'WOW!' and you get a few wonderfully creative tips.  One of the demonstrators, showed us how to make a bracelet out of the buttons!  How fabulous!  One container of SU! buttons will make 2 bracelets!  Very creative and a fun accessory!   (Pam Hodges of Illinois.)  

this is how the almost finished bracelet looks!
I think the bracelets look artsy, unique, and fun!   I will be hosting a class on this craft in August/September.  Please stay posted!  But, if you would like to collect a few friends, and make this a 'private party' class, please contact me, so we can make arrangements!
Please check back daily, as there will be lots to see!  I'm off to one of their Stamp Camps!  Yipee! and then a shoe box swap - 10 min card.  Fun filled days with all the crafting one person can do!

Monday, July 11, 2011

SSC211 & JUGS 92

I hope that everyone had a fabulous weekend! and was able to carve-out some crafting time!  I sure did!  Phyllis Shepherd, who is my up-line has sent me an email, informing me that she has a 'gift' for me @ the Stampin' Up! Convention!  How fabulous, huh?  Well, Phyllis is a warm, wonderful lady who always has a little gift for me at Convention and Leadership.  So, its a wonderful feeling, knowing that she hasn't forgotten me!  :)  So, I wanted to make her a special Thank You card, to show my appreciation and thank her for her thoughtfulness.
So, I went to two of my 'go-to' challenge sites to get some inspiration.  Stamping 411 has a wonderful sketch, that is easy to work with.  JUGs has a technique challenge.  So, I combined them both!
Here's my card!

I used Pink Pirouette cardstock, for the base of the card.  I received my first order from the new catalog, so I HAD to use some of the pattern papers from Beau Chateau DSP.  I used probably every thank you stamp that I have.  I stamped them in different classic inks: Soft Suede, Sahara Sand, Crumb Cake, Pink Pirouette, and Pretty in Pink.  I had to add a hand-made flower!  So, I used Floral Fusion to create a flower using Pink Pourette cardstock.  I used the Square Lattice to give the flower a softness.  I added a hand-made button to the center.  I die cut some leaves with the little leaves die and a scrap piece of the DSP.  I had a scrap piece of Pretty in Pink Satin ribbon, and so I added it on! 
So, now for the technique!  Just Us GirlS, want you to make your own button out of cardstock.  Sound hard, not really.  Just use your head, die cut several 'buttons'.  Stack them, to give then some bulk, or die cut a button out of chip board.  Adhere them all together.  I added some Diamond Glaze to the top button to help give it some dimension and gloss.  I used my stylus to keep the thread holes clear and usable.  I threaded some linen thread through the holes and tied a tiny bow.
I hope that Phyllis likes my card.  She is truly a very warm, giving and thoughtful person.