Saturday, August 30, 2014

Pretty Little Notes

Happy Saturday!  I hope you have something wonderful planned for this U.S.A. holiday: Labor Day! This holiday was originally created to celebrate the working man, who through his hard work and dedication helped our economy grow!  So, my hat is off to all those whose strong work ethic and loyalty to their employer, made this nation a great place to work, and venture out on our own business opportunities.
I have added a few new items to my Etsy shop, HERE.  And through out this long weekend, I will be adding more and more stuff.  I'd like to take a moment and share with you a few items that will be for sale in my little shop this weekend.

mini composition notebook
This altered/decorated mini composition notebook, is the perfect size to travel with you in a tote, handbag, or backpack.  The ribbon holds a pen.  And yeah, I even added some pattern paper in the pen barrel to coordinate with this sweet little notebook.  I left the ends of the double stitch ribbon long, so you have enough length to re-tie a bow.  You may also cut the ends of the ribbon to a length you prefer.  This little notebook has 75 pages of white lined paper.  See more photos HERE.

narrow notepad
This long, narrow notepad is the perfect size for making a list, or dotting down chores.  The clip at the bottom holds this pad closed, so it can travel along with you in a tote, or handbag.  But don't keep this little beauty a secret!  Move the clip to the top of the notepad, and it will hang from a message board, too!  The pad has 25 pages of vanilla lined paper.   See more photos HERE

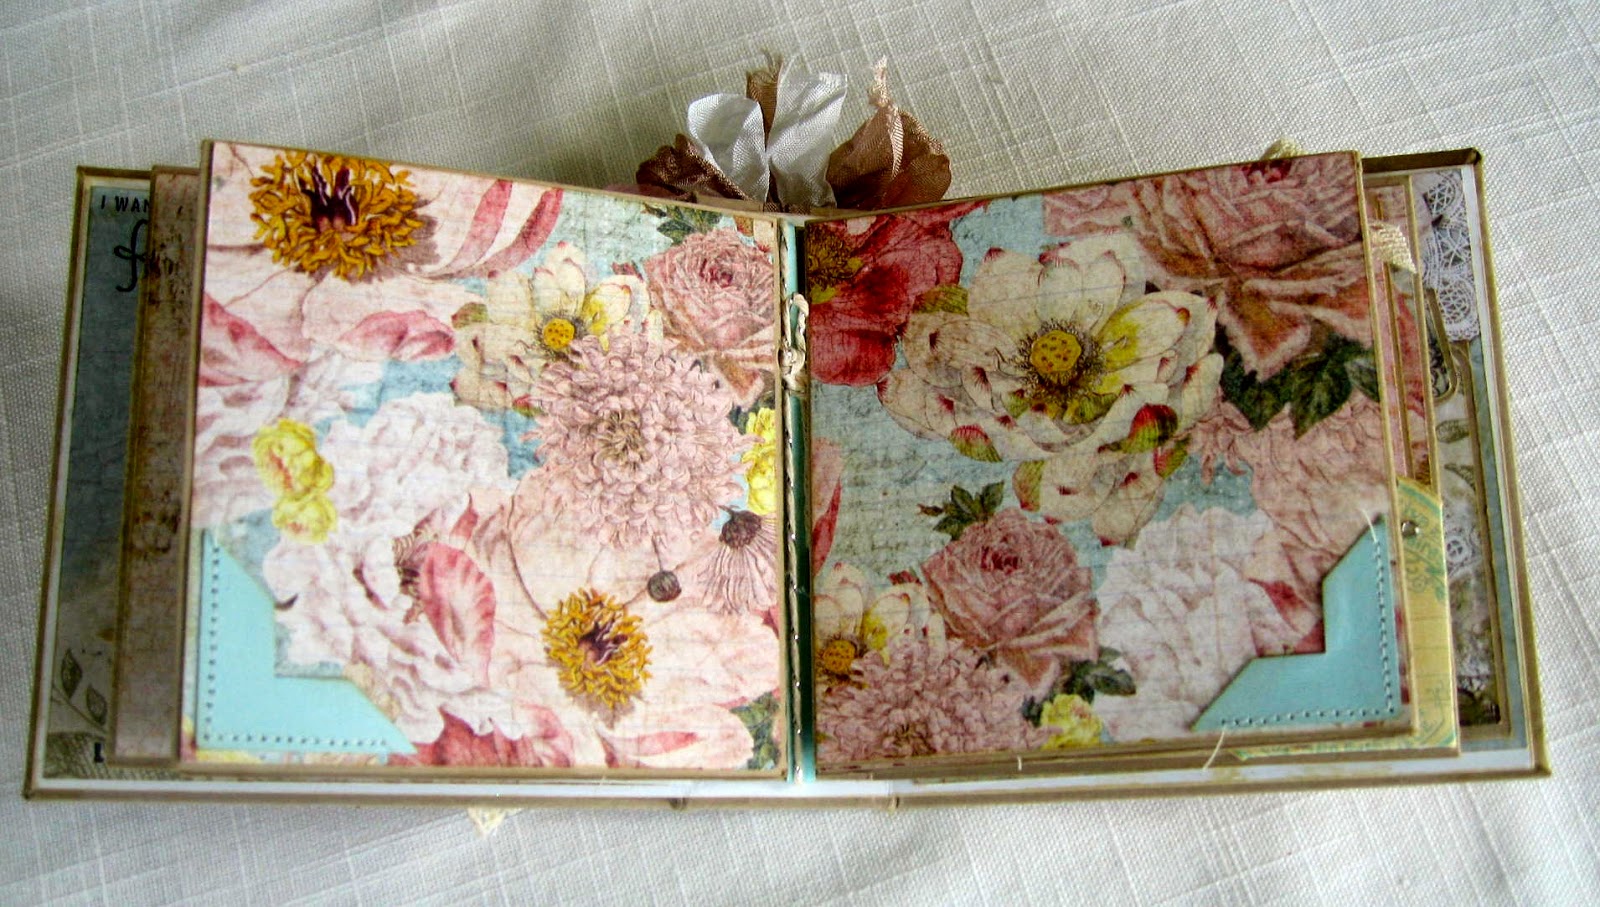
I purchased these beautiful pattern papers earlier this year, in April (2014).  I was making some crafts for Mother's Day, and stumbled upon these sweet pattern papers.  For some reason they reminded me of my Mother and Grandmother.  The company is Bazzill.  Yeah, they started making pattern paper too.  And like their solid card stock, this pattern paper is a heavy weight.  Perfect for these covered note pad/book.  I added my personal touches to these little gems: machine stitching, hand-stamped sentiments,  buttons, twine, and of course ribbon!

Thank you for stopping 


Wednesday, August 27, 2014

Had a Lovely Time


Howdy! and welcome to my little piece of blog-land.  I'm so happy that you could stop by, and have a look around {smile}  Have you ever been to a party that was just so much fun, that you really wanted to send the hostess a card/gift/something?!  I have.  Not recently, tho.  But I have.  
After perusing the internet, and stopping at a few of my favorite paper crafting challenge sites, I have been inspired to create a card for that very occasion.  
The wonderfully talented ladies over @ Retro Sketches have a super fun sketch for you to try.  Here it is:

I just love the different pieces and parts.  But you should really check out what the design team has done with this sketch!  Holy Moly are they a talented and creative bunch!
Then, I stopped by one of my all time favorite challenges, the Shabby Tea Room.  I visit their blog every Monday, just to see what the challenge is for the week.  Yeah, I don't always have time or the creativity to play along every week, but I stop by!  And yeah, sometimes several times a week.  Those ladies on the design team, are just so darn talented!  It's like window shopping for some inspiration {smile}.  Anyways, this weeks challenge is: Let's Celebrate, and you have to use pink, lace, and flowers.  Here is their inspiration board:


And here is what I created.  But first, the disclaimer:  my card is a 'thank you' for the hostess for throwing such a fabulous party.  So, I'm not sure if this qualifies for the celebrate, but . . .


For the recipe:  The card base is kraft card stock from Paper Trey Ink.  The wood grain pattern paper, the recipe collage pattern paper, and the sweet ticket at the upper right corner, are ALL digital papers.  How fabulous, huh?  I did (and always do) print my digital paper on Whisper White card stock by Stampin' Up!   Their paper has this wonderful matt finish, and it takes ink beautifully.  Oh and my printer has no problem accepting it into the feed.  Gotta love that!
The white lace trim is from my stash that I purchased last year about this time, for a specific holiday craft.  The cream lace trim is from Stampin' Up!, it's a new item this year.  The pink paper/tulle blossom is from Prima, and about 5 years old.  The single pearl loop is from the wedding section of a big box craft store.  (Originally, the loop had 3 strands.  I just cut one off.)  I added a lone pearl just below the simple bow.  I felt it needed something, and just couldn't get a button to work.  Right?  How crazy is that!
Oh, one last bit.  I matted the recipe collage pattern paper onto card stock and did a double machine stitch.  I added the white lace trim, and did a single stitch.  Then I added the cream lace trim and did a zig zag stitch to hold everything together.
Now, I don't have a cake on my card, but look . . .

  
My recipe collage pattern paper has a recipe for a Birthday cake on it {smile}.  How super sweet is that?
Thank you so much for stopping by.  I hope you have been inspired, but please check out those challenge sites.  I am sure you will find some inspiration there!


Tuesday, August 26, 2014

Vintage Blue Clock

~ photo heavy post ~


Yahoo!  I have finally finished my altered assemblage clock!  For some odd, crazy reason, it is super easy for me to start a project.  But, finishing is sometimes a whole different story!  One of my very close crafting girl fiends says that's because I am a perfectionist.  Ok, is that a bad thing?  I love balance, and repetitiveness.    Now I can finish writing my tutorial on altering one of these clocks. (whew)

here is a front view


a few different angels:


I used several different stamps and stamped directionally onto the clock.  I added a variety of paper blossoms, rhinestones, and pearls.  The banner is made from taupe linen.  I started the fabric to make it stiff, and machine stitched the pattern paper pennants to the fabric.  
Thank you for stopping by.  This clock will be for sale in my Etsy shop HERE.  It if doesn't sell by craft fair time, it will be at the fairs.

I hope you have been inspired to alter, decorate, or simply repurpose an unused household item!


Thursday, August 21, 2014

even more pages . . .

Ok, the last few pages of my latest mini album.  
We left off, at the start of the last interactive page.  So, let's continue . . . 


The page with the large typewriter and faux pocket holding a tag and coin envelope, is pulled forward . . .  this page(s) are revealed.  Here is the perfect place to hide either very special photos or journalling.
The opposite page, is another place for journalling or posting a photo.  The paper has lines to make writing a breeze.  But also, the little tag in the corner, is only attached at the top, so it is another faux photo corner.  That means, you can tuck something flat under it.  Or simply keep it as decoration. 
Turn the page  . . .   


Ahh, this is our last page in this mini album.  But, there are more treasures!  The page with the alphabets on it, has another faux pocket at the bottom left corner.  And look!  more goodies!  


Another journalling tag and coin envelope tucked into the corner.  All the coin envelopes were fussy cut, the edges inked, and a small (ok, tiny) journalling tag is tucked inside {smile}.  I know, how super sweet is that?  But this page will surely hold another photo, or simply these/other little memorabilia.  
The inside of the back cover is just as precious.  I created a simple belly band to hold a little photo album.  {smile}  I added two sentiments that were fussy cut from the pattern paper:  Beautiful Memories, and a little date tag.  Simply slide this little photo jacket out of the belly band and open it to reveal a sweet place to hold two wallet size photos!


And we are done with the inside of this mini album.  So, lets see the outside!


and with the covers opened:


I used a mix of 12" x 12" and 6" x 6" pattern papers from the same collection.  I just love how the two flip pages look with a larger image pattern paper cut to fit.  Also, the middle folio page is stunning with large images.  But, actually, any size will work.
I used heavy weight solid card stock for main/grounding pieces.  I love Stampin' Up! and Paper Trey Ink card stock for those pieces.  If you need to purchase your solid card stock from Stampin' Up! I do have a shop 24-7 button on the side bar.  Please make your selection there {smile}.

Thank you for joining me, for this little 'tour' so to speak.  And I will have this mini album, along with the fairy mini album for sale in my Etsy shop soon.  Look for those and others during the long Labor Day weekend.  Take care, and happy crafting!


Tuesday, August 19, 2014

more pages . . .

~ photo heavy post ~

A few more pages of the latest mini album I created.  Just a heads up, some text has been added to the photos to keep this write up short.  Also, I will be 'teaching' this mini album at a private craft retreat this Saturday.  I am really looking forward to this class.  I'm pretty excited and I sure do hope the ladies are too!  {smile}
So, we turn the page, and we are on page two.  Yep, the other side of the page with the glassine envelope.  Not so much interaction, but very pretty.


I made a simple pocket page here.  I didn't add a tag, so you can add your own memorabilia, or photo(s), or whatever {smile}.  Now for the first flip flop page.  Pull the pink journalling square on page three, and . . .


A journalling side bar is right/write at your fingertips.  There is a faux pocket to hold these two paper pieces: a journalling tag and a coin envelope.  But, you can simply tuck a photo in behind these two paper pieces.  The coin envelope was fussy cut and a small journalling block in tucked inside.   Yeah, linen thread is used to hold the envelope closed. (pretty sweet)


So, the 'flip' part is the opening of the little flap.  Now, here comes the 'flap' portion:  pull the floral pattern page up and viola!


You now have two large spaces to hold photos, private notes, or anything flat that can be tucked into the photo corners.  Pretty cool, huh?
We turn the page, to reveal the center of the mini album.  And this is where the long photo spread is housed.


A photo corner is added to each page to hold photos or any flat memorabilia.  Now, open these two pages and reveal . . .


I added photo corners in a way, that either two large photos can be displayed or four smaller photos can tell a story {smile}  Fold these pages back in, and turn the page. . . .


As you can see, another flip flap page {smile}.  I just love the movement.  This page works the same as the earlier one, but opposite.


Open the flap with the journalling tag on it, to reveal another faux pocket.  I hand-stamped the 'LOVE THIS' on the side bar journal spot.  I also hand-stamped 'Love' on the page divider (above the INSPIRED label).
Ok, we will take a break here.  {smile}  I will post the rest of the mini album in a few days, most likely Thursday.  But Friday the latest.  I hope you are enjoying this little peak at my latest creation.


Monday, August 18, 2014

Our Love Story Mini Album

~ photo heavy post ~


I made another flip flop mini album.  I used crafting supplies that I had on hand.  (It's a New Year's Resolution, to use what I have.)  This pattern paper collection is from Prima, Romance Novel.  {smile}  I'm pretty happy with how it turned out.  There are a lot of photos for this album, so I am posting the photos over a few days.   I added text to each photo, so my write up will be short.  Grab a cup of coffee, or tea, and settle in for a journey down this creative road.


Here is a photo of the cover and spine.  We'll work left to right.  So, starting with the spine, I added burlap banner from Maya Road.  I added a metal 'W' coin (wonderful), a multi-loop kraft seam binding bow with a pink button.  The cover was fun to decorate.  I added a Recollection door knob plate.  I added a clear plastic door knob.  I added a collection of paper blossoms.  I sponged linen ink on the blossom petals and glitter.  I cut the leaves with a die, using a textured green card stock.  I added a double strand of pearls between the leaves and blossoms.  I fussy cut the letters out 'OUR' and 'STORY'.  I stamped 'Love' in basic black classic ink.  I die cut a swallow from silver glitter paper and adhered it with foam tape.  There is a trio of iridescent sequins, too.


The inside cover has some hand-stamping.  I did add a date tag to the bottom of the inside cover.  Page one has a few folds that provide layers to this interactive page.


Three journalling cards have been removed from the photo corner.  Use this photo corner to hold a wallet size photo and/or the journalling cards.


Opening the flap, exposes a whole page with a journal block (photo corner) at the upper right corner.  The inside of the flap, holds another wallet-size photo matt (with an 'unforgettable' label), tucked behind the ' perfect day' label.


Tags in the glassine envelope allow you to document '10 things you never want to forget'.

The pages were made with Basic Black card stock by Paper Trey Ink.  The lining of the album is made with Blushing Bride card stock by Stampin' Up!   All edges were sponged with Old Paper distress ink by Ranger. Thank you for stopping by.  I'll post page two and three soon.  I hope you have been inspired to create your now mini album.  This album will be added to my Etsy Shop later this week.


Sunday, August 17, 2014

Sweet Retirement


Hello.  and welcome to my little slice of blog-land,  I hope you are having a good weekend.  Me, Oh Yeah!  School is back in session, and the weather is a bit cooler.  So, that translates to more crafting!  It is that time of year when I get revved up and start crafting for Holiday Arts and Craft Shows. I probably should start earlier, but when it's 100 degrees out, I just can't even begin to think of Halloween, Thanksgiving, or Christmas.
I don't have a Holiday craft to share with you today, but, behind the scenes I am crafting more monogram magnets, flip-flop books, and other crafts.  I did take a quick break from that, and sat at my craft desk and whipped up this super special card.  {smile}  I don't have anyone in mind to send it to, so it will be in my Etsy shop, (HERE) for sale.
I am entering this card is three different challenges.  For those who know me, entering three challenges is a rarity for me.  Typically I only enter one or two.  So, here we go!
I am entering my card in a sketch challenge over @ Cardabilities.  They always have some creative and easy to use sketches.  And their design team is super talented, so there is always some inspiration.


I needed a bit of direction, so I stopped by Sugar Creek Hollow for a little more inspiration.  This week, they have a theme challenge:  Let's Celebrate.  Who wouldn't love to create something for that!

And finally, I needed a bit more direction, so I headed over to Crafting by Designs to see what this creative challenge has planned this week, and I think I found heaven.  Their theme this week, is to use PolkaDots!  AHHHH!  polka dots?  My absolutely favorite pattern!

and here is what I created:


the recipe:  The card base and matt are Baked Brown Sugar card stock from Stampin' Up!.  The two pattern papers are from the White Fern collection by DCWV.  I created my own paper blossoms with the stamp set and die; Vintage Floret by Heartfelt Creations.  I stamped the blossoms in River Rock classic ink by Stampin' Up! onto whisper white card stock.  I sponged the edges of the blossoms with the River Rock classic ink, also.  The ribbon is swiss dot satin in Fine Linen by Paper Trey Ink.  The sentiment stamp is Teeny Tiny Wishes by Stampin' Up!
I machine stitched on both pattern papers.  I wrapped the ribbon around the center panel and adhered this piece to the card front with foam tape.  I wanted a little height on the card front.
I brushed some white ink onto the die cut leaves, and added glitter to the petal tips.  I added light grey pearls to the blossom centers and a dash of silver german fine glass glitter.
Challenge requirements:
Sketch:  two blossoms, with a banner sentiment tag.  sponsors: heartfelt creations.
Polka Dots:  the background pattern paper and the ribbon.
Let's Celebration:  happy retirement

Thank you for looking!  I am off to my craft room, to get busy on more items for the craft sales!  I hope you have been inspired to play along in any of these challenges.  Enjoy!


Thursday, August 14, 2014

Fairy Mini Album

~ photo heavy post ~

the embellishment collage on the cover
I am teaching a class at a private retreat next weekend.  The class I am teaching is a 'flip-flop mini album'.  The reason I call it a 'flip-flop', is that one page flips and another page flops {smile}.  Ok, one page opens up and one page opens down.  But lets admit, flip-flop is just fun to say {smile}.  I'll walk you through this mini album.  So, grab a cup of joe, a glass of lemonade, whatever quenches your thirst, and have a look!


Here is the cover.  I used a Fairy pattern paper by Prima for this mini album.  I cut this page of paper, to make sure the fairy would be honored with a collage of pretty trinkets.  I added a light bulb (ME), a butterfly bingo piece, a clay blossom, a pen nib, a lace bow, and this beautiful large blossom.  But take a closer look.  There are two silver glitter butterflies on the blossoms, and a collection of iridescent sequins.  {smile}  I did a little bit of stamping right on the pattern papers.  'LOVE THIS'


Here is the book opened.  The spine has a wooden embellishment piece, a black bauble, and a multi-loop bow of white, pink, and kraft seam binding.   


This is the inside cover has a decorative label piece with a date tag sticker.  I stamped onto the date sticker with a date spot.  I also stamped right onto the pattern paper is two sentiments about Remembering and loving these moments.  
The mini album pages have a little interaction.  So, lets start with the first page.  There is a faux pocket holds a photo matt for a wallet size photo.  But open this page, and . . .


expose a decorated glassine envelope and pocket.  Tags are housed in the pocket and envelope. 


Turn the page, and see another faux pocket.  This faux pocket holds a journalling block.  You can add a photo behind the journalling block.
Now, this next page is very exciting!  There is a tag with a paper blossom,  but open this flap, and there is a place to tuck a photo, in the 'take note' corner pocket.  But wait!


 Lift the page, and expose another place to hold a photo (or two) and another beautiful fairy.


Turn the page, and gaze upon the field of beautiful bright blossoms.  I have added photo corners at opposite corners to hold photos.  But, wait.  Open these bright blossom flaps, and expose . . . 


a panoramic view of bright blossoms, or a great collection of your favorite photos!  I have added photo corners to opposite corners, to allow you to display several of your favorite photos!


Turn the page, and expose another interactive flap.  The round label provides you with a place to pull the flap open to expose a journalling side bar, and a place to hold another photo.  And the opposite page has a corner pocket holding a tag.  This corner pocket will hold both a photo and the journalling tag.


If you open the flap on the left side and pull the page down, it showcases another beautiful fairy and a great place to hide photos and/or journalling.


Turn the last page, and here is one more beautiful spot to hold a photo.  And last, the inside of the back cover.  


Open the flap to provide you with a small journalling side bar and a beautiful spot to hold a photo.  The back cover doesn't stop the interactive pieces!  Here is a swing flap.  Move the tag, and the flap folds down to give you one more place to put wallet size photo(s) and/or a hidden journalling spot.


And here is the back cover.  I cut this pattern paper to show the butterfly.  I also wanted a lot of the text on the pattern paper.  I think it adds some visual interest without having to add anything.  I did stamp my 'brand' on the bottom in a light brown.  I didn't want the branding to be too obvious. 
Thank you so much for looking!  I will have this mini album on sale at my craft booth at this year's holiday arts and craft fairs!