Showing posts with label clay blossom. Show all posts

Tuesday, March 31, 2015

I Won't Forget, Card

Welcome.  I wanted to take a quick break from my craft room, and share a card I made for a special friend; Denita.  We have been getting together once a month to craft.  Now, who wouldn't love that? {smile}.  And this sweet friend, is pretty creative!  She makes me craft better!  Anyways, when we got together earlier this month she shared a book tutorial.  And she made it simple, easy to follow instructions, and even cut out 'sample' pieces for me.  How super awesome is that?  Well, I wanted to send her a thank you card for everything! Lunch, the tutorial, her time, her friendship, and just being a very giving, considerate, and friendly person.   
Anyways, to help get some of those creative juices flowing, I stopped by a favorite sketch challenge site:  retro sketches.  I love this site, because their sketches are easy to use, and the design team is very inspirational.  Here is the currently sketch:

here is what I made:


Recipe:  I started with kraft card stock from a big box store.  I love the color.  The weight of this card stock is on the light side, so I added a matted panel to the inside to balance out the weight, so the card will stand.  
different view: straight on
I still have a few scraps from my LemonCraft purchase: Forget Me Not.  So, I matted the two different pattern papers onto some Tim Holtz texture steel blue solid card stock.  I did a single machine stitch border.  
For the half circle element, I added a tea dyed paper doily.  [yes, I tea dyed several paper doilies to have on hand when white is too bright.]  I also added some pale blue seam binding to the doily.  I just had to.  I tied a simple bow.  But you know me, there is nothing simple about it.  I tied a simple bow with cream twine to the seam binding bow, and then topped it off with a white clay blossom I had made and baked a few weeks ago.  [I always make extras when I make any clay embellishments.]
The sentiment is heat embossed in early espresso.  I wanted a stark contrast, but not black.  I added a flair button, and then some blue pearls and clear rhinestones.  
This card is pretty simple for me, but I think it still has a lot of pizzazz!  Now, I need to head into town to get this gem off to the post office.  Thank you for looking! and I hope you have been inspired to play along with the talented ladies over @ retro sketches.


Thursday, August 14, 2014

Fairy Mini Album

~ photo heavy post ~

the embellishment collage on the cover
I am teaching a class at a private retreat next weekend.  The class I am teaching is a 'flip-flop mini album'.  The reason I call it a 'flip-flop', is that one page flips and another page flops {smile}.  Ok, one page opens up and one page opens down.  But lets admit, flip-flop is just fun to say {smile}.  I'll walk you through this mini album.  So, grab a cup of joe, a glass of lemonade, whatever quenches your thirst, and have a look!


Here is the cover.  I used a Fairy pattern paper by Prima for this mini album.  I cut this page of paper, to make sure the fairy would be honored with a collage of pretty trinkets.  I added a light bulb (ME), a butterfly bingo piece, a clay blossom, a pen nib, a lace bow, and this beautiful large blossom.  But take a closer look.  There are two silver glitter butterflies on the blossoms, and a collection of iridescent sequins.  {smile}  I did a little bit of stamping right on the pattern papers.  'LOVE THIS'


Here is the book opened.  The spine has a wooden embellishment piece, a black bauble, and a multi-loop bow of white, pink, and kraft seam binding.   


This is the inside cover has a decorative label piece with a date tag sticker.  I stamped onto the date sticker with a date spot.  I also stamped right onto the pattern paper is two sentiments about Remembering and loving these moments.  
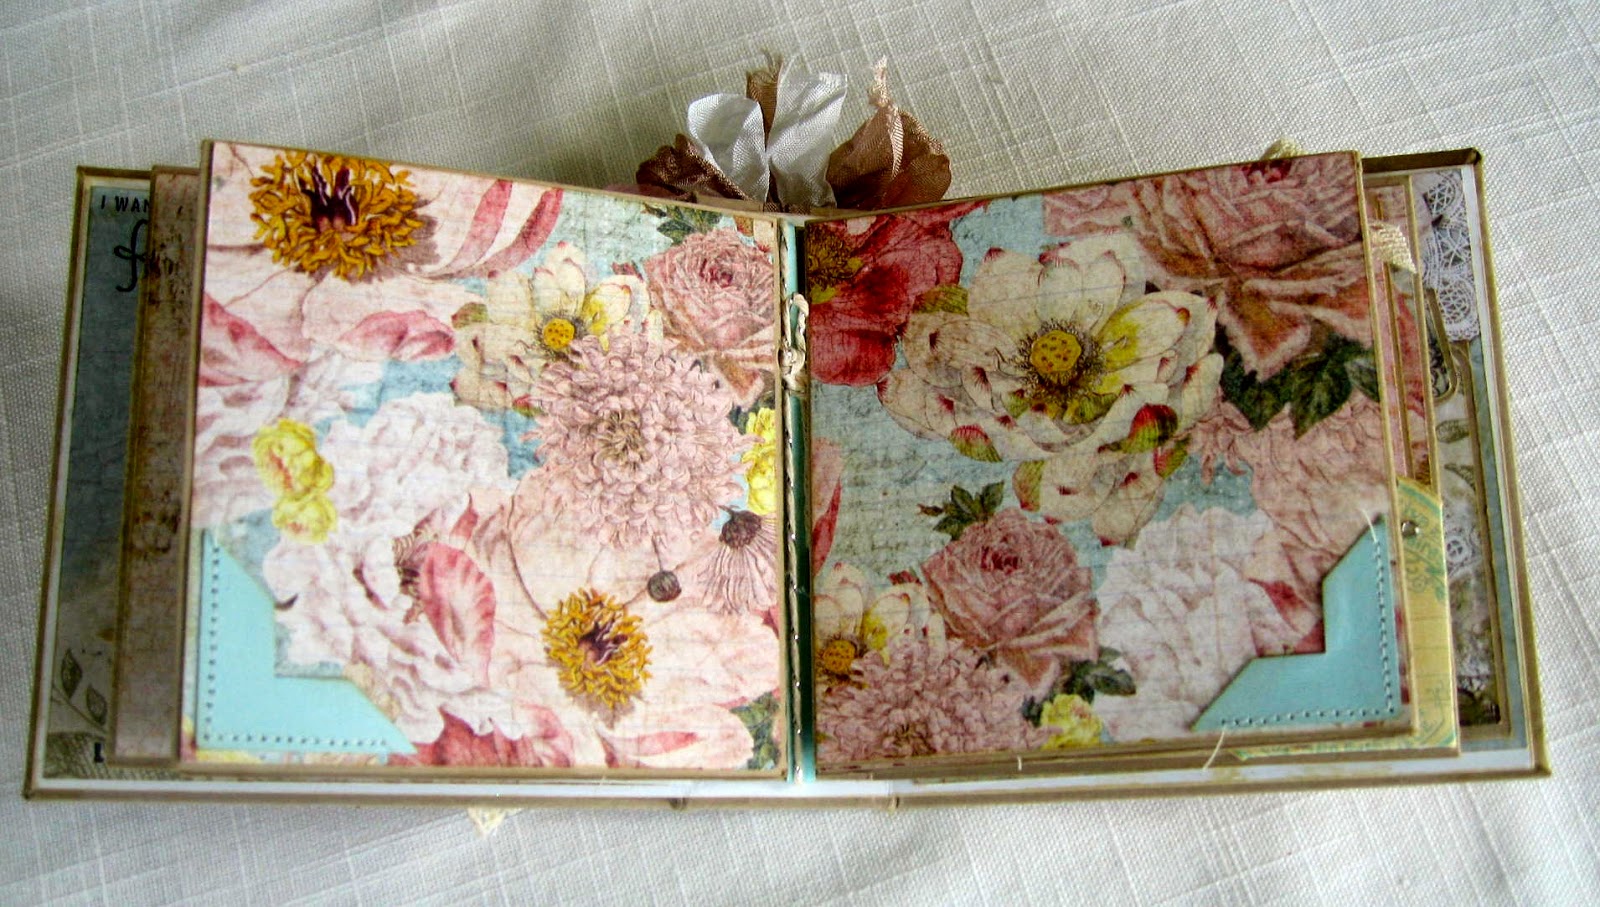
The mini album pages have a little interaction.  So, lets start with the first page.  There is a faux pocket holds a photo matt for a wallet size photo.  But open this page, and . . .


expose a decorated glassine envelope and pocket.  Tags are housed in the pocket and envelope. 


Turn the page, and see another faux pocket.  This faux pocket holds a journalling block.  You can add a photo behind the journalling block.
Now, this next page is very exciting!  There is a tag with a paper blossom,  but open this flap, and there is a place to tuck a photo, in the 'take note' corner pocket.  But wait!


 Lift the page, and expose another place to hold a photo (or two) and another beautiful fairy.


Turn the page, and gaze upon the field of beautiful bright blossoms.  I have added photo corners at opposite corners to hold photos.  But, wait.  Open these bright blossom flaps, and expose . . . 


a panoramic view of bright blossoms, or a great collection of your favorite photos!  I have added photo corners to opposite corners, to allow you to display several of your favorite photos!


Turn the page, and expose another interactive flap.  The round label provides you with a place to pull the flap open to expose a journalling side bar, and a place to hold another photo.  And the opposite page has a corner pocket holding a tag.  This corner pocket will hold both a photo and the journalling tag.


If you open the flap on the left side and pull the page down, it showcases another beautiful fairy and a great place to hide photos and/or journalling.


Turn the last page, and here is one more beautiful spot to hold a photo.  And last, the inside of the back cover.  


Open the flap to provide you with a small journalling side bar and a beautiful spot to hold a photo.  The back cover doesn't stop the interactive pieces!  Here is a swing flap.  Move the tag, and the flap folds down to give you one more place to put wallet size photo(s) and/or a hidden journalling spot.


And here is the back cover.  I cut this pattern paper to show the butterfly.  I also wanted a lot of the text on the pattern paper.  I think it adds some visual interest without having to add anything.  I did stamp my 'brand' on the bottom in a light brown.  I didn't want the branding to be too obvious. 
Thank you so much for looking!  I will have this mini album on sale at my craft booth at this year's holiday arts and craft fairs!  

Sunday, May 4, 2014

Altered Clock

I debuted my altered clock this weekend at the craft fairs.  I received a good response from folks who stopped by my booth and had a look.  So, I am ready to part with it.  I have placed my clock in my Etsy shop, here.  This beauty is for sale.  I used almost $36 in various products and over 4 hours of solid work into creating this one-of-a-kind original art piece.


I added layers of gesso, and various shades of paint.  I did some random stamping in 3 different colors.  I added paper, fabric, clay, and acrylic blossoms.  Various gears where added for clock mechanisms, and some different metal leaf clusters to add different textures.  I added a few pearl sprigs to help give this clock a romantic look.  I added a few resin pieces: frame, swag, and bird.  I did some heat embossing: clock face, and the butterflies.  I had to add a multi-loop bow made from seam binding.  And to help give some visual interest I even added a zipper pull with a crystal dangle.

Thank you for looking.  I will be working on another clock (hopefully) later this week.  I will be writing a tutorial for Kindle, also.  So stay tuned for that.

Tuesday, February 18, 2014

Mojo Card-Gift Combo

Welcome back {smile}.  I have been trying to craft something everyday/night, to build my inventory for the Spring Craft Fair.  I want several different, unique paper crafts.  So, I am trying some new items.  One of which, is my Card-Gift Combo.  I just love this little creation.  You open the box like a book, but a drawer is inside to hold your gift {smile}.  How super sweet, huh?  
So, I have the item I want to create.  But, I need a direction.  Color.  Layout.  Some type of inspiration and direction.  So, what better place to turn, than Mojo Monday .  This week, #333, is a wonderful sketch.  But, now I needed a color scheme or theme. 


here is what I came up with:


I used all current Stampin' Up! products to create this Card-Gift Combo.  So, I opened a package of Watercolor Wonder DSP, and put beautifully soft, pretty, pattern papers:  a green-blue floral, a soft gray polka dot, and green chevron strips.  
The base of this 'card' is made from Pear Pizzazz card stock.  The floral pattern paper is matted onto Island Indigo card stock.  I matted the light gray polka dot pattern paper onto Slate card stock.  I cut a doily out of Pear Pizzazz card stock and then matted a circle of Pear Pizzazz DSP polka dot pattern onto whisper white card stock.  I used pool party seam binding to add some softness to the cover.   I used pool party seam binding, again, to tie the 'box' closed.  I just love the new metallic accented bakers twine, so I tied a bow with the silver accent bakers twine to my front bow.  I'm also a sucker for clay and molds.  So, I used the new buttons and blossoms mold to create my clay blossom.  

open the Card-Gift combo


Thank you for looking.  If you love this paper, just click on my 'Shop 24-7' button, and purchase a package for yourself, along with any other Stampin' Up! products.I will be posting more photos of my Card-Gift Combo soon. 
Yeah, I will be selling these at the Spring Craft Fair.  I want to make more, but with various greetings and salutations.  So, stay posted {smile}.