Saturday, March 31, 2012

Growing Green

The weather here is finally nice.  And when I say, 'nice' I mean 70's.  I'm not a big fan of 100 degree weather, and yes, it can be too hot.  But, for now, the weather is wonderful and you can actually go outside and do stuff.
Marcy, over @ Our Creative Corner, wants us to create a paper craft item showing 'Spring in its full spender, using GREEN as your main color!'  Ok, I have to admit, the first thing I thought of was a bunch of stuff that looked like St. Patricks day left overs.  (Not that I have anything against St. Patricks Day.)  But just look at the inspiration board Marcy gave us!

So for some inspiration, I went on over to Seams A Little Sketchy, for help with my layout.  Here is their sketch for us to play with:

 For some reason, tax time was incredibly stressful for me, so I didn't want to make just a card.  I'm not sure I could make, 'just a card'.  Anyways, I altered a blank box.  And, I didn't use ANY seam binding.  I know, scary!

Here is the top of my box:


Here is an angled view of my box:


Ok, this box was really fun to make.  Second, it has a lot of my favorite products on it; just a wonderful collection of this and that.  The great thing, is I only needed one sheet of 12" x 12" pattern paper.  How cool is that?  I used a new paper from Kaiser Crafts, that had a vintage feel to it.  This paper is actually a green pattern paper.  So, all I really needed to do was find/create green embellishments.  
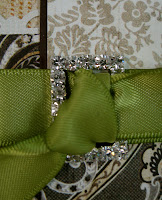
I stamped the framed sentiment and the front sentiment in black classic ink, directly onto the pattern paper.  To give the frame a worn look, I painted it with white picket fence crackle paint, and then swiped my silver stamp pad over it.  I inked all the edges of the white box with burlap distress ink and then randomly with my silver ink pad.  I added buttons, half faux pearls, and rhinestones here and there.  To showcase the architecture corner, I distressed the top paper and curled the edge inwards.  The extra large half faux pearl surrounded by rhinestones, is actually a Melissa Frances broach.  I have a pair of super duty scissors in my craft room, and I just cut off the clasp.  
Thank you for looking.  I hope your weekend is fabulous and you get a chance to enjoy the outdoors!
You know, its kind of funny, but now that I look at my box, I'm thinking the two yellow paper blossoms should be replaced with white paper blossoms.  Let me know what you think, as I will be posting this box for sale in my Etsy shop.
Thank you, to those who have left me some of the most flattering and gracious comments!  They really do make my day!

Friday, March 30, 2012

Congratulations

Wow! this week is flying by!  But, I hope you have a chance to join us @ Sketch Frenzy Friday, for another creative blog hop!  The talented, Tammy F. has a fabulous sketch for you to try, so won't you play along?
Here is the sketch:

Here is my card:


This card was actually quite fun to create.  I really needed to isolate myself in my craft room, and just play with different items and various products.

I started with a plain, blank piece of very vanilla cardstock.  I stamped the two smallest doilies in pool party and pear pizzazz.  Then I stamped the Hello, Dolly doily stamp in Versa Mark and added white embossing powder.  I wanted a simple, yet feminine design on part of the card.
I made my blossoms from different papers: pattern, tetured, stamped, and plain solid.  I created the middle blossom larger, and the two supporting blossoms a bit smaller.  I sponged frost white shimmer paint on all the edges of the different layers of petals and then dunked them into some dazzling diamond glitter.  I thought the added shimmer would give them a 'candied' look.   I added a scrap piece of vanilla velvet ribbon to help keep this card soft and feminine.
I stamped the sentiment in Basic Grey classic ink.  I thought black was too harsh, and a beige was too blah.
After the card was assembled, I sprayed it with vanilla smooch, then I used the spritzer with first a crumb cake marker and then the pool party marker. 
Thank you for stopping by, I do appreciate the company, and your comments really do make my day.  But, before you leave, don't forget to stop by Tammy F.'s blog, to continue on with this blog hop!

Wednesday, March 28, 2012

SQSC 32

I am not able to participate in this weeks challenge, @ Stampin' Queens Sketch Challenge.  But I encourage each of you to participate.        Here is the sketch:


Once I saw this sketch, I was excited!  I couldn't wait to create something, and I should have created something right then.  I have been working on tax stuff since Sunday afternoon.  And yes, after I have finished, my wrists hurt, and I can't think.  
This sketch is sooo wonderful!   Please take the time to create something beautiful to share with us!

Sunday, March 25, 2012

Box Set #129

The weather here, this weekend, is warm and sunny!  It's a great change from snow and cold winds.  It gave me a chance to run some errands, and not wear a jacket or close toe shoes.  It is a t-shirt and flip flop weekend!
So, with the change of weather, I decided to change it up a bit.  The talented ladies over @ Just Us GirlS, have a great challenge this week: make a boxed note card set, with choose your own sentiment tags.  Now, doesn't that sound fun and creative?  And why not change it  up a bit!  So, I went shopping.  I did some looking through the paper crafting products at home, and then went to a local paper craft store, to see what I could purchase for about $5 that would help me complete this challenge.
If you have seen the videos and sneak peaks of CHA 2012, you have probably falling love with some gorgeous new products out there.  I knew what I was looking for, but I always keep my options open.  
I have my products picked out, some new pattern papers from Prima, and some gorgeous dimensional 'ribbon'.    But now I need a sketch to help me put these products together and look great.  So, I headed over to i {heart} 2 stamp and fell in love with this months sketch.  The sketch let me really show off the great graphics in these new Prima papers and that gorgeous new 'ribbon' I purchased.  I used two different pattern papers for the black and grey rectangles.  As for the circle, I used a butterfly shape.  The white rectangle was replaced with a tag.  The long grey rectangle, is where I added a strip of cream lace.  As for my sentiment tags, I actually stamped 5 different sentiments twice, and added foam tape to the backs, so all you need to do is adhere the sentiment circle to the text circle on top of the white doily tag.
Here is my box set:  


This box set contains 6 cards.  The cards are similar, but not exact.  The tags are all different and the white doily tags have three different designs.  But other than that, they are all the same.  With this box set, I have included two sheets of the sentiment circles: Here for You, for you, Heartfelt Thanks, thinking of you, Birthday wishes.  I used my butterfly die to cut those butterflies out of the gorgeous petal ribbon.  I used white bakers twine, when I hand sewn the kraft buttons onto the butterfly bodies.  I used my hot glue gun to adhere the butterflies to the card fronts.  The cards remain blank inside, so you can add your own hand-written message.
Here is a look at the whole set:
  

Thank you for looking.  This card set will be for sale at my Etsy shop soon.  I hope you have a chance to play along in a challenge this weekend!  Remember, have fun, and make something you really love!

Saturday, March 24, 2012

from Paris, with Love

I'm not sure what the weather is like where you are, but here, its actually starting to get nice outside.  When I say, 'nice' I mean 70 degree weather, with the sun shining.  This winter, to me, has been long.  Before you think that I hate the winter, I don't.  I love sitting at home, watching the snow fall outside.  The trees covered with snow.  The whisp of smoke from our chimney.  However, we haven't had a lot of snow.  But, we have had a lot of cold temperatures.  And I am not a fan of cold temperatures.  Did I mention that it snowed here on Sunday evening.  And yes, it was 70 today.
Anyways, Anita, over @ Our Creative Corner is our hostess this week.  Anita, would like you to show us your 'spring break vacation destination'.  The only other requirement is to include the name of your destination on your paper craft item.  Sounds pretty fun!
                     Here is my card:

You would probably guess that my 'spring break vacation destination' would be the south pacific.  And, you would be wrong.  I'd go to the south pacific anytime of the year, not just during the end of winter.  But, I have a 'love affair' with Paris.  Don't ask me why.  I have wonderful memories of Paris.  I even prefer French cuisine.   But there is something about that city.  I even have a board on Pinterest dedicated to Paris.  For my card I used some new products that I picked up recently.  The beautiful pattern paper, is from Teresa Collins.  
I used two different stamp sets:  Avignon, and Greetings from Paris.  I cut a scrap piece of very vanilla card stock to create my own postcard.  Then I used various stamp pads to stamp the different stamps: Desert Sand, Twilight, Crumb Cake, Early Espresso, Soft Suede, and Chocolate Chip.
The doily is actually a 4" paper doily, that I cut in half and adhered to the back of the yellow pattern paper.  I wrapped a piece of Baja Breeze seam binding around the card front.  I made one of those multi-loop bows.  I added another bow made out of white bakers twine and then a small paper blossom from Prima. 

I stamped a postage stamp in Crushed Curry classic ink, and fussy cut it out.  I adhered it below the paper blossom, so it would cover up the pointy end of the corsage pin.  I added a rhinestone ring below the pearl tip corsage pin.I also added a yellow button.  I had to.  It's a weakness, for me: buttons and bling.  There is also a blue rhinestone added to the post card. 
Thank you for stopping by.  Now, lets see your 'spring break vacation destination!  


Friday, March 23, 2012

Frame Nature

This week is really rolling by.  One of things I really love about being on a design team, is the challenges. Challenges as in working with creative sketches, limiting what you use, or color combinations.  And, sometimes I even challenge myself.  This week, over @ Sketch Frenzy Friday, the talented Patrice has given us a great sketch.  But, I also wanted to see what I could do with minimal supplies.  FYI, not using half the stuff in my craft room, is 'minimal supplies'. {smile}
Here is Patrice sketch:


At first, I was considering using a butterfly instead of a flower.  You know, something different and interesting.  But, I just couldn't get it to work.  Oh well.  As for the matted center square, I was having a problem getting that to work, too.  I was having a bit of a struggle.  
So, I started with the paper.  I wanted to use a paper I haven't really used, in that, I still have all the paper. I love the black/cream color combination, so I selected Timeless Portrait.  The graphics in this collection of DSP, is really pretty.  So, I selected a large and a small print.  Then, I looked through my stamps to see if I have something that 'matches' the graphics in the Timeless Portrait DSP.  I grabbed the Frame It stamp set, and loved how this frame looked with the paper.  Now, I needed a sentiment.  I love the font in the You're Cherished stamp set.  But, I still had the problem with the object at the top right corner.  And what would I put inside the frame?
Well, I made my own flower sprig.  Which I just love how it looks.  Looking through my stamp sets, I came across Nature Walk, and saw the butterfly image.  I have a weakness for butterflies and birds, and they do make me happy.  So, I stamped the butterfly inside the frame.  I'm pretty happy with how this card turned out.  Take a look, and let me know what you think.


Continue on with this blog hop, and see what Tammy F. has created, using the same sketch.  Take care.

Wednesday, March 21, 2012

hello baby

As I mentioned yesterday, I have made another baby card.  But this card is Clean And Simple.   I used the sketch from the Stampin' Queens Sketch Challenge.  This is a super group of ladies.  They are all so talented.  If you have a chance to play along, you should!
Here is this weeks sketch:


I used my Stampin' Up! supplies to create this card:


I just love how soft and sweet this card turned-out.  I used pattern paper from the same package: Domestic Goddess DSP.  The card base and the only matt is pool party card stock.  The fancy shape of the main image was created using the labels collection die.  I love how this shape looks like a cloud.  The stamp is an ala carte stamp:  Bringing Baby.  The sentiment is from the Teeny Tiny Wishes stamp set.   I thought the font of this sentiment really worked well with the image.  The crocheted flower is from the fleurettes II package.  The pool party brad is from the printed designer brads collection.   Did you notice the scalloped edge of the scallop trim?  That was created with the adorning accents die.  I think it adds some softness and whimsy.
Thank you for looking, and I hope that you can play along with us @ Stampin' Queens Sketch Challenge.

Tuesday, March 20, 2012

Baby Girl

I hope your week is off to a good start.  Me, now that we have power, I'm better.  Our power went out yesterday for 20hrs.  It snowed last night, too.  So, as you can image, I was not a happy camper.  To turn my frown upside down, I just found out that a card I created was selected as a top 3 winner @ The Ribbon Reel.   How fabulous! [here is that post]  To keep on my high, I went to my craft room, and I made a baby card.  But, I don't have anyone to give it to, so it will be for sale in my Etsy shop.  There are several photos of this card.  So, please be advised, PHOTO HEAVY POST.

Here is the card:


 I have a few close-up images of three of the corners.  I started making this card with some left over supplies, and it kinda grew! I did use the current sketch from My Favorite Things stamps blog site.  
The card base is crumb cake card stock.  The largest matt is white card stock that was run through my big shot, using the Vintage Wall paper embossing folder.  I thought the texture would give the card stock some visual interest.  The pattern papers used are from Prima.  Yes, Prima makes more than flowers. {smiles}  I added two Athena Flowers to this card.  I thought the pale yellow helped keep the card girly, without drowning the card in pink.  
The buttons are from Paper Trey Ink, all three pink buttons.  I used some light twine to tie bows behind two of the buttons.  
I used the 2-step bird punch from Stampin' Up! to create all the leaf sprigs.  The paper I used has a distressed white wash pink polka dot pattern.  
I stamped the stork in Basic Brown classic ink.  Mainly because the ink is water resistant.  So, when I used my blender pen to color various portions of the image, the ink wouldn't run.
For the rattle, I stamped the image and fussy cut it out.  I added a heart punched from some silver glimmer paper, and added a pearl.  I felt that that corner needed something, so that is what I did.
Yes, you do see some text paper peaking out from behind the white cloth ribbon.  I added a strip of First Edition DSP, and did a scallop trim edge to it.  I used a white brad to hold the multi-loop bow together, and added a half pearl to the brad, to jazz it up.  The tiny butterfly was a last minute addition.
As for the bottom right corner, it didn't really photograph very well.  The flower has leaves, pearl swirls, and a push pin.  See the green ball?  Well, it is a push pin by Webster's Pages.  It also has a clear butterfly just below the  green pearl.  I thought it helped pull the green from the floral centers.
That tiny photo frame from Melissa Frances, was a lot of fun to work with.  I know what I wanted to say, I just needed to find the right tiny stamp set.  And I did.  Its from a Monogram stamp set by Paper Trey Ink.  I stamped the words in a dark brown ink onto a subtle pink pattern paper.  I used a hot glue gun to adhere the photo frame to the card.
The main image is a stamp from Stampin' Up!.  I used Pink Pirouette, Crumb Cake, and Blush Blossom to color the image.  I used my white gel pen, to add white specks on the lens of the eye glasses.  I used foam tape to lift this decorative piece off the card front.  I wanted this card to have some dimension.
I really wanted to make a sweet, vintage, baby card, and I think believe that I have.  Sometimes, when you get lost in your own creativity, and the right style of music is playing, you I can make some really pretty things.
Thank you for looking.   I hope your week is going well.  Tomorrow, I have CAS baby card to share.

Monday, March 19, 2012

Thank You, #50 + #3

I hope everyone is enjoying this Monday.  Me, I'm surviving.  We had snow again.  Ugh.  I am sooo ready for warm weather.  And I don't mean 80 degrees warm.  Just a nice 70-75 would be absolutely wonderful!
Speaking of wonderful, we know this couple, who live in California.  They have got to be the nicest folks I have ever met.  They are kind, thoughtful, generous, and down right lovely.  Anyways, for my birthday, they sent me a gift package.  Inside was a nice bottle of champagne, along with some Hibiscus in syrup, and the most beautiful set of love birds perched on a branch.  Now, for those who know me, know I have a thing for birds.  (Ok, any creature with wings, but mostly birds.)
So, I wanted to make them a card, to thank them for both thinking of me, and their generosity.  I stopped by one of my favorite challenge blog sites and a new one:  CR84FN Color Challenge  and  retro sketches.
Here is my starting point:

I just love the bright and vibrant colors for this weeks color challenge @ CR84FN.  Pink, Orange, and Yellow.  How pretty!  And they make me think of spring.  The quote is quite lovely, too:  "Of all the things which wisdom provides to make us entirely happy, much the greatest is the possession of friendship. ~ Epicurus"  
So, the card I made is just that, for a friend!  Here is what I created:


I used these beautiful papers from Kaiser crafts.  Aren't they just dreamy.  The yellow pattern paper is from Authentique (my scrap box).  The flowers are from a stash, so no brand, sorry.  The ribbon is from Paper Trey Ink.  The butterflies, and leaves are from Stampin' Up!, the sentiment is from Amuse Studios.  I added dazzling diamond glitter to the buttons, once again.  It's kinda addicting {smiles}.  The half pearls are from my stash, too.
The card was quick and easy to put together.  Thank you for stopping by.  And, I'll have another post for tomorrow morning!  Stay tuned.  

Sunday, March 18, 2012

Birthday Wishes, my friend #232

I can't believe that this weekend is almost over.  But, that is how time flys at my house.  I made a birthday card for one of my good friends, and I haven't given it to her yet.  So, my fingers are crossed that she doesn't realize it is for her, until she opens the envelope, later this coming week.  I made her card using the Mojo Monday #232 sketch.  I also used her favorite color combo.  (Isn't that what friends do?)

Here is the sketch:

Here is my card:


 I have to say that I think this card came out pretty!  I used some pattern paper from Basic Grey.  I just love how their papers coordinate together and the print is just so pretty.  I used a label from Amuse Studios.  I used a flower from Kaiser crafts.  The bucket I received in a gift stash from another friend.  The solid card stock, the classic ink, the satin ribbon, the leaves punch, and the sentiment came from Stampin' Up!.  
Ok, so my friend loves black and white, with just a punch of color.  Any color except pink.  She isn't a fan of pink.  I wanted to use a pretty blue, but I couldn't match paper blossoms and the ribbon I had on hand to do that.  So, I used green.
Ok, if you look at the sketch, my proportions aren't a true match, but I just loved the graphics in the pattern paper, that just a strip wouldn't do it justice.  Also, I didn't want a large text box/rectangle.  So, I swapped the dimensions.

Thank you for looking!  I hope that you enjoy the rest of your weekend.  I am actually running out the door to do some shopping.  I have quite a few gift cards from the holidays that I want to redeem.  See, the best kind of shopping : FREE!

Saturday, March 17, 2012

Birthday Bash

One of the things that I really do love about the weekend, is the time to look at other blogs, and to check out different challenges.  And this weekend isn't really any different.  I really do enjoy being on the design team for Our Creative Corner.  The challenges are always different, and most of them really do make me exercise my creative side.  The other designers are super talented and they keep me on my toes.  
This week, is no different.  Anita, would like us 'to make a card or tag with some sort of bingo card on it, and use the color green somewhere on the project'.
The Ribbon Reel Challenge, is having a 'Newsprint' challenge this week.  I am entering my card in this challenge, too.  The requirement is to use news print / book print, and ribbon on your paper craft item.  The pattern paper I am using, has text print on both the background paper and the blossoms.  Here is their inspiration photo:


Sounds pretty fun.  Sounds creative.  So, here is what I came up with:


This card was pretty fun to make.  The floral pattern paper is from Basic Grey.  The yellow polka dot paper is from Cosmo Cricket.  The 'bingo card' I made with a stamp set.  The 'wish' ticket is from Tim Holtz.  The 'Birthday' sentiment is from Stampin' Up!  The flower is made from card stock and a scallop circle punch.  I centered the paper blossom onto a butterfly, that was cut from a die.  I made a double bow, out of some green seam binding.  I also added some bakers twine and a button.
I created a Birthday card, because I also wanted to help another challenge blog celebrate their second birthday, The Shabby Tea Room.  I have found some inspiration there, and have participated in a few of their challenges.  They have helped me 'develop' my favorite style of paper crafting: shabby chic.  
Join us @ Our Creative Corner, to play along with our current challenge: The Luck of the Irish.  Show us what you can do with a Bingo card and green.  And, if you have a chance, stop by the The Shabby Tea Room, to join them in their celebration of their second year!
Happy Saturday!  I hope you enjoy your weekend!

Friday, March 16, 2012

old friends

It's Friday! and it's time for another blog hop over @ Sketch Frenzy Friday.  So, how this works, is we (the design team) give you the sketch and, you can visit each of our blogs for inspiration.  How fun is that?  Each of us, (on the design team) takes a turn at providing the sketch to work with.  And this week, it was my turn.  So, here is my sketch: 


and we all hope that you get a chance to play along with us!
Here is what I created:


I used some of my favorite paper: Attic Boutique DSP.  I just love the vintage images and the colors are so wonderful to look at.  I used crumb cake as the card base.  I used two stamp sets, Creative Elements and Timeless Treasures.  I love the graphics in the stamp sets.  I added some crochet trim, which I just love, too.  I used very vanilla card stock to create the rolled flower.  I sponged the edges with so saffron classic ink.  Then I added some ultra fine glitter.  The butterfly just seamed to pull it all together!
And I hope that you have a chance to play along with us!  Sketch Frenzy Friday

Wednesday, March 14, 2012

Layers of Ruffles

I want to welcome my new followers.  I hope you find something to inspire you and create a beautiful paper craft item {smiles}.
Today, is another sketch challenge from Stampin' Queens Sketch Challenge.  Just remember, to use your Stampin' Up! supplies to create an entry.  Here is this weeks sketch (#30):


When I first saw this sketch, I instantly thought of ruffles.  I was thinking how I could sew some DSP to look like ruffles, but my sewing skills are 'beginner-ish' and it didn't work out.  So, I took two different DSP and did two different 'cuts'.  Take a look see:


I used the tasteful trim die to make the large scallop edge.  I used the eyelet border punch to make the 'lacely' edge.  I put a little more space at the top to give my ribbon room to sit.  I used the vanilla 1/8" taffeta ribbon and tied a simple bow.  I wanted to give my card a little punch, so I used some pure poppy card stock and made a paper blossom.  I added my 'flower' to a vintage tag.  I was going to stamp 'thank you' on it, but thought the flower would be sweet.  I stamped 'just for you' toward the bottom right border of the card, in basic black classic ink.  My card is simply sweet! and I hope you like it!
Enjoy the week! It's half over! and thank you for stopping by.  Leave me some 'love', it really does make my day!  

Saturday, March 10, 2012

Soar

It's Saturday, so that means it's time for another challenge over @ Our Creative Corner.   Holly has a very interesting challenge:  Tic Tac Toe, so to speak.  Holly created a tic tac toe grid, and all you have to do is select your embellishments in a diagonal, straight across, or down in a row. 
Here is Holly's tic tac toe grid:


My first thought was to go across the top: brads, pink, flowers.  But, then I thought  that was too obvious and easy.  I can make a pink card.  I'm not a big fan of stickers.  So, I went down the left side: brads, buttons, and blue.  I don't really make a blue cards, so I thought why not, it's a challenge, right?

Here is my brads, buttons, and blue card:


To start off, I picked up some new pattern papers from Authentique.  I just love the vintage look of their pattern papers.  Very pretty.  Not too girly, and yet, not too masculine.  
I took various stamps and stamped on the notebook paper.  I was trying to achieve a vintage, worn-look to my papers.  
I had one bird left from my Melissa Frances stash.  So, I added the bird. 
I added some buttons from Lost & Found.  I wanted to add a fabric brad to add some softness and character, so that went on, too.
Thank you for looking.  I hope that you, too, get a chance to play along with us @ Our Creative Corner.
Have a great weekend!

Friday, March 9, 2012

Happy Moments

Today, is our new blog hop over @ Sketch Frenzy Friday.  There is a new sketch challenge on our main challenge site.  But, to see what the design team has created, you will need to visit each DT members blogs!  Doesn't that sound like fun!  Robbie, has created this weeks sketch:


So, I created this:


I wanted to make a card that has a different 'look' than my usual.  I typically make something that looks vintage or shabby chic and has crochet trim, first edition dsp and some sort of feminine embellishment: button, butterflies, smooch spray, etc.  I used the new hostess DSP: Cheerful Treat DSP.  I used lucky limeade card base and one matt.  The other matt is melon mambo.  
I hope that you get a chance to play along with us this week.  Now, head on over to Tammy F.'s blog and she what she has done with this sketch.

Thursday, March 8, 2012

Paris, Shutters

Wow!  The wonderful ladies over @ the Shabby Tea Room, have selected their winner, the top three, and honorable mentions for their previous challenge: Shabby Shutters.  And my card is listed on the honorable mention list! Yahoo!  How exciting!
Here is one more look at my card:


I'm so happy that my card got picked! How fabulous!  Now, don't get me wrong, I'd love to win 1st place, but to be mentioned, is still an honor.  Thank you.

Wednesday, March 7, 2012

Calorie Counter + prize

I have decided to keep track of my calories and hopefully loose weight.  But, I needed something unique to write my food journal.  So, I went to a big red store and purchase a notebook from the clearance rack.  And used some pretty paper to alter the notebook.  
I worked with the sketch from Stampin' Queens Sketch Challenge.  Why don't you play along with us this week?  There is a prize this week, also!

Here is the sketch:

And here is what I created:


I know, there aren't any circles on my card.  I followed the curves of the circles and made the scallop edge of my 'layers' of ruffles.
I used some of the new DSP from Stampin' Up! and used one of the new edge dies.  
For my flower I used a die to create the paper blossom.  I added some very vanilla seam binding and a new designer brad.  
I used a mini vintage tag, and a soft suede marker to write my '1800'.  I also added a big half faux pearl over the hole.  
I used the BFF stamp set to stamp the worn flourish onto the DSP before adding my scallop trims.
Thank you for stopping by, and I hope you play in our challenge this week.

Sunday, March 4, 2012

Paris, retro

This is my second post today.  I stumbled upon this new sketch challenge blog, and I thought that the sketch was very interesting, so I am playing along.  As I was surfing the web, I also came across this beautiful color challenge at one of my favorite challenge blogs, and so I have decided to play along in that challenge as well.
The new challenge, is entitled:  Retro Sketches.  And one of my favorite inspirational challenge blogs is: the Shabby Tea Room.  
Here are their boards:


For my card, I did use the required neutral colors and Navy.  My distressed element is my postage stamp and background panel.  For the sketch, I did turn it on its side, I wanted something vertical.  

Here is my card:


I used two stamp sets to make the distressed background: sanded and friends 24-7; both sets are retired from Stampin' Up!.  The stander background was stamped in sahara sand classic ink, and then the flourishes were stamped in not quite navy classic ink.  
To make the main panel I did some collage stamping, using two different stamp sets: Paris, and Carte Postale.  I stamped the Eiffel tower in soft suede classic ink, as well as the 'Bonjour'.  I stamped Paris and true friend in not quite navy classic ink.  I stamped the postal mark and the flourish in crumb cake classic ink.  I stamped the paris address in sahara sand classic ink.  I stamped the postage stamp in going gray classic ink.  I stamped the floral strig in grey flannel ink.  
The two sentiment banners were made with vellum card stock.  
I distressed the edges of the light panels with crumb cake ink.  I added some buttons from my jar o'buttons.  I tied a piece of white taffeta ribbon around the bottom of the raised panel.  To finish the bow, I  added a floral rhinestone brad to the center.  The card looked like it was missing something, so I added a paper blossom on top of a scrap piece of frayed crochet trim.  
Thank you for looking, and I hope you have/had a chance to 'play' in your craft spaces this weekend!

Chic of the Week!

I have been waiting for a free moment to share my news with you!  Last week, I needed to make a thank-you card for a wonderful friend, who through her own struggles, found time to remember me on my birthday.  And so I wanted to let her know how special she is!
Well, I went surfing to find some inspiration and possibly a challenge or two.  And I found three challenges to get some inspiration and that I could enter.  So, I set off in my craft room and started 'playing' and I came up with this very stylish card-gift combo:


And, well, long story short, I was a winner on one of the challenges!  I was selected as 'Chic of the Week #125' for the Just Us GirlS template/3-D challenge! I was sooo excited when I found-out!  I have added my 'badge' to my blog, to display it proudly!  Here is my original post, here .

Saturday, March 3, 2012

Wedding Music

The weekend is upon us, and it's a beautiful day, today! The sun is shining and there are snow clouds in the sky.  It's a good day, to sit in my craft room, with the blinds open and view is beautiful.  I'm not sure how you craft, but me, I listen to music.  All kinds of music, everything from Van Morrison, Poco, to Creed.  And we all know how music changes your mood.  A nice simple beat of regae can turn an otherwise 'rough' day, into something 'happy'.  And the fast beat of metal can cause you to drive faster, and a bit more aggressive.  Well, for me, the same is true with how music can influence my crafting.  I tend to listen to 'old' music to create a calmer mood in my craft room.  It allows me to think clearer and not rushed.  
The reason I rambled on about music, is because Holly over @ Our Creative Corner, has asked us to: "take inspiration from a song and work it into any papercraft project you'd like. Just make sure your post includes the song title (and if possible the artist) that inspired you!"  What a creative idea!

Here is my card:
Angel from Montgomery by Bonnie Raitt


I wanted to make something 'pretty' and I wanted to use this fabulous sketch @ Sasya-Sketch, here:


I know, I wasn't very creative with this sketch.  But, it was just so beautiful, that I wanted to use it, in its original state.  No flipping, no changes, just keep it as is.
This card is also another one of my collaborations of a 'million' products.  No restrictions, just create.  So, here we go.  

I used pattern paper from Cosmo Cricket.  I used solid card stock from Paper Trey Ink and Stampin' Up!.  I used ink from Paper Trey Ink and CTMH.  I used crochet trim from Paper Studios.  My main flower is a collaboration from several.  The yellow one is from a company that is no longer around.  The white one, is a 'naked' flower mean for 'coloring'.  The next white flower below that one is one I cut from waffle paper and then adding dazzling diamond glitter to the tips.  The two white leaves came from a wedding floral sprig.  The tiny yellow flower comes from Webster's Pages.  The tag comes from Melissa Frances.  The buttons are a collection of Amuse Studios, Paper Trey Ink, and CTMH.  The stamps are from Stampin' Up! and Amuse Studios.  The label is from Amuse Studios.  I used a distress paint on the edges of the pattern paper pieces.  I made a cluster of various rhinestones at the top of the main flower.  The large half faux pearl was added at the end of this creation.  I added a string of half faux pearls to the bottom of the sentiment, and wanted to continue that elegance, that softness.  I think the scrap piece of crochet trim helped.
Thank you for stopping by.  Leave me a comment, I'd love to know what types of music help you create!