Showing posts with label ocean tides. Show all posts

Sunday, October 15, 2017

Mini Hand Sanitizer Holder

Wow, I didn't realize that it has been almost a whole month since I posted.  I guess time really does fly.  I have been busy crafting.  I'm working on several holiday craft fair items, and trying to make new things, too.  And here is a 'new' item: mini hand sanitizer holder.  My thought process is making the packaging pretty for the little things; to give the gift big impact.  
A popular store, to do some basic holiday shopping is Bath & Body Works.  Let's face it, they have some wonderfully smelling soaps, lotions, candles, and various air fresheners.  They have a scent for just about everyone.  They are even carrying a mens line of products.  I was surprised (but not really) that they started carrying air fresheners for your car.  
An item that my grandchildren and I carry with us, is their mini hand sanitizers.  They even have 'fun' clips to hold these little bottles to your back pack, gym bag, purse, etc.  But, I want to make a 'fun' holiday package for these little bottles, and make gift giving easier and pretty.

front
We all have office/work gifts to get during the holiday season.  But, with everything else we all need to buy, we can't really afford to spend another hundred dollars.  So, we all wrack our brains trying to find something 'good', but not too expensive.  I work at a hospital, so everyone there are germ-a-phobes, and they all love food.  So, usually I make some homebaked goody.  But, this year, I think I'll get them these cute mini hand sanitizers.  They are relatively inexpensive 5 for $6.  An useful gift, without breaking the bank and I won't have to spend an hour in the kitchen {smile}.  Now, I need a way to package them, other than throwing them in a little gift bag. . . and that is how I came upon this idea!

Left-side

Right-side
This is my first one.  So, it isn't perfect.  There is usually a learning curve to making anything out of paper.  I usually keep these for my samples.  I don't give away these first generations, because they usually have a 'mistake' in/on them.
The sentiment rectangle is actually the 'piece' that holds the flap down/the box closed.  Pretty easy to load with the hand sanitizer, just slide the bottle in.  Easy, Peasy, and Pretty!
I used Ocean Tide card stock for the base.  I matted the pattern papers and sentiment rectangle onto Early Espresso card stock.  I added a small strip of foam tape to the bottom of the sentiment rectangle, to lift it off the box.  I used a small snowflake die to cut out the snowflake, using glitter paper.  I added a trio of wood-grain sequins to continue the woods-y feel of the pattern paper.  I used some scraps of this holiday themed pattern paper from 2 years ago.
I am going to try and make a 'bag' holder for these little bottles, too.  I think 'bags' may be a nice option.  {smile}


Saturday, October 10, 2015

Vintage Farm Happiness: Card

I actually was able to photograph this card during the daylight! Yeah!  Love it.  But, that also means that I wasn't able to complete my chores.  {frown}  Well, there is always tomorrow.  {smile}
I saw the sketch over @ Mojo Monday earlier this week.  And all I can say, is wow!  I will be using this sketch for several paper crafts I have on my 'to do' list.  
Here is the current sketch 

So when I saw this sketch, I thought blossoms in place of the stars.  
But, I didn't do that.  Here is what I created:


Ok, this is another small A6 size card: 4 1/4" x 6".    I just love this 'new-to-me' size card.  The card base is made from Ocean Tides card stock.  I added a matt of kraft card stock by Paper Studio.  The pattern paper is another digital download.  I did a single border machine stitching around the main panel. 
I added a strip of white cotton eyelet trim, then a scrap of mint macaroon lace trim (by Stampin' Up!) and cream twill ribbon (by Paper Trey Ink).
My focal piece is another digital pattern paper from the same collection as the larger piece.  I did another kraft card stock matt.  I did a single border machine stitch, but only on the bottom half of this piece.
I added a vintage price tag, and a vintage mini milk cap.  The vintage scale was hand-stamped from the A Second Helping of Sunshine stamp set, by Paper Trey Ink.  The sentiment is from Close to my Heart: Country Born stamp set.
I also added a Tim Holtz safety pin to the bow, and created a tag from the packaging of the 'helping of sunshine' stamp set.  I used a sentiment from the Friendship Jar stamp set, by Paper Trey Ink.  
I added a very vanilla card stock panel with a kraft card stock for the inside.  I also re-stamped the vintage scale on the lower right corner.

Thank you for looking.  I hope you have been inspired to create something beautiful!  Now I'm off to start my chores.  {frown}  And then I'll have a few evenings this week, to continue crafting! {smile}


Sunday, April 12, 2015

Cake : card-gift box

Howdy! and welcome {smile}.  So, yesterday, I spent quite a few hours in my craft room.  I have a craft fair coming up, and so the craft frenzy has begun {smile}.   I had a goal of creating 6 card-gift combo boxes.  And well.  I didn't.  I got three covers done, the inside templates are printed, the pattern paper has been cut to go on those, and the embellishments have been selected.  So that's a good start.  I also started 3 magnetic letters: O, E, and T.  And I started working on altering 6 tins.  All in all, not a wasted day.  By problem, was once I finished the covers of the 3 card-gift combos, I noticed that they all kinda look alike, and the creative juice for those had run dry {frown}.  That is why I started working on other projects.
Anyways, not to fret.   Today is a new day.  Let me share with you what I have done, and then I can get back into my craft room and either finish the magnetic letter, the tins, or start on some gift card holders.  Possibilities are endless in my craft room {smile}.

My typical style is vintage country chic.  Super easy for me.  I love lace, cotton trim, buttons, sequins, pearls, rhinestones, jars, banners, staples, metallic heat embossing, machine stitching, text, music sheets, and floral pattern papers.  
And sometimes I need a little help organizing these things and a direction of my crafting.  I stopped by a favorite challenge site to see what the current sketch challenge is @ Cardabilities.  There are two things I love best about this challenge site: 1) the sketches are very easy to work with,  2) a majority of the DT is in Europe.  Their perspective is completely different that American crafters.  So, it helps me broaden my horizons.  Here is the current sketch challenge:


and here is what I made:


At the time of photographing this entry, the inside box had not been completed.  That is why there is a gap where the bow is.  This grosgrain ribbon actually ties, to hold the box closed.  Untie the ribbon, and the card-gift box opens like a book.  You can place a smallish  gift inside the box (3" x 5 1/2" x 3/4").
Recipe:  The base is made from Ocean Tides card stock by Paper Trey Ink.  Love the color.  I used two pattern papers from the same collection Corner Shop by Tilda.  LOVE IT!  The cake poster card is one of the embellishments that is included in the pattern paper stack (12" x 12").
I add three different trims: a cream cotton trim, white lace, and a cream/pink saddle stitched ribbon.  I machine stitched them to the pattern papers.  I also included a large loopy double bow of cream twine.  
I added three blossoms, one pink and two aqua paper blossoms.  These were purchased from the dollar bin at a big box craft store.  (yeah, the dollar bin!  9 paper blossoms on a card! SCORE!)  I added some platinum sparkle to the petal tips. 
I tucked in a cake poster card.  I distressed the edges.  I added my sentiment banner of 'best wishes'.  This little gem can be used for a birthday, or wedding.
In the sketch there are some splatters, so I used sequins instead; Marshmallow and Pink Blush sequins from Pretty Pink Posh.  I also tucked in a metal brad.
The ribbon to hold this little gem closed is also Ocean Tides, by Paper Trey Ink.
Here is a different view:

thank you for looking.  I hope you have been inspired to play along with the talented ladies over @ Cardabilities.  Now, back into my craft room! {smile}


Sunday, October 26, 2014

Holiday Banners

I am having a great weekend.  I got to see some wonderful girl friends and I got a lot of crafting done!  Yahoo!
And so, I want to share with you what I made.  I created some banners (ok, 2) out of thick chipboard, and some wonderful holiday pattern paper: Christmas by Fancy Pants.  Here is what they look like:


I used a variety of the pattern papers.  I just love the mix of blue and red and green.  Just gorgeous and festive and playful.  Love it.  
I cut a large scallop trim piece from one pattern paper and matted it onto cherry cobbler card stock.  I machine stitched it, to give it a home-made and nostalgic look.  I also used cherry cobbler card stock to create the scallop circles under the rosettes.
I created the rosettes by hand.  I scored a 1" x 12" strip of pattern paper every 1/4".  I stamped and heat embossed the letters in early espresso embossing powder onto shimmer white card stock.  I matted the letters onto cherry cobbler card stock, and then ocean tides card stock.  
I used ocean tides ribbon from Paper trey ink.  I tied red vintage buttons on to each bow.   I have both banners for sale in my Etsy shop HERE.  Don't forget, my easy shop will be closed the day before, the day of, and the day after each craft fair.
Thank you for looking.  I'll be posting more soon!


Thursday, August 14, 2014

Sprite Mojo

my sprite in a jar
Welcome.  I have been a bit busy.  I have been asked to teach a class at a private retreat next week, and well, I have been making a few samples of a mini album I am teaching.  Anyways, along this journey to find some inspiration for my mini album, I stumbled upon this wonderfully creative challenge site.  And, so I have taken a break from creating mini albums to play along.   Sometimes, its good to change your focus, so you can get back on track.
I'm not quite sure how I stumbled upon this challenge blog: Aurora Wings, but I am certainly glad that I have.  This challenge site uses digital images.  I have embraced this new type of images lately.  And this challenge site, asks that you hand color your digital image.  I have to admit, I do love coloring.  There is a certain peace that goes with this activity.  You can't really focus on troubles, or worries.  You need to focus on the task at hand - coloring.  It gives your mind and soul a chance to take a break from the worries and busy-ness of everyday life.  A small retreat for your mind.
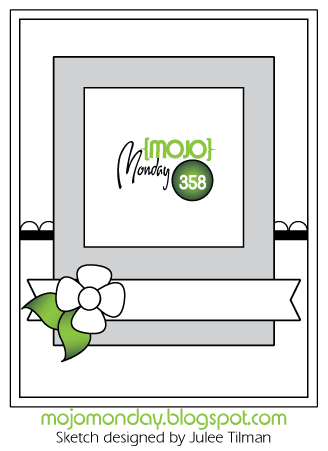
I needed a little direction for my creation, so I went to Mojo Monday, because they have some very easy-to-use sketches.  Here is this week's sketch:

Aurora Wings provided a free digital image this week, for the Sprite challenge.  I want to thank them for doing so.  Their generosity for providing everyone with a free image, is rather sweet {smile}.   I downloaded my free image, and set out to color my little sprite.  This is my first attempt at coloring a digital image.  I typically stamp an image in Staz-On, or heat emboss an image.  Because I typically love to water color.  I wasn't sure how the 'ink' from my printer would hold up to water, so I used my color pencils instead of watercolors.  It was really fun to sit and color.  Here is what I created:


The recipe:  The card base is Cream Cardstock from Paper Trey Ink.  I used Ocean Tides card stock (PTI) for the matt.  I used some scraps I had in my scrap box for the panels.  The yellow pattern paper is from My Minds' Eye and the polka dot pattern paper is from Heidi Swap.  I added a small open scallop trim border with whisper white card stock from Stampin' Up!.  I added some random machine stitching along the sides, and a zig zag stitch across the top of the scallop border.  I used a scrap piece of Melissa Frances pattern paper for the back drop of the jar.  I matted this piece to Ocean Tides card stock.  I added a simple single machine stitch to the piece.  (I repeated the ocean tides card stock matt and machine stitching to keep everything connected.)
I stamp and heat embossed the jar (Friendship Jar stamp set by Paper Trey Ink) onto Vellum Cardstock (Stampin' Up!).  I stamped and fussy cut the jar banner and adhered it to the vellum.  I stamped the bee in Staz-On and used my coloring pencils to color in his body.  The bee is adhered to the card front with foam tape.  
I printed my sprite onto shimmer white card stock by Stampin' Up!.  I adjusted the size of the image to 1 1/2" x 1 3/4".  To color my digital Sprite image, I used four different yellows, two greens, two browns and a black.  I fussy cut him out, and used foam tape to adhere him to the jar.  
I stamped my sentiment from the Garden Variety stamp set (PTI) onto a scrap piece of shimmer white card stock, inked the edges and cut a banner end.  I used hot glue to attach my sun flower and leaf.  I sponged linen ink on all of the edges of card stock and pattern paper.
Thank you for looking.  I hope you have been inspired to play along in either of these challenges, or both!  I have another post today of the second mini album I finished.  Please look for that.  But be aware, it is a photo heavy post.

Sunday, May 11, 2014

Daughter's Card

Happy Mother's Day to all the wonderful, selfless mothers out there.  I can now share a card I created.  I used the sketch over @ Mojo Monday for this card.  However, I wasn't a great fan of the diamond shape, so I used a different shape.  
I used pattern paper from Kaiser Craft.  When I saw this pattern paper, I instantly thought Mother's Day.  Don't know why, but that was my first thought.  Maybe its because it reminds me of vintage wall paper, or the fact that I truly miss my grandmother.
here is the sketch:


here is my card:


The polka dot pattern paper is from Heidi Swapp.  The reverse side has different texts on it.  But there is just something about this color of polka dot pattern.  Its not blue, its not green, is something that is a wonderful blend of the two.  
The floral and rich red pattern paper is from Kaiser Kraft: Telegraph Road. I just LOVE it.  
Ok, I changed the diamond shape for this top note shaped piece.  And the rectangle piece I switched for a coin envelope.  (Yeah, I made my own.)  I added the red pattern paper to the outside of the envelope to help give it some character.  I machine stitched the pattern paper to the envelope.  I used some gold bakers twine and tied a double bow, tied the key and button to the flap.  
I added a tag to the envelope.  I stamped 'Happy Mother's Day' and 'I can't imagine a wold without you' on the tag.  Because I truly can't.  It's amazing to me how when we are younger, us girls don't want to be our mothers.  But when we become mother's ourselves we immolate them.  And we are happy to.  
I did change the banner piece coming out of the rectangle piece.  I simply used a tiny vintage safety pin to elevate my banner.  I stamped 'made with {heart}' on the banner piece.  Because I truly did {smile}.
The key was purchased last year, for a craft I was working on for some Christmas craft fairs, and I have a few left over.  Oh, and the stamps are from Verve: One Person.
Well, I am off to my daughter's house to have lunch with her and her family.  Then to a local restaurant to take my mother-in-law out to dinner.  Take a moment to let your mother know how special she is today.  and always.


Saturday, May 10, 2014

Teamwork

Good Morning.   I hope this post finds you well.  I have been busy crafting, and getting things listed and weighted for my Etsy shop.  Sorry I haven't posted this week.
If you don't know, I work in a local hospital.  And recently our department has needed some help from the nurses.  So, in my usual fashion, I made them some cupcakes and a card {smile}.
The cupcakes were a lemon cake with a red raspberry whipped icing.  I was focused on pink lemonade, so that is where I got my inspiration and their name {smile}.
But, a 'gift' isn't complete without a card.  So, here is what I whipped up.  I wanted something simple but with some visual interest.


The card base is Ocean Tides cardstock by Paper Trey Ink.  They make a good heavy card stock, like Stampin' Up!.  The black and cream text pattern paper is a retired piece from Stampin' Up!  I can't remember what the name of the DSP is, but it is at least 2-3 years old.  The floral pattern paper is from Bazzill.  Believe it or not.  I love the sweet, simple floral design in stripes.
I tied some gold bakers twine thru the back of a Bo Bunny button and added it to the left of my sentiment banner.  I inked the sentiment in basic black classic ink and stamped on a very vanilla piece of card stock; both from Stampin' Up!  The stamp was a free gift from Verve.  So, I don't know if you can 'buy' the stamp.  I love the mix of font and the simple sentiment.
Thank you for stopping by.  Don't forget, I have blog candy available to 'win'!  Take care.


Saturday, March 3, 2012

Wedding Music

The weekend is upon us, and it's a beautiful day, today! The sun is shining and there are snow clouds in the sky.  It's a good day, to sit in my craft room, with the blinds open and view is beautiful.  I'm not sure how you craft, but me, I listen to music.  All kinds of music, everything from Van Morrison, Poco, to Creed.  And we all know how music changes your mood.  A nice simple beat of regae can turn an otherwise 'rough' day, into something 'happy'.  And the fast beat of metal can cause you to drive faster, and a bit more aggressive.  Well, for me, the same is true with how music can influence my crafting.  I tend to listen to 'old' music to create a calmer mood in my craft room.  It allows me to think clearer and not rushed.  
The reason I rambled on about music, is because Holly over @ Our Creative Corner, has asked us to: "take inspiration from a song and work it into any papercraft project you'd like. Just make sure your post includes the song title (and if possible the artist) that inspired you!"  What a creative idea!

Here is my card:
Angel from Montgomery by Bonnie Raitt


I wanted to make something 'pretty' and I wanted to use this fabulous sketch @ Sasya-Sketch, here:


I know, I wasn't very creative with this sketch.  But, it was just so beautiful, that I wanted to use it, in its original state.  No flipping, no changes, just keep it as is.
This card is also another one of my collaborations of a 'million' products.  No restrictions, just create.  So, here we go.  

I used pattern paper from Cosmo Cricket.  I used solid card stock from Paper Trey Ink and Stampin' Up!.  I used ink from Paper Trey Ink and CTMH.  I used crochet trim from Paper Studios.  My main flower is a collaboration from several.  The yellow one is from a company that is no longer around.  The white one, is a 'naked' flower mean for 'coloring'.  The next white flower below that one is one I cut from waffle paper and then adding dazzling diamond glitter to the tips.  The two white leaves came from a wedding floral sprig.  The tiny yellow flower comes from Webster's Pages.  The tag comes from Melissa Frances.  The buttons are a collection of Amuse Studios, Paper Trey Ink, and CTMH.  The stamps are from Stampin' Up! and Amuse Studios.  The label is from Amuse Studios.  I used a distress paint on the edges of the pattern paper pieces.  I made a cluster of various rhinestones at the top of the main flower.  The large half faux pearl was added at the end of this creation.  I added a string of half faux pearls to the bottom of the sentiment, and wanted to continue that elegance, that softness.  I think the scrap piece of crochet trim helped.
Thank you for stopping by.  Leave me a comment, I'd love to know what types of music help you create!