Showing posts with label Garden Variety. Show all posts

Sunday, September 14, 2014

the Scent of Roses


Thank you for stopping by, and I hope each of you has a chance to create.  Create something fabulous!  Something pretty.  Something you love.  {smile}  I use the word, 'create' because I think it encompasses all forms of self-expression.  Because isn't that what we are doing?  Doing what makes us happy, what calms us, what gives us joy!  I also don't mean this for just those of us who paper craft.  I want to wish everyone who crafts, joy!  Bakers, quilters, painters, paper-crafters, wood-workers, auto mechanics, welders, . . . everyone who creates something with their hands, uses their free-time to practice their 'craft', and everyone who finds pure joy in what they do!  {smile}

I had time today to create a greeting card.  And yeah, in my favorite color: pink.  I don't have a particular occasion for this card, but rather just the desire to create something pretty {smile}.
I stopped by Crafting by Designs to see what these talented ladies have been crafting.  The current challenge is: Pretty in Pink.  I got this!  This is an inspirational challenge site!  So check it out!
I also stopped by Retro Sketches, because these ladies are sure to inspire!  This is the current sketch:


The thing that I love the best about their sketches, is how simply beautiful they are!  It encourages clean and simple designers, and everything all the way to me!  Love the layers!
and here is what I created:


and here is how I created this card:  I started with Pink Pirouette card stock (SU!) for the card base.  The pink floral music sheet pattern paper, is actually a digital download.  I trimmed this paper and then sponged Soft Suede classic ink (SU!) along the edges, so that no white paper would peak through.   [all digital downloads are printed on whisper white card stock(SU!) and the edges are sponged with soft suede classic ink (SU!)]
I cut a piece of the cream/kraft polka dot pattern paper to 3 1/4" x 3 1/4".  (And yeah, another digital download.)  I added some machine stitching all the way around.  I wrapped a piece of Venetian crochet trim (SU!) around the polka dot piece.  The wrapped a piece of blushing bride 1/4" cotton ribbon just over the top edge of the crochet trim.
I printed the ticket (another digital download) and fussy cut the ticket out.  I added foam tape to the back of the ticket to 'lift' it off the front of the card.
I took a plain white paper blossom, and plucked the center out of the blossom.  I sponged Blushing Bride classic ink (SU!) on the tips of the petals.  I brushed picket fence paint (Ranger) to the petal tips, and then sprinkled the paper blossom with Dazzling Diamond glitter (SU!).  I adhered the paper blossom to the card front with my glue gun.  (love my glue gun!)
I added a strip of champagne colored half faux pearls just over where the two trims join.
I tied a simple bow with the same pink cotton ribbon, and adhered it just below the paper blossom with my glue gun {smile}.
I cut a strip of Very Vanilla card stock (SU!)  5/8" wide  (just over a half-inch) for my sentiment.  I stamped the sentiment 'Have a SWEET day.' in soft suede classic ink.  The sentiment comes from the Garden Variety stamp set (PTI).  I used my scissors to create a shallow flag-end to the banner.  I used my tape runner to apply some adhesive to the back of this sentiment banner, and added one lone staple to the left of the sentiment.
And finally, (right?) I adhered a trio of clear iridescent sequins to the card front.  At this time, I finally added the card front to the card base.  That way, the machine sewing and staple are not viewed on the inside of the card.
I am happy with how my card turned out.  It's not what I originally set out to create, when I walked into my craft room and sat at my craft desk.  I actually began working on a pink Christmas card.  It never came together.  {frown}  Oh well.  But I am really happy with what I did create! {smile}


Thursday, August 14, 2014

Sprite Mojo

my sprite in a jar
Welcome.  I have been a bit busy.  I have been asked to teach a class at a private retreat next week, and well, I have been making a few samples of a mini album I am teaching.  Anyways, along this journey to find some inspiration for my mini album, I stumbled upon this wonderfully creative challenge site.  And, so I have taken a break from creating mini albums to play along.   Sometimes, its good to change your focus, so you can get back on track.
I'm not quite sure how I stumbled upon this challenge blog: Aurora Wings, but I am certainly glad that I have.  This challenge site uses digital images.  I have embraced this new type of images lately.  And this challenge site, asks that you hand color your digital image.  I have to admit, I do love coloring.  There is a certain peace that goes with this activity.  You can't really focus on troubles, or worries.  You need to focus on the task at hand - coloring.  It gives your mind and soul a chance to take a break from the worries and busy-ness of everyday life.  A small retreat for your mind.
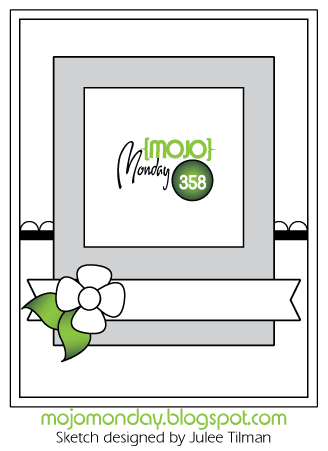
I needed a little direction for my creation, so I went to Mojo Monday, because they have some very easy-to-use sketches.  Here is this week's sketch:

Aurora Wings provided a free digital image this week, for the Sprite challenge.  I want to thank them for doing so.  Their generosity for providing everyone with a free image, is rather sweet {smile}.   I downloaded my free image, and set out to color my little sprite.  This is my first attempt at coloring a digital image.  I typically stamp an image in Staz-On, or heat emboss an image.  Because I typically love to water color.  I wasn't sure how the 'ink' from my printer would hold up to water, so I used my color pencils instead of watercolors.  It was really fun to sit and color.  Here is what I created:


The recipe:  The card base is Cream Cardstock from Paper Trey Ink.  I used Ocean Tides card stock (PTI) for the matt.  I used some scraps I had in my scrap box for the panels.  The yellow pattern paper is from My Minds' Eye and the polka dot pattern paper is from Heidi Swap.  I added a small open scallop trim border with whisper white card stock from Stampin' Up!.  I added some random machine stitching along the sides, and a zig zag stitch across the top of the scallop border.  I used a scrap piece of Melissa Frances pattern paper for the back drop of the jar.  I matted this piece to Ocean Tides card stock.  I added a simple single machine stitch to the piece.  (I repeated the ocean tides card stock matt and machine stitching to keep everything connected.)
I stamp and heat embossed the jar (Friendship Jar stamp set by Paper Trey Ink) onto Vellum Cardstock (Stampin' Up!).  I stamped and fussy cut the jar banner and adhered it to the vellum.  I stamped the bee in Staz-On and used my coloring pencils to color in his body.  The bee is adhered to the card front with foam tape.  
I printed my sprite onto shimmer white card stock by Stampin' Up!.  I adjusted the size of the image to 1 1/2" x 1 3/4".  To color my digital Sprite image, I used four different yellows, two greens, two browns and a black.  I fussy cut him out, and used foam tape to adhere him to the jar.  
I stamped my sentiment from the Garden Variety stamp set (PTI) onto a scrap piece of shimmer white card stock, inked the edges and cut a banner end.  I used hot glue to attach my sun flower and leaf.  I sponged linen ink on all of the edges of card stock and pattern paper.
Thank you for looking.  I hope you have been inspired to play along in either of these challenges, or both!  I have another post today of the second mini album I finished.  Please look for that.  But be aware, it is a photo heavy post.

Tuesday, April 24, 2012

Delightful Journal

Hello.  Thanks for stopping by.  I altered another blank notebook.  I just loved the pattern paper I used on the last spiral notebook I altered for my granddaughter.  I decided to alter another one, to sell in my Etsy shop.  The pattern paper is from Authentique.  They have created some really beautiful pattern paper this year.  And they have different styles to work with your different tastes.
To help me with my creative flow, I stopped by the Vintage Cafe Card Challenge.  They have the most interesting sketch for this challenge.  So, that is where I got my layout.   (Please note that this challenge site is in Polish.  They do have a translator button.  Please don't let that detour you from their site.)
Here is a look at their sketch:


See what I mean?  I found my self just staring at it, with the 'wheels' in my head turning!  Stop by their challenge site, and get some inspiration to play along too!  Without further delay, here are some photos of my altered notebook, using the above sketch:


 a few close-ups

Here are the particulars:  To give the pattern paper a vintage feel, and take away the white empty space, I stamped a French script in crumb cake classic ink.  Instead of a border trim, I used a piece of 2" white silk ribbon.  Also, to help fill-in the collection of flowers on the sketch, I tied the silk ribbon into a bow.  For my title piece, I stamped 'Bloom * Blossom * Become', from a Paper Trey Ink stamp set: Garden Variety.  In the middle of my altered journal, I have added a sticker: Be Your Own Kind Of Beautiful.  The graphics are of a little girl selecting what to wear.  I also added a vintage shoe sticker, and a sticker tag that says, 'beauty'.  To help pull the 'getting dressed-up' theme, I die cut and stamped a mannequin in grey flannel ink.  I had a scrap piece of this absolutely beautiful vintage trim.  So, I made a 'make-shift' skirt out of this beautiful trim.  I added a skinny ribbon in delightful daffodil.  I thought the grey and yellow combo worked so well, and really made the pattern paper pop!  I added a white shimmer button and half faux pearl to it's center.  To make the paper blossom, it is really easy!  Cut your circles in different sizes.  I hand-cut, and punch different size circles.  Crinkle the circles and layer them.  To give the edges some sparkle, I used my 2 way glue pen and dabbed it on the edges and then dunked the paper blossom into my tub of dazzling diamond glitter.  (The leaves were made in the same fashion.)  To keep the shabby chic look, I added some tied buttons, and half faux pearls randomly.  I added a resin white architecture piece to the right upper corner, to help give the spiral book cover some visual interest.  I added a long strip of polka dot pink scallop trim ribbon, to be used as a book mark.  That ribbon is attached to the spiral with a white brad.
I hope that you get a chance to play along with the creative ladies over @ the Vintage Cafe Card Challenge.  Thank you so much for stopping by!  I hope you have a great day. 

Monday, April 16, 2012

Baby Reveal

Well, I have finally gotten a chance to upload some photos for you.  Our daughter is expecting another child, and we threw a Baby Reveal Shower.  Her theme was bumble bees.  You know, 'what will it bee?' 'Bee is for baby', and 'mother to bee'.  The colors for our party were black and yellow.  Not very unique, but that's ok.  It help tie everything together.
We had a 'Crave Bar', where we put foods that the expecting mother has been craving:

S'mores to Go

Chocolate-Dipped Strawberries

Caramel Apples

dark chocolate cake covered in yellow fondant with bumble bees

the party favor. 
These party favors were a lot of fun to create.  The gold heat embossed design is actually a seed packet.  That is why the 'Garden Seed. Farm. Home.' stamp is across the top.  I thought the 'Grown with LOVE' was perfect for an unborn child.  And the bottom stamp, 'Have a SWEET day' just flowed with the theme.  There is a small jar of honey inside the box.
I forgot my camera at home, and so I had to take these photos with my phone.  Thank you for stopping by.  Please join us @ Stampin' Queens Sketch Challenge this week, as you can win some blog candy, just for playing along.  I'll have this weeks sketch and my card on Wednesday.  So, please stop by!