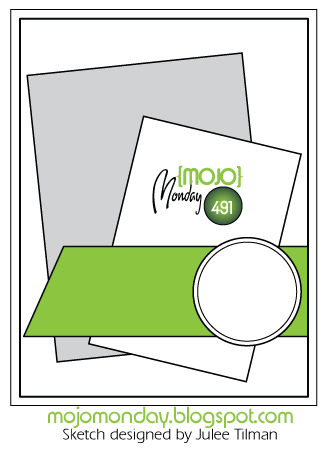
Showing posts with label mojo monday. Show all posts

Saturday, June 10, 2017

Roses, for a Friend

Hello.  Life has gotten a bit messy lately.  Well, actually the whole month of May, was a living nightmare.  I know, how poopy.  But, I am a strong woman, and I have endured a lot worse, unfortunately.  And, that little piece of knowledge still hasn't taken the sting off of the horrible treatment I have endured at work.
I didn't get my June Happiness challenge out.  Actually, I haven't sat down to write it, yet.  I will.  It will be super late.  But, it will get done.  Because that is what I need to focus on now.  Happiness.  Peace.  Joy.  Reflection.  Family.   Friends.  
I made a few cakes, and posted images on various social media accounts.  Just quick little creations, that unfortunately didn't take a lot of effort, but did bring me some joy {smile}.
Today, I actually went into my craft room.  I haven't been there in over a month.  To say the stress and depression from work has really put a wrench in my creativeness, is a severe understatement.  But, I walked-in, head held high, and began looking through pattern papers to inspire me.  Then, I searched from some favorite embellishments: trim, ribbon, and a button {smile}.  I created a card.  I'm not sure who for, maybe my Etsy shop.  But, I wanted to craft something.  Something pretty.  Something simple.
I stopped by a few challenge sites, to get some of those old, forgotten creative mojo juices flowing.  I am entering this card in three challenges.  Not unique for me.  But, some very dear challenge sites.
My first stop was Mojo Monday.  I was incredible sad, when I read that they will no longer be active.  That little bit of news made my heart sink a bit deeper.  But, I truly understand the reasoning.  

My next stop was Word Art Wednesday.  This group of talented ladies, really have a lot of talent.  The write-up is always inspiring, and uplifting, so for that I am truly grateful.

And my final stop is Crazy 4 Challenges.  Their challenge this week:  rose.  June is rose month, so this group of talent paper crafters want to see a rose, or two, or a whole garden of them!

and here is what I created today:


Recipe:  I used my favorite kraft card stock for the base.  I used my favorite vanilla card stock for the main matt.  This card is a typical A2 size card: 4 1/4" x 5 1/2".

I used three different but beautiful pattern papers from French Flea Market.  The text pattern paper is just gorgeous.  What can I say, I love the writing.  The floral pattern paper is so pretty, and nostalgic.  And finally the blue damask is just timeless.  It also really high lights the blues in the small florals.  I just HAD to add some machine stitching to this card.  I did a simple single border stitch.  I used silver glitter paper for the parallel stripes.  I separated the glitter strips with a scrap piece of blue lagoon ribbon.  I thought that the blue ribbon also high lighted the blue blossoms.  {smile}  Pretty happy that it matchy-matchies.  And yeah, I machine stitched it to the card front.  I added two different, but beautiful trims in place of the vertical strips.  I added a cream crochet eyelet trim, and a green cotton embroidered trim.  The trims are attached to the card front with a simple zig-zag stitch.  (yeah, more machine stitching {smile})
For the sentiment piece, I found a pretty font, simple wording.  I stamped the sentiment in early espresso classic ink onto very vanilla card stock.  (my favorite vanilla card stock.)  And then matted it with that beautiful blue damask pattern paper.  I used foam tape at each corner, to help lift the sentiment off the front of the card.
I added a single floral button to the sentiment piece.  I cut off the shank with a pair of heavy duty scissors.  And viola! my card is complete.  And I am happy with how it came together.
Thank you so much for stopping by.  I hope you have a chance to play along with any or all of these beautiful challenge sites.  And remember, we all need time and space to get through some of life's messes.  Thank you for your support.


Monday, May 1, 2017

Rustic Love

Howdy.  I've been busy.  Busy with life.  But, I imagine you have, too.  I went out of town for several days (had a GREAT time) and then it was back to baking, crafting, cleaning, laundry, working, and taking care of my husband and dog.  See, life.
I took almost a week off from my normal chores and headed to Phoenix with 2 of my granddaughters and daughter.  It's dance competition time of year.  But, we headed out a few days early, to enjoy some fun activities, and some girl time {smile}.  We had a great time.  Spent sometime in the swimming pool, ate some great food, enjoyed some education spots (think Children's museum), and tried our hand at golf.  Yes, golf.  We spent that time laughing more than hitting hole in ones!  Ok, none of us hit a hole in one.  {smile}
Now, I have returned to reality.  The chores never stop, but moms know that.  Once back home, I had to get busy with a few cupcake orders and the never-ending chores.  I also wanted to get some crafts completed.  I am working on an altered art piece.  It's a wooden book-box.  But, I needed some direction, so I headed over to Mojo Monday to get a sketch going.  I loved their sketch so much so, that I actually used it for the cover of the box.  (this sketch is expired)  Here is what I made!


I am using some 'old' pattern paper.  I think, it may still be available at some on-line paper sources.  The Rustic Elegance collection, by Carta Bella, is a beautiful mix of mint, blush, green, and neutrals.  There are mixes of florals, chevrons, circles, text, and flourishes, with a country flair!  Mason jars, bicycles, floral wreaths, wooden plank backdrops, and so much more!
I used various pattern papers from this collection (Rustic Elegance) added a paper doily, some paper blossoms, and lace.  I added simple machine stitching around two of the main pieces, to give it a homespun look.  The sentiment 'love' is lifted off the piece with foam tape.  I haven't yet, but I am thinking of adding some sparkle to the paper blossoms.
I have added white wax to the wooden book box, and now I am adding my paper pieces.  Yes, I will photograph it once it's done.  Hopefully, I get a chance to work on it this week.  But, I have a few cupcake orders to work on late this week.  So, we will see how well I can manage my time.  {smile}
I hope you have a great week!  and Happy May Day!

Saturday, April 15, 2017

Printed Flowers in My Garden

Howdy.  I hope you are well.  I have been working on my 'month of happiness' goals.  I hope you have, too.  Or at least journalling what you are grateful/thankful for each week.   I have.   I think that, recognizing what has brought me joy, or what has lead me down the road to joy, makes my heart feel rejuvenated.  {smile}
I needed to make a card for a girl friend.  You see, I mailed her one a few weeks back, and it never made it to her house.  Super sad.  It was a 'Thank You' card, for her support on a fund raiser.  So, I set out to find some inspiration on the internet, to get me started.  I stopped by a few favorite challenge sites:  Crafting by Designs, Really Reasonable Ribbon, and Mojo Monday.
I stopped by Mojo Monday, first, to get the sketch!  I thought that their current sketch, looked easy to work with.  And, as always, it's 'user friendly'.

My next stop, was Crafting by Designs.  I wanted to see what their current challenge is:  Girls or Flowers.  How super sweet, and I can do flowers!

My last stop, was Really Reasonable Ribbon, and they have a Flower theme challenge.  But, remember, you need to include ribbon, lace, or trim on your paper craft!

and here is what I crafted:


Recipe:  this is a typical A2 size card (4 1/4" x 5 1/2").  The two pattern papers, is actually the same paper.  I used both sides {smile}.
I cut the pink pattern paper too short, (as illustrated in the sketch).  But, to me, it looked 'too short'.  So, I added a strip of champagne glitter paper, and used a lace edge hand-held punch, to create the decorative border.  I love how it looks.  The glitter paper adds the right amount of interest and sparkle.
I used my sewing machine to add a simple border around the pink pattern paper.  I then adhered the floral pattern paper.  I added a simple machine sewn border to that paper, as well.  
I sewn the seam binding to the card front, to secure it.  I just love how the sewing machine adds so much character and homespun look and feel, to a card.  {swoon}
I cut a rectangle of very vanilla card stock, and stamped my sentiment using soft suede classic ink.  I used a favorite stamp set from Paper Trey Ink; Choose Joy.  I adhered the sentiment piece onto a scrap piece of the champagne glitter paper, and adhered the sentiment to the card front with foam tape.  
I tied a double loop bow with the seam binding, and tied a vintage button to the bow with kraft twine.  To finish the card, I added a cluster of clear sequins to the right side of the card.
I hope that my friend likes the card I made her.  Unfortunately, if I don't purchase tracking, I can't count on the United States Postal Service to deliver my cards.  I have had bad luck, when it comes to mailing my hand made cards.  My cards require extra postage, and require hand canceling, and they seem to get 'lost' at the post office.  How frustrating, and annoying.  So, I won't focus on the lack of professionalism, or providing the service that I have paid for.  Instead, I will look at this as an opportunity to hand deliver my card to my friend {smile}!
  

Sunday, April 9, 2017

Shabby Green Bingo

~ second post today ~

Howdy!  I shared my pink version of this card, in an earlier post today.  But, now I want to share the green version with you!
As I said earlier, I need to make 16 cards, to say 'Thank You' to various folks who help support the North Valley Academy PTO, and variety is the spice of life.  Right?
I stopped by Mojo Monday to see their current sketch.  And I have to say, it's pretty exciting!  The possibilities are truly endless.  You can use either rectangles to showcase pattern papers, embossed papers, text papers, emphoria, and so much more.

and here is what I made:


I am also entering this card in another card challenge:  Word Art Wednesday.  Their challenges are: Anything Goes & Family Friendly.  So, how can you say no to that?  The design team will certainly inspire you!

Recipe:  I used my favorite kraft card stock for the card base.  I just love this card stock.  The color, the feel, the ease of work.  Everything of it!  I added a matt of very vanilla card stock, by Stampin' Up! to give my main piece some contrast.  
I used digital papers, for all of my pattern papers.   I distressed the edges of all the papers with tea stain ink.  I adhered the pink floral paper onto the very vanilla card stock, and then added a machine stitch border.
I layered a floral tag and a bingo card off center, and angled in two different orientations.
I hand stamped the sentiment for my horizontal piece.  I used a very old stamp set by Technique Tuesday.  I added a banner edge to give the sentiment some visual interest.  
I replaced the circle element with a multi-loop bow.  I tied a vintage kraft button, using kraft twine to the bow.
Viola!  Not a 10 minute card, but not too incredibly daunting to make over a dozen cards.   And yes, I made a green version and a blue version.  Variety is the spice of life, right?

Thank you for looking!


Shabby Pink Bingo

Howdy!  I've been busy training for a few races, but you know me, I can always carve time into my day for a little crafting and baking {smile}!
Today, I did some paper crafting!  I need to make 16 cards, to say 'Thank You' to various folks who help support the North Valley Academy PTO.  So, I set out to get some inspiration.
I stopped by Mojo Monday to see their current sketch.  And I have to say, it's pretty exciting!  The possibilities are truly endless.  You can use either rectangles to showcase pattern papers, embossed papers, text papers, emphoria, and so much more.

here is what I made:


I am also entering this card in another card challenge:  Word Art Wednesday.  Their challenges are: Anything Goes & Family Friendly.  So, how can you say no to that?  The design team will certainly inspire you!

Recipe:  I used my favorite kraft card stock for the card base.  I just love this card stock.  The color, the feel, the ease of work.  Everything of it!  I added a matt of very vanilla card stock, by Stampin' Up! to give my main piece some contrast.  
I used digital papers, for all of my pattern papers.   I distressed the edges of all the papers with tea stain ink.  I adhered the pink floral paper onto the very vanilla card stock, and then added a machine stitch border.
I layered a floral tag and a bingo card off center, and angled in two different orientations.
I hand stamped the sentiment for my horizontal piece.  I used a very old stamp set by Technique Tuesday.  I added a banner edge to give the sentiment some visual interest.  
I replaced the circle element with a multi-loop bow.  I tied a vintage kraft button, using kraft twine to the bow.
Viola!  Not a 10 minute card, but not too incredibly daunting to make over a dozen cards.   And yes, I made a green version and a blue version.  Variety is the spice of life, right?
Thank you for looking!


Sunday, April 2, 2017

Harmony & Grace Card

~ second post today & photo heavy ~

Howdy!  I needed to make a card for a special friend, so I set out to find some inspiration.  And you know I found some! {smile}
My first stop is Mojo Monday.  Because let's face it, they have some great sketches, and the design team will certainly inspire you! (I turned the sketch 90 degrees)

I also stopped by As You See It Challenge.  Their current challenge is Spring has Sprung.  How super fun is that?  And the best part, you get to decide what spring means to you!  Me, I see it as a 'new' time.  Flowers, snow melting, more sunshine.  Everything fresh!  (weathered wood, blossoms, distressed elements, and a little sparkle)

I also stopped by Word Art Wednesday for their current challenge - Anything Goes & Family Friendly.  This creative and inspirational challenge site gives you a free bible scripture that you can use, but is not required.   (I'm using an inspirational sentiment and thought it fit perfectly with this design team.)

And finally, I stopped by Brown Sugar Challenge, for their current challenge - Anything Goes.  Because let's face it, this design team is creative and very innovative!

and here is what I created:


spring to me, means exposed weathered wood and blossoms


Recipe:  This is a typical A2 size greeting card: 4 1/4" x 5 1/2".  I used kraft card stock as the card base, because let's face it, the color is just so creamy, and sweet!
I used one pattern paper, blossom pattern paper from the Harmony Collection by Bo Bunny.  I just love this weathered wood looking paper!  So sweet, and shabby chic!
I used the weather wood side for the large panel, and the blossom print for the main panel.  I machine stitched them together.  I sewn a purposefully sloppy double border stitch.  I thought it adds some depth to the weathered wood print.  


I wrapped some cream lace trim and Lyric Rose seam binding around the card front.  I also machine stitched these two trims to the card front, in place of adding adhesive.  I tied a single bow with the lace trim and layered a double bow tied in the seam binding.  I tied a vintage cream button with kraft twine and added it to the stack of bows.  
I stamped my sentiment in soft suede classic ink, onto cream card stock by Paper Trey Ink.  I used the Scripture Medley 4 stamp set by Verve.  (I 'won' this stamp set from a challenge-yahoo!)  I cut the sentiment into a rectangle, and matted it with a scrap piece of the Harmony Collection paper.  I added a piece of a paper doily to the bottom of the sentiment piece.  Then, I added some zig zag stitching to the sides of the sentiment piece.  I just love how these little touches gave my card a shabby chic look and feel.  {smile}
Finally, I added two embellishments, I felt conveyed the shabby chic look: a lock from Melissa Frances.  The white, distressed embellishment just looks at home here! {smile} And who doesn't like a little sparkle?  So, I added a glitter heart!  You know, my heart is locked in shabby chic!  {smile}.  
Thank you for looking.  I hope that you get a chance to play along with any/all of these challenges, and find some peace and happiness creating!  I think it does a lot of good for our souls.  {smile}  Have a great day! and hopefully you can stop by again soon!


Saturday, April 1, 2017

Vintage Label For You Card


Howdy!  I needed to make a card for a shopper of my Etsy shop {HERE}.   So, I stopped by an all favorite challenge site: Mojo Monday.  They have a wonderful sketch challenge.  But, then again, they always do!  The folks @ Mojo Monday have easy, user-friendly sketches.

See what I mean about this sketch?  Beautiful to work with.  
I also stopped by another favorite challenge site:  Word Art Wednesday.  Their design team will certainly inspire you to play along!


I am also entering my card in a 'new to me' challenge site:  Eclectic Ellapu.  And their current challenge is Shabby Chic or Vintage.  You will certainly be inspired by this creative design team.


and here is what I made:


Recipe:  this is a typical A2 size card: 5 1/2" x 4 1/4".  All the edges of the papers have been distressed with tea stain ink.
I used a long ago pattern paper from My Mind's Eye 2.  I just love this shade of pink gingham pattern.  And the other side of this pattern paper, is just as stunning: the pink floral pattern.  {smile}  This paper is so me!       I cut the formal pattern paper one inch smaller than the pink gingham pattern paper.  I machine stitched them together, to add character.       I wrapped some pale pink seam binding around the front of the card, and tied a multi-loop bow.  I love seam binding.  It looks vintage, shabby chic, and simply soft and pretty!      I added a scrap piece of ledger paper for my focal piece.   I tucked a white paper doily in behind the ledger paper on the right side.  I wanted this piece to hold my sentiment, and not be the sentiment.  So, I stamped a fancy frame in soft suede classic ink, onto  card stock.  I used a retired stamp set by Stampin' Up! Vintage Labels.  I also used a sentiment stamp from the same set, and stamped For You in basic black classic ink, inside the frame.  I used the extra large oval punch, by Stampin' Up! to create my sentiment piece.  I adhered it to the card front with foam tape, to 'lift' the sentiment oval off the front of the card.           I wanted to had more of a homespun look and feel, so I added a small fabric 'rose' and a pair of cream vintage buttons tied with kraft twine.            Well, I hope that Kathey likes this card, as its already in the mail, heading her way! {smile}
I hope that you get an opportunity to play along with the folks @ Mojo Monday, Eclectic Ellapu, and Word Art Wednesday.


Sunday, March 26, 2017

Thank You in Primrose


Howdy!  I needed to make a few Thank You cards, and set out to find some inspiration.  You know me, I have my favorite challenge sites.  So, let's get started.
My first stop was Mojo Monday Challenge.  They have very 'user-friendly' sketches, and this week, was no exception.  

Now, I needed a little more inspiration.  So, I stopped by Candy Floss Challenge.  They have a great inspiration mood board.  Beautiful colors, and images.

And a little more direction.  I stopped by the Really Reasonable Ribbon Challenge.   Their current challenge is: Spring/Easter, with a ribbon, trim, or lace required element.  I can do that!

and here is what I made:
Typical A2 size card: 5 1/2" x 4 1/4"

Recipe:  I used kraft card stock for the card base.  I just love this warm kraft color.  For the pattern paper, I used a new paper collection from Bo Bunny - Primrose.  
The first layer (matt) is this beautiful soft green honeycomb pattern.  I love the subtle pattern, but the soft green spring-like color is just beautiful.
My favorite pattern paper in this collection, is this stunning rose and polka dot pattern paper.  The roses are a mix of cream, soft pink, and a soft green.  The colors say, 'Springtime' to me.  But this pattern paper also has a romantic, shabby chic, look.  I machine stitched a purposefully sloppy double border stitch all the way around.  I just love the homespun look, this gives my cards.
I used the medium pink trefoil pattern, for the strip across the card.  I machine stitched a white cotton eyelet trim, and spring green satin ribbon.  I just love how this ribbon matches the green color scheme in this pattern paper collection.
I added a cream delicate paper doily to the back of my large circle.  To make it the base to the paper blossom, I stamped the leaves in two coordinating green colors (pistachio, and pear).  I first sprayed my paper blossom with shimmer mist, to give it some sparkle.  (I love sparkle).  I hot glued the blossom to the large paper circle.
I stamped my sentiment in burlap ink.  I first cut the decorative shape from a die, and then stamped.  I added a bow to the card front, and finally a trio of flat back pearls.  Viola!


Thursday, March 23, 2017

Coffee, Friends, and Birthdays

Howdy.  Me?  I've been crafting.  {smile}  Doesn't saying that statement, just make you happy?  It makes me happy!  One of my best friends, had a birthday last weekend.  And we celebrated today at work.  By 'celebrating' I mean, we had sweets, and ordered lunch.  I was going to make cupcakes, but she loves my fudge-y brownies.  So, I made brownies.  {smile}
I also made her birthday card.  I know that you are not surprised by that.  Right!  I was 'shopping' at a local paper crafting shop, when I spotted this new paper line by Julie Nutting French Flea Market.   This beautiful pattern paper collection, is perfect for both female birthday cards and Mother's Day cards.  
I stopped by one of my favorite sketch challenge sites: Mojo Monday.  This sketch challenge site is very user-friendly, and the design team will certainly inspire you with their creativity!

I love the large circle.  You know I instantly thought: doily!
I also stopped by another favorite challenge site: Word Art Wednesday.  I especially love this challenge site, because of their faith, creativity, and inspiration.    This challenge site, has Anything Goes & Family Friendly.  

and here is what I crafted:


Let me first apologize for the photography of this card.  I made the card @ 4a, and there was no natural sunlight.   And I was not able to download these images until after I delivered the card.  {frown}
Recipe: this is a typical A2 size card: 5 1/2" x 4 1/4".  I used the 'Accessories' paper for the main panel of this card.  I cut a narrow strip of 'Robe de Soiree' paper across the lower third of the card.  
I then sewn a simple border stitch around the card front.
For my large circle, I used a vanilla paper lace doily.  I thought it added a feminine accent.
I wrapped some pale blue seam binding around the card front, and tied a simple bow to the far right of the card.
I cut a scallop square from a die, using whisper white card stock.  I stamped my sentiment onto this scallop square.  I used the Prefect Blend stamp set by Stampin' Up! for the sentiment and the coffee cup(s).  I matted the sentiment square onto 'Belles Fleurs' paper.  
For the coffee cups, I did some stamping and fussy cutting.  I stamped the cups onto whisper white card stock.  And layered different pattern papers onto the stamped cups.  
For the bottom cup, I used back side of the of the 'Robe de Soiree' pattern paper.  I just love the blue damask print.  I used a scrap piece of the same paper for the coffee cuff.
For the top cup, I stamped the coffee cup onto 'Belles Fleurs' pattern paper.  I wanted to repeat the pink polka dots.  I stamped the coffee cuff onto a piece of 'Lettre D'Amour' pattern paper.  I adhered this cup to the card front with foam adhesive.  For a final touch, I added a tiny button to each coffee cuff.
Thank you for looking.  Again, my apologizes for the crummy photos.