Showing posts with label kraft twine. Show all posts

Monday, April 10, 2017

Shabby Blue Bingo

I loved the pink and green version of this card, so much so, that I decided to make a blue version.  How wonderful! right?
Well, it is too late to enter this card in the Mojo Monday card challenge like the previous cards, so I am entering this card in two different challenges:  Brown Sugar Challenge and Crafting by Designs. The wonderful folks over @ Brown Sugar Challenge, have an Anything Goes challenge.  So, create something beautiful and enter!
The creative folks over @ Crafting by Designs, have a Spring Edition Anything Goes challenge.  Super fun! and why not make something 'spring-like' and enter!

and here is what I made:


Recipe:  I used my favorite kraft card stock for the card base.  I just love this card stock.  The color, the feel, the ease of work.  Everything of it!  I added a matt of very vanilla card stock, by Stampin' Up! to give my main piece some contrast.  
I used digital papers, for all of my pattern papers.   I distressed the edges of all the papers with tea stain ink.  I adhered the pink floral paper onto the very vanilla card stock, and then added a machine stitch border.
I layered a floral tag and a bingo card off center, and angled in two different orientations.
I hand stamped the sentiment for my horizontal piece.  I used a very old stamp set by Technique Tuesday.  I added a banner edge to give the sentiment some visual interest.  
I replaced the circle element with a multi-loop bow.  I tied a vintage kraft button, using kraft twine to the bow.
Thank you for looking!  I'm off to make some cupcakes for a meeting tomorrow.


Sunday, April 9, 2017

Shabby Green Bingo

~ second post today ~

Howdy!  I shared my pink version of this card, in an earlier post today.  But, now I want to share the green version with you!
As I said earlier, I need to make 16 cards, to say 'Thank You' to various folks who help support the North Valley Academy PTO, and variety is the spice of life.  Right?
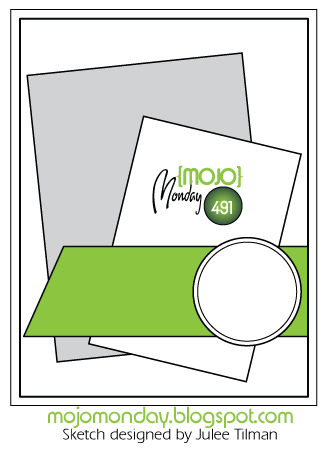
I stopped by Mojo Monday to see their current sketch.  And I have to say, it's pretty exciting!  The possibilities are truly endless.  You can use either rectangles to showcase pattern papers, embossed papers, text papers, emphoria, and so much more.

and here is what I made:


I am also entering this card in another card challenge:  Word Art Wednesday.  Their challenges are: Anything Goes & Family Friendly.  So, how can you say no to that?  The design team will certainly inspire you!

Recipe:  I used my favorite kraft card stock for the card base.  I just love this card stock.  The color, the feel, the ease of work.  Everything of it!  I added a matt of very vanilla card stock, by Stampin' Up! to give my main piece some contrast.  
I used digital papers, for all of my pattern papers.   I distressed the edges of all the papers with tea stain ink.  I adhered the pink floral paper onto the very vanilla card stock, and then added a machine stitch border.
I layered a floral tag and a bingo card off center, and angled in two different orientations.
I hand stamped the sentiment for my horizontal piece.  I used a very old stamp set by Technique Tuesday.  I added a banner edge to give the sentiment some visual interest.  
I replaced the circle element with a multi-loop bow.  I tied a vintage kraft button, using kraft twine to the bow.
Viola!  Not a 10 minute card, but not too incredibly daunting to make over a dozen cards.   And yes, I made a green version and a blue version.  Variety is the spice of life, right?

Thank you for looking!


Shabby Pink Bingo

Howdy!  I've been busy training for a few races, but you know me, I can always carve time into my day for a little crafting and baking {smile}!
Today, I did some paper crafting!  I need to make 16 cards, to say 'Thank You' to various folks who help support the North Valley Academy PTO.  So, I set out to get some inspiration.
I stopped by Mojo Monday to see their current sketch.  And I have to say, it's pretty exciting!  The possibilities are truly endless.  You can use either rectangles to showcase pattern papers, embossed papers, text papers, emphoria, and so much more.

here is what I made:


I am also entering this card in another card challenge:  Word Art Wednesday.  Their challenges are: Anything Goes & Family Friendly.  So, how can you say no to that?  The design team will certainly inspire you!

Recipe:  I used my favorite kraft card stock for the card base.  I just love this card stock.  The color, the feel, the ease of work.  Everything of it!  I added a matt of very vanilla card stock, by Stampin' Up! to give my main piece some contrast.  
I used digital papers, for all of my pattern papers.   I distressed the edges of all the papers with tea stain ink.  I adhered the pink floral paper onto the very vanilla card stock, and then added a machine stitch border.
I layered a floral tag and a bingo card off center, and angled in two different orientations.
I hand stamped the sentiment for my horizontal piece.  I used a very old stamp set by Technique Tuesday.  I added a banner edge to give the sentiment some visual interest.  
I replaced the circle element with a multi-loop bow.  I tied a vintage kraft button, using kraft twine to the bow.
Viola!  Not a 10 minute card, but not too incredibly daunting to make over a dozen cards.   And yes, I made a green version and a blue version.  Variety is the spice of life, right?
Thank you for looking!


Thursday, November 24, 2016

Thanksgiving Thank You Card

Howdy.   I am still crafting for my last holiday craft fair.  December 3rd, @ La Cueva High School, in Albuquerque, New Mexico.  But, I did stop for an evening to bake some pies that were ordered for today, and of course I had to make a Thank You card to go with them!
Typically, my baked goods are hand-held, aka small.  But a wonderful co-worker asked for 2 slab pies.  A slab pie, is a pie made in a jelly roll pan.  So, it has the ease of a sheet cake, but it's pie!  When we have pot lucks at work, and I am asked to bring dessert, I bring either cupcakes or slab pie.
I made my version of SummerTime Harvest Pie.  This pie has strawberries, blackberries, blueberries, red raspberries, green apples, and peaches.  I omit the top crust for a sour cream topping that is baked.  I feel that this keeps it 'light and sweet'!
here is the card:


When I was photographing this card @ 5a yesterday (no sunshine or full moon light available) I just loved how my white sweater Starbucks coffee-to-go ornament looked sitting next to the card, so I didn't edit it out.  I'm happy I left it.  I think it helps add some warmth to my photo.  {smile}
Recipe:  I used kraft card stock for the card base.  The heavy weight card stock is from Paper Trey Ink.   The polka dot pattern paper, is actually a digital paper that is printed on Linen card stock, by Paper Trey Ink.  
I sponged crumb cake classic ink, by Stampin' Up! to the edges of all the papers and the doily.  I printed a sheet of floral tags (digital), and sentiment cards (digital) onto whisper white card stock, by Stampin' Up!  I layered the sentiment card on top of the floral tag, but left the blossom at the bottom showing, along with the text at the top of the tag.
I added a simple, single border stitch with my sewing machine around the top portion of the card.
I sewn a 'messy' pleat with a 2-inch wide cream cotton embroidered trim.  I then sewn a scrap piece of this pale pink seam binding over the cotton trim.  I didn't wrap the cotton trim or the seam binding around the card.  I wanted it left 'messy' with unfinished edges.
I tied a triple bow with the same pale pink seam binding.  I tied a snowflake dangle embellishment with kraft twine around the seam binding bow.  This 'bow' is adhered to the card front with hot glue.
Viola! done.  Not a ton of embellishments, and not a lot of 'stuff', and my card is done.  A 'quick' (for me) card that was completed in just under an hour.  
I tied each pie with a pink ribbon, and added a tag from the same sheet of tags I printed for this card.  That way, it all looks like it belongs together.  {smile}


Sunday, May 22, 2016

Provence-Style Rose

Howdy!  Hope this post finds you well, and enjoying your weekend.  Me, busy as a bee.  But, what's new.  I always wait patiently for the summer, because I tell myself, 'life will slow down, and I can catch my breathe.'  And we all know that is so far from the truth.  No one's life 'slows down' during the summer.  Actually, it is quite opposite.  We are all in a rush to get in some vacation time, and attend as many cook outs as possible.  {smile}
I did however, take some time for myself this morning to create a card for a challenge or two.  (ok, 3) So, here we go!  I stopped by the creative challenge site: Crazy 4 Challenges.  Their current challenge is a sketch.  Awesome!
I turned the sketch 90 degrees to the left

My next stop, was the beautiful challenge site:  Scrap Magic.  They always have great inspiration boards.  Their current challenge is to craft in Provence Style.  {I'm going to try it}


And last, I stopped by the Brown Sugar Challenge site.  Their current challenge is - Anything Goes.

here is what I crafted:


Recipe:  I used kraft card stock for the base of the card.  I love the rustic look of this paper.  I used two different pattern papers, and both are years old.  (sorry, I'm trying to use what I have on hand.)
The main panel is a Valentine's day theme paper from My Minds Eye.  It has that weathered look to it.  The blossoms are done in a faint reddish purple color.  I used the edge of my scissors to distress the edges.  I then swiped some white canvas ink over the edges.  And finally, I added some machine stitching.  
The grayish polka dot pattern paper is from a Christmas collection.  (my scrap piece no longer had the manufacture name on it.  If I had to guess, I'd say another My Minds Eye pattern paper.  I matted that piece with a scrap piece of kraft card stock.  A little more machine stitching.
The cotton-rhinestone piece is actually from Prima.  And probably 6/+ years old.  I still have 5 of these left, in a cream, a brown, and this beautiful rose color.  [I know this sounds like I'm a hoarder, but, really just a collector.]  I painted a wooden button with white acrylic paint, and dunked it into a tub of glitter.  Once the paint was dry, I took a small piece of sand paper to the button, to rough it up a bit.  I tied the button to the card front with kraft twine, from Paper Trey Ink.  I tied a double bow between the card and button.
I added a scrap piece of cotton trim just above the cotton-rhinestone piece.  I felt that the card needed another layer of fabric.  
My sentiment piece is hand-stamped and machine cut.  I used a coordinating stamp and die set from Amuse Studios for that piece.  [Vintage Labels is the die & stamp set]  I stamped the outline, and sentiment with basic grey classic ink, by Stampin' Up!  The Hand Scripted sentiment stamp set comes with various words to mix and match.  The card stock I used for the sentiment piece, is actually the back side of the weathered blossom pattern paper I used for the main panel.  The grey streaking is a distressed look for the paper.
I added a white resin piece from Melissa Frances.  I thought the basket of blossoms was a perfect fit for this card.  I used a retired Pale Plum marker, by Stampin' Up! to color two blossoms and the bow. I thought this color of purple matched the cards overall look perfectly!  And finally, I added a trio of pearl halves.  {smile}

Thank you for stopping by.  I hope that I have inspired you to create something beautiful or simply to play along in any or all of these challenge sites!


Tuesday, May 3, 2016

Sweet Rustic Mother's Day Card

~ photo heavy post ~

Howdy!  and welcome back to my little slice of blog-land.  I've busy crafting, and I love it!  It is very good for my soul!  As many of you know, Mother's Day is right around the corner!  And I wanted to make something pretty, soft, vintage, country, and over all sweet!  So, while surfing the internet, I stumbled upon two (new to me) paper craft challenge sites, and I'm anxious to play along! So, without further ado, let's get to it! {smile}

I stopped by an old favorite challenge site to get a sketch:  Mojo Monday Sketch Challenge.  These folks have some of the most user-friendly sketches out there!  And the design team will inspire you if you need it.  {smile}  Oh, and it's prize week!

My next stop is a (new to me) challenge site:  Crafting When We Can Challenge.  Their current challenge is: add flowers.  Oh my, YES!  The design team varies in styles, so I am sure that you will be inspired to play along with this talented group.
My last stop, is another (new to me) challenge site:  Robyn's Fetish Challenge.   This challenge is: Mother's Day Cards.  Thank you ladies, that's right up my alley!  This lovely group of designers will certainly inspire you with their soft, tender style!

and here is what I have created:


and different view:


Recipe:  The card base is crumb cake card stock by Stampin' Up!  I just love this soft kraft color and heavy weight card stock.  The perfect card stock for your cards!
I used Ocean Tides card stock, by Paper Trey Ink, for the matts.  I just love this different shade of blue.  {smile}  The wood grain/floral 'pattern paper' is actually a digital paper.  I love the colors and the sweet rustic look.    The pale kraft star pattern paper is from Tilda.    Ok, we'll start from the top and work our way down the card.

The canvas banner piece is from Maya Road.  I adhered it to the card front with hot glue just at the top.  I wanted it to have some movement.
I added a trio of paper blossoms.  Each blossom was painted with white acrylic paint and then dunked in a tub a dazzling diamond glitter, by Stampin' Up!  I adhered the paper blossoms to the card front with more hot glue.
The large white blossom and the pale blue blossom are from a big box store, different Reflections collections.  The tiny white blossom is from Kaiser Krafts.  To help add a little bling, I added a trio of gold sequins to the top half of this card.  Yeah, they are tucked in, to reveal a sweet surprise.
I stamped the sentiment onto very vanilla card stock, by Stampin' Up!  I stamped the sentiment in Early Espresso classic ink.  I used a very retired stamp set:  Something to Celebrate.  I used a photo corner punch to create the banner ends.  I adhered the sentiment piece to the card front with foam tape.
For the lower half of the card, I layered a trio of different materials.  I cut a large scallop border out of a scrap piece of pale pink polka dot pattern paper with my Tasteful Trims die, by Stampin' Up!.  I added a strip of white cotton trim just above the pink polka dot pattern paper.  And then I wrapped a piece of this beautiful pale pink seam binding, that I purchased while junking in Phoenix.
I created a multi-loop bow with the seam binding.  I tied an altered wooden button* with kraft twine. (*white acrylic paint and glitter)  I created my own tag with the Tiny Tag stamp set by Paper Trey Ink.  I stamped the 'tag' in ocean tides ink.  (It is actually a second generation stamp) and I stamped the 'XOXO' in crumb cake classic ink.  I fussy cut the tag with a pair of small scissors.  I used sand paper to smooth out the rough edges of my hand cutting.  Strung the kraft twine through the tag and tied it to the multi-loop bow, and altered wooden button.  I cut a too long length of kraft twine, so I added a single loop of twine behind the seam binding bow.  I added a small piece of foam tape behind the tag, so it would be anchored to the card front.   I also added a pair of gold sequins around this beautiful bow.  {smile}
For those of you who are frequent visitors to my blog, you are probably wondering about the missing machine stitching.  And, all I can say, is me too!  I actually ran out of thread, and wasn't able to pick some up before creating this card.  So, I am trying to embrace this 'plain jane' card.
Thank you for stopping by.  I hope I have inspired you to play along with all or any of these challenges.  Hopefully your week is off to a great start!


Tuesday, March 15, 2016

Happy Birthday Mom; Card

Hello, and Happy Birthday Mom!  I made a birthday card a few weeks ago, and have kept it under wraps.  My mom reads my blog.  {smile}  The birthday card I made, is, yeah, for my mom.  Her birthday is actually today.  So, I can 'share' my creation with you today.  My mom's Birthday card will be in her snail mail box today!  Sure happy and sure excited for her!  Because who doesn't love snail mail that isn't a bill or some junk mail [that doesn't even make it in the house]. {smile}


Ok, this card is an A2 size card: 4 1/4" x 5 1/2".  Love this size!  So, let's get right to business, so you know how I made it, and you can use some of these techniques yourself.
For the card base, I used Wisteria Wonder card stock by Stampin' Up!  It's a beautifully heavy weight card stock.  I used a light weight card stock by Amuse Studios in Taupe for the matt.  I used three different, but coordinating pattern papers from Tilda for the card.  I added a pale grey blue floral pattern paper for the main panel.  I added a darker blue tiny floral pattern paper and a pink leaf pattern paper.  [I matched the pinks in the blossoms when selecting the pattern papers.]

I used the edge of my scissors to rough-up the edges of the paper panels.  I did sponge some kraft ink onto the edges to help convey the 'time' or 'age' of the card.  I also used the edge of the scissors to create the 'rip'.  I added a polka dot pattern paper in that area.  I wanted something contrasting, but coordinating.  {smile}
I added a purposefully sloppy double border with my sewing machine.  [I love this look.]  I added some sponging on top of the stitching, to help them 'pop'.  
I had a scrap piece of white cotton trim that was tea dyed, so I stitched that piece onto the front of the card too.  
I strung kraft twine through a trio of lavender moon vintage buttons by PaperTrey Ink and adhered them to the pink leaf pattern paper.  I kept the twine long on purpose.  
The TAG:  this is the focal piece, and one that I'm super happy with {smile}.  I used a scrap piece of taupe card stock for the tag base.  I tied a small piece of wisteria wonder seam binding through the hole, but wanted something more.  so I added a bow tied with lavender thin tinsel.  I love how it adds some sparkle and softness to the over-all whole look of the card. {smile}

My sentiment was created with heat embossing and simple stamping.  I stamped the sentiment in versa mark onto vellum card stock and added silver embossing powder and heat embossed.  I just love how soft and elegant the silver embossing looks.  I used the hand script stamp set by PaperTrey Ink.  I added my adhesive to the back of the vellum piece where the sentiment is to help 'hide' the adhesive, which can be seen through this semi-translucent card stock.  I stamped the 'happy birthday' onto whisper white card stock in basic black classic ink, using Teeny Tiny wishes stamp set by Stampin' Up!.  Then I fussy cut the sentiment and adhered it to the vellum piece.  
I added a gift card to the inside of the card.  That way, my mom can celebrate HER day, anyway she wants: shopping, dining, relaxing at the spa, or simply going to afternoon tea with girlfriends.
Happy Birthday MOM!  I hope your day is fabulous and you get a chance to do what your heart desires.  Love you!
Thank you for stopping by and taking a moment to look at what I have been creating!  Enjoy your day! and come back soon.  I'll be sharing more.


Sunday, November 29, 2015

Green & Red Poinsettia Gift Bag

Howdy.  I have been having such a great time making these little fabric scrap Christmas 'trees' that I just had to make another. {smile}.  And today, I am on my second post of these gift bags.  I used the same fabric as the previous post, but this time I created a 'green' bag.
I am entering this bag into these three challenges:  Die Cuttin DivasInky Impressions Challenge, and Crafting By Desings.   
The wonderfully talented ladies over @ Die Cutting Divas have a great holiday preparations challenge:  Tag, Bag, or Box.  Sounds perfect! and let's just admit it, something we need to get crafting, anyways.  {smile}
I am playing along with the creative design team over @ Inky Impressions Challenge.   Their current challenge is to use: Traditional Christmas Colors: Red, Green, and Kraft.  I believe this is right up my alley, so to speak.  The design team has done a wonderful job at providing us with some inspiration.  
I am also playing along with the ever inspiring design team over @ Crafting By Designs.   Their current challenge is themed: getting ready for Christmas.  I think all of us can create something beautiful to play along with their challenge, too. {smile}
Finally, I am using the inspirational photo from the card Concept.  I am not 'playing' along with their challenge, due to the fact, that their challenge site is for cards, and not projects.  But their inspirational photo is very beautiful, home-y, and a bit vintage-country. {smile}

and here is my Green version of my holiday gift bag:


a close-up of the 'tree'
Recipe:  I used green card stock to create the bag shape.  It measures 4 3/4" x 12".  A nice size for that special holiday gift.  {smile}
To create the 'tree' I tied on strips of fabric from a fat quarter set by Stampin' Up!.  It is retired.  But I love the red blossoms, the green accents and the brown patterns.  Very pretty, vintage-y, and a bit country.
I also added some crochet trims, tree tinsel, green velvet ribbon with red satin backing, and a brown gingham ribbon.
The fabric, trims, and ribbons are tied to a kraft striped paper straw.  I topped my 'tree' with a single red paper rose.
I tied on a trio of vintage buttons with kraft twine.
The background and sentiment are hand-stamped using crumb cake classic ink.  I just love how soft and 'innocent' this color looks on vanilla card stock.
I love to add some machine stitching to my hand-crafted cards and projects.  I think it 'finish'es a project, and adds that special homemade touch.  {smile}  I also added some machine stitching to the sentiment rectangle.  
I hope you create something beautiful and holiday inspired, so you can play along with these challenges, too!

Enjoy the rest of your weekend.   And yeah, I have a few more gift bags to share with you.  But, I'll leave those for another post.


Christmas Roses Gift Bags

Howdy.  I hope this post finds you all well, and busy making stuff {smile}.  Me, of course!  I had such a great time making my previously posted fabric scrap 'trees' that I decided to make several more, using various fabric scraps.  Today, I want to share a new red gift bag.
I am entering this bag into these three challenges:  Die Cuttin Divas, Inky Impressions Challenge, and Crafting By Desings.   
The wonderfully talented ladies over @ Die Cutting Divas have a great holiday preparations challenge:  Tag, Bag, or Box.  Sounds perfect! and let's just admit it, something we need to get crafting, anyways.  {smile}
I am playing along with the creative design team over @ Inky Impressions Challenge.   Their current challenge is to use: Traditional Christmas Colors: Red, Green, and Kraft.  I believe this is right up my alley, so to speak.  The design team has done a wonderful job at providing us with some inspiration.  
I am also playing along with the ever inspiring design team over @ Crafting By Designs.   Their current challenge is themed: getting ready for Christmas.  I think all of us can create something beautiful to play along with their challenge, too. {smile}
Finally, I am using the inspirational photo from the card Concept.  I am not 'playing' along with their challenge, due to the fact, that their challenge site is for cards, and not projects.  But their inspirational photo is very beautiful, home-y, and a bit vintage-country. {smile}


and here is my Red Holiday bag:


close-up of the 'tree'
Recipe:  The outside of the bag measures 4 3/4" x 12" .  The 'bag' itself measure 4 1/2" x 9 1/2".  For the base of the gift bag, I used a rich, dark red card stock, very similar to Cherry Cobbler card stock by Stampin' Up!.
I used very vanilla card stock for the main panel, and matted that with my favorite Kraft card shock by Paper Studios.  I used a snowflake stamp set to hand-stamp the snowflake background in crumb cake classic ink.  I just love how 'soft' this color is on vanilla.  {smile}  I added a single border stitch with my sewing machine.  I think it really adds a 'finished' and homespun touch to my projects.
I used a kraft striped paper straw as my tree trunk/branch.  And then I just tied various fabrics, crochet trims, ribbons and trims to the straw.  I then added my tree topper (red velvet bow), and vintage buttons tied with kraft twine.
I trimmed the fabric strips in varying lengths to create the 'tree' shape.  I used hot glue to adhere the 'tree' to the snowflake stamped panel.
The sentiment is from a homespun holiday stamp set by Paper Trey Ink.  And then finally, I added a wooden snowflake to the sentiment rectangle and topped it off, with a green faux half pearl.

I finished the bag with a decorated mini clothes pin, and a gift tag.
Thank you for looking.  I hope you have been inspired to craft something beautiful for your holidays.


Monday, July 27, 2015

Shabby Girl's Life; Book

Howdy, and welcome.  I set back into my craft room, to create another spiral bound book.  I wanted to make something girly, shabby-chic, and a pretty place to jot down what makes you happy!  To help give me a direction, and a bit of inspiration, I headed over to a favorite sketch challenge site @ Cardabilities .  The design team, will certainly give you some inspiration and the sketches are so easy to work with.  
Here is the current challenge (soon to close)
I found this sketch a breeze to work with.  The simplicity of it, allows you to do a little or a lot.  And the layers!  Who doesn't love layers?  I do!  And what about that sweet banner hanging across the top!  You know I had to use this sketch!  {smile}
and here is what I created:


I haven't bound my book yet, with the spirals.  Only because I haven't finished the covers.  And this challenge is closing soon!  I also haven't decided if I want to put the spirals at the ends, or add them to the center.  hmmm.  But, without the spirals, let me give you the recipe.
Recipe:  I used chip board for the cover.  I adhered pool party cardstock to the chipboard.  I just love this color of aqua blue.
The text pattern paper, is Melissa Frances.  I just love this paper!  Love it so much I bought a whole package of it!  Yep! 25 sheets of this one pattern paper.  I did a simple machine stitching along the border, and added a trio of zig zag stitches at the bottom right and upper left.  You know, to add some spice {smile}!
I layered the text pattern paper with a scrap piece of Bazzil pattern paper,  the Vintage Marketplace collection.  Love this collection of shady chic sweetness!  I did a double border with my sewing machine.  I added a half pink paper doily to the lower third of this pattern paper.  Then I wrapped a piece of mint lace trim, from Stampin' Up! to cover the doily seam.
I stamped my sentiment in basic black classic ink, on very vanilla card stock, both by Stampin' Up!.  I used a favorite stamp set; Favorite Memories by Technique Tuesday.  I cut the banner end with scissors.  I adhered this piece over the top of the lace trim.
I wanted to add a little something else, so I cut out a 1" circle of a thread label and tucked it behind the sentiment, but purposefully left the 'Handmade' visible.  I just love the aqua blue color with the typewriter font!
I hot glued the paper blossom, to the left of the sentiment.  I tied a kraft vintage button by Paper Trey Ink, to a multi-loop bow made of pale pink seam binding.  I hot glued this ribbon 'bundle' and tucked it in close to the paper blossom.
For the banner swag, I die cut a row of hearts, using the reverse side of the Bazzill pattern paper.  I also machine stitched this banner to the front of the cover.
I used a thread cutter to distress the edges of the pattern papers.  I also sponged kraft ink on all of the edges.  I haven't decided if I want to add some white paint and glitter to the paper blossom petal tips.
I haven't quite decided if I will be filling this spiral notebook with blank pages only, or adding a few pockets.  And, I'm not too sure how the spirals may 'alter' the cover.
Stay tuned, I might be able to finish this spiral notebook this week.  And yeah, it will be for sale in my Etsy shop once it is done.   Thank you for looking!


Tuesday, April 14, 2015

Appreciation : Card

Welcome.  If you are stopping by for the first time, please take a look around.  I love paper crafting, but mostly I make cards.  Not always.  My style is typically vintage country chic.  Its a mixture of shabby chic, vintage, and country charm.  You would almost think I live (and work) on a farm.  I don't.  I'd love to have some chickens and tend to my own bee hive.  But, maybe in another life, or when I retire {fingers crossed}.
I have a craft fair coming up, so I am spending my day in my craft room.  I want to make some gift card holders.  But, wasn't sure on the format.  So, I stuck with a card.
The super creative and talented DT over @ Brown Sugar Challenge have a wonderful current challenge:  distress.  I think I can do that {smile}.
here is what I created:


Let me start by saying, I just couldn't make up my mind on the sentiment.  So, I have added several.  Each sentiment has double sided tape on the backs, so you simply remove the protective strip and adhere the sentiment across the white bar on the decorative piece on the little goodie bag.  Super clever, huh?
Recipe:  I started with my favorite kraft card stock from Paper Studio.  I added two different pattern papers for the main panel.  Love the mix of texture and text.  I sponged the edges of the paper with a brown ink.
I added a strip of cream crochet trim and a strip of soft sky seam binding by Stampin' Up!.  Yeah, they are machine stitched.  I also stitched around the text paper.   I made a multi-loop bow out of the seam binding, and added it to the top of the card.  
I found these super cute tiny bags at a major discount store; I purchased them about 6 weeks ago.  I printed these beautiful digital image seed packet covers onto whisper white card stock by Stampin' Up!.  Cut them out, distressed the edges with my thread cutter, sponged brown ink on the edges, and adhered them to the bags.  

I tied a vintage button with kraft twine and hot glued it to the bottom of the bag.  
I purchased a box of these decorative small paper clips (regal clips) from a big box office supply store about 12 years ago.  (yeah, how ridiculous is that?  Anyways, I think you get 100 of them in a box, and I have a few left.)  I tied some soft brown bakers twine that I picked up in the dollar bin at a big box craft store.  Made a tiny tag, and tied this together onto the Regal clip.  

The digital paper I have, has 6 of these seed packet covers, so I am making 6 of these cards.  Each card will have a different color scheme that coordinates with the seed packet cover.  Each card will come with 4 of the sentiments below: happy birthday, thinking of you, thank you, and happy mothers day.  And then at least one other sentiment that goes with the word at the top of the seed packet.  

These little gems will be for sale at my booth at the craft fair at the beginning of May.  Stay tuned.  I will post photos of each card on my Facebook page, when I finish them.
Thank you for stopping by, and I hope you get a chance to play along with the ladies over @ Brown Sugar Challenge.


Friday, April 10, 2015

Grateful, for you : Card

Howdy!  Welcome.  I have a quick post this evening before I head to bed.  I was going to clean(ing) my craft table, to make space for a frenzy craft session this weekend, when I was stacking some scraps of digital pattern papers and a few scraps of trim, when a card came together!  I didn't use a sketch challenge or a color challenge or an embellishment challenge.  It just came together.  So, I distressed, machine stitched, heat embossed, glues, and voila!  I'm actually very happy with my little creation.  Start to finish it took 55 minutes!  Holy cow that's fast for me!


Recipe:  I used my new favorite kraft card stock from the big box store as my card base.  I added a text pattern paper from Paper Studio.  I just love this text paper.  They now make a white on black version too.  How super fun is that?
I machine stitched a floral wood pattern digital paper onto the text pattern paper.  I had several trim scraps on my craft table and they just kinda fell onto the stack.  So, I machine stitched them into place.  I knew I wanted a bow.  You aren't really surprised, are you? {smile}
So I also stitched some seam binding onto my trim stack.  I tied a multi-loop bow with the same pink seam binding, but it looked too flat, too pink, too blah.  So, I grabbed the golden tea dyed seam binding strip that was on my craft table and tied a bow with it.  Placed the pink bow on top, and it looked fabulous!  So, I grabbed my kraft twine and tied these two bows together.  I went digging into my button stash that sits on my desk.  {you know, when you are too lazy focused to get up and put things away.}  I think it looks pretty good.
I added a postage cancel stamp to the floral card.  But it needed something more, so I added some splatters.  I wanted to help bring out the gold in the tea dyed seam binding, so I heat embossed my splatters with antique gold embossing powder.  LOVE IT!
I wanted a sentiment, but didn't really have space, so I stamped and heat embossed my sentiment onto a scrap piece of vellum card stock that was already on my craft table.  I also used the stamp set i haven't put away yet, so it was already on my craft table.  I thought the sentiment banner needed a little something more, so I added some machine stitching to the wide open spaces of the sentiment.
I am super happy with my little quick card that came together while cleaning!  Thank you for stopping by!  I hope you have been inspired to craft something beautiful today!  Even if it is just for you! {smile}

Saturday, October 11, 2014

Happiness in Psalm

Welcome to my little slice of blog-land.  I hope this finds you well, and crafting!  I have a very sweet card I want to share with you today.  I had another package come in the mail recently, and just had to 'play'.  Another pattern paper collection from Tilda, a company in Sweden.  This pattern paper isn't 'Christmas' in theme, but rather has a sewing theme:  Happiness is Homemade.  
I needed a little focus, so I went to an industry staple:  Mojo Monday, to see this week's sketch:

Clean lines, nice size element pieces, easy to embellish.

But, I also wanted something very special.  So, I went to another favorite challenge blog:  Word Art Wednesday.  I have been stalking visiting their challenge site for sometime.  But only recently have I started playing.  Don't really know why, it just 'came upon me'.  My friend Christina says that the Lord is guiding me to share my talent.  All I know, is that I have become very fond of their challenge.  They provide a scripture each week.  They also explain what it means, and how to use the scripture in your life.  For the challenge, they want you to use the scripture as your inspiration.  You don't even have to use the scripture in your paper craft.  
This wonderful group of talented ladies is just a blessing.   Here is this weeks:


So, I combined the three.  Some beautiful pattern paper that just called to be cut, a wonderfully designed sketch, and some beautiful scripture.  Here is what I made:


Recipe:  The card base is crumb cake card stock by Stampin' Up!.  I just love the weight!  Nice and heavy to hold up an embellished card {smile}.  The matts are ripe avocado by Paper Trey Ink.  The largest piece of pattern paper isn't polka dots, its actually stars!  (Happiness is Homemade from Tilda.) Love the pale mint green color.  I did a 'sloppy' double border machine stitch.  I really wanted it to look homemade {smile}.  No pun intended.  The tiny script pattern paper is a scrap left over from a paper project I created in April.  I believe the company is My Mind's Eye.  And the beautiful floral pattern paper is also Tilda Happiness is Homemade.
I printed the scripture onto whisper white card stock by Stampin' Up!  I love using their white card stock for all my printing; either digital paper or word documents.  The card stock is a printer friendly weight, and for digital work the colors come out clean and crisp.
I took a piece of this pink crinkle satin ribbon I purchase while in Phoenix, and a piece of a beautiful white crochet trim and did a zig zag machine stitch across the front of the card.  The floral paper piece is adhered to the front of the card with foam tape to lift it off the front of the card, due to the crochet trim.
I made a multi-loop box out of the same crinkle satin ribbon.  I tied a pink vintage button to the center of the bow with some kraft twine (both items from Paper Trey Ink).  I adhered the bow to the front of the card with hot glue.  I then tied some kraft twine to the trio of tiny vintage buttons (Paper Trey Ink), and adhered those to the upper corner of the floral pattern paper with hot glue, too.
For the final touch, I added 5 half faux pearls to the front of the card.  (Ok, 4 are on the card, and one is on the kraft twine bow on the button.) I wanted something pretty, feminine, and soft.  So I chose the pearls over rhinestone/sequins.
Thank you for looking.  I hope I have inspired you to create something beautiful! and to get back into your craft space and play along with these wonderful challenge sites:  Mojo Monday and Word Art Wednesday.  Both challenge sites have supper talented crafters who are sure to inspire you!