Showing posts with label tilda. Show all posts

Wednesday, December 7, 2016

Christmas Tiny House

Howdy!  I wanted to share with you a project I made, that isn't all paper.  I made these tiny wooden houses for my holiday craft fair.  (Yep.  Me.)  But, I cover them with paper and fun embellishments.  My husband does a little wood working, and so he did help me in the beginning.  But, I'm a quick learner {smile}.  I made a few dozen of these for my holiday craft fairs.
I started with a scrap piece of MDF.  (please, I don't know what that stands for, or what it means.)  And I cut house shapes out of it.  My house shapes aren't perfectly symmetrical.  Which, is how I like it!  I think it helps add character, and interest to the finished product {smile}.
here is one of my holiday favorites:


Recipe:  The tiny wooden 'house' roughly measures 2 inches wide (at the base) and 1 1/2 inches tall (at the peak) and 3/4 inch thick.  Super cute size!  I painted the block (all over) with white chalk paint.  Just one good, thick coat.  Then I took my sanding block and sanded it smooth.  This took off some of the paint, giving my naked block a distressed look.  It also help soften the corners.  Then I applied a cream sealant.  I didn't want the block to continue to 'loose' its paint.  
Now the fun part! Decorate!  I used two scrap pieces of my Tilda pattern paper. (love, love, love this paper!)  I used my Paper It to adhere the pattern paper to the block, and it also seals the paper.  To help cover the seam of the two papers, I added a scrap piece of white crochet trim.  I added this beautiful rhinestone flat-back snowflake.  It has so much sparkle in real life.  I tied a tiny bow with a scrap piece of pink silk 1/4" ribbon and adhered it to the other side of the snowflake.  I added a trio of flat-back faux pearls; one in the attic, and two on the side.  (I thought it added a fanciness, and a sweet feminine touch.)  The word 'NOEL' is actually a rub-on.  My final touch, was to add 'snow' to the roof.  I adhered glitter to the roof, and then sealed the glitter with an application of Paper It.  I didn't do anything to the back.  So, it is left plain, well, distressed {smile}.
Thank you for stopping by and having a look!  I will get busy making a few things for some challenges I want to enter.  Hopefully, I can get some 'good' photos (fingers crossed).  So, please come back again soon!  But, until then, happy crafting!

Tuesday, March 15, 2016

Happy Birthday Mom; Card

Hello, and Happy Birthday Mom!  I made a birthday card a few weeks ago, and have kept it under wraps.  My mom reads my blog.  {smile}  The birthday card I made, is, yeah, for my mom.  Her birthday is actually today.  So, I can 'share' my creation with you today.  My mom's Birthday card will be in her snail mail box today!  Sure happy and sure excited for her!  Because who doesn't love snail mail that isn't a bill or some junk mail [that doesn't even make it in the house]. {smile}


Ok, this card is an A2 size card: 4 1/4" x 5 1/2".  Love this size!  So, let's get right to business, so you know how I made it, and you can use some of these techniques yourself.
For the card base, I used Wisteria Wonder card stock by Stampin' Up!  It's a beautifully heavy weight card stock.  I used a light weight card stock by Amuse Studios in Taupe for the matt.  I used three different, but coordinating pattern papers from Tilda for the card.  I added a pale grey blue floral pattern paper for the main panel.  I added a darker blue tiny floral pattern paper and a pink leaf pattern paper.  [I matched the pinks in the blossoms when selecting the pattern papers.]

I used the edge of my scissors to rough-up the edges of the paper panels.  I did sponge some kraft ink onto the edges to help convey the 'time' or 'age' of the card.  I also used the edge of the scissors to create the 'rip'.  I added a polka dot pattern paper in that area.  I wanted something contrasting, but coordinating.  {smile}
I added a purposefully sloppy double border with my sewing machine.  [I love this look.]  I added some sponging on top of the stitching, to help them 'pop'.  
I had a scrap piece of white cotton trim that was tea dyed, so I stitched that piece onto the front of the card too.  
I strung kraft twine through a trio of lavender moon vintage buttons by PaperTrey Ink and adhered them to the pink leaf pattern paper.  I kept the twine long on purpose.  
The TAG:  this is the focal piece, and one that I'm super happy with {smile}.  I used a scrap piece of taupe card stock for the tag base.  I tied a small piece of wisteria wonder seam binding through the hole, but wanted something more.  so I added a bow tied with lavender thin tinsel.  I love how it adds some sparkle and softness to the over-all whole look of the card. {smile}

My sentiment was created with heat embossing and simple stamping.  I stamped the sentiment in versa mark onto vellum card stock and added silver embossing powder and heat embossed.  I just love how soft and elegant the silver embossing looks.  I used the hand script stamp set by PaperTrey Ink.  I added my adhesive to the back of the vellum piece where the sentiment is to help 'hide' the adhesive, which can be seen through this semi-translucent card stock.  I stamped the 'happy birthday' onto whisper white card stock in basic black classic ink, using Teeny Tiny wishes stamp set by Stampin' Up!.  Then I fussy cut the sentiment and adhered it to the vellum piece.  
I added a gift card to the inside of the card.  That way, my mom can celebrate HER day, anyway she wants: shopping, dining, relaxing at the spa, or simply going to afternoon tea with girlfriends.
Happy Birthday MOM!  I hope your day is fabulous and you get a chance to do what your heart desires.  Love you!
Thank you for stopping by and taking a moment to look at what I have been creating!  Enjoy your day! and come back soon.  I'll be sharing more.


Saturday, March 12, 2016

Say Cheese!; Card

Howdy and welcome.  Today is the first day of the Rubber Stamp Show, here in Albuquerque, NM! Yahoo!   This annual event is a great opportunity for rubber stamping companies from all over the United States to set up shop and sell their wares.  The show runs from 9:30a to 5p today and 11a to 4p tomorrow, I believe!  
During the show, they have a card contest.  Two contests (one of each day) and I entered this year.  It's actually a big accomplishment, because I always say that I will enter, and then life gets in the way, and I don't.  But, I actually sent in a card for this year!  I entered Sunday's contest, that has the theme 'Say Cheese".  [Saturday's contest theme is 'Across the Miles'.]

Sunday Card Contest theme: Say Cheese
My card was selected as their First Place winner!  I received $100 in 'show bucks', to spend at the Rubber Stamp Show.  I'm super excited and very proud of my work!  A huge 'Thank You', to everyone who voted for my card.  I appreciate it!
This card is the typical A2 size (4 1/4" x 5 1/2").  
When I read what the theme was, I instantly thought of a camera.  And I have a camera stamp.  So, I set out in my craft room to see what I could create.  The only stamp I have with a camera, is this one from Paper Trey Ink: Shutterbug.  It's a 'vintage' camera, but so perfect for me, right!  I stamped the camera onto very vanilla card stock three times.  Yes, three times.  And then I fussy cut it out.  One whole image, and the then two downsized portions.  I used foam tape to stack the images on top of each other, to give the illusion that the camera is coming out of the card.  Perfect.  but now I needed paper.  
Since my camera image is 'vintage' why not pair it with 'vintage' paper.  Tilda, came to mind.  It's a craft company from Scandinavia and the pattern papers are just vintage, shabby chic perfect!  I layered three different pattern papers (large floral, tiny floral, and polka dots), and adhered to a Taupe card stock matt, by Amuse Studios.  I added a single, simple border stitch with my sewing machine.  Wrapped some crinkle seam binding, and crochet trim.  I didn't want to add adhesive to the trims, so I machine stitched them to the card front, using a zig zag stitch.
Adhered the card front to an A2 size card made with Crumb Cake card stock by Stampin' Up!  I just love the heavy weight of this card stock for the base of my cards.  
Tied a multi-loop bow, added a simple bow made with metallic bakers twine just under the seam binding bow, and topped that piece with a small, simple paper blossom.  Not too fussy, just simply pretty!
The Shutterbug stamp set has this adorable sentiment: Say Cheese & Eat Cake.  So I stamped it onto a scrap piece of very vanilla card stock.  Used a hand-help circle punch to create the sentiment tag.  I added a single faux brad to the top of the circle and adhered it to the card front with foam tape to get it over the edge of the camera.  I also made another sentiment tag, 'happy birthday'.  Its from the Tiny Wishes stamp set by Stampin' Up!  I just love the typewriter font.  I hand cut the sentiment out into a rectangle.  I sponged the edges of both sentiment pieces, to help convey the 'vintage' look and feel.  And it helps give the sentiment pieces some dimension.

Thank you for looking, and here I am with my fingers crossed, hoping I win, place, or show.  {smile}
[Win, Place, Show - are horse racing terms.  Win - 1st place, Place - 2nd place, and Show - 3rd place in horse racing.   The rubber stamp show is held at the Albuquerque Fair Grounds, which has a horse racing track.]  The prize for having your card voted 1st place, 2nd place, and 3rd place is receiving 'show' bucks to use at the Rubber Stamp Show.  It's like free money! {smile}


Sunday, February 28, 2016

Congratulations Cake: Card

Howdy!  I hope your weekend is going well.  Me, I've been busy, cleaning, and getting stuff ready for tomorrow - the beginning of the work week.  {grimace}  And, I came upon a card I forgot to post last week.  UGH!  But, have no fear!  I am posting it here! (cute little rhyme)
I am entering this card into two challenges, so without further ado, here we go!
My first stop is at this wonderfully creative Russian challenge site: Scrap Magic.  They publish Inspiration Boards, give you a few requirements, and then let your mojo run free!
Here is the inspiration board:
For this current inspiration board, you are required to use turquoise and pink colors.  And you need to add a cake/rose to your project.  Their design team is very creative and I am sure that you will find more than enough inspiration from their projects, and their wonderful inspiration boards.  Their challenge site is in Russian, but they have a 'translate' button.  It's super easy to play along.  
My next stop is Really Reasonable Ribbon Challenge #135.  Their current theme is: Celebrate.  This can be any type of celebration: birthday, wedding, baby, etc.  Their design team is clever and creative!  You will find a lot of inspiration regardless of your paper crafting style!
my card was selected as a 'Top Three' @ Really Reasonable Ribbon Challenge #135! Yahoo! and thank you ladies!  Look for my 'badge' on my AWARDS page.
here is my card:

Recipe:  This card is a A-6 size card (4 1/4" x 6").  The card base is Soft Sky by Stampin' Up!  I just love the soft, pale, blue color.  Very pretty, and a bit shabbylicious!  The pattern papers are from Tilda. (I used three different, but beautiful collections.)  I used my sewing machine to add a simple border stitch to the card front.  Yeah, the thread is a silver metallic.  I thought it added a homespun feel with some sparkle! {smile}
The journal card is actually a digital download.  I just love the stripes and floral images with the blue french as an overlay.  Super pretty!   The 'cake' is from Tilda, also.  I adhered the cake to the journaling card with foam tape.  I just love the stripes on the cake.  It looks yummy and beautifully stunning at the same time.

The lace trim is a scrap, and I can't remember where I purchased it.  But, I'll need to buy more, I only have about 6inches left. {frown}  The seam binding is Soft Sky, by Stampin' Up!.  But I fear this may be a retired color.  And I used the last of what I had stashed.  {frown}  Ugh, this is dreadful!  I just love working with seam binding.  It is easy to manipulate and easy to color!
I tied a multi-loop bow with the seam binding, and then added my extras.  {smile}  I used some thin silver cord, to tie on a aqua mist vintage button, (by Paper Trey Ink) then tied on the key, and finally created a large loop bow behind the seam binding bow.  I adhered the bow piece onto the card front with my hot glue gun.
I added the key to the bow, because I think it signifies so many things to different people: the key to knowledge, the key to happiness, you hold the key to my heart, the key is the future, and so many other thoughts.
I made two trio clusters with some sequins (marshmallow, and pink blush) and one lone aqua mist vintage button to the card front.  I think it adds of bit of 'interest' to the card.
I stamped my sentiment in Going Gray classic ink, by Stampin' Up! using the Timeless Love stamp set.
Thank you for stopping by.  I do hope that you get a chance to play along in a challenge this weekend.  It is really great to see how others interrupt the sketches, inspirational boards, and such.  Ok, I am off to clean some floors.  WOW! sounds fun, huh?  But before I go, I want to remind you don't forget to stop back by on Tuesday, for my Triple T Tuesday segment.  {smile}


Saturday, January 16, 2016

Pink, Aqua, & Yellow Fabric Strip Banner/Backdrop

I wanted to share with you the latest fabric strip banner/backdrop with you.  I finished this last week.  But with the limited day light hours, I wasn't able to get a decent photo until earlier today.  I can now finally share with you what I have created.
I used fabric from Tilda.  I just love the patterns, and the material washes very nicely.  It's a big investment.   The fabric is sold at a premium price and international shipping is a bit steep in price.  But, just look at the finished product.  I think it's worth it {smile}


The fabric banner measures 4 feet wide.  Yes, that's 48 inches of beautiful fabric and trim pieces!  Each fabric strip and trim measured 22-inches long before they were hand-tied to the jute twine.   I used a total of five fabrics: 3 tilda, one aqua blue with gold foil blossoms, and a white cotton with taupe heart trees.  I used trims, laces, and ribbons to help accent the colors and over-all look of the banner.

There are seam binding, laces, ruffled chiffon, cotton ribbons, and pink glittered tulle to accent the beautiful fabrics.  I just love how this shabby chic, pretty banner turned out!  And yeah, you can buy it! HERE

Why not add some sweet, shabby-chic prettiness to your home, or next party?  This banner would look adorable over a crib, or to decorate a cake table at a farmland, shabby chic wedding, or to the top of a window for a 'no-sew' window treatment in your creative space, or simply to add some homespun beauty to a kitchen.


I have shared a few banners, and I hope you like them.  If you love these, but would love a different color combo, or length, or width, just convo me.   Give me the opportunity to create something beautiful for you.  And as always, special orders/custom orders do NOT acquire an additional charge.  Ok, I am finishing a few wreaths, so I need to sign off.  I'll post photos of the new wreaths as soon as possible.  Also, these banners and wreaths will be for sale @ this years Trash to Treasure Trunk Show in Albuquerque, on Jan. 23rd, 2016, 9a - 5p.


Sunday, November 22, 2015

A Sweet Pink Christmas Card

Howdy.  Welcome.  Well, the sun is out this morning, so I took advantage of the daylight and snapped a photo of a card I made last night.  I LOVE pink, and shabby chic, so why not put those two together to make a sweet, pink, shabby Christmas card?  {smile}
I used the current sketch challenge over @ Mojo Monday.  They have some very user friendly sketches.  And the design team is just so talented!   Here is the current sketch: 
today's the last day for this sketch challenge

I also wanted to enter another challenge.  The current challenge over @ A Snowflakes Promise, is Winter/Christmas.  This challenge site, has some very creative folks on their design team as well.  So, I am sure you will find some inspiration there, as well.
this challenge ends this month

and here is what I made:


So, let me just dive right in, with how I made this card {smile}!  This card is 4 1/4" x 6".  So, its larger than an A2, but smaller than an A6.  I like this size of card, because the A6 envelope allows for bulk from embellishments.  (I know I have made flat cards before, but its been so long ago, I can't remember the year {smile}).
I started with Vintage card stock from Paper Trey Ink.  I just love the heavy weight of their card stock, to use for card bases.  Their vintage card stock, is a bit lighter than Very Vanilla by Stampin' Up!, so that is why the two vanilla pieces don't match.
I used two pattern papers from Tilda (Christmas, and homemade), and one pattern paper from Carta Bella (baby girl).  

I added two different white cotton trims to the top and bottom of the middle panel. I added a double border stitch with my sewing machine.  I also machine stitched a white crochet trim to the bottom of the middle panel.  
I used some scrap pieces to create my flags (I hand-cut my flag ends).  I made a larger flag for the sentiment piece.  I hand-stamped my sentiment, using a stamp set by Paper Trey Ink; Season's Greetings.  I heat embossed the sentiment with silver embossing powder.  It's beautiful, but a bear to photograph.
I stacked two pale pink blossom pieces.  The bottom blossom is glittered, while the top blossom is flocked.  I added a pink cotton rosette to the center, and used a square rhinestone to hold it all together.  I had a scrap piece of that shimmery chenille trim, so I tied it into a bow.  I added a silver-tone ice skate charm, and tied it to the trim with cream twine.

Thank you for looking.  Now, I'm headed back into my craft room, to create another vintage style piece for another challenge!  Yahoo!  I love days like these!  No obligations, or chores.  Just crafting! I hope you get the opportunity to create something wonderful, too!


Wednesday, November 11, 2015

Homemade Fancy Christmas

I had so much fun making my last gift bag, that I decided to continue working with the latest sketch from Mojo Monday.
I also stopped by the Merry Monday Christmas Challenge site.  Because let's face it, I'm working on Christmas crafts, so why not let them help inspire me to create something beautiful!

The folks over @ Merry Monday Christmas Challenge,  have a inspiration photo, and a color challenge: pink, green, and white.  I can do that!
here is what I made:


I rotated the sketch.  I also changed the circle element for another square element.  I used ribbon and trim for the long banner piece.  I did add a floral element but I tied on an ice skate!  I used a holiday image and sentiment.  Both of which are heat embossed with early espresso embossing powder, on shimmer white card stock.  

close-up

For the 'panels' I matted each of the pattern papers with kraft card stock.  I also added some machine stitching to these pieces.  I think this adds a homespun look and feel.  I used Happiness is Homemade pattern paper from Tilda.  The large pink blossom is a Melissa Frances item.  I used a light champagne shimmer textured card stock for the base of the bag.  
Thank you for looking.  I hope you have been inspired.  Now, I'm headed back into my craft room, to finish some jar toppers, desk top calendars, and some magnetic monograms.  Oh, and my trophy cups, and some altered salt shakers.  Whew, sounds like a lot, but once I get started, it moves along quickly.


Thursday, November 5, 2015

Shabby Chic Pink Holiday

Howdy.  I have been fighting with my camera, and daylight, to get some beautiful photos.  And well, I lost.  {frown}
But, I salvaged a sorta good, (not really) photo to share with you.  Let's get to it!


Ok, lets get the recipe.  I used a Pinktini color of solid card stock for the base.  I used my favorite kraft card stock for the matt.   (I just love that color)  And the beautiful pattern paper?  Tilda pattern paper: All That is Spring.  (be still my beating heart.)  I used the blue background floral pattern paper for the top flap and the distressed pink stipe for the bottom flap.  
I added a strip of white cotton eyelet trim, a silver chevron ribbon, and Pink Pirouette seam binding, across the middle of the top flap.  I thought that these trims added to the homespun 'feel' of this project.  I tied a simple bow with the silver chevron ribbon.  I added a large pom pom pink trim.  And a small round pink glass ornament.  I added a silver glittered star, and a hand stamped tag.  The tag reads: let it Snow.  I thought that really expresses the 'feeling' of the winter.  I also like the mix of different textures between the trims, the glitter star, and the softness of the pattern papers.  
Thank you for looking.  I hope to get some half decent photos soon.  As my next arts and craft fair is this Saturday!  Yep!  in a few days!  So, I may be photographing just before the doors open!  Yikes!


Sunday, October 18, 2015

Shabby Chic Holiday

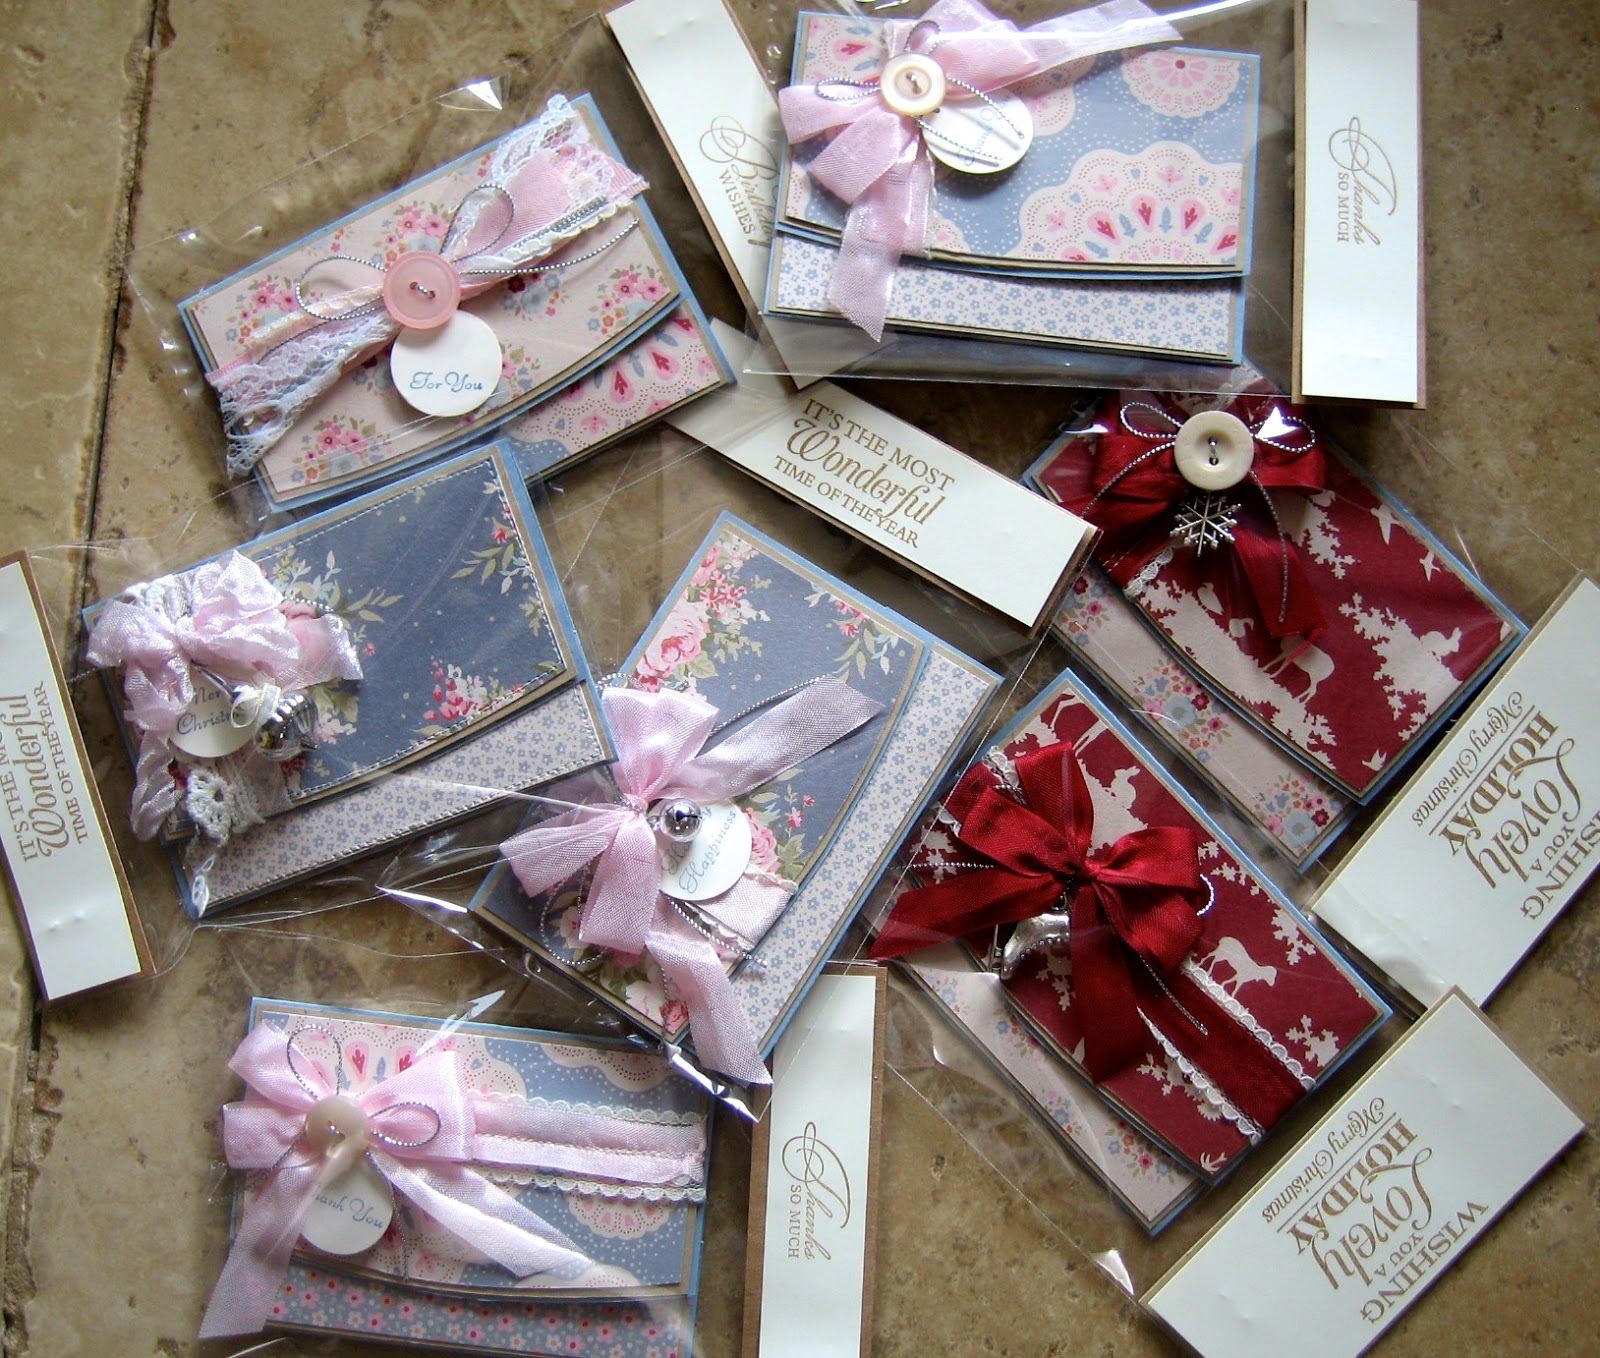
Howdy.  I shared earlier a romantically shabby-chic gift card holder.  I just love these little beauties. {smile}  Well, I got to crafting, and made more.  And well, I wanted to share them with you.


A mix of sweet, romantic pattern papers from Tilda; the Sweetheart collection.  I even made a 'thank you' and a 'birthday wishes' gift card holder from these pretty papers.  I think the florals and blues and pinks are just super sweet!
Thank you for stopping by.  I'm off to make a few (ok, several) more traditional colored holiday gift card holders.


Friday, October 16, 2015

Sweet, Vintage Christmas Gift Card Holder

Howdy my paper peeps!  I've been busy.  Busy like a little bee {smile}.  But, I did want to take a moment and share a new craft I am working on.  It's a gift card holder.  And I make a lot of these.  So the idea, or template that I use isn't 'new', but the holder is.  {smile}
I make many of these for the holiday craft fairs.  They are super sweet, and super easy to use during the busy holiday season.  They make perfect stocking stuffers, sweet little additions to gift bags, and boxes, great teacher gifts, or hostess gifts.  Purchase a gift card to your recipient's favorite store, and simply tuck it inside to a wonderfully beautiful holder.  Easy peasy!


I love adding machine stitching, it is so sweet, and home-y.  The round tag is hand-stamped with 'Merry Christmas'.  Simple and sweet.  And here is the inside:


The sentiment on the inside is always heat embossed.  I believe the raised lettering is a very elegant touch.  I tucked a gift card inside, from one of my favorite shops for the photo shoot.  I defaced their logo for legal reasons.  But, we all know I have a deep love for them.  {smile}  There is room on the panel where the gift card sits, to write a personal message for the recipient, too.  
Oh yeah, the pattern paper is from Tilda.  The card stock is a very old retired card stock from Stampin' Up! (bordering blue).  I used a very retired stamp set by Stampin' Up! to stamp the tag: Fancy Flexible Phrases in brocade blue classic ink.  And finally, for the inside, I used a stamp set  from Paper trey Ink: season's greetings.  I tuck the finished gift card holder in a clear cello bag, with a bag topper, so whoever purchases one of my gift card holders, the holder stays fresh and untouched.  {smile}
Thank you for stopping by.  I hope all is well, where you are.  I'm off to finish several more. {smile}


Thursday, October 8, 2015

Marquee Sign

Welcome.  I've been busy.  Busy crafting.  I've painted and distressed more clothes pins for message clips.  I've started working on more magnetic monograms.  And a few marquee signs.  Yep, marquee signs.  No, these won't be for sale.  I am planning on having them in my booth for the craft fairs, to get peoples attention and hopefully they stop by my booth {smile}.
So, I'm sure you won't be surprised when I show you my shabby chic marquee sign.  Here it is:


The marquee letters and symbols come white and blank.  That way, you can 'decorate' them anyway you want!  Paint, paper, tape, glitter, whatever your little artist heart wants.  I think that's pretty fabulous!   
So, I started with a super pale pink chalk paint.  (love chalk paint!)  Two coats.  The texture of this paint is soft, and rustic at the same time.
I cut my pattern paper just inside the lines of my template.  That way, the paper didn't fit perfectly inside.  I wanted a little bit of a border.  I used pattern paper from Tilda.  Love the 'faded' print.
And then, before the final assembly, I added silver leaf, randomly.  I wanted the marquee sign to look old, weathered, and worn.  As if someone painted over the metal, and over time, the metal has started to peek through.  Now, my distressing technique isn't perfect, and I probably should have used an additional color, but I am happy with it.  
I sealed the silver leaf to the paint, added the lights and bulbs, and viola!  Oh, and the best part is that it's battery operated!  No outlets needed to have a little 'light' in my booth, at this year's holiday arts and craft fairs.  My booth has white table cloths with burlap over lays, and the display pieces are either white or silver mercury glass.  So, I think this little gem will look right at home!

Thank you for stopping by and having a look.  I'll get more photos of projects soon.  It's easiest to photograph during the weekend.  {smile}


Wednesday, September 30, 2015

Holiday Happiness: Card


Sorry, it's another holiday card.  And I imagine that I will be posting more and more holiday paper crafts here.  I will be making a few non-holiday items, and yeah, I'll post some images here, too.  {smile}.
I had ordered some Scandinavian pattern papers from Italy, and they arrived yesterday!  and yeah, I just had to play with them.  
To give me some focus, I stopped by a favorite sketch challenge site:  Mojo Monday.  The sketch challenge is not only a sketch, it has a specific card shape, too:  Tall & Skinny.  Their suggestion is 3 1/2" x 5 1/2".  I am not too fond of tall and skinny.  It's very hard for me to work with.  So, I gave my card a little leeway: 4 1/4" x 6".  It's tall, but not too skinny.  {frown}
here is the sketch:

But just look at this sketch!  WOW! wonderful!  I love the layers, the trio of embellishments and the ribbon piece.  I got this!
here is what I made:


The photos aren't that great, sorry.  I actually finished the card this morning before work.  So the sun hadn't even rose yet.  (It was completed before 6a.)  I took photographs of it once I got home, after work around 6p.  The sun was going down, so I went outside to get the most light.  Please bear with me.
I used my new Tilda pattern paper: Sweetheart.  I fell in love with this pattern paper as soon as I saw it.  The large scale polka dots, the sweet animal silhouettes, the floral images, the mixture of blue and red with pink thrown in the mix.  Just beautiful!
My first layer is the red large scale polka dots.  Then I added the blue animal silhouette pattern paper. I wanted to show as much of this pattern paper as possible.  And then finally, the sweet, small scale floral bouquet pattern papers.
I matted each of these pattern papers with kraft card stock, and then machine stitched them.  I did a double border of a simple stitch line, purposefully sloppy.  {smile}
I added two ribbons/trims instead of the one.  I added a white pleated glitter tulle, and then machine stitched a light blue gingham pattern ribbon to the card front.  I tied the ribbon into a simple bow, and tied on a silver snowflake charm.  
For the round element on the small square, in the sketch, I added a flair button.   Santa is wearing a pink coat.  {smile}.
I replaced the trio of embellishments, on the sketch, with a scrap piece of crochet trim, that had scallops. I thought it added a bit of softness and elevated the home-made feel.
I used a retired Stampin' Up! card stock for the card base: bordering blue.  It matched the blue in this pattern paper perfectly.


I hand-stamped the envelope flap with my branding, and the inside sentiment, in cherry cobbler classic ink.  I also stamped the front of the envelope in bordering blue classic ink.  I added a banner made from the pattern papers I used on the outside of the card, and machine stitched them to the very vanilla card stock.
Thank you for looking!  I am planning on making two desk top calendars, and a few gift card holders, with this pattern paper collection.  I think they are just lovely {smile}.  Please check back later.

Sunday, September 20, 2015

Sew Sweet Treasure Tin


Howdy!  I finished another altered Altoid size tin.  I painted it with two contrasting colors of chalk paint: cotton (white) and mint (pale green).  I used pattern papers from Tilda: Happiness is Homemade.  I just love this collection.
I added some machine stitching and various beautiful embellishments.


This treasure tin, is for sale in my Etsy shop, HERE.  There are also a few more photos of just how beautiful this little tin is!  The tin measures approximate 3 3/4" x 2 1/4".


Thank you for looking.  Remember, if you see anything you love, but want something a bit different, just message me.  Let me know if you want a different color, or theme, and allow me the opportunity to create something unique and beautiful for you {smile}.  I do custom orders at my Etsy shop.  


Saturday, August 29, 2015

Pretty Thank You: Card


Welcome.  I took an hour this morning to make a card for a very special friend.  She has been my rock when I needed it the most.  She is always available when I need her.  And always helps me see the bright side to life.  I really do love her, and I know I am truly blessed to have her in my life.

a sneak peak
I needed some inspiration and direction, so I went to a few of my favorite challenge sites:
I started @ Shabby Chic.  Because let's face it, that is my easiest style to craft {smile}.


Their challenge is two parts: include an apple(s) or/and use the required colors: soft pink, pale green and white.   Also, your craft must be in Chebbi or Provence style.  Easy for me!

I next stopped by I Love Scrap.  They have sketches that are so easy to work with, and the design team really can get your creative juices flowing with their creativity and clever use of embellishments {smile}.   
I always love the layers in the sketches, and the design team will sure to inspire you.  They have various styles of crafting, but all of them are beautiful!  You just might find a new blog to follow.  {smile}

And finally, I stopped by another creative challenge site:  Brown Sugar Challenge.  Their current challenge theme is: make the sentiment BIG!  I have noticed that several crafting companies have started creating large sentiment stamps and chipboard words.  This is your perfect opportunity to use those large sentiments.  

and here is what I created:


and a slightly different view:


the Recipe:  I used kraft card stock from Paper Trey Ink for the card base.  I love the weight of this card stock, and I really wanted a 'light' kraft color.  
The text matt is a pattern paper from Melissa Frances.  I love the dark grey text on white paper.  It's very beautiful!  The cream floral pattern paper, is from Tilda: Happiness is Homemade.  I used a thread cutter to distress the edges.  I also added some machine stitching along one corner (upper right corner).
I machine stitched a strip of this beautiful gold lace trim to the pale green tiny star pattern paper.  This is also from Happiness is Homemade.  I adhered this piece to the left side of the card.
For my large circle piece, I cut an embroidery hoop out of a thin wood sheet.  I sponged white ink on the edges to help give the hoop some dimension.  I adhered the same dark grey text pattern paper to the inside of the hoop.  I felt that the repeating of this pattern paper would tie the large matt into the over all look of the card.  [I thought that a different pattern paper would look too random and possible out of place.]
I tied a multi-loop bow out of a pale pink seam binding.  And tied a button to the bow, and tied the whole piece to the hoop with some kraft twine.  I made sure my twine had a double wide loop bow, too.
I added a trio of paper blossoms to the lower right of the embroidery hoop.  I selected pale, soft colors that matched the required colors of the Shabby Chic challenge.  I stuck a button stick pin into the floral cluster.
For my sentiment, I could find the right font, the right words, the right shape.  And then, I decided to use vellum as my 'paper', and use embossing powder as my 'ink'.  It sounds relatively simple, but I did stamp several different sentiments in various colored inks, on various shaped papers, before I thought of using vellum.  I selected gold embossing powder, because gold is the accent color on the lace trim.  I used the Hand Scripted stamp set by Amuse Studios, the sentiments are big and 'hand written' style.
I also added a scrap piece of gold washi tape to the bottom right corner on the inside of the card.  And yeah, I added some machine stitching, to tie it all together. {smile}
Thank you for looking.  I'll post some photos of my advent calendar tree soon.  It's super cute!