Showing posts with label heat embossing. Show all posts

Thursday, May 3, 2018

a bowl of cherries

Howdy, and welcome.  I am super excited today to share with you some happy news and a card!  I recently won the challenge over @ Tic Tac Toe Challenge and was given the opportunity to be a guest designer!  How fabulous is that, right!  So, without any delay let's get to their current challenge #tttc046!

right column: fruit, watercolor, free
Now, before you get discouraged, here are some ideas.  For the 'fruit', you could add apple(s) and create a Teacher Appreciation card.  Or lemon(s)/lime(s) for a Summer themed card.  Or add a pineapple for a Hostess card.  For the 'Free', simply add your favorite item: machine stitching, a button, sequins, a paper straw, etc.  The list is almost endless.  Don't forget to use what's in your stash, and most importantly have fun!  This Tic Tac Toe card, really does lean towards a Summer theme.  I can't wait to see what you create.  Here is what I made:


Recipe:  my card, is a typical A2 size greeting card.  (4 1/4" x 5 1/2").  
FRUIT: cherries, WATERCOLOR: color wash on watercolor paper, FREE: machine stitching, button, seam binding, and lace.
The base of the card is made with Crumb Cake card stock by Stampin' Up!, due to their lovely heavy weight card stock.  The main panel is made from a linen plaid card stock by Paper Trey Ink.  I love this soft color!  I added a piece of 6" lace over the main panel.  I 'attached' the lace with some machine stitching along three sides.  I did a quick, purposefully sloppy double border stitch.  I love adding machine stitching to my crafts.  I think it adds a homespun look/feel.  
I adhered a 4" paper doily to the right side of the card.  I simply folded the over-hang around the main panel.  I machine stitched a strip of pale blue seam binding along the lover third of the card to help anchor the seam binding to the card front.  I tied a double-loop bow, and tied a 'swirl' red button to the center of the bow with some gold twine.  This 'fancy' button reminded me of a cherry with its imprinted design.  {smile}
The sentiment is stamped and heat embossed on a scrap piece of white card stock.  I rounded one end, and pointed the other end.  I thought this shape looked like one of those garden/plant markers.    Super sweet, right? {smile}
I made my own embroidery hoop.  I used a die to cut the shape.  I used a scrap piece of wood veneer 'paper'.  I just love this stuff.  But my shock is dwindling.  {frown}. For the inside of the hoop, I took a scrap piece of watercolor paper and stamped my bowl in Versa Mark ink, and added white detail embossing powder.  I used Versa Mark ink to stamp the cherries, and added deep red embossing powder.  I heated the paper, and my bowl of cherries came to life!  I misted the water color paper heavily with water, and then washed it with a pale blue color.  I wanted the cherries to pop! and the bowl to have some contrast, to showcase the bowls design.  I used a fine tip brown marker to create the cherry stems.  (hand drawn)
The final touch was the trio of wood grain printed sequins.  I felt that they helped tie the wood-grain hoop to the card.  I adhered the main panel of this card to the card front with foam tape.
I believe that if you repeat elements/colors, it helps tie that element to your card.  The color I washed the watercolor paper with, matches the seam binding.  The red in the cherries is repeated with the same color of the button.  The wood grain of the hoop is repeated with the sequins.  The white doily and card base are repeated in the plain paper.
I hope that you join this beautifully talented group of ladies over @ the Tic Tac Toe Challenge.  Just let them know which row you are using on their tic tac toe card, and don't forget to have FUN!  Create something beautiful to share with us, but to also share with your family and friends!  Trust me, they will appreciate your efforts in creating something handmade!


Sunday, December 3, 2017

Sweet Floral Holiday Bags

Howdy! I wanted to share with you a project I did.  I made a paper tote and gift bag.  But, I used non-holiday pattern paper, to make holiday themed bags.  Because like a lot of us can't always afford to purchase another collection of pattern paper.  And lets face it, I really need to start using the paper I have, and not keep adding to my collection {smile}.  I am entering the current challenge over @ A Snowflakes Promise Challenge - Anything Goes.


and here are my projects
the paper tote:


and here is my gift bag:


~ disclaimer:  I was crafting late into the evening, and lighting was scarce. ~

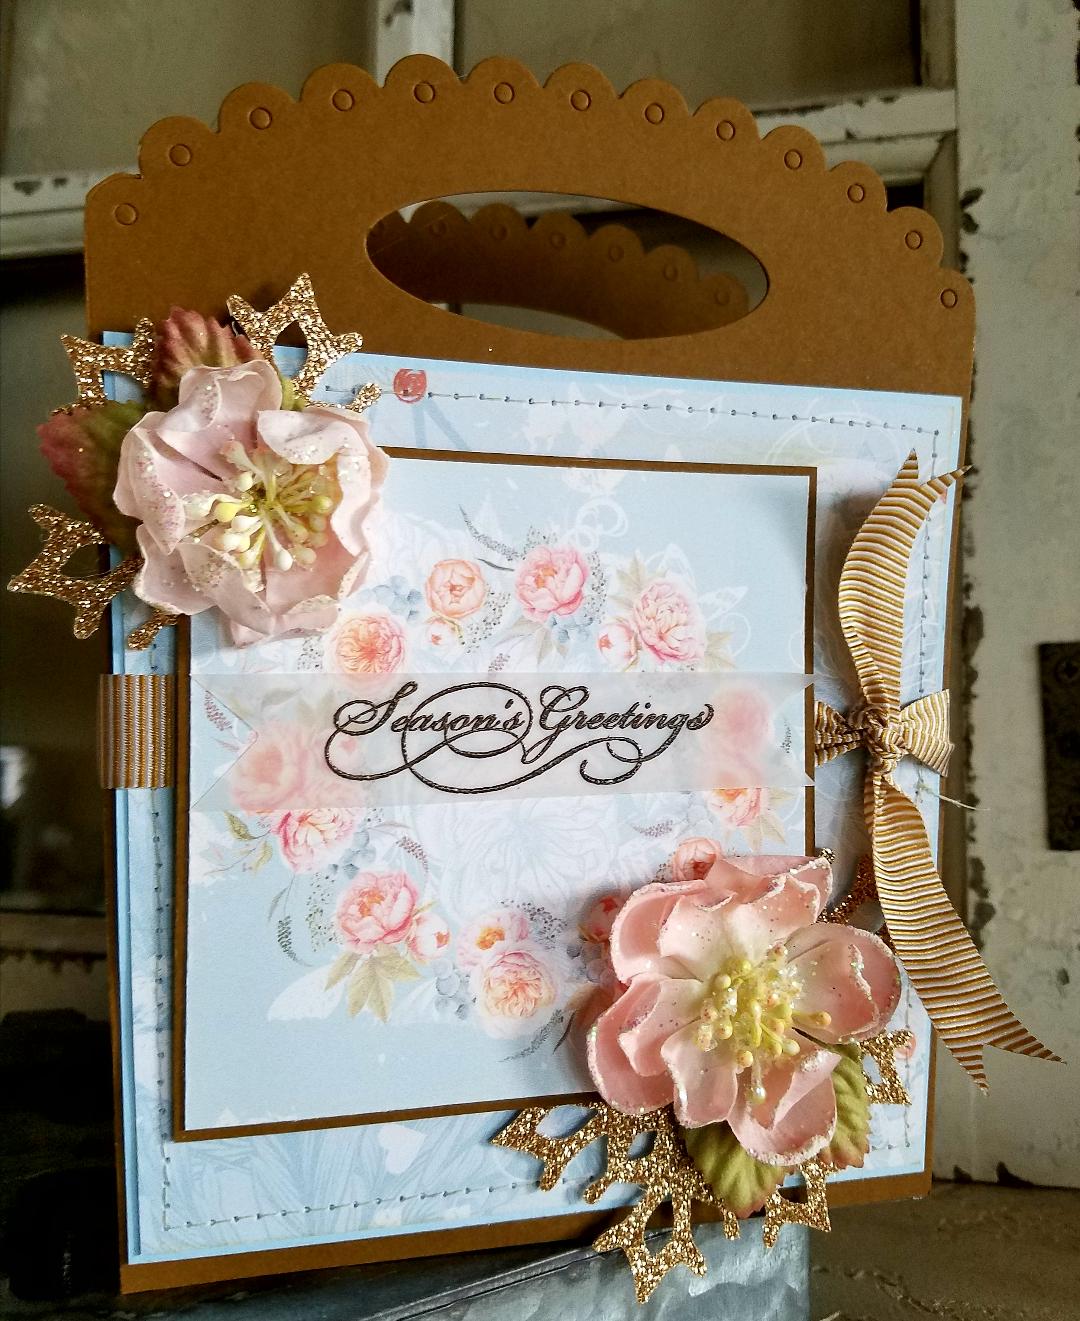
Recipe:  I used Cocoa Bean card stock, and snowflake die, are by Paper Trey Ink.  The pattern papers I have used are digital papers.  The sentiment is a stamp.  The vellum card stock, Early Espresso embossing powder, seam binding, ribbon, and champagne glitter paper are by Stampin' Up!.  The tulle trim is Mellissa Frances.    The two peach blossoms (on the tote) are from Recollections.  The beige blossom (on the bag) is from Prima.  The tiny pink ornament bulb is from a big box store.
The Tote:  I used a die from Paper Trey Ink to die cut the tote.  I layered the pattern paper onto solid card stock, and added some machine stitching.  I adhered the floral circle paper to the front of the tote with foam tape.  I tucked the snowflakes between these two layers.  I hot glued the blossoms to the corners.  To create the sentiment piece, I heat embossed the sentiment onto vellum and adhered it off center of the blossom circle.  And lastly, wrapped the ribbon around the tote, to help give it a finished look.
The Gift Bag:  I only had scraps of this pattern paper, so I wanted to use them up, before I started printing again.  The large floral pattern was a 6" x 6" piece.  So, I cut my piece 4 1/2" x 6", to use more of what I had.  I added two different polka dot papers, both of which were scraps.  I added some machine stitching to give it a homespun look.  I added the tulle trim and seam binding to help hide the seam where the two papers meet.  I tied the seam binding into a multiple loop bow, attached a bulb, and tucked in a paper blossom.  I created the sentiment piece, just like I did for the tote (heat embossing).  To hide the seam, at the top, where the two pattern papers joined, I added a scallop trimmed pattern paper.  I adhered the card stock panel to a paper bag.
These two types of bags were for sale at yesterdays craft fair.  I hope these two samples have given you some inspiration to use the non-holiday themed pattern paper for your next holiday paper craft.  {smile}

Wednesday, November 11, 2015

French Holiday Set

~ photo heavy post ~
Howdy.  Welcome.  Before you asked, I haven't quite finished my trophy cups.  But, I promise, I will.  As they will be for sale at my next Craft Fair - this Friday!  I was able to work on a few other holiday projects.  For those of you who don't know, I love taking non-holiday pattern paper, and creating holiday projects.  {smile}  I do love typical holiday pattern papers, but sometimes, its fun to set out side of the box.  Exercise your creative mojo, so to speak!
A month ago, I saw quite a few wonderfully creative projects using Gilded Lily pattern paper by G45 (Graphics 45).  And let's just say that I fell in love with both the paper and the projects.  So much so that I went out and purchased a few sheets of the pattern paper.  Then, it just sat there.  (I'm sure this sounds familiar to a lot of you - smile)  This pattern paper has royal images of Marie Antoinette, crowns, lilies, script, dots, and flourishes.
I set out to start working on holiday projects to have for sale, at my next holiday craft fair.  And then, I grabbed that beautiful Gilded Lily pattern paper.  I also stopped by Mojo Monday challenge site to get a layout.  This is this week's sketch:


and here is what I did with the sketch:


Let's look at each piece separately!
First, the bag:


As you can tell, I rotate the sketch.  I also used a 'tag' for the circle piece.  The tag is heat embossed with pink embossing powder.  I used cream velvet ribbon for the top of the tag.  But I didn't want a lot of bulk with a traditional tag 'loop', so I tied the velvet ribbon with kraft twine, and added a jingle bell.  {jingle bells are fun!}  I switched out the floral accent piece with a holiday shabby chic piece.  {smile}
and a close-up:


I wanted the bulb and snowflake to move, so they are tied onto a Tim Holtz safety pin, that is secured to the front of the bag with a rhinestone floral brad.  I also added some fabulous trim in a make-shift 'junk bow': tulle, pom pom trim, crochet trim and thin ribbon.  I used kraft twine to hold everything together.

The gift card holder:


I wrapped some white cotton trim and seam binding around the top flap of the gift card holder.  I  layered a silver glitter snowflake on top of the trims.  And then added that sweet bow, with a snowflake charm tied to it.  {smile}


And the inside of the gift card holder.  Simply tuck the gift card into the bottom flap.  The sentiment is heat embossed with silver embossing powder :  Greetings of the Season.  Elegantly simple.

and now the stocking stuffer - chocolate!


I used some of the scraps of the pattern papers, and wrapped some chocolate candies.  I added a cream crochet knot, tied on a simple tag stamped with 'Noel', and tied the gold cord into a simple bow.  {smile}  Something elegantly simple.  Perfect {smile}

Well, thank you for looking.  I hope you have found some inspiration and get an opportunity to craft something fabulous, too!


Friday, October 16, 2015

Sweet, Vintage Christmas Gift Card Holder

Howdy my paper peeps!  I've been busy.  Busy like a little bee {smile}.  But, I did want to take a moment and share a new craft I am working on.  It's a gift card holder.  And I make a lot of these.  So the idea, or template that I use isn't 'new', but the holder is.  {smile}
I make many of these for the holiday craft fairs.  They are super sweet, and super easy to use during the busy holiday season.  They make perfect stocking stuffers, sweet little additions to gift bags, and boxes, great teacher gifts, or hostess gifts.  Purchase a gift card to your recipient's favorite store, and simply tuck it inside to a wonderfully beautiful holder.  Easy peasy!


I love adding machine stitching, it is so sweet, and home-y.  The round tag is hand-stamped with 'Merry Christmas'.  Simple and sweet.  And here is the inside:


The sentiment on the inside is always heat embossed.  I believe the raised lettering is a very elegant touch.  I tucked a gift card inside, from one of my favorite shops for the photo shoot.  I defaced their logo for legal reasons.  But, we all know I have a deep love for them.  {smile}  There is room on the panel where the gift card sits, to write a personal message for the recipient, too.  
Oh yeah, the pattern paper is from Tilda.  The card stock is a very old retired card stock from Stampin' Up! (bordering blue).  I used a very retired stamp set by Stampin' Up! to stamp the tag: Fancy Flexible Phrases in brocade blue classic ink.  And finally, for the inside, I used a stamp set  from Paper trey Ink: season's greetings.  I tuck the finished gift card holder in a clear cello bag, with a bag topper, so whoever purchases one of my gift card holders, the holder stays fresh and untouched.  {smile}
Thank you for stopping by.  I hope all is well, where you are.  I'm off to finish several more. {smile}


Saturday, July 25, 2015

Bigger Gift Card Holder

~ photo heavy post ~


welcome.  I hope you are well, and finding time to express your creativity.  Me, yeah.  I love cooking/baking, as much as paper crafting.  So, I have been busy making bulk meals.  You know, where you make 3-4 dinners of the same dinner, and freeze them for later.  That way, when you are running late, you just pop them in the oven, and viola!  Lasagne, casseroles, meatloaf, enchiladas, and roasted chicken are what I make.  I do a traditional lasagne and a 'white' lasagne.  The white lasagne has chicken, an alfredo sauce and green chili in it.  A 'New Mexico' spin on a wonderful dish.  I also roast chicken breasts and thighs.  I prefer mine with the bone-in and skin-on.  Rub the skin with olive oil and sprinkle salt and pepper, in an 350 degree oven for 45 minutes.  De-bone the chicken, cut up the meat, package in 2 cup freezer bags, and viola!  Now you have chicken available to add to recipes and go!
But through all of this, I did stop and craft {smile}.  I make gift card holders to sell at my craft fairs.  But these holders hold just the gift card.  You know, the kind you get at Starbucks, or a major retailer. I have a girl friend who buys all of her gift cards at the grocery store or Walgreens.  And well, those gift cards are 'packaged'.  And she doesn't want to rip them open to get to the gift card to put in one of my gift card holders.  So, I am making some of the holiday craft fairs, to see how well, or not so well they do.  
I made one last year for this particular friend, (see post here) and she just LOVED it!  So, I am on a crafting mission.  However, when I made that one, I didn't write down dimensions, because I thought that I would remember.  Well, I didn't and I didn't show images of it opened.  {frown}  
so without further ado, here it is:


I am not too set with the straight edges.  But, I am happy with how the front looks.  I used this beautiful pale aqua blue color card stock in solid and two various patterns for the front.  The polka dot paper is from Paper Trey Ink, and the interlocking circle pattern paper is from Carta Bella.  The floral pattern paper is actually a digital paper.
I did a simple border stitch with my sewing machine, around a few pieces.  I just love the look it gives my crafts.  {smile} homemade!

Here is the flap open, to 'present' the gift card.  I continued the polka dot pattern paper on the inside.  The 'label' is heat embossed with the sentiment: happy birthday, in silver.  That panel is not attached, so you can write something.  I'm not too sure about that either.
I think I would like my 'holder' panel to have a higher bottom lip.  But, I haven't totally decided on that.  I also think that I would like a belly band.  But, I wasn't too sure when I created one, here.  Maybe a bow to hold it closed?  But, can everyone re-tie the bow?  UGH!
I tied a junk bow on the front.  I thought these little scraps of trim looked sweet with the front.  And yeah, I do have seam binding that matches that pale purple textured card stock.  
The polka dot brad I had on my craft table, and unfortunately, I can't remember where it came from.  If I had to guess, I'd say My Mind's Eye Nostalgia collection.  But, I could be wrong.  The silver rim makes me think that it could be from Carta Bella.  {frown}
My other 'problem' with this gift card holder, is that it is a bit flimsy.  Because the top and bottom flaps have layers and embellishments, the over all holder seems light in the back.  And that makes me want to add pattern paper to the back.  And I don't know if I want to do that.  Maybe, I'll add a matt to the inside of the holder, where the gift card sits, to allow a space to write a note.  I know this shouldn't be this hard!  And I also need to have a price.  Let me get a prototype complete that I am super happy with first.  And then I can easily do a price.  And I promise, I'll share that one with dimensions!  But, I am sure that, that won't be this weekend.  
Enjoy your weekend!  I'm headed into my craft room, to create my 'book' to hold my 5 x 5 weekly challenge (here)! I think I'll be using the current sketch from Mojo Monday.  {fingers crossed}


Thursday, April 23, 2015

Sew Glad We're Friends, Gift Card Holders

Howdy!  If you stopped by the other day, I shared with you a greeting card, and a decorated mini notebook I crafted using some special pattern papers from Maja Designs and Pion Designs.  Well, I didn't stop there!  I used some of the scraps to make two different, but equally beautiful gift card holders.  I am entering them in a current challenge over @ Word Art Wednesday.  They have an 'Anything Goes, Family Friendly' challenge.  The ladies on this design team, as super talented.  They always include a scripture from the bible, and provide a clip art of the verse to use in your paper crafting.  I however, did not include the scripture.

here is my entry: friends


For this gift card holder, I used a seriously retired pale plum card stock from Stampin' Up!.  I thought this color of card stock matched the background on the pink floral pattern paper.  The scraps I had were a bit narrower than I wanted, so I matted them onto Heather card stock from Amuse Studio.  I like how it compliments the pale plum card stock.  
Anyways, I did some machine stitching, added a scrap piece of white lace.  I have just a few of these half spools left over from a Tilda purchase last year.  [yes, I hoard some things {smile}].  I wrapped a scrap piece of cream crochet trim from Stampin' Up! I had laying on my craft table.  I created another double bow from this pale lavender seam binding.  I stuck in a button stick pin, from a recent Etsy purchase.  I also added a tiny hand made tag, that is hand-stamped with 'friends' in basic black classic ink, by Stampin' Up!.  The inside of this gift card holder is hand-stamped and heat embossed with 'Wonderful You', in pewter embossing powder.


For this gift card holder, I used Lagoon card stock by Stampin' Up!.  Instead of using solid card stock for my matt, I used a scrap piece of this pattern paper.  Its this wonderful grey, charcoal-like color.  It matches the colors in the leaves of the blue floral pattern paper.  [the reverse side, is what I used for the pink lady on the previous gift card holder.]
I added some machine stitching, as well.  I also added a scrap piece of this white crochet trim I recently purchased from Etsy.  I added a pale pink triple-bow, and tied a vintage cream button to the bow.  I made another tiny tag, and hand-stamped the sentiment in basic black classic ink, by Stampin' Up!  This inside is also hand-stamped with 'Wishing you all the Best', and heat embossed with pewter embossing powder.

Thank you for looking!  I am really working on using what I have, and that includes scraps.  I know these are all one-of-a-kind creations, so it will be hard to reproduce them without making another purchase.  I'll have to cross that bridge when I get to it. {smile}


Tuesday, March 31, 2015

I Won't Forget, Card

Welcome.  I wanted to take a quick break from my craft room, and share a card I made for a special friend; Denita.  We have been getting together once a month to craft.  Now, who wouldn't love that? {smile}.  And this sweet friend, is pretty creative!  She makes me craft better!  Anyways, when we got together earlier this month she shared a book tutorial.  And she made it simple, easy to follow instructions, and even cut out 'sample' pieces for me.  How super awesome is that?  Well, I wanted to send her a thank you card for everything! Lunch, the tutorial, her time, her friendship, and just being a very giving, considerate, and friendly person.   
Anyways, to help get some of those creative juices flowing, I stopped by a favorite sketch challenge site:  retro sketches.  I love this site, because their sketches are easy to use, and the design team is very inspirational.  Here is the currently sketch:

here is what I made:


Recipe:  I started with kraft card stock from a big box store.  I love the color.  The weight of this card stock is on the light side, so I added a matted panel to the inside to balance out the weight, so the card will stand.  
different view: straight on
I still have a few scraps from my LemonCraft purchase: Forget Me Not.  So, I matted the two different pattern papers onto some Tim Holtz texture steel blue solid card stock.  I did a single machine stitch border.  
For the half circle element, I added a tea dyed paper doily.  [yes, I tea dyed several paper doilies to have on hand when white is too bright.]  I also added some pale blue seam binding to the doily.  I just had to.  I tied a simple bow.  But you know me, there is nothing simple about it.  I tied a simple bow with cream twine to the seam binding bow, and then topped it off with a white clay blossom I had made and baked a few weeks ago.  [I always make extras when I make any clay embellishments.]
The sentiment is heat embossed in early espresso.  I wanted a stark contrast, but not black.  I added a flair button, and then some blue pearls and clear rhinestones.  
This card is pretty simple for me, but I think it still has a lot of pizzazz!  Now, I need to head into town to get this gem off to the post office.  Thank you for looking! and I hope you have been inspired to play along with the talented ladies over @ retro sketches.


Sunday, February 15, 2015

Life is Sweeter With You, Card

Howdy!  WOW, I didn't realize so much time had passed since my last post.  My apologies.  I have had some health issues, work has been crumb-y, and various other life happenings.  {grimace}
But, have no fear, I will continue to carve out time to craft!  It's in my blood!  I dream of pattern paper {smile}.  
I am getting my crafting focused.  I have a craft fair in 2 months.  I also am hosting Bunco a few weeks following that.  So, I am trying to keep my crafting prioritized, so I can make the most of the time I have.  And trying not to get tunnel vision.  {fingers crossed}  I will post projects completed for Bunco when I get them done, so stay tuned. 

card flattened, so it will fit in an A-2 envelope

But, before I get started on some of the Bunco stuff, let me start with a new item I will be selling at this year's Spring Craft Fair on May 2nd, 2015.  I call them 'cards with movement'.  I have a board on Pinterest with the same name HERE.  I will have several of this type of greeting card (card-in-a-box), with a few different occasions.  But, I will also have a few of the 'explosion box' cards, too.  (stay tuned for a post on those, this week.)
So, without further ado, my version of the 'Card-In-A-Box' Card:


an angled view:


I used some pattern paper I already had on-hand, Signature Homespun.  I figure I should use the stuff I already have, instead of just spending more money on new stuff.  Right!  (One of this years New Years Resolutions.)
Recipe:  The card base is Cherry Cobbler card stock.  I used a numeric pattern paper and matted with Early Espresso card stock.  I also used a rustic red blossom, aqua polka dot pattern paper and matted that onto Cabana card stock.  (I am a fan of red and aqua.  Love the contrast.)  
For the center piece, I stamped the 'tag' in Chocolate Chip classic ink, onto very vanilla card stock.  I stamped the 'label' piece in cherry cobbler classic ink, onto very vanilla card stock.  I sponged the edges with soft suede classic ink*.  I used foam tape to life the label off the surface of the tag.
For the side panels, I cut 1 1/4" circles from the back side of the numeric pattern paper.  I cut a 1 3/8" circle with early espresso card stock.  Adhered them together.  I stamped the bow in versa mark ink, onto very vanilla card stock.  I added pool party embossing powder, and heat embossed.  I fussy cut each bow out, and used foam tape to adhere them to the center of the matted circles.
I stamped each blossom twice.  I used a hand held punch for the larger blossoms, and fussy cut the smaller blossoms.  I adhered two the same blossoms together, back to back.  So that the blossom would be seen from any view.
I added gold embossing to the center of the larger blossoms, and rhinestones to the center of the smaller blossoms.  
The bird is stamped in versa mark ink, onto whisper white card stock.  I added gold embossing powder, and heat embossed the bird.  The bird is adhered to the back of the card with foam tape.  
The sentiment is stamped in Chocolate Chip classic ink, onto cabana card stock.  The large scallop circle is punched from cherry cobbler card stock.
I added leaves here and there, to give the illusion of a flower garden.  The back panel is left blank, so a hand-written note can be added.  These cards will be packaged with this 'note' panel un-attached, (so the piece can be laid flat when writing).
Thank You for looking.  This card is my 'sample' for the Spring Craft Fair.  I am heading back into my craft room, to make a few shabby chic 'card-in-a-box' cards.  {smile}.  Tuesday, I will be working on my sample 'explosion' box card.  I will try my best to get it photographed, and posted.  It will most likely be baby-girl themed box card.  I say that, because I already have a paper collection in mind.
If you have any suggestions, as to what you would like to see, let me know!  I'd love to know what folks could potentially be shopping for.  Enjoy the rest of your weekend!

*the edges of all solid, and pattern paper, as well as all stamped items were sponged with soft suede classic ink.

Friday, January 23, 2015

Tulips, Please Card

Happy Friday!  I hope this post finds everyone well, happy, and ready for the weekend!  Me, I am!  I have a wonderful friend who needs a German Chocolate Cake for a party on Sunday.  So, she asked me to deliver her cake on Saturday.  So, I am excited to bake something wonderfully yummy!  (I'll post a photo or two this weekend {smile})
But, before I tie on an apron and get the oven heated, I wanted to share a sweet card I am teaching tonight.  Yes, I do workshops on card making.  LOVE it! and I really get energized by the ladies who come out to my classes.  A lot of fun!  So without further ado, here is tonights workshop card:


Recipe:  (all products used to create this card are from Stampin' Up!)  The card stocks used are: pool party, lagoon, and whisper white.  The stamp sets are: Dictionary, and Love is Kindness.  
I stamped the dictionary stamp onto the lighter blue cardstock and heat embossed the lettering with white embossing powder.   I stamped the Love is Kindness stamp with Black ink.  I used my blender pen and ink pads to 'color' the tulips.
I poked a hole on either side of the newspaper roll and threaded my gold bakers twine through and tied in a simple knot.
I wrapped gold satin ribbon across the large, embossed panel, before adhering it to the card front.
I matted the small panel with lagoon card stock and used foam adhesive to adhere it to the card front. Viola!
Ok, some tips and tricks:  You want things to repeat, so that they belong.  Use a small print back ground stamp, or pattern paper that coordinates with your focal image.  You don't want the background to be too busy.  Also, use 'matching' ribbon and twine, so the colors repeat.  You also want your ribbon/twine to compliment the card stock.  And finally, use the same color of card stock, but different shades, to ground the card.  
The card is pretty, didn't use every technique or tool in your craft space, and you didn't have to spend a $100 in supplies.  Remember, to use what you have.  And have fun doing it {smile}
Thank you for stopping by.  Have a wonderful day!


Sunday, September 6, 2009

workshop

This is a card we made at a friends workshop. She wanted to have her friends give a try at heat embossing and she likes wheels! Pretty cute. Not to fussy, but really nice.
So, if you are waiting for the most beneficial time to hold a workshop? Don't wait any longer! Stampin' Up! is holding this great promotion from Sept. 01- Nov. 30, 2009. Host a qualifying workshop ($250/+) along with all the wonderful benefits (any level 1 hostess set, and $25 worth of free product of your choice) you can select any item out of the Holiday Mini Catalog (except hostess sets and My Digital Studio) for ONLY $10! That means any stamp set, paper, die, charm, chain, ribbon, rub-on, ANYTHING!