Showing posts with label seam binding. Show all posts

Saturday, January 26, 2019

Let It Snow, in January

Howdy, and welcome back.  I have been busy crafting, but not busy photographing what I have created {frown}.  But, I will work on being better at sharing what I create here, and on my Facebook page.  To be honest, sometimes, its just easier to take a quick pic with my phone and upload it on Facebook.  Yeah, that makes me sound lazy.  Honest. But lazy.  So, a New Year's Resolution has been declared!
I am playing along with three challenges: Just Add Ink, Paper Craft Crew, and Word Art Wednesday.  So, let's get started!  I stopped by Just Add Ink blog, and they have a color inspiration photo for their current challenge.

When I saw this photo, I instantly thought of a new line of holiday paper from Prima: Santa Baby.
For a little bit of direction, I stopped by the Paper Craft Crew blog.  Their current challenge is a sketch.  Perfect!  Here is that sketch:

I'm pretty sure I can work with this! {smile}
Finally, I headed over to the Word Art Wednesday blog.  Their challenges are Anything Goes, Family Friendly.  And the design team will certainly inspire you!

and here is what I created:


Recipe:  I created a standard A2 size greeting card (5 1/2" x 4 1/4").  I used PaperTrey Ink's Aqua Mist card stock for the card base.  I just love this soft, pale water color!  I added a piece of the 'houses' pattern paper from Prima: Santa Baby.  I thought it looked sweet, and cozy.  
The next layer is the mugs of cocoa pattern paper from Prima: Santa Baby, matted with Autumn Rose card stock by PaperTrey Ink.  
I then wrapped a piece of cream lace and pale pink seam binding around the second layer (similar to the sketch), and then I machine stitched these layers together.  I added my layered stack towards the right (as in the sketch).  I machine stitched the sentiment panel to the Aqua Mist card stock.  I slipped on a 'tree' paper clip.  And used foam tape to adhere it to the paper paper layer.  
I tied a double bow with the pale pink seam binding, and tied a tiny pale pink ornament to the bow with some gold and white bakers twin.  I adhered a paper blossom from the Prima: Santa Baby collection just above the bow.  I punched out some leaves and stuck them in behind the paper blossom (as in the sketch).  
I added a trio of crystals (as in the sketch) from Prima to the front of the card; two below the bow and one next to the tree paper clip.  I thought that they added the right amount of sparkle, even tho they are two different colors: aqua and pale pink.
Thank you so much for stopping by.  I hope that you have a chance to play along with any or all of these challenges!  Enjoy your weekend, and I hope to be back soon!

Tuesday, September 11, 2018

Birthday Blue

Howdy, and welcome.  Oh my goodness, I hadn't realized that it's been a month since I last posted.  I have been crafting.  I guess life has me pulled in too many different directions.  Just like the rest of you.  Life gets busy, and we don't always have enough time in the day to get everything done that we want.  {frown}
This past weekend, a sweet, dear friend was celebrating her birthday.  And well, I wanted to craft something special for her. {smile}  My friend, is a lover of shabby chic, and a junking girl, just like me.  She also loves simpler things in life: a good book, afternoon tea, needle-work, family, and close friends.  
My favorite styles of crafting are shabby chic, retro, and vintage.  So, crafting something for this special girl friend, is easy.  I pulled out some pattern paper by Prima: Something Blue.  I know, this is a 'wedding' themed collection.  But, I think I can make it work {wink}.
I am sharing with you a gift tote that I created.  I also crafted a Birthday card, a bookmark, an extra card for her stash, and a packaged gift card holder.  Let's start with the tote:


Recipe:  The card stock tote is made from Kraft card stock by PaperTrey Ink.  I just love their heavy weight card stock.  Sturdy, and strong!  I layered the pink and cream polka dot pattern paper as the matt.  I then added the text & fauna printed pattern paper.  I love how the two pattern papers contrast each other.  I added a simple border stitch to the pattern papers.  
I wanted to add some visual interest and design, so I decided to add two large banner pennants.  I wanted to keep with the contrast, but to play-up the main floral pattern paper.  I used the mint text and black text pattern papers for these banner pieces.  The pattern paper that I truly love, is the floral pattern paper that was added last.  I wanted a decorative shape, so I went with a 'top note' shape.  
I wanted to soften the contrast of the black pattern paper, so I added a small piece of a white paper doily peeking out of the bottom of the pretty floral pattern piece.  To help add a little feminine touch, I added a pair of pale mint half faux pearls parallel to the edge of the tote.
This dear friend, has a love of books.  So, I wanted to include 'books' as an underlining theme.  I pulled out my All Booked Up stamp set by PaperTrey Ink.  I inked the 'tag' portion of this sentiment piece in Mint Macaroon by Stampin' Up!.  I stamped the sentiment and circle piece in Dark Grey classic ink.  I used foam tape to the back of the circle piece and sentiment piece, to lift them off the front of the tag piece.  
I tied a simple bow with rose seam binding to the top of the 'tag'.  I tied a faux pearl and an aqua mist button to the bow with silver cord.  I wanted soft, shabby colors that contrast (rose and aqua), but also a feminine touch (pearl).  To help add some bling & metallic, I selected the silver cord.
I wanted to continue with the softness that trims can add, so I selected a white lace, a rose cotton scallop trim, and a kraft seam binding.  To continue with the metallic, I added a piece of cream and silver bakers twine across the kraft seam binding.  I added a paper blossom from the same Something Blue collection by Prima.  I tied a simple bow with the silver metallic bakers twine just behind the paper blossom.  I used a small snippet of the rose cotton scallop trim, in place of leaves.  This continues with the rose color with the seam binding and cotton trim.
Thank you so much for looking.  I'll post an image and write-up for the Birthday card tomorrow.


Thursday, August 9, 2018

Baby Boy Collection

Howdy.  I purchased a few items from the Heaven Sent 2 collection by Prima.  Let me start by saying how sweet and beautiful the pattern papers, blossoms, and the embellishments are.  So, it was very easy to create a variety of paper crafts using this collection.  


I created a gift bag, a small gift box, a pizza box, a greeting card, and two different sizes of gift card holders.  I used Kraft card stock by Paper Trey Ink as the base for all of these items.  I did use two different blue matts: Aqua Mist by Paper Trey Ink, and Lost Lagoon by Stampin' Up!.  I used silver as an accent only on the large packaged gift card holder.  I used gold as the accent metallic on everything else.  I mostly liked white paper blossoms, but there are two blue blossoms.  
And yes, all these items will be available at my craft shows.  Thank you for stopping by.  I hope you have seen something that makes you smile.  Have a great day, and I hope you have a chance to create something beautiful!

Monday, August 6, 2018

Cherry Money

Howdy, and welcome.  Oh my goodness, I can't believe that it has been so many weeks, since I posted.  YIKES!  Well, I haven't stopped crafting.  Apparently I have stopped photographing my work.  I will get some photos uploaded soon.  I have been working on a few baby themed items.  I'm using the Heaven Sent 2 collection by Prima.  Oh my, is it gorgeous and a lot of fun to work with! {smile}  I am working on some non-holiday items for a few Holiday Craft Fairs, this year.  And well, I was afraid of running out of time, so I started in June.  We will see how this goes.
Anyway, I took a break from baby stuff, to create a sample money holder.  If you have been to my booth at a craft fair, you know that I alway have a sample of what is packaged, so you can play with it, see how it works, get a feel for the dimensions, etc.  Sometimes, the gift is cash.  Not always a bad idea.  Sometimes, that's what works for the occasion, the recipient, or what you want to give.
It is a simple money holder, in that you open the 'card' and there is a slot for cash.  See, super simple. No bells or whistles.  Clean, easy, simple, and sometimes just the perfect gift.  {smile}
here it is:


Recipe:  I used True Black card stock, by Paper Trey Ink, as the base.  I just love the heavy weight of this card stock.  It will stand-up to my embellishing.  And that's a good thing.
I used pattern paper from the Cherry Blossom collection by Prima.  I wanted something soft, feminine, and pretty.
I machine stitched a simple border around the main panel.  And then I machine stitched the three trims: pale pink seam binding, white crochet trim, and a black & white check ribbon.  
The banner piece is a different pattern paper from the same collection.  To help give it structure, I matted it with a scrap piece of the True Black card stock.  I added foam tape to the top and flag end of the banner piece.  To keep it from squishing the trio of trims.
I hot glued a large pale pink paper blossom, I picked-up from a large box craft store, earlier last year. I added a pink and gold glitter leaf from Prima.  And tied a thin gold string through a tiny pale pink vintage button, and add those to the banner piece, as well.
I used my die-cut machine & a die, to create the sentiment piece.  I also used a different pattern paper from the same collection.  I selected a pattern paper that wasn't too busy, but still had the same color scheme.  I inked my sentiment stamp in Basic Black classic ink, by Stampin' Up! and hand-stamped the sentiment.  I adhered this sentiment piece to the money holder with foam tape, as well.  
I tied a triple bow with the pale pink seam binding, and added a faux pearl brad to the center of the bow.  I adhered the bow to the front of the money holder with hot glue.  And my final touch, is a trio of pink faux half-pearls.
I am still trying to decide if I want to add some white paint and glitter to the tips of the large paper blossom.  Let me know what you think.  I'm kinda on the fence with that one.
Now, I'm off to make a few baby-themed money holders, and a few small gift card holders.
I hope you have a chance to craft today!  I know my soul always feels so much happier when I do!

Sunday, May 13, 2018

Mother's Coupon

Howdy.  I hope you are well.  Me, I'm busy, tired, training, and still working.  I don't always get to craft as much as I want.  But, I did carve out some time, to get this card created, and in the mail.  It's a hand-made card I made my mom, for Mother's Day.  I used items I already had.  Because sometimes you just need to stop spending $, when your stash is overgrown.  {smile}
here is what I created:


an angled view:


The card base is made from Pink Pirouette card stock by Stampin' Up!.  I just love the heavy weight of their card stock.  Sturdy, and holds up to embellishing.  And the soft sweet color is perfect.
The plaid pattern paper is Chicken Scratch from Paper Trey Ink.  It's a River Rock or Fresh Linen color.  I thought it matched the leaved in the pattern paper almost perfect.  The floral Pattern Paper is from American Crafts.  
I took one paper doily and cut it in half and adhered it to opposite corners.  And then machine stitched the pattern papers together.  I just love the homespun look cards have with machine stitching.  I took a scrap piece of cotton trim and wrapped it around the pattern papers.  I added a piece of soft pale pink seam binding to the cotton trim, and machine stitched them to the card front.  
I hand-stamped the coupon onto a scrap piece of white linen card stock, in crumb cake classic ink.  I adhered the coupon onto the card front with foam tape.  I hand-stamped the 'Love You' onto a scrap piece of vellum card stock, in Versa Mark.  I used Early Espresso embossing powder, and heat embossed the sentiment.  I cut the the vellum card stock with scallop scissors.  (yeah, I still have several pairs of those scissors.)
I added two different, white, paper blossoms to the right side of the coupon.  I tucked in some leaves that I hand-punched from a green and mint card stock.  I tied a double bow with the same pale pink seam binding, and adhered it to the card front just under the paper blossoms.  I adhered a white glitter clay rose to the center of the bow.
Thank you for stopping by.  I mailed this card to my mom earlier this week, and super happy she received it before today {smile}.  I want to wish all the moms out there Happy Mother's Day!  Being a mom is hard work, but super rewarding!  


Thursday, May 3, 2018

a bowl of cherries

Howdy, and welcome.  I am super excited today to share with you some happy news and a card!  I recently won the challenge over @ Tic Tac Toe Challenge and was given the opportunity to be a guest designer!  How fabulous is that, right!  So, without any delay let's get to their current challenge #tttc046!

right column: fruit, watercolor, free
Now, before you get discouraged, here are some ideas.  For the 'fruit', you could add apple(s) and create a Teacher Appreciation card.  Or lemon(s)/lime(s) for a Summer themed card.  Or add a pineapple for a Hostess card.  For the 'Free', simply add your favorite item: machine stitching, a button, sequins, a paper straw, etc.  The list is almost endless.  Don't forget to use what's in your stash, and most importantly have fun!  This Tic Tac Toe card, really does lean towards a Summer theme.  I can't wait to see what you create.  Here is what I made:


Recipe:  my card, is a typical A2 size greeting card.  (4 1/4" x 5 1/2").  
FRUIT: cherries, WATERCOLOR: color wash on watercolor paper, FREE: machine stitching, button, seam binding, and lace.
The base of the card is made with Crumb Cake card stock by Stampin' Up!, due to their lovely heavy weight card stock.  The main panel is made from a linen plaid card stock by Paper Trey Ink.  I love this soft color!  I added a piece of 6" lace over the main panel.  I 'attached' the lace with some machine stitching along three sides.  I did a quick, purposefully sloppy double border stitch.  I love adding machine stitching to my crafts.  I think it adds a homespun look/feel.  
I adhered a 4" paper doily to the right side of the card.  I simply folded the over-hang around the main panel.  I machine stitched a strip of pale blue seam binding along the lover third of the card to help anchor the seam binding to the card front.  I tied a double-loop bow, and tied a 'swirl' red button to the center of the bow with some gold twine.  This 'fancy' button reminded me of a cherry with its imprinted design.  {smile}
The sentiment is stamped and heat embossed on a scrap piece of white card stock.  I rounded one end, and pointed the other end.  I thought this shape looked like one of those garden/plant markers.    Super sweet, right? {smile}
I made my own embroidery hoop.  I used a die to cut the shape.  I used a scrap piece of wood veneer 'paper'.  I just love this stuff.  But my shock is dwindling.  {frown}. For the inside of the hoop, I took a scrap piece of watercolor paper and stamped my bowl in Versa Mark ink, and added white detail embossing powder.  I used Versa Mark ink to stamp the cherries, and added deep red embossing powder.  I heated the paper, and my bowl of cherries came to life!  I misted the water color paper heavily with water, and then washed it with a pale blue color.  I wanted the cherries to pop! and the bowl to have some contrast, to showcase the bowls design.  I used a fine tip brown marker to create the cherry stems.  (hand drawn)
The final touch was the trio of wood grain printed sequins.  I felt that they helped tie the wood-grain hoop to the card.  I adhered the main panel of this card to the card front with foam tape.
I believe that if you repeat elements/colors, it helps tie that element to your card.  The color I washed the watercolor paper with, matches the seam binding.  The red in the cherries is repeated with the same color of the button.  The wood grain of the hoop is repeated with the sequins.  The white doily and card base are repeated in the plain paper.
I hope that you join this beautifully talented group of ladies over @ the Tic Tac Toe Challenge.  Just let them know which row you are using on their tic tac toe card, and don't forget to have FUN!  Create something beautiful to share with us, but to also share with your family and friends!  Trust me, they will appreciate your efforts in creating something handmade!


Friday, March 16, 2018

Beautiful You Card

Howdy, and welcome!  Today I wanted to share with you a card I hand-crafted.   I wanted to make something pretty, with a generic sentiment.  This card isn't for anyone, so nothing specific.  I just wanted to paper craft.   I set out looking at a few of my favorite paper challenge sites to get some direction, and I found some very fun challenges.  So, let's get started!
I wanted a bit more direction, so I decided on a sketch challenge.  I knew what I wanted to use, I just needed a little more direction.  So, I stopped by the Paper Craft Crew challenge site.  This challenge site mostly does sketches.  But every now and again they will throw in a theme, or tic tac toe board, but they will always inspire you!  


I didn't rotate or flip their current sketch.  I used it as is!  I also did not switch out the blossom images for any other shaped item.
Since I already knew what pattern paper I wanted to use, and I now have a sketch to work with, I decided to play along with the wonderfully talented ladies over @ Word Art Wednesday.  Their challenges are : anything goes, family friendly.  

You will be pleasantly surprised by this design team.  They are very creative and talented, and the submissions are pretty great too!


and here is what I created:


Recipe:  this blank inside greeting card is the typical A2 size: 4 1/4" x 5 1/2".  I used cream card stock by Paper Trey Ink for the card base.  This card stock is a beautiful heavy weight, so it stands up to my embellishing!  The main panel matt is Kraft card stock by Paper Studio.  I just love the neutral soft color of kraft. {smile}
The pattern papers are digital.  I use my at home printer to print these.  I used whisper white card stock by Stampin' Up! for 3 of the pattern papers.  This card stock has a 'slick' feel to it, and allows the card stock to take the ink from my printer beautifully! I have zero complaints.  The small square that has the sentiment on it, I shrunk down.  It would have printed 6" x 6", but I wanted the whole sheet of paper to be my focal piece.  And I just love the sentiment.  That piece I printed on Linen card stock by Paper Trey Ink.  I felt the added texture would help give my card some depth, and not be so flat.
I cut my top pattern paper, so that the mix of floral images would have some blues in it, to help tie the bottom pattern paper that is a blue collage with copper dots.  
I added a simple border stitch with my sewing machine.  I think it adds a 'homespun' look/feel.  
To hide the seam where the two pattern papers overlap, I added a scrap piece of white cotton trim, and topped that with a scrap piece of pale pink seam binding.  I added a little machine stitching there too.  It holds the card front together, and continues with the machine stitching along the card's edge.
The pink polka dot pattern paper, I flagged the end, for visual interest.  
To make my 'tag' piece, I simply added my pattern paper square to a scrap piece of the same Kraft card stock I used for the main matt.  I used my scissors to make the tag shape at the top.  I used a traditional hole punch to give my tag that finished look.  I threaded a piece of pale pink seam binding through the hole and tied a simple knot.  I then tied a simple knot of pale pink tinsel to a rich brown button, and hot glued it to the top of my seam binding bow.  I adhered the tag to the card front with foam tape, to help elevate it off the front of the card.
The paper blossoms are from my stash.  The brownish blossom is from Prima.  I just loved the color.  Not quite brown.  Not quite copper.  The white paper blossom and the little pink paper blossom are from LemonCraft.  I added some white paint and glitter to the petals, of both blossoms.
Thank you for stopping by and having a look at what I created.  I hope you have been inspired to play along with either or both of these challenge sites.  Enjoy your Friday!


Wednesday, March 14, 2018

Pretty Little Birdie

Howdy.  I want to share with you another gift card holder I created for a very special someone.  I hope you like it {smile}


Recipe:  I used digital pattern paper, that I printed on both white Linen & whisper white card stock.  I used the textured (Linen card stock) to print the taupe pattern paper and the cream pattern card stock. I just love this added texture of the paper.  I added some machine stitching to help convey the homespun look and feeling {smile}.
The card base was made from Sahara Sand card stock.  I just love the soft color, and the heavy weight card stock is strong to hold up for these projects.
I matted the blue pattern paper to a pale pink card stock.  I wanted to highlight the pale pinks {smile}.  I also added a thin strip of the pale pink pattern paper to the top of the gift card holder, over the bow & scallop white cotton trim.   The pale pink pattern paper has taupe colored birds, flying in multiple directions on a pale pink background.  Super sweet!
The main panel was matted with a light taupe card stock, to help highlight this piece from the card front.
I added a sweet, delicate, paper doily to the main panel.  To help off set it, I added a piece of light blue pattern paper behind it.  This pattern is that taupe-y color hearts on top of the pale blue background.  I thought this heart pattern paper mimics a polka dot pattern paper, and so I just fell in love with it!
I added a large pink crepe paper blossom on the delicate paper doily.  To help tie the colors together, I added a triple bow tied with coconut seam binding.  I thought this color really matched the over-all taupe color.  To help the pale pink color to pop, I added a pale pink button to the center of the bow.  I also wanted to add some sparkle, so I tucked in a rhinestone charm.  It's a silver floral shape with a rhinestone center.  Just the right amount of sparkle.
The sentiment was hand-stamped in basic black classic ink, onto a scrap piece of very vanilla card stock.  I used a very retired stamp set from Stampin' Up! I just love the font!
Thank you for stopping by.  This gift card holder has already been mailed, and I hope the recipient is happy with my work {smile}.


Saturday, February 10, 2018

Celebrate YOU!

Welcome.  I wanted to use some of the scraps I had left over from a beautiful paper collection by Prima - Rossibelle.  I just love the flecks of metallic mixed in with florals, stripes, & texts.  I am entering my card in three different, but equally wonderful card challenges {smiles}:  Double D, the Card Concept, and Tic Tac Toe challenges.

My first stop was Double D challenge site.  They have some pretty clever challenges and their current challenge is no exception: sequins.  Now, who doesn't love sequins?  Not this girl!
I sprinkled my sequins

My next stop was the Card Concept.  I love this challenge site, because they have a theme and a mood board.  So, no confusion, and you are given a direction for your entry.  Easy peasy.  Their current theme: old fashion LOVE.  I can do that!
I used pinks, and a blossom

And finally, my newest interest: Tic Tac Toe challenge.  I like these types of challenges, because it helps give your crafting a direction and takes away some of the restraints.  LOVE that!  Here is their current Tic Tac board:
I went down the right side: Celebrate, floral, ribbon
and here is what I created:
still learning how to photograph shiny things

I just love the mix of metallic, pinks, cream, and pops of black - pretty!
and a different view:


Recipe:  This blank inside card is a typical A2 size: 4 1/4" x 5 1/2".  I used a pale pink card stock for the base.  I believe its one of my last few sheets of Blush Blossom from Stampin' Up!.  
I layered a text pattern paper and a black design pattern paper from the Rossibelle collection by Prima.  Then I sandwiched a scrap piece of cream cotton trim between them, and machine stitched a simple border.  I rubbed some tea stain ink across the machine stitching to help it pop.  
Starting with the right upper corner:  I adhered a tag from the collection and hot glued a double bow tied with pale pink seam binding.  I found that sweet tiny button in my stash.  I believe it is from CTMH neutrals collection.  
The focal piece is actually a piece from the embellishment kit.  I adhered it to the front of the card with foam adhesive.
I adhered a fabric blossom to the left lower corner of the focal piece.  I then tucked in a cream button from Stampin' Up!.  I thought the button design matched with the cream cotton trim design.  {smile}
And the last two pieces from the Rossibelle collection to go onto my card were those two strips at the lower right corner.  The pink text paper is actually a strip from the text pattern paper.  The sentiment strip is a sticker from the same collection.
My two final additions were the metallic embossed sentiment piece, and the sprinkle of the copper sequins.  The sentiment piece was hand-stamped onto cream card stock and detail copper kettle embossing powder was used.  I adhered the 'CELEBRATE' to the card front with more foam adhesive.  I glued the copper sequins to the card front.  I added three tucked, so they would peak out, and the other four I wanted full view of.  {smile}
Thank you for looking.  I hope you get a chance to play along with any/all of these challenge sites.  Have a great weekend!  and do something that makes your heart happy!

Saturday, January 27, 2018

Celebration Tickets

Howdy, and welcome.  I am still working on Christmas/Holiday themed crafts, but I think most folks are done with looking at those.  So, I am sharing some other paper crafts with you today - handmade cards.  It's like 'a hug with a fold in the middle' - how super sweet is that saying {smile}.
I am entering my card(s) into two challenges.  One a recent play-a-long, and the other is 'new-to-me'. So, let's start with the recent play-a-long:  Time Out Challenge.  Their current challenge is 'inspired by a word'.
I have chosen: Celebrate!
And the next challenge stop is a 'new-to-me' challenge:  Sweet Sketch Wednesday.  Their current challenge is, well a sketch of course! {smile}

What originally caught my eye about this sketch, is the potential!  The circle can be a circle, a snowflake, a large blossom, a doily,  etc.  The possibilities are endless, and I just love those!
and here is what I made:


Recipe:  I used crumb cake card stock by Stampin' Up! for the base of this card.  I just love the soft, creamy kraft color.  The pattern papers are from  three different manufacturers.  I've been working hard at using what I have, and not hoarding collecting craft supplies {smile}.  It's a work in progress.
The pink ledger pattern paper is from Bo Bunny.  The mint polka dot pattern paper is from Core'dinations. and the random ticket pattern paper is from American Crafts.  I just love how these soft, sweet colors mix so well {smile}.  I layered the pattern papers on top of each other, and then did a simple border stitch with my sewing machine.  I just love the homespun look this gives my crafts.  I wrapped a piece of cream cotton trim, and seam binding around the lower third of the card, and sewn it in place.  Tied a double bow with the seam binding, and hot glued it to the front of the card.  I stamped and cut a wreath from the same crumb cake card stock, to repeat the color.  My sentiment is a stamp from Close To My Heart.  I stamped it in black ink onto a textured white card stock, then matted it with a scrap piece of pool party card stock by Stampin' Up!.  I used foam tape to lift the sentiment off the front of the card.  I added some rhinestones to give it some bling, and tied a vintage button with a gold bakers twine to add to the sparkle.  The blossom was glittered and adhered to the card front.


I couldn't decide if I liked this card with pink or blue seam binding, so I simply made both.  {smile}
Thank you for stopping by, I hope you get a chance to play with either or both of these challenge sites.  Until my next craft share, have a great day!

Tuesday, January 23, 2018

Winter Wonderland in Blue & Green

Howdy.  I have another holiday-themed gift card holder.  I hope you are up for one more {smile}.  I am entering this gift card holder into two 'new-to-me' challenges: First Belarusian Challenge, and the Holly and Ivy Christmas Challenge .
My first stop is @ First Belarusian Challenge.  This is a challenge site from Russia, and yes, they do have a 'translate' button.  Their current challenge is Winter Fun.  You need to look at what the design team has created.  Truly creative and simply gorgeous!  They also have an inspirational board:


My next stop is @ the Holly and Ivy Christmas Challenge.  Their current challenge is Always Anything Christmas Goes.  This design team uses pattern papers and die cuts with a creative flair.  You will certainly be inspired!
and here is what I created:


and a different view:


Recipe:  The base of this gift card holder was made out of Pool Party card stock by Stampin' Up!  I just love this soft, creamy, pale blue color.  I used two pattern papers from the same digital pattern paper collection.  I used Mint card stock by Paper Trey Ink for the matt of the music & floral pattern paper.  I added a simple border of machine stitching, to give it a homespun look and feel.  I just love the music & floral pattern paper, so I wanted the pattern paper to be center stage.  I added a pale green seam binding and vanilla crochet trim.  I just love how soft, and vintage seam binding makes projects, and the crochet trim to echoes the same softness.  The paper blossom is from the Sweet Peppermint collection by Prima Marketing.  I think this pink blossom goes very well with the pattern paper.  I added a double bow tied with the seam binding.  I tucked a sentiment chipboard piece to the opposite side of the paper blossom.  And finally, to add a bit more sparkle, I added several silver sequins.  I just love how shiny they are {smile}.  Once you open this 'card' you will find your gift.  Gift card, that is!
card opened:


Thank you for stopping by.  I hope you aren't too tired of looking at Holiday/Christmas themed cards and projects.  I hope that you have time to play along with these or your favorite challenge site.  Crafting makes the soul happy {smile}.

Wednesday, December 20, 2017

It's a Blue Wednesday

Welcome.  I am so happy you have decided to stop by today.  I have some good news.  I am a Guest Designer, again, for the wonderful ladies @ Word Art Wednesday.  {smile}  How absolutely fabulous is that?
If you have a chance, you really must play along with this challenge site.  The ladies over @ Word Art Wednesday, run their challenges for 2 weeks, provide you with a scripture to add to your paper craft, and their theme is generally Anything Goes - Family Friendly!  How wonderfully different.
here is what I created:


Recipe:  This blank inside greeting card is a typical A2 size (4 1/4" x 5 1/2").  I used crumb cake card stock by Stampin' Up! as my card base.  I just love this creamy kraft colored, heavy weight card stock for card bases.  
I then layered two pattern papers from Prima Marketing Something Blue collection.  I just love the vintage look of these papers.  I layered the vintage, faded green text pattern paper on top of the distressed black text paper.  I added a simple single border stitch, with my sewing sewing machine.


I wrapped both a matching seam binding and a soft, delicate lace trim around the front of the card.  
I printed a digital library card, that I believe matched these pattern papers beautifully.  
I printed the scripture onto whisper white card stock, then matted it on a scrap piece of crumb cake card stock, and adhered it to the card front with foam tape.
I selected a few pale blue-green blossoms to add to the front of my card.  But first, I painted the petals with a pearl white paint and then dusted them with fine glitter.  I adhered those paper blossoms to the card front.  And then tucked a double bow tied with the seam binding, just below the largest paper blossom.  And the final touch was adding a clear faceted button just below the bow.  Viola!
I hope that you have an opportunity to play along with the wonderful ladies over @ Word Art Wednesday.  {smile}


Wednesday, December 6, 2017

Guest Designer


Now, for the most exciting news:  I am the Guest Designer @ Word Art Wednesday!  How super fabulous is that?  I know I am blessed to have this opportunity to share my paper crafting with all of you, and I hope I don't disappoint you!   My crafting style is vintage, shabby-chic, with a little country flair thrown in.  Let me explain.  Vintage, because I like everything to look worn, used, old, but not grungey.  Think peeling paint, scruff marks, weathered.  Shabby-chic, because I like to add buttons, seam binding, machine stitching, pinks, blues (or any soft hue), and a splash of elegance/bling.  Country flair, because I like 'farmland' imagery: milk caps, chicken wire, vintage scales, mason jars, burlap, chickens (birds), and some recycled items.  I hope that makes my 'style' a little easier to understand/translate. {smile}

The lovely, and super talented ladies over @ Word Art Wednesday, have an Anything Goes - Family Friendly challenge for you to participate in.  The challenge runs for two weeks, to help give you time to play along.  They provide you with a piece of scripture that you are welcome to include in your paper craft, but it is NOT required.  The design team has a wonderful collection of different style of crafters, so I am sure at least one of these creative ladies will inspire you to play along!
Here is the current challenge scripture:


and here is what I made:


Recipe:  I used vintage cream card stock as my card base.  I just love this heavy weight card stock.  It's thick, so it will stand up, even with all my layers and embellishments {smile}.
I used pattern paper from Prima Marketing.  It's not holiday themed paper, but this paper is easy to work with!  
I added a paper doily peaking out of the bottom of the top layer.  Then added some machine stitching.  
I wrapped some pale pink seam binding around the card front and tied a multi-loop bow.  I then tied a pink button to the center of the bow.  I also added a trio of sweet buttons along the bottom left corner.
I printed the scripture onto very vanilla card stock and adhered it over the seam binding.
I cut out a snowflake using champagne glitter paper.  I tucked it in under the sentiment piece.  I then stamped some pine braces using light grey and light pink ink.  I added glitter to the paper blossom, and then adhered it over the pine branches and snowflake.  To give my card a bit more sparkle, I added some sequins around the blossom.
Thank you for stopping by!  I hope you visit again! 


Sunday, December 3, 2017

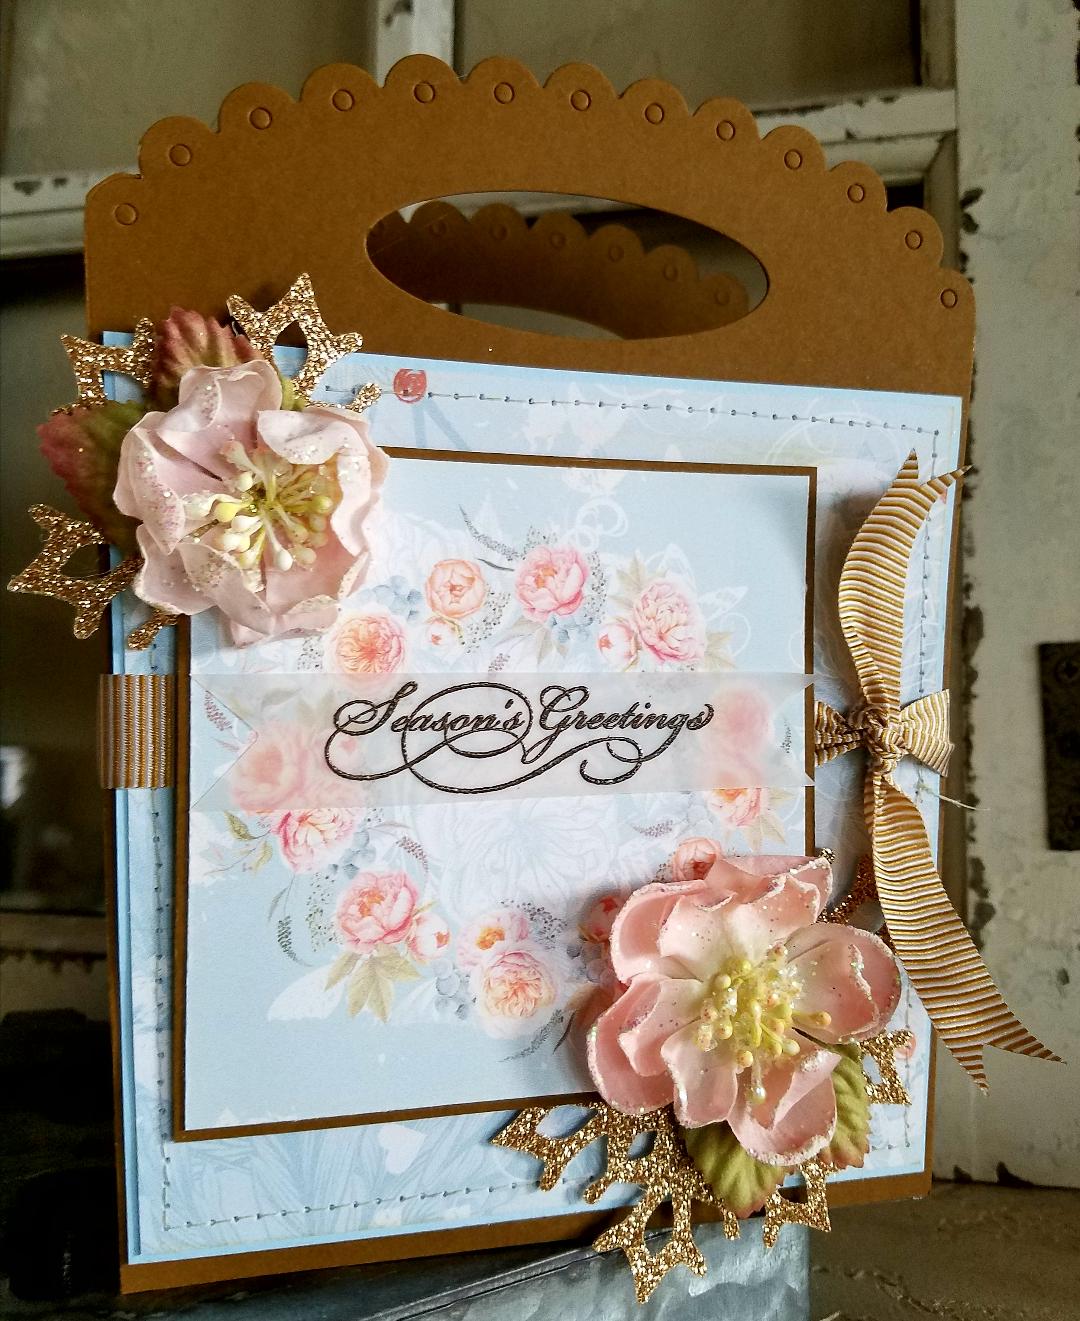
Sweet Floral Holiday Bags

Howdy! I wanted to share with you a project I did.  I made a paper tote and gift bag.  But, I used non-holiday pattern paper, to make holiday themed bags.  Because like a lot of us can't always afford to purchase another collection of pattern paper.  And lets face it, I really need to start using the paper I have, and not keep adding to my collection {smile}.  I am entering the current challenge over @ A Snowflakes Promise Challenge - Anything Goes.


and here are my projects
the paper tote:


and here is my gift bag:


~ disclaimer:  I was crafting late into the evening, and lighting was scarce. ~

Recipe:  I used Cocoa Bean card stock, and snowflake die, are by Paper Trey Ink.  The pattern papers I have used are digital papers.  The sentiment is a stamp.  The vellum card stock, Early Espresso embossing powder, seam binding, ribbon, and champagne glitter paper are by Stampin' Up!.  The tulle trim is Mellissa Frances.    The two peach blossoms (on the tote) are from Recollections.  The beige blossom (on the bag) is from Prima.  The tiny pink ornament bulb is from a big box store.
The Tote:  I used a die from Paper Trey Ink to die cut the tote.  I layered the pattern paper onto solid card stock, and added some machine stitching.  I adhered the floral circle paper to the front of the tote with foam tape.  I tucked the snowflakes between these two layers.  I hot glued the blossoms to the corners.  To create the sentiment piece, I heat embossed the sentiment onto vellum and adhered it off center of the blossom circle.  And lastly, wrapped the ribbon around the tote, to help give it a finished look.
The Gift Bag:  I only had scraps of this pattern paper, so I wanted to use them up, before I started printing again.  The large floral pattern was a 6" x 6" piece.  So, I cut my piece 4 1/2" x 6", to use more of what I had.  I added two different polka dot papers, both of which were scraps.  I added some machine stitching to give it a homespun look.  I added the tulle trim and seam binding to help hide the seam where the two papers meet.  I tied the seam binding into a multiple loop bow, attached a bulb, and tucked in a paper blossom.  I created the sentiment piece, just like I did for the tote (heat embossing).  To hide the seam, at the top, where the two pattern papers joined, I added a scallop trimmed pattern paper.  I adhered the card stock panel to a paper bag.
These two types of bags were for sale at yesterdays craft fair.  I hope these two samples have given you some inspiration to use the non-holiday themed pattern paper for your next holiday paper craft.  {smile}