Showing posts with label card. Show all posts

Saturday, January 26, 2019

Let It Snow, in January

Howdy, and welcome back.  I have been busy crafting, but not busy photographing what I have created {frown}.  But, I will work on being better at sharing what I create here, and on my Facebook page.  To be honest, sometimes, its just easier to take a quick pic with my phone and upload it on Facebook.  Yeah, that makes me sound lazy.  Honest. But lazy.  So, a New Year's Resolution has been declared!
I am playing along with three challenges: Just Add Ink, Paper Craft Crew, and Word Art Wednesday.  So, let's get started!  I stopped by Just Add Ink blog, and they have a color inspiration photo for their current challenge.

When I saw this photo, I instantly thought of a new line of holiday paper from Prima: Santa Baby.
For a little bit of direction, I stopped by the Paper Craft Crew blog.  Their current challenge is a sketch.  Perfect!  Here is that sketch:

I'm pretty sure I can work with this! {smile}
Finally, I headed over to the Word Art Wednesday blog.  Their challenges are Anything Goes, Family Friendly.  And the design team will certainly inspire you!

and here is what I created:


Recipe:  I created a standard A2 size greeting card (5 1/2" x 4 1/4").  I used PaperTrey Ink's Aqua Mist card stock for the card base.  I just love this soft, pale water color!  I added a piece of the 'houses' pattern paper from Prima: Santa Baby.  I thought it looked sweet, and cozy.  
The next layer is the mugs of cocoa pattern paper from Prima: Santa Baby, matted with Autumn Rose card stock by PaperTrey Ink.  
I then wrapped a piece of cream lace and pale pink seam binding around the second layer (similar to the sketch), and then I machine stitched these layers together.  I added my layered stack towards the right (as in the sketch).  I machine stitched the sentiment panel to the Aqua Mist card stock.  I slipped on a 'tree' paper clip.  And used foam tape to adhere it to the paper paper layer.  
I tied a double bow with the pale pink seam binding, and tied a tiny pale pink ornament to the bow with some gold and white bakers twin.  I adhered a paper blossom from the Prima: Santa Baby collection just above the bow.  I punched out some leaves and stuck them in behind the paper blossom (as in the sketch).  
I added a trio of crystals (as in the sketch) from Prima to the front of the card; two below the bow and one next to the tree paper clip.  I thought that they added the right amount of sparkle, even tho they are two different colors: aqua and pale pink.
Thank you so much for stopping by.  I hope that you have a chance to play along with any or all of these challenges!  Enjoy your weekend, and I hope to be back soon!

Saturday, February 10, 2018

Celebrate YOU!

Welcome.  I wanted to use some of the scraps I had left over from a beautiful paper collection by Prima - Rossibelle.  I just love the flecks of metallic mixed in with florals, stripes, & texts.  I am entering my card in three different, but equally wonderful card challenges {smiles}:  Double D, the Card Concept, and Tic Tac Toe challenges.

My first stop was Double D challenge site.  They have some pretty clever challenges and their current challenge is no exception: sequins.  Now, who doesn't love sequins?  Not this girl!
I sprinkled my sequins

My next stop was the Card Concept.  I love this challenge site, because they have a theme and a mood board.  So, no confusion, and you are given a direction for your entry.  Easy peasy.  Their current theme: old fashion LOVE.  I can do that!
I used pinks, and a blossom

And finally, my newest interest: Tic Tac Toe challenge.  I like these types of challenges, because it helps give your crafting a direction and takes away some of the restraints.  LOVE that!  Here is their current Tic Tac board:
I went down the right side: Celebrate, floral, ribbon
and here is what I created:
still learning how to photograph shiny things

I just love the mix of metallic, pinks, cream, and pops of black - pretty!
and a different view:


Recipe:  This blank inside card is a typical A2 size: 4 1/4" x 5 1/2".  I used a pale pink card stock for the base.  I believe its one of my last few sheets of Blush Blossom from Stampin' Up!.  
I layered a text pattern paper and a black design pattern paper from the Rossibelle collection by Prima.  Then I sandwiched a scrap piece of cream cotton trim between them, and machine stitched a simple border.  I rubbed some tea stain ink across the machine stitching to help it pop.  
Starting with the right upper corner:  I adhered a tag from the collection and hot glued a double bow tied with pale pink seam binding.  I found that sweet tiny button in my stash.  I believe it is from CTMH neutrals collection.  
The focal piece is actually a piece from the embellishment kit.  I adhered it to the front of the card with foam adhesive.
I adhered a fabric blossom to the left lower corner of the focal piece.  I then tucked in a cream button from Stampin' Up!.  I thought the button design matched with the cream cotton trim design.  {smile}
And the last two pieces from the Rossibelle collection to go onto my card were those two strips at the lower right corner.  The pink text paper is actually a strip from the text pattern paper.  The sentiment strip is a sticker from the same collection.
My two final additions were the metallic embossed sentiment piece, and the sprinkle of the copper sequins.  The sentiment piece was hand-stamped onto cream card stock and detail copper kettle embossing powder was used.  I adhered the 'CELEBRATE' to the card front with more foam adhesive.  I glued the copper sequins to the card front.  I added three tucked, so they would peak out, and the other four I wanted full view of.  {smile}
Thank you for looking.  I hope you get a chance to play along with any/all of these challenge sites.  Have a great weekend!  and do something that makes your heart happy!

Saturday, September 16, 2017

Christmas Craft Fair

Howdy.  and welcome to my little slice of blog-land.  I received both good news and bad news this past week.  First, the bad news.  Who are we kidding.  Let's just get this over with.   The Tramway Community Church will NOT have a holiday craft fair this year.  Boo-Hoo!  I just love this craft fair. The fellow artists are true artist.  And the patrons are equally great!  I will miss the folks there.  I have had the same booth location for 5/+ years.  And well, I have gotten to know a few of my 'neighbors'.  I also have some shoppers who visit my booth every year.  They are familiar with my work, and rave about my creations.  So, I am on the look out for a 'new' holiday craft location.  If anyone knows of any that they are familiar with, please pass along the info. 
Now the good news.  I have been selected to participate in the La Cueva High School Holiday Craft Fair, again this year!  Yahoo!  This is another 'juried' craft fair.  So, you already know that the crafters are pretty good! and our creations are devine!
So, with all the frenzy of holiday craft fairs, I have started making items to sell.  And, as usual, I start with some easy things, and then get into my groove.  Today, I made a card with some holiday scraps. I'm pretty happy with how my card turned out.  Please stop by these two challenge sites, and play along!
I stopped by a 'new' to me sketch challenge site.  Cheerful Sketches Challenge Blog.  The design team will certainly inspire you!

the sketch is easy to work with.  easy to create something beautiful in your own style.
My second stop is an all time favorite challenge.  Word Art Wednesday.  Their challenges are anything goes.  But their design team creates some beautiful cards!

and here is what I created:


this blank inside greeting card is A2 size: 4 1/4" x 5 1/2".  I used some retired and 'long-ago' products.  The card base is made form Night of Navy card stock by Stampin' Up!.  I just love the dusky card blue.  The music sheet is a digital download that I printed on cream textured card stock.  It helps keep the paper from looking too flat.  I used a vintage Christmas ornament pattern paper for the main panel.  I machine stitched these two papers together.  I love the way machine stitching looks on cards.  {smile}
I took a scrap piece of scallop bordered eyelet trim and a dusky green seam binding, and did a quick and incomplete stitching to the paper stack.  I left the trims unfinished, to give the card a more homespun look.  I tied the seam binding into a double bow, and then tied a gold twine to the bow.  I finished the bow off with a snowflake charm.  Now the card has some glimmer. {smile}
I fussy cut an ornament block, and matted on a teal textured card stock.  I added some foam tape to the ornament square and adhered it to the front of the card.
I added a piece of vanilla card stock to the inside of the card.  That way, you have a place to write a special message, and you won't have to dig for a special pen!
Thank you for looking.  Now, I need to get back to crating a few more simple 'things'.

Wednesday, August 30, 2017

the simple LIFE card

Howdy.  thank you for stopping by.  I know that I have been absent, so I truly appreciate your patience, and willingness to stick around.  I was getting some craft supplies in order, when I found this pretty pattern paper that I had had stashed for almost a year.
I wanted to create something shabby, vintage, and country.  But, I also needed a little direction.  So I stopped by the Paper Players blog, to see their current sketch, and wow!  Very work-able!


See what I mean?  Beauty in simplicity!
I stopped by one of my all time favorite blogs, Word Art Wednesday, because they are always inspirational!  Their challenges are Anything Goes, and they will inspire you with both their crafting, and their scripture.

And finally, I went to Really Reasonable Ribbon blog to get some more inspiration!  Their theme is Anything Goes, just use trim, lace, and/or ribbon on your hand-crafted piece.  Easy-peasy!

and here is what I created:


The card is the typical A2 size (4 1/4" x 5 1/2").  The pattern papers is actually one sheet of two-sided pattern paper.  This vintage beautiful pattern paper is from Adrienne Looman, called Dream Big.  I love the soft tender aqua color, with a sweet, deep pink, and pops of red.  Simply pretty!  The white doilies, flowers, and kites give this pattern paper a vintage nostalgic feel.
I machine stitched the two pieces of pattern paper onto the white card stock.  I added a scrap piece of white eyelet trim, and wrapped a pale aqua blue seam binding around the card.  How beautiful!  I tied a multi-loop bow with the seam binding.  I tied a red button to the bow with gold and white twine.  Simple, but beautiful!  
I hand-stamped a half circle in real red classic ink.  The stamp set is from the Farm House paper company.  The stamp set is called Country Kitchen.  
The sentiment is hand-stamped in basic black classic ink, right onto the pattern paper.  I used the Country-Born stamp set, by Close To My Heart.
I love how simple but pretty this card is, and I hope you do too!  I am truly happy to be crafting again {smile}.  My mind is at peace, and my heart is full.  Thank you for hanging in there with me, and for everyone's support and words of encouragement!  LOVE you all!!!


Monday, November 28, 2016

Vintage Chic Christmas Card

Welcome to my little piece of blog-land.  Grab a cup of coffee/tea, and scroll through my posts.  I have been busy crafting and posting what I have created.  I was browsing a local paper store, and stumbled upon this beautifully neutral pattern paper by Heidi Swap: Vintage Chic.  A beautiful collection of pattern papers in cream, black, grey, teal, and pink.  Amazing.   Now, if you scroll down a few posts, you will see that I have crafted two notebooks, a gift tote, and a few cards.  But, I am not done crafting with these beautiful pattern papers, yet! {smile}  
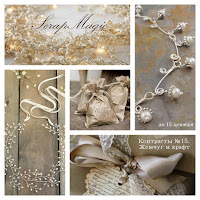
While surfing the web, I stopped by one of my favorite eastern European challenge sites: Scrap Magic.   Their current challenge is kraft & pearls, it is part of their 'contrast' challenge.  They also have a beautiful inspiration board.  And if you need a little more creative eye candy, please check out what the design team have created.  You will be pleasantly surprised {smile}.

*there is a translate button for this site

This challenge and my 'new' Vintage Chic pattern paper, are perfect together!
I also stopped by the Christmas Card Challenge.  I wanted to see what their new challenge is.  Their current challenge is Anything Goes.  Easy to work with {smile}.


and here is what i created:

*my mix of textures, and **my repeat of color

Recipe:  I used kraft card stock by Paper Trey Ink, for the card base.  I used mint macaroon card stock by Stampin' Up! for the matt.  I used 3 different pattern papers from the Vintage Chic collection by Heidi Swap: kraft & cream stripes, grey polka dots on cream, and ledger print on cream paper.  I sponged all the edges with crumb cake classic ink, by Stampin' Up!.  It's a soft kraft color ink.
I adhered the kraft & cream stripe paper onto the mint macaroon card stock, and sewn a simple border stitch on the main panel.  
I used my Tasteful Trim die to create the large scallop panel with the grey polka dot on cream pattern paper.  I wrapped a piece of mint macaroon taffeta ribbon around the large scallop die cut piece.  
I used one of my digital bingo cards and matted it on mint macaroon card stock.  I tucked it just under the large scallop piece.  
I used a mini banner punch by Stampin' Up! to create my trio of banners.  I sponged all the edges with crumb cake classic ink.  I used a scrap piece of mint macaroon card stock to matt each banner piece. I adhered them to the main panel, and then used my stapler to secure them to the card front.  (*I love mixing different textures: paper, fabric, metal, pearls/rhinestones, etc.)  I tied my bow upside down.  I like how the bow sat, upside down, better then right side up.  
I stamped my sentiment in baked brown sugar classic ink by Stampin' Up!, onto white card stock.  I wanted a soft, creamy, kraft color, and love how this color looked.  I used mint macaroon as my matt. I used foam tape to 'lift' the sentiment block off the card front.  
I used one of my Prima: Coffee Break fabric blossoms, to add a feminine touch to the card.  I just love the lace and pearl center.  So delicate and pretty.  
For my final touch, I added some kraft-colored, flat-back pearls, and some mint-colored, flat-back jewels in two clusters of three.  (**Kraft and Mint are the two main colors, and so I repeated these colors whenever I could.)
Thank You, for visiting my blog.  I hope you have found some inspiration.  And I hope you have the opportunity to play along with either of these challenges.  I know that they would love to see what you have created {smile}.


Saturday, July 30, 2016

Gracious Hostess

Ugh, have I mentioned that I am NOT a fan of this new upgrade on my photo editing program!  I hate it!  It is difficult to navigate and utilize.  And yes, that has kept me from sharing.  I spend more time using this new improved program, then I do creating a craft.  And that is awful!  Especially since I spend anywhere from 2-3 hours to complete projects.  I don't have this kind of time to sit and click, and click, and search, and click some more to be at the beginning.  UGH!  
Anyways, I created a card for a current challenge and wanted to take a quick photo, edit it, upload it, and move on with my day.  Now that I have been up for 4hrs 'working' on this. . .   I am DONE!
Mojo Monday Card Sketch challenge has a very creative sketch that I just couldn't wait to work with.  


here is what I made:


Recipe:  My card base is Cream card stock by Paper Trey Ink.  I just love the heavy weight of this card stock for card bases.  LOVE IT!
All the pattern papers are from Prima.  Yeah, I am still working with products I have on hand.  One of which is this beautiful pattern paper from Prima - Printery Collection.   Its a lot of text paper with vintage graphics on it.  The main colors are black, cream, and mint.  Just gorgeous!  Even those cute tags are in the paper pack.   (I used the 6" x 6" pad.) 
I also broke open a package of decorative brads by Spare Parts - Deer Assortment.  I used the 'gem' brad to secure my lace bow to the card front.   I sprinkled on some gold sequins by Studio Calico.  
And what card wouldn't be complete without some machine stitching and beautiful trims!  Yes, I added some beautiful cotton trim (left over from an earlier project), and some mint lace by Stampin' Up!.
I almost forgot!  I hand-stamped my sentiment onto a scrap piece of the pattern paper in basic black classic ink, by Stampin' Up!.  I used the Text Style mixed messages stamp set by Paper Trey Ink.  I used foam tape to 'lift' the sentiment off the card.
Well, I need to get out on the road this morning and run 6 miles.  My training hasn't stopped.  I have 3 more races this summer: a 10K, and 2 half-marathons.  So, I need to get out there before the temp reaches 85.  Because then its just brutal.
Thank you so much for stopping by.  I promise, I will get the hang of this updated photo editing program before the summer ends.  (fingers crossed)  Ugh, and now I  have a pop up to upgrade by blogger.  I think I will pass.