Showing posts with label season's greetings. Show all posts

Sunday, December 3, 2017

Sweet Floral Holiday Bags

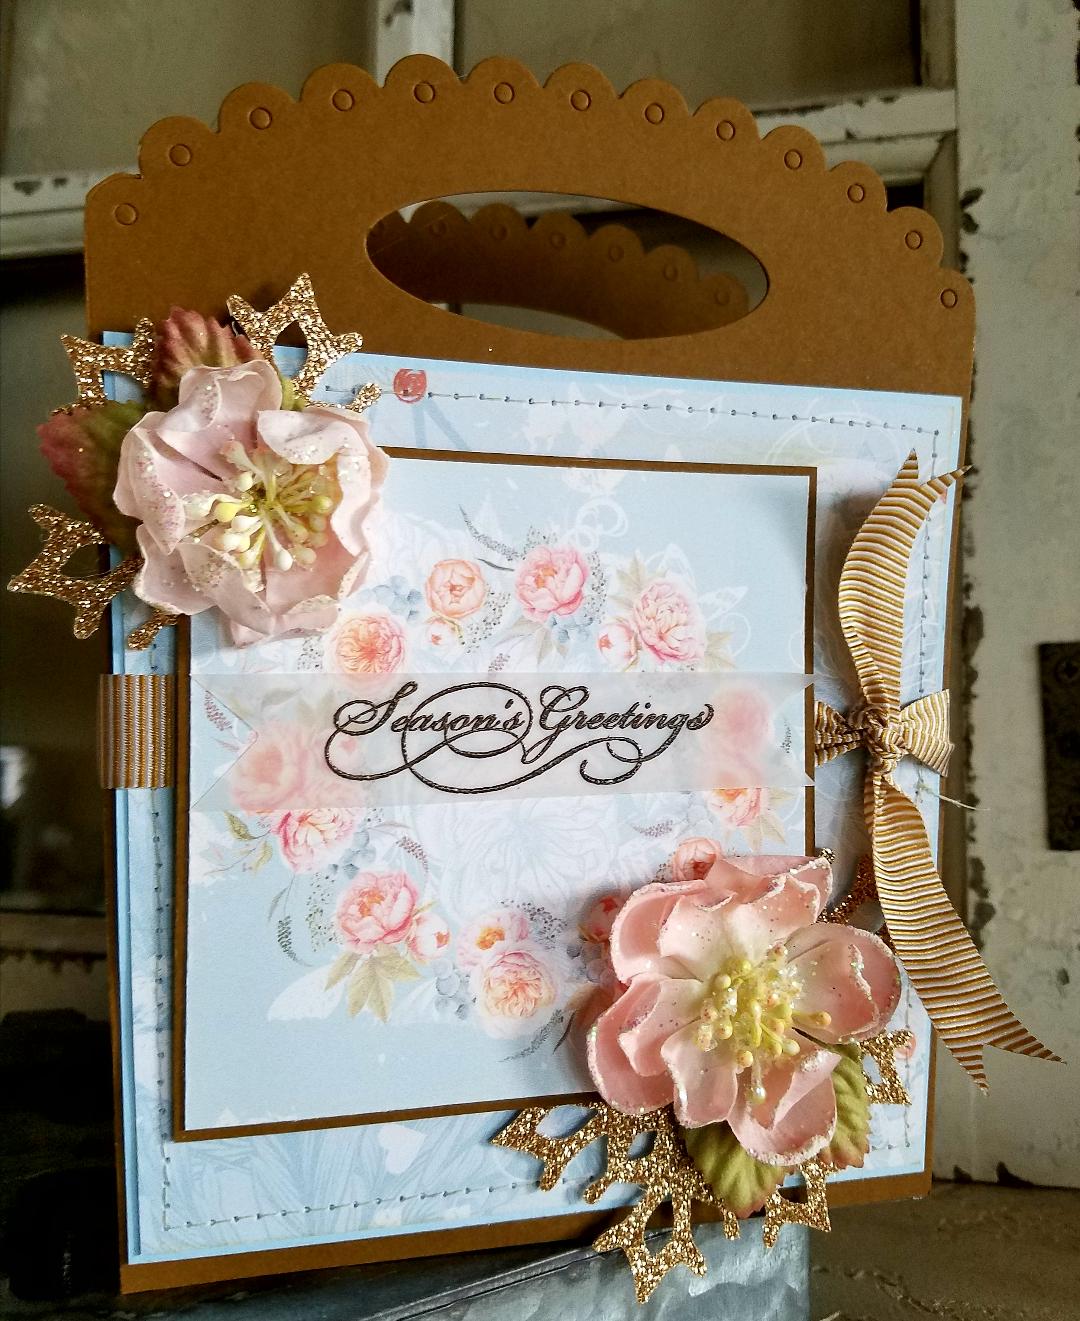
Howdy! I wanted to share with you a project I did.  I made a paper tote and gift bag.  But, I used non-holiday pattern paper, to make holiday themed bags.  Because like a lot of us can't always afford to purchase another collection of pattern paper.  And lets face it, I really need to start using the paper I have, and not keep adding to my collection {smile}.  I am entering the current challenge over @ A Snowflakes Promise Challenge - Anything Goes.


and here are my projects
the paper tote:

and here is my gift bag:


~ disclaimer:  I was crafting late into the evening, and lighting was scarce. ~

Recipe:  I used Cocoa Bean card stock, and snowflake die, are by Paper Trey Ink.  The pattern papers I have used are digital papers.  The sentiment is a stamp.  The vellum card stock, Early Espresso embossing powder, seam binding, ribbon, and champagne glitter paper are by Stampin' Up!.  The tulle trim is Mellissa Frances.    The two peach blossoms (on the tote) are from Recollections.  The beige blossom (on the bag) is from Prima.  The tiny pink ornament bulb is from a big box store.
The Tote:  I used a die from Paper Trey Ink to die cut the tote.  I layered the pattern paper onto solid card stock, and added some machine stitching.  I adhered the floral circle paper to the front of the tote with foam tape.  I tucked the snowflakes between these two layers.  I hot glued the blossoms to the corners.  To create the sentiment piece, I heat embossed the sentiment onto vellum and adhered it off center of the blossom circle.  And lastly, wrapped the ribbon around the tote, to help give it a finished look.
The Gift Bag:  I only had scraps of this pattern paper, so I wanted to use them up, before I started printing again.  The large floral pattern was a 6" x 6" piece.  So, I cut my piece 4 1/2" x 6", to use more of what I had.  I added two different polka dot papers, both of which were scraps.  I added some machine stitching to give it a homespun look.  I added the tulle trim and seam binding to help hide the seam where the two papers meet.  I tied the seam binding into a multiple loop bow, attached a bulb, and tucked in a paper blossom.  I created the sentiment piece, just like I did for the tote (heat embossing).  To hide the seam, at the top, where the two pattern papers joined, I added a scallop trimmed pattern paper.  I adhered the card stock panel to a paper bag.
These two types of bags were for sale at yesterdays craft fair.  I hope these two samples have given you some inspiration to use the non-holiday themed pattern paper for your next holiday paper craft.  {smile}

Sunday, November 22, 2015

A Sweet Pink Christmas Card

Howdy.  Welcome.  Well, the sun is out this morning, so I took advantage of the daylight and snapped a photo of a card I made last night.  I LOVE pink, and shabby chic, so why not put those two together to make a sweet, pink, shabby Christmas card?  {smile}
I used the current sketch challenge over @ Mojo Monday.  They have some very user friendly sketches.  And the design team is just so talented!   Here is the current sketch: 
today's the last day for this sketch challenge

I also wanted to enter another challenge.  The current challenge over @ A Snowflakes Promise, is Winter/Christmas.  This challenge site, has some very creative folks on their design team as well.  So, I am sure you will find some inspiration there, as well.
this challenge ends this month

and here is what I made:


So, let me just dive right in, with how I made this card {smile}!  This card is 4 1/4" x 6".  So, its larger than an A2, but smaller than an A6.  I like this size of card, because the A6 envelope allows for bulk from embellishments.  (I know I have made flat cards before, but its been so long ago, I can't remember the year {smile}).
I started with Vintage card stock from Paper Trey Ink.  I just love the heavy weight of their card stock, to use for card bases.  Their vintage card stock, is a bit lighter than Very Vanilla by Stampin' Up!, so that is why the two vanilla pieces don't match.
I used two pattern papers from Tilda (Christmas, and homemade), and one pattern paper from Carta Bella (baby girl).  

I added two different white cotton trims to the top and bottom of the middle panel. I added a double border stitch with my sewing machine.  I also machine stitched a white crochet trim to the bottom of the middle panel.  
I used some scrap pieces to create my flags (I hand-cut my flag ends).  I made a larger flag for the sentiment piece.  I hand-stamped my sentiment, using a stamp set by Paper Trey Ink; Season's Greetings.  I heat embossed the sentiment with silver embossing powder.  It's beautiful, but a bear to photograph.
I stacked two pale pink blossom pieces.  The bottom blossom is glittered, while the top blossom is flocked.  I added a pink cotton rosette to the center, and used a square rhinestone to hold it all together.  I had a scrap piece of that shimmery chenille trim, so I tied it into a bow.  I added a silver-tone ice skate charm, and tied it to the trim with cream twine.

Thank you for looking.  Now, I'm headed back into my craft room, to create another vintage style piece for another challenge!  Yahoo!  I love days like these!  No obligations, or chores.  Just crafting! I hope you get the opportunity to create something wonderful, too!