Showing posts with label champagne glitter paper. Show all posts

Sunday, February 19, 2017

Love Pink

~ a few photos ~


Howdy, I have been busy making a few different cards, getting my tasks organized, and getting some running done. {smile}  But, I want to share with you, the a card I made today {smile}.
I stopped by a favorite challenge site, for some direction: the Card Concept to see what their current challenge is: Vintage.  I have to say, I am a sucker for text pattern paper, and I just love hearts!


My next stop, is an Eastern European challenge site:  Art-Kladovaya.  These talented ladies have a unique and creative take on paper crafting, so please stop by to see what they have created.  Anyways, their current challenge is:  Shabby Chic.


I used their inspirational photo as my palette.  I love the blossoms, and the pink & white color scheme.
I also want to play along with the wonderful ladies over @ Word Art Wednesday.  Their current challenge is: Anything Goes & Family Friendly.  They include a scripture to include in your paper crafting.  And their post are always inspirational!
and here is what I created:


This is a typical A2 size card: 4 1/4" x 5 1/2".  I added layers of my favorite papers: text, gingham, calendar, and floral.  I inked all the edges of all my papers with a tea stain ink pad.  All of my digital papers were printed on whisper white card stock, by Stampin' Up!.  I love the weight of this card stock, and how beautiful it takes ink.
I started with kraft card stock for the card base.  I just love the color, and the weight.  My first matt, is a text pattern paper from Melissa Frances.  I really like the softness of the cream and deep brown color.  My pink gingham matt, is a digital pattern paper.  I just love this pattern.  I think it adds a softness and vintage look.  {smile}

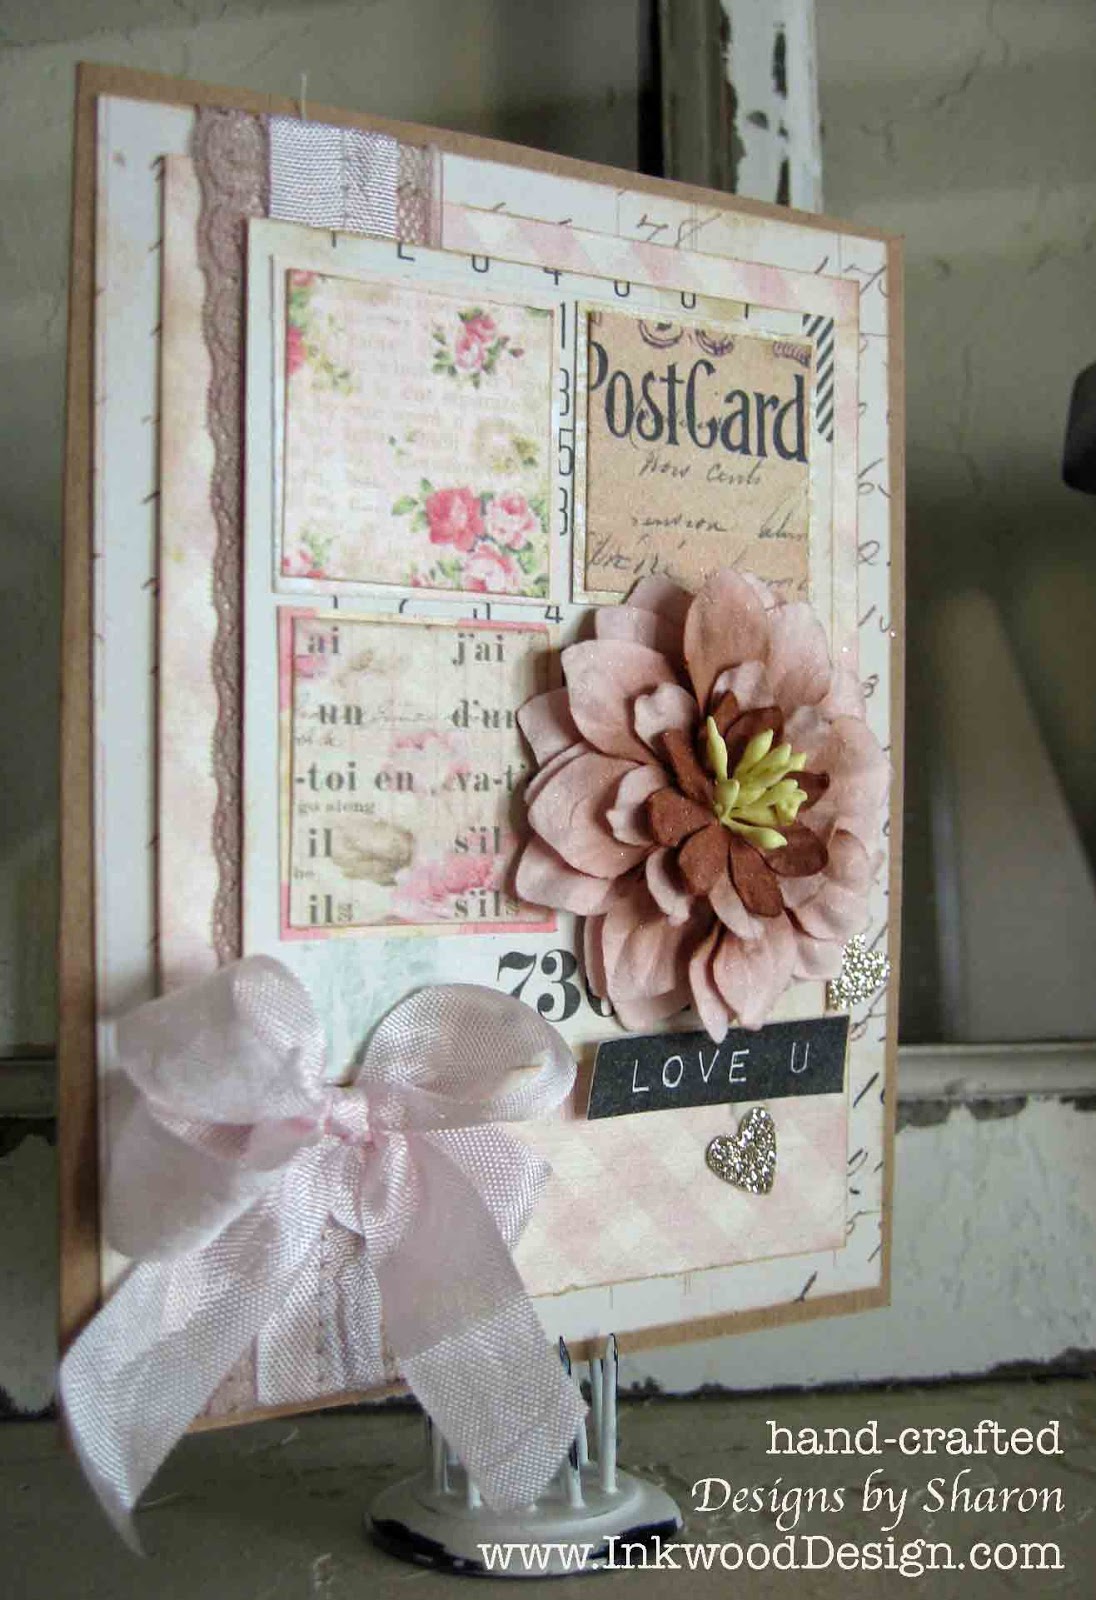
I machine stitched a taupe swiss dot lace and pale pink seam binding to these layered pattern papers.  I also tied a double bow, with the pale pink seam binding.
I cut down a calendar card, to allow the pink gingham pattern paper to show.  I then cut three squares (1 1/2" square) from another digital pattern paper.  I matted each square with a different digital pattern paper.  I just love the mix of patterns & texts.
I added some sparkles to the pale pink & brown paper blossom from Prima.  I adhered the paper blossom to the area on the card, that the missing square should have been placed.
I hand-stamped my sentiment in basic black classic ink, onto whisper white card stock.  I adhered the sentiment with foam tape, to give it some height off my card.  I used a new stamp set: Label Love of Altenew.
I added the champagne glitter hearts to the card front with glue dots.  I felt that it added balance and visual interest to my card.  And finally, I adhered the bow with hot glue.
Thank you for stopping by!  I hope that you have been inspired to play along with any (or all) of these challenge sites.  Now, I'm off to get a few chores done before bed.  


Tuesday, November 12, 2013

Post Card Christmas

Howdy.  Hope this post finds you well.  It's hard to believe that we are already into double digits of November.  Where has the time gone?  And before you know it, I fret that I will be scrambling for that last minute Christmas gift.  You?
Well, before I get too carried away, I wanted to share a card I made.  The wonderfully talented ladies over @ Nacho Average Challenge have this fun sketch for you to play with.


It looks pretty plain and simple, right?  Well, it actually lends itself to a lot of potential of creating an absolutely gorgeous card!  The simplicity of the sketch is actually a creative license.


I used the large 'empty' space to my advantage.  One of my favorite stamps is this 'postcard' stamp.  I don't really know why, but it calls to me.  And it was very easy to use it with this sketch.  {smile}.
I stamped the postcard in crumb cake classic ink, onto very vanilla card stock, and then cut close to the lines with my scissors.  I used my distressing tool, to rough up the edges.  
I stamped the winter tree in always artichoke classic ink.  Then I stamped the snowflakes randomly over the tree.  I stamped the little pinecone branch in crumb cake classic ink, on two opposite corners of the address side.  To 'decorate' the tree, I added three rhinestones and three pearls.


For my sentiment, I used the new holiday clear stamp set.  I stamped the 'christmas'  in always artichoke classic ink, and the other words in crumb cake classic ink.  Instead of adding a postage stamp, I added some seam binding.  The center of the bow, looked a bit bare, for me, so I tied some linen thread to the bow and created another bow.
I matted my post card onto always artichoke card stock.  Then added a sparkle-y border with champagne glitter paper.  Finally, matting this whole piece onto soft suede card stock.  The card base in crumb cake card stock.

Well, thank you for stopping by to see what I have created.  It's always nice to have company.  I hope you get a chance to create something with this sketch, and play along with us!  We'd love to see what you create for the NAC!


Thursday, June 27, 2013

Mixing

I started teaching technique classes again.  I really love teaching.  The reason I love teaching, is that I love sharing what I love {smile}.  I have a passion for paper crafting, and I want to share what I love with others.
I taught a 'Mixing Pattern Papers' classes this past weekend.  When I started writing down the principles that I use, I found it a bit difficult.  Not that I don't 'know' what I'm doing.  It's just that it was hard to put what I do into words.  The 'why's and 'what to do's.  Each person who attended this class was given my guidelines of mixing pattern papers.  

a full-size card:


a refrigerator magnet, to hold a wallet-size photo:


We used different packages of pattern papers and supplies from Stampin' Up!  I also taught them how to make my favorite multi-loop bow.  
My next technique class is in July, in Albuquerque, New Mexico.  I'll share what we make in that class, too.  Thank you for stopping by.  {smile}


Saturday, October 27, 2012

Hallowe'en Sweets

I have been busy getting some crafts done for this years holiday arts and craft fairs, that I am attending.  I hope this year is just as successful as last years! and I hope the fair goers love my creations.  Don't worry, I'll post some photos soon!  
Anyways, the super creative Marcy, over @ Our Creative Corner has a super fun challenge for us this week.  She would like us to embrace the spirit and theme of Hallowe'en, and use the masking technique.  Ok, now how fun is that?
I think Marcy is a super talented lady, and I hope that our design team has inspired you to play along with us this week.  Here is a photo of my 'Masking' technique project:


I purchased a case (yes, a case) of these plain, blank, kraft food-safe bags about 3 years ago.  And yes, I still have some left {smile}.  Anyways, I am making home-made short bread cookies for the folks at work.  And well, I needed something fabulous to package them in!  So, I grabbed 8 of these window bags, and set out to embellish/decorate the bags.  
For my MASKING technique, I needed to mask the 'window', so that the polka dots wouldn't be stamped on the 'window' material.  I wanted the bag to look 'clean' and not 'rushed'.  (I'm not sure if that makes any sense to anyone but me.)
So, I masked the window to stamp the polka dots.  It's a large background stamp from Stampin' Up! and I love the distressed polka dots.  Very vintage.  I also used a lace wheel by Stampin' Up! and I love the feminine shabby look of that.
For my tag, that was the easy part.  I purchased this holiday paper from a local scrapbook store and cut out the hallowe'en 'cards' and matted them on black card stock.  I took some black seam binding, and crinkled it up.  Made a multi-loop bow and used a green polka dot brad to hold it together.  I punched a scallop circle out of champagne glimmer paper.  I also made this cute, tiny tag, which I couldn't get a good photo of.  It sits under the brad, and simply says, 'sweet'.  I put these elements together, and viola! you have a decorative tag.
For the clothes pin, I brushed mod-podge on the pin, and dunked it in some champagne glass glitter.  To set the glitter, I sprayed the clothes pin with Aqua Net.
Thank you so much for stopping by.  And I hope you get a chance to play along with us @ Our Creative Corner.  We would love to see your masking technique!

Friday, October 12, 2012

Antique Pretty

If there was a way to get an extra hour or two out of a day, I'd be all over that! This week  Ok, every week, seems to rush by.  Maybe, if I sleep less.  Well, I'm not sure if I can really function on under 5hrs of sleep.  So, lets cut something out.  Uhm.  I'm still thinking.  But while I'm re-calulating the time in my day, have a look at what the talented ladies over @ Sketch Frenzy Friday have in-store for you this week!   Patrice, has given us a wonderfully workable sketch to work with!  LOVE IT!


This sketch is so easy to work with, you just have to play along with us!  You can rotate or flip the sketch, if you would like more horizontal space.  And don't let the rectangles limit you.  Here is what I created:


I replaced the long vertical rectangle with a banner piece.  I replaced the horizontal rectangle with a circle.  And then, I just jazzed it up!
I used pink pirouette card stock for the card base.  The main panel is very vanilla card stock that I ran through the lacy brocade embossing folder.  I matted this main panel with a piece of soft suede card stock.  The banner is cut from a scrap piece of fan fair DSP.  I wrapped a scrap piece of crochet trim around the top.  I took a wooden button and rubbed it onto a very vanilla craft ink pad.  Then I dunked the wet button into a tub of dazzling diamond glitter.  I used a heat gun to speed up the drying time.  I used a length of linen thread to tie the button to the crochet trim, and then into a bow.  
For the circle, I stamped the sentiment from the blooming with kindness stamp set, in soft suede classic ink.  I used the 1 3/4" circle punch, to punch out the stamped circle.  I added a piece of first edition DSP to the stamped circle, and hand trimmed it.  I used a sanding block to help smooth out the rough edges.  I used a small piece of champagne glitter paper and the delicate doilies die to create the beautifully scalloped circle.  I used dimensionals to pop the sentiment off the glitter paper.  I added three tiny half pearls under the sentiment, to continue the vintage look.
I edged all papers with crumb cake classic ink and a sponge.  I wanted the card to have a vintage feel. 
Now, won't you play along with us @ Sketch Frenzy Friday?  We would love to see what you create!