Showing posts with label scallop circle punch. Show all posts

Friday, April 12, 2013

Banners of Blue

Happy Friday.   I'm glad you had a chance to stop by and take a look around.  This week over @ Sketch Frenzy Friday, I am the designer of this weeks sketch.  How cool is that?  Anyways, you know me.  Love a challenge, and the whole creative process of it all.
Here is this weeks sketch:


See how much fun this is?  There is alot of potential for this sketch, just take a look.  The arrows can be arrows or some other horizontal piece.  The tag can be a tag, or any other vertical rectangle.  The scallop circle on the tag can be a flower, a star, a butterfly, a circle, or any other shape.  The sentiment placement, well, that's a no brainer.  Put that puppy on the right lower corner of your creation.  To me, easy peasy.  And I hope you don't get stumped or derailed by the arrows.  Remember, this is a sketch.  Play, have fun! and lets create!
Here is what I did with the sketch:


When I went in my craft room, I knew that I wanted to make something vintage.  I have a wonderful girlfriend, who I call my sister, but we aren't blood relatives.  Well, she got some horrible news from her doctor, and her heart is hurting.  As well as her family, and friends.  Anyways, I wanted to make a card for her.  She is very special to ALOT of folks, who only want the very best for her.  So, I made this card with her in mind.  I will be getting this out to her in the mail today.
As you can tell from my sketch, there is alot of horizontal lines.  I wanted to add a little more vertical lines, to give the card a nice balance.  The pattern paper I selected from the Fan Fair DSP collection I cut, so the lines would be running up and down.  I also  made my tag's orientation tall.  To add a bit more vertical, I added a hand-stamped ticket to the left side of the tag.  
I used my square hand held punch to create the flag ends of the horizontal tape measure pattern papers. Also from fan fair dsp.  As is the tag.
I used the first edition DSP for the scallop circle.  I used the silver glimmer paper for the butterfly, and the butterfly die.  I used very vanilla cardstock and the fusion flowers die for the blossom.  I cut one lone blossom from the floral trim, to help build the center portion of the butterfly.
For my' sentiments, I did a double banner.  I stamped the words in basic black classic ink onto very vanilla card stock.  
I used the burlap ribbon for the top of my tag.  I also added some pearl jewels to the card, to help give it a feminine look.  All edges of each paper piece has been distressed with crumb cake classic ink and a sponge.

I hope that we have inspired you to play along with us this week, using my sketch @ SFF.

Saturday, October 27, 2012

Hallowe'en Sweets

I have been busy getting some crafts done for this years holiday arts and craft fairs, that I am attending.  I hope this year is just as successful as last years! and I hope the fair goers love my creations.  Don't worry, I'll post some photos soon!  
Anyways, the super creative Marcy, over @ Our Creative Corner has a super fun challenge for us this week.  She would like us to embrace the spirit and theme of Hallowe'en, and use the masking technique.  Ok, now how fun is that?
I think Marcy is a super talented lady, and I hope that our design team has inspired you to play along with us this week.  Here is a photo of my 'Masking' technique project:


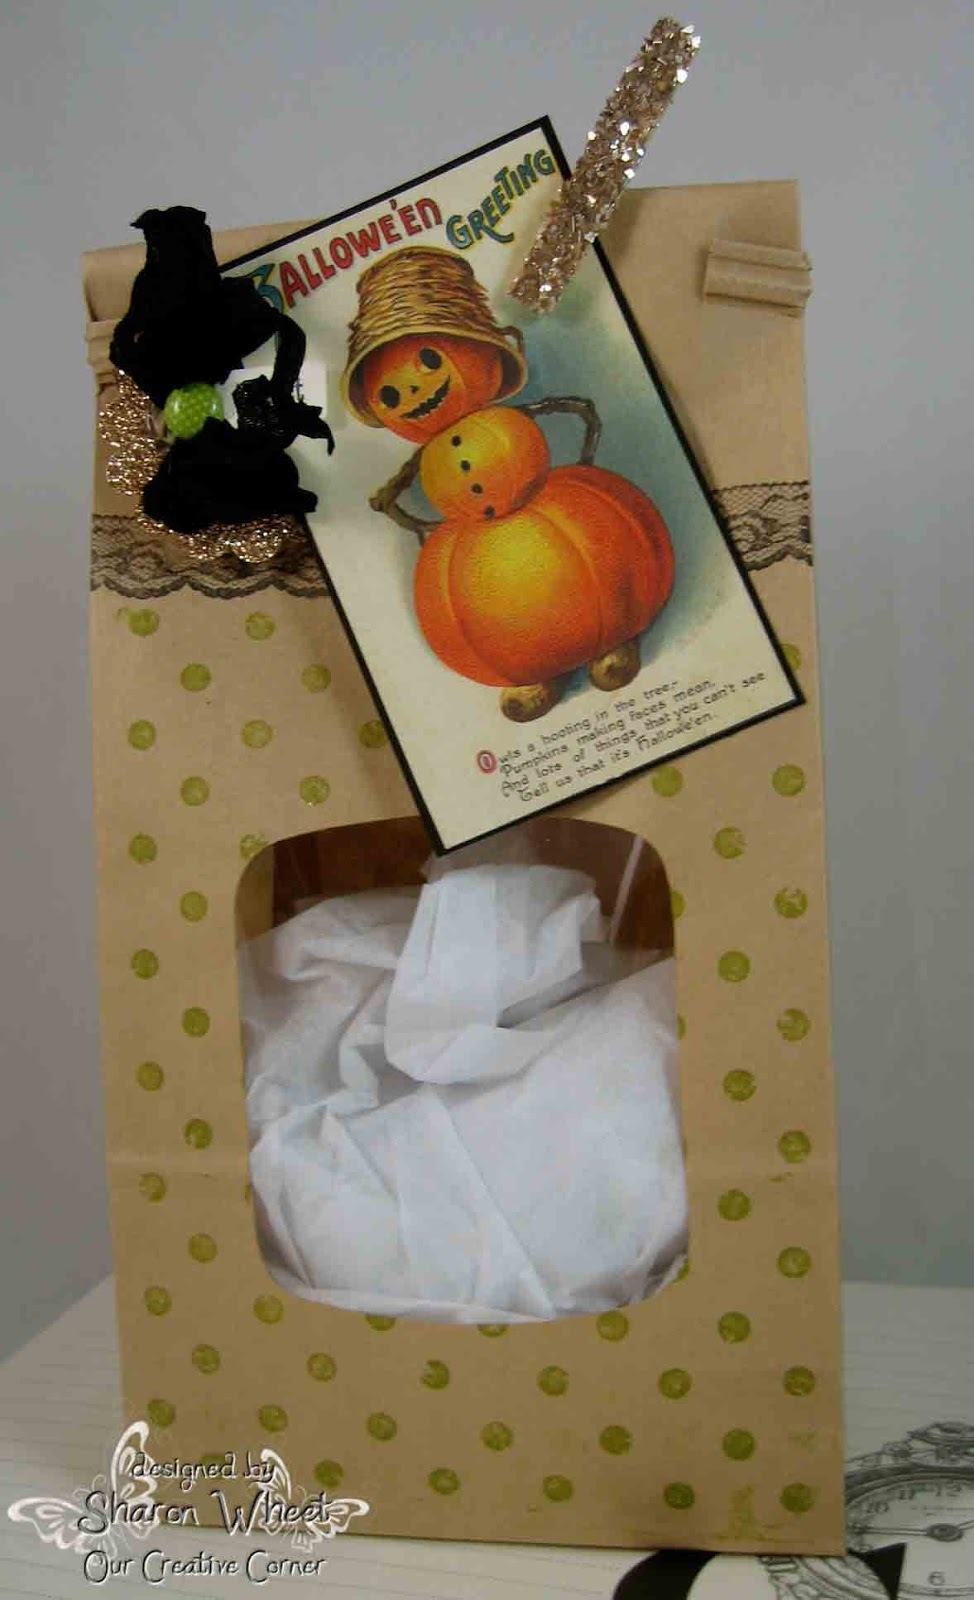
I purchased a case (yes, a case) of these plain, blank, kraft food-safe bags about 3 years ago.  And yes, I still have some left {smile}.  Anyways, I am making home-made short bread cookies for the folks at work.  And well, I needed something fabulous to package them in!  So, I grabbed 8 of these window bags, and set out to embellish/decorate the bags.  
For my MASKING technique, I needed to mask the 'window', so that the polka dots wouldn't be stamped on the 'window' material.  I wanted the bag to look 'clean' and not 'rushed'.  (I'm not sure if that makes any sense to anyone but me.)
So, I masked the window to stamp the polka dots.  It's a large background stamp from Stampin' Up! and I love the distressed polka dots.  Very vintage.  I also used a lace wheel by Stampin' Up! and I love the feminine shabby look of that.
For my tag, that was the easy part.  I purchased this holiday paper from a local scrapbook store and cut out the hallowe'en 'cards' and matted them on black card stock.  I took some black seam binding, and crinkled it up.  Made a multi-loop bow and used a green polka dot brad to hold it together.  I punched a scallop circle out of champagne glimmer paper.  I also made this cute, tiny tag, which I couldn't get a good photo of.  It sits under the brad, and simply says, 'sweet'.  I put these elements together, and viola! you have a decorative tag.
For the clothes pin, I brushed mod-podge on the pin, and dunked it in some champagne glass glitter.  To set the glitter, I sprayed the clothes pin with Aqua Net.
Thank you so much for stopping by.  And I hope you get a chance to play along with us @ Our Creative Corner.  We would love to see your masking technique!

Wednesday, June 1, 2011

'for you' {CR84FN #30 & CP sketch #117}

There are a few challenge sites that I just go to; like a habit.  Cupcake Creations color challenge, and Card Patterns sketch challenge, just to name a few.  And this past weekend, was no exception.  So, the colors are: light blue, light yellow, and kraft.  The sketch calls for a center object with an object above and below.  Sounds easy enough, huh?  Here are their inspiration boards and sketch:


This past weekend, was a nice break.   It gave me time to catch up on some household chores, and some time to do nothing.  So, I feel a bit revived, and want to sit and create!  So, here is what I created with the inspiration and guidelines from these two wonderful challenge blogs:


My card base is Crumb Cake (Kraft).  I layered a scrap piece of Daisy D's pattern paper as my main paper.  I had a piece of Very Vanilla Satin ribbon that I wrapped around the card front.  I cut a strip of the lace pattern paper into a banner.  The blue is the other side - 2 sided paper!  I collected two Kraft buttons out of my 'jar o'buttons', threaded some 1/8" Very Vanilla taffeta ribbon through the button holes and cinched the satin ribbon, tying the skinny ribbon into a bow.  I found a doily tag, from Martha Stewart, and layered two circles on top of it.  The largest circle is punched from a piece of Crumb Cake DSP (1 3/4") and the smaller circle is punched from a scrap piece from the Bella Blue DSP (1 3/8").  I stamped the 'for you' in Crumb Cake classic ink, using my stamp-a-ma-jig.  I wanted it to be off-center and high.  The flower I made myself.  I used Shimmer White card stock and sponged the edges with So Saffron classic ink.  I used two different dies and a hand-held punch to create the three different flowers, and then stacked them.  I added a light yellow button to the center.  The leaves were made with a die and the other side of the Crumb Cake DSP.  I used glue dots to hold the leaves on. (the leaves are actually one piece.  I cut it into two pieces so that I could have leaves at the top and bottom of the flower.)  The butterfly was made with a butterfly die and Soft Suede card stock.  I added two faux half-pearls for the body.
I really like how my card turned-out.  I did have a few concerns about the flower.  At first I put it right smack in the middle of the doily.  But, then changed my mind to an off-center look.  I balanced the flower by adding a dark butterfly to the opposite corner of the middle circle.  I really wanted to add a faux half-pearl flourish on my card, but I didn't 'see' a good spot.  The button in the middle of the flower looks 'naked' to me, but I couldn't come up with a solution that didn't look yukky.  Any suggestions?
So, if you have a free moment, please stop by both challenge sites and enter!  Its fun!

Saturday, May 7, 2011

The Wonder of Weaving @ OCC

Jen, from Our Change of Art, is our hostess this week @ Our Creative Corner challenge blog.  Jen, has challenged us, to add some type of weaving to our card/project.  I tell ya, these girls are super creative! and they challenge me every week.  So, here is what I came up with:


I wanted to use some 'different' colors this time.  Alot of folks are using pinks, and yellows, and bright colors.  I guess everyone is pretty tired of the snow and cold weather.  Anyways, I chose a neutral color palette.  The black and cream pattern paper is a scrap, but I think its a paper studio piece, from one of those big box craft stores.  The rest of the supplies are from Stampin' Up!
Stamp set:  Water Color Trio
Cardstock: Basic Black, Crumb Cake, Very Vanilla, and Old Olive. and First Edition DSP.
Classic Ink: Basic Black, Marina Mist, and Old Olive
Tools: leaves die, beautiful wings die, top note die,  2 step bird punch, scallop circle punch, and the 1 1/4" circle punch.
I used a shaped die to cut-out the 'window', which was placed crooked on purpose (but now you can't see).  I then punched out some leaves, and put them into the weaved lattice I made with strips of Very Vanilla card stock.  I punched my flowers out with the scallop circle punch and circle punch, and rolled the flowers.  I sponged the tips of the 'petals' with Old Olive classic ink.  I was going to use a pink color, but then I changed my mind, and decided to go with the green.  I added some half pearl jewels to the center of the flowers.   I used a stylus to create the 'vein' in the leaves. (those didn't photograph very well.)  I sponged some Marina Mist classic ink on the wings of the butterflies to give them definition.   Here is a close-up of my weaved card stock pieces:


Well, thank you for looking!  And if you have a few free moments this weekend, you should play along with our new challenge over at Our Creative Corner challenge blog.  We would love to see what you made!  And don't forget to stop by Jen's wonderfully creative blog Our Change of Art.  You'll be glad that you did!

Saturday, April 10, 2010

Color Throw Down #87

I saw the color challenge on a wonderfully talented paper crafter, VA Sunshine, and I just love her work.
I stamped the flowers in pretty in pink, and the flourish in certainly celery. I stamped the french filigree in whisper white craft ink and used clear embossing powder. I thought the just stamped images needed something. I stamped my bird in basic grey classic ink. Re-stamped the bird on a scrap piece of card stock, cut him out and used dimensional to give him some lift off the card. All supplies used are Stampin' Up!