Showing posts with label rhinestone jewels. Show all posts

Friday, November 29, 2013

Sweet & Simple

Whew, where has this year gone?  I can't believe that we are already nearing the end of November!  I hope you had a wonderful day yesterday, celebrating Thanksgiving.  We had family over, and did the traditional cooking.  Smoked a brine prepped Turkey, candied yams, mashed potatoes, corn pudding, cranberry relish, stuffing, and of course, my yummy dinner rolls.  The dessert table was well stocked: pumpkin pie, pecan tart, and apple pie, all served with fresh whipped cream.
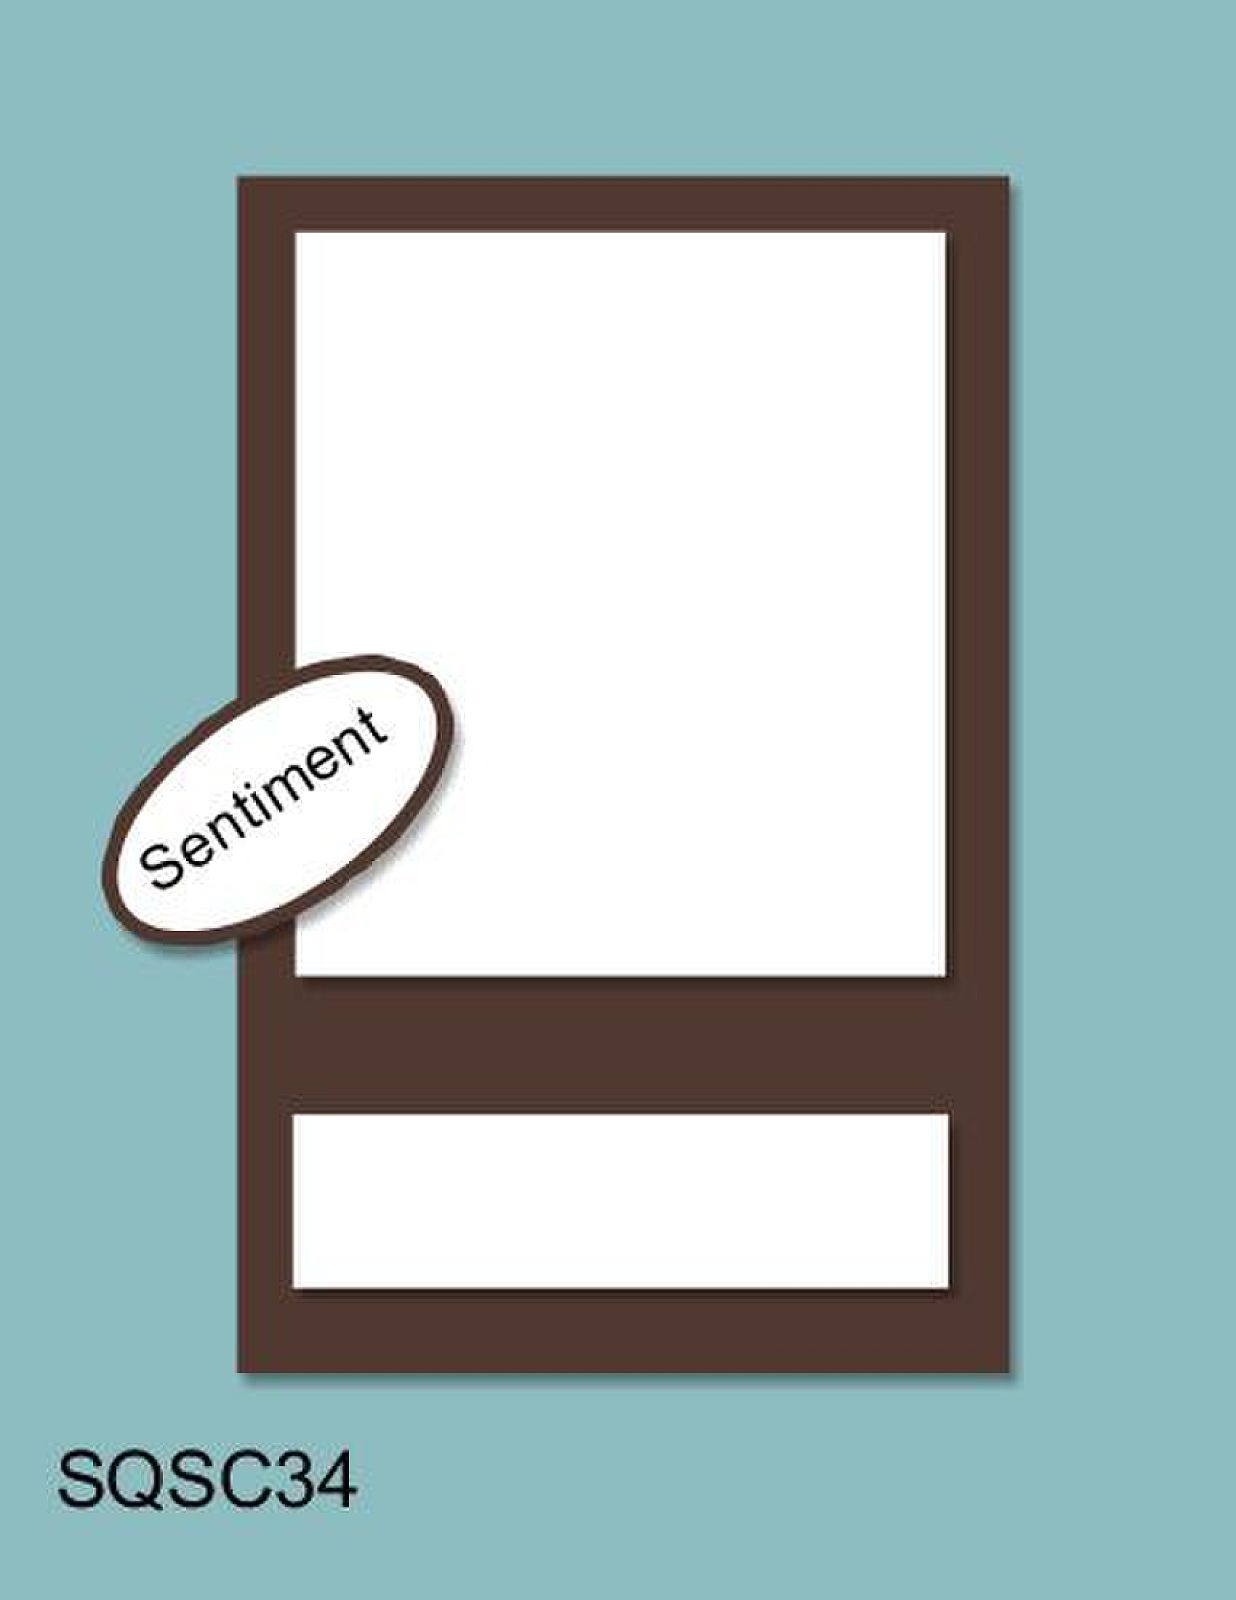
So, on to todays challenge from Sketch Frenzy Friday.  As usual, the sketch is wonderfully adaptive.  I sound like I'm tooting my own horn.  Only because I designed the sketch!  It has my signature colors: pink and brown.  Hope you get a chance to play along.  I know this time of year is spent shopping, visiting, baking, and decorating.  But if you get a chance to play along, please do.  We would love to see what you create!


a quick card I made


The card base is made from Midnight Muse card stock.  For the card front, I used a bright floral pattern from Gingham Garden DSP and matted it onto a piece of Melon Mambo card stock.  For the long banner pieces, I used scrap pieces from Gingham Garden & Sweater Weather DSPs.  I inked the sentiment in Midnight Muse classic ink, and then colored the blossoms with Melon Mambo  and Old Olive markers.  The sentiment piece is actually shimmer white card stock.  Just to give it a bit of shimmer.  I used the Labels Collection of dies to cut the shape.  I wrapped white taffeta ribbon around the top portion of the card, and tied a simple bow.  I wanted to add some more sparkle, so I added three random rhinestone jewels to the card front.
Please stop by the SFF site, and see what the rest of the design team has created! And play along with us!  We would love to see what you create!  A holiday card, a birthday card, or anything your heart desires.  {smile}

Friday, November 23, 2012

Wisteria Romance

I hope all of you had a wonderful Thanksgiving filled with great food, family and friends.  We sure did!  We ate too much and had a wonderful time visiting with family.  I generally don't venture out on Black Friday, as there really isn't anything I need so bad that I will be at a store @ 4a or battle an unruly crowd.  So, here I sit with a card to share.  The ladies over @ Sketch Frenzy Friday have a sketch that I am sure you will love.

Here is what I did with it:


For me this is not my typical card.  I love layers and embellishments and this and that.  So, here is a lot of white space.  The card is pretty simple.  My main panel is actually a piece of water color paper.  I stamped the floral image in Staz-On jet black.  I used the reindeers to water color the flowers with my aqua painter.  I created the large scallop from a scrap piece of silver glitter paper.  I tied a piece of the ruffle ribbon in Wisteria Wonder.  My sentiment is the tiny tag, that I attached to the simple knot with a tiny safety pin.   To jazz up the simple image, I added half pearls and rhinestones to the flower centers.
I hope you have an opportunity to play along with us @ SFF!  We would love to see what you create with this fabulous sketch!

happy crafting.  hugs, Sharon W.

Wednesday, April 11, 2012

Just Plum

This is week is especially busy, as I am getting things prepared for my daughters baby reveal shower.  But, I took time out of my busy schedule to play along with the talented ladies over @ Stampin' Queens Sketch Challenge.  The sketch this week, is super user friendly, and I encourage you to play along.  There is a lot of empty space, so you can fill it, or leave it CAS.  The possibilities are endless and your creative flair will add some fab to it!
Here is the sketch:


Here is my card:

See what I mean?  I turned the sketch on its side.  And here is what I did: I used a left over piece of the fabulous Mocha Morning DSP.  Isn't it just lovely?  I used one stamp set.  Yes, amazing achievement!  Notably Ornate.  I used two colors: soft suede and perfect plum.  Easy peasy!  I added some of the new perfect plum taffeta ribbon.  It is just so pretty.  I add to add the mini vintage tag and one tiny rhinestone jewel.  Not a lot of product, but its uniquely pretty.
Let's see what you create!

Monday, December 19, 2011

Blue Christmas #93

Happy Monday.  I know for a few of us, this is a crazy Christmas shopping day.  But, I wanted to take a break, and share a card with you.  If you are one of the few folks who receive a hand-made Christmas card from us, this is the card you have received in the mail.  
I purchased this paper several years ago; probably 4-5 yrs ago, when this company, Scenic Route, was experiencing some financial difficulties.  The store in which I purchased it, only had 10 sheets left.  well, I bought them all.  And yes, I have been hoarding them, until I found the perfect project.  Well, this is the year!  
But, I needed some guidance, so I went over to Sasya Sketches for a look see.  Well, they have a few days left on their card sketch challenge, so here it is:


This sketch was easy to work with, and you could potentially make a variety of cards for different occasions.  So, why not our annual Christmas card? and here it is:


I wanted my card to look 'vintage' without too much work.  Not that I'm lazy.  I just need to make 40 of them.  So, you see, I didn't want to distress or work on a hundred little pieces.  Plus, I needed them to be relatively flat.  They need to be mailed.  I didn't want to spend $2.25 on postage for each card.  Not that I'm cheap.  I just need to mail 40 of them.

I wanted our Christmas card to have a 'cozy' feel to it.  So, that is how this gorgeous snowflake pattern paper came about.  I added one of my all time favorite crochet trims to the card.  Along with one of my multi-loop bows made from seam binding and a button brad.  Along with my all time favorite vintage tags, which has a snow flake heat embossed on it.   I just had to tie a button and tag onto the crochet trim.

To give my card a bit of sparkle, I did add a rhinestone jewels to the center of the printed snowflakes.  No shimmer mist on this card.
I used products from three companies: Stampin' Up!, Scenic Route, and Paper Trey Ink.  Not too bad, if I say for myself!  I did want to add some hand-painted jingle bells to the cards.  But, they would have driven the price of postage through the preverbal roof.  So, if your Christmas card is hand-delivered, look for those hand-pained jingle bells.


Happy Holidays!  Check back periodically this week, as the design teams are still busy, and I'll also be posting some photos of hand-made Christmas gifts.

Friday, October 21, 2011

Thank You Spiced

Oh my, is it Friday already?  Whew, where did the time go?  So, as it is Friday, it is time for another sketch challenge by the fabulous group Sketch Frenzy Friday!  And, I have to admit, that I have really enjoyed the creative sketches these wonderful ladies have created.  And this week is no exception.  Tammy B. is this weeks designer.   So, without further ado, here is her sketch:

Isn't this just a great sketch?  Here is my card:


I used my new favorite dsp: Spice Cake DSP.  I just love how the colors and patterns make me 'feel' autumn.  I matted the lighter dsp to help bring out that beautiful pool party blue.  I wrapped some early espresso ribbon around it, to help ground the piece to the card.  I stamped the 'thank you' in soft suede classic ink.  And, I'm sure I haven't surprised you by using some of the first edition dsp.  I used the hand held punch to create the flowers and added a rhinestone jewel to the centers.  
Thank you for looking! and I hope that you find some time to play along with us in this weeks challenge.  Now, don't forget to stop by Tammy B.'s blog, to continue on with the blog hop!

Tuesday, October 18, 2011

Regionals

Stampin' Up! is coming to Albuquerque!  It's a half-day regional event!  So, you know that I will be there! and so are the wonderfully talented ladies in my downline.  If you aren't familiar with what that is, when you recruit another person, they are your downline.  And you are their upline.  Kinda cute, huh?  Anyways, so I'm super excited!  I'm even hosting a vintage card swap at this fabulous event.  But, what I wanted to share with you are the tags that I made for my downline.  
So, a little background.  Once you reached Senior Supervisor you can name your downline group.  It's kinda big deal.  So, after much thought, and quick action, I named my downline group, 'Hoot's Got Stamps?'.  Hoot, you know, like an owl.  Isn't that just the cutest? 
So, here are the tags I made.  I have one of each of my downline ladies who are attending regionals.


Aren't these just the cutest?  The overall size is 3 1/2" x 2 1/2".  I haven't quite figured out how to get it to attach yet.  But don't fret.  I'll have that all taken care of by Thursday.
Thanks for looking!  Stop back by all week, because I have made my cards for the design teams I am on.  I hope you won't be disappointed.  They are actually quite good!

Wednesday, October 12, 2011

sketch because

It's Wednesday!   We are half-way to the weekend!  Just think extra time to paper craft!  Yahoo!  Oh, and it's time for another sketch brought to you by the Stampin' Queens Sketch Challenge!  So, without further ado, this is the sketch:

This sketch has alot of potential!  You can use a variety of cardstock to make this sketch work.  Don't forget, you can turn the sketch on it's side, or flip it!  Here is what I came up with:


See what I mean?  I used a pattern paper to occupy some of the blank space.  I used some scrap pieces of different pattern papers to create the top piece.  I tore the first edition dsp to re-create the rough edge, as in the sketch.  I used a scrap piece of the cherry cobbler quilted ribbon.  I just love this ribbon.  It has a wonderfully elegant pattern in the solid color ribbon, and the weight is soft enough to tie without adding a bunch of bulk!  
Come on, join us in this sketch challenge!  Use your Stampin' Up! materials, to create something fabulous!

Tuesday, August 30, 2011

Birthday Blue

I wanted to share a card I had made for a girl friend.  She is a very special lady, and I wanted to make something for her that is as beautiful as she is.


I layered a mix of different blue pattern papers and wrapped some ruffle ribbon around them.  I found this beautiful 'cupcake' paper at the big box M store.  I layered the cupcake paper onto some chocolate chip card stock, to help mimic the chocolate cake.  I stamped Happy Birthday in Chocolate Chip classic ink on a scrap piece of white card stock and used my square punch to make the flag tail.  I added a short row of rhinestones and viola!

Saturday, August 27, 2011

Paper and Fabric

Howdy!  It's Saturday!  Oh, doesn't feel wonderful to be IN the weekend!  It does.  Let me kick off my shoes, grab a latte, and take a deep breath!
It's time to break out your paper crafting items, and join these fabulous girls over @ Our Creative Corner for another challenge!  Well, Vicki has given us another challenge.  This challenge is a color challenge.  The colors are Basic Gray and Basic Black with a pop of Real Red.  Sounds pretty easy.  What I did was pull everything out that was black, gray, or red.  I mixed papers and different embellishments.  You know, the usual.  
Here is Vicki's color block:
Here is my card:
Let me just say that no, your eyes are not playing tricks on you.  There is NO rubber stamping on this card.  Once I pulled all my color appropriate stuff out, I got to mixing and matching, and forgot to leave room for a stamp!  But, I really like the card.  And if nothing else, it shows the versatility of the products.
The card base is made with Basic Black card stock.  I layered a piece of black and cream pattern paper from Love Letters DSP.  I had a scrap piece of that fabulous rose pattern paper.   I put it on crooked on purpose.  I wanted some visual interest, so I kept opposite corners on the pattern paper, and chopped off the over hanging corners.  I had a scrap piece of of that black hounds tooth pattern paper from the Love Letters DSP and a scrap piece of the text pattern paper from the News Print DSP, that really looked tailored and handsome together.  So, I added those scrap strips across the lower middle of my crooked card stock.  I found this fabric tab in my drawer of embellishments and thought it looked fun, so I added that too.  I tied a piece of Real Red Satin ribbon around these layered pieces.  The oval tag was already made. I added some foam tape behind the card stock oval tag.  I adhered 5 rhinestone jewels to the bottom line on the oval tag.  I found these two black corner flourishes, and add to add those.  
This card has a few different products on it, but I don't think it looks 'heavy' or over-loaded.  Let me know what you think.  Now, go create something wonderful using Basic Black, Basic Gray, and a pop of Real Red, and enter our challenge over @ Our Creative Corner challenge blog.

Tuesday, August 2, 2011

Surprise Birthday

Howdy!  Glad that you could stop by today and see what I've been crafting!  A girlfriend had asked me to make her some Birthday invites for another friend, but it's a surprise party!  How fun!  I think those parties are generally the best!  You get to make it all fancy and special, and the recipient  gets to bask in the special efforts, surrounded by her friends!
here is the invite:

I used four different pattern papers from three different companies.  Once I figured out what I wanted to do, finding the perfect pattern paper wasn't soo hard.  Just a few minutes to hunt and peck!  I have to admit, I just love the scallop trim piece from the Tasteful Trim die by Stampin' Up!  I think it helps give any project a little feminine touch, without being over whelming.  I sprayed the whole card with some 'home-made' shimmer mist.  I used the champagne shimmer paint by Stampin' Up!, a drop or two of Sahara Sand re-inker and rubbing alcohol.  The champagne paint has gold mica flakes, so it gives a soft golden shimmer.   The 'shh' was stamped each letter at a time.   I 'painted' the 'flame' from the candle with white craft ink and then added some dazzling diamond glitter by Stampin' Up!

Thursday, June 30, 2011

Creative Sketches Style

Happy Thursday, and thank you for stopping by to see what I've been crafting.  I want to thank everyone who had posted a comment on yesterdays blog candy post.  Good Luck!  But, now it's time for another challenge from Creative Sketches!  The challenge this week, is pretty easy - create a new card showcasing your style!  Easy Peasy!

I know what you're thinking, 'this really isn't you, Sharon.'  but take a closer look.  I've used vintage-style paper, a piece of text paper, a hand-made flower, some ribbon, and some sparkle.  It's me, just not my usual color combo.  
close-up of the tag
 A fellow paper crafter had made a comment to me a few weeks back, that she didn't know that blue was my favorite color.  And it's not.  Red, is my favorite color.  I love the color itself.  (To me it evokes strength, power, passion, and love.)   So, she wondered why I don't use it.   If Red is my favorite color, then why does 80% of my cards have no red.  They have Pink, Blue, and Crumb Cake.; this is my typical color combo.  But, they don't have Red.  When I paper craft, and I don't have to follow a style, I love vintage/shabby chic.  And you really don't see alot of red.  But I love Red.  
And then, I found this new paper in my local scrapbooking store, Authentique.  I had to have at least one sheet of each pattern paper that is in the collection.  And I LOVE it!  For some odd reason, this paper makes me think of my grandmother.  Don't know why, but it does.  And so, I have had a smile on my face the whole time I have worked with it. 
Thank you for stopping by and for looking.  Let me know what your favorite color is.  Even if it doesn't make numerous appearances in your crafting.   Have a wonderful day!

Saturday, June 25, 2011

My Style

It's Saturday!  That means its time for a new challenge @ Our Creative Corner challenge blog.  This is a new and different challenge this week.  It's a Design Team call!  So, the challenge is to create a new card showcasing your abilities and talents!  So, use whatever colors inspire you, and use any layout that showcases your talent!  This design team call challenge closes July 8th.  So, what are you waiting for?
here is my style

If you look at my blog posts from previous challenges, you will see that my style is generally vintage/shabby chic.  I love to stamp on pattern papers, if I'm not making my own.   My two favorite card additions are a button and soft ribbon/crochet trim.  I really enjoy using those doily tags, too.  I generally make my own flowers out of cardstock or synthetic fabric.  If I add a corsage pin, I usually make my own, and that is what I did this time, too!


I cut two pieces of pattern paper to fit off-set onto my card front.  I added a piece of First Edition DSP as the matt.  I made a wide scallop trim border from a coordinating pattern paper.  I added a slim strip of crochet trim over the scallops.  I stamped 'ADORE' in Jet Black Staz-On onto the bottom pattern paper.  I punched a 1 3/8" circle from the First Edition DSP, and added it to the center of the doily tag.  I punched 4 scallop circles from River Rock cardstock, sprayed them with my home-made white shimmer mist, crumpled them, and hot glued a button to the center of the flower.  I distressed the edges of the paper flower with white paint, and gave them a few spritz of vanilla shimmer mist by Smooch.  I made my own push pin, and stuck it behind the flower.  I punched some leaves with the 2-step bird punch.  I cut the butterflies from the same blue pattern paper I used for the scallop trim, and added some faux half-pearls for their bodies.
Thank you for looking.  Now, its your turn!  Create something that showcases your style, and submit it to us @ Our Creative Corner.  As part of the design team, you will need to submit an entry weekly to for our challenges.  You will also need to take a turn at hosting a challenge during your 6 month term.


Thursday, June 23, 2011

Wedding Creative Sketches Style

Well, its Thursday! And that means another challenge from Creative Sketches.  It's time for another 'holiday' themed sketch challenge!  The rules are super simple: make a paper craft item with a holiday theme and follow the sketch.  See, super simple!

Now, if you notice, not only did I flip the sketch, but I also did a mirror image.  I made a shabby chic wedding card.  For the main panel of aqua blue cardstock, I created my own background pattern paper.  I stamped the flourish repeatedly from the Friends 24-7 set and then stamped the Sanded background stamp. I wanted my paper to have some depth.  I had a scrap piece of First Edition DSP that I used to create my decorative square.  For the circle, I punched out the circle shape from a tag that was originally a rectangle,.  I wanted to add my sentiment on the circle and not the square, so I stamped the wedding congrats in Chocolate Chip classic ink.   I stapled the  scrap piece of crochet trim to the circle, I thought it added some shabby style to the whole look.  I also used my hot glue gun to attach the button.   I made the multi-loop bow out of Crumb Cake seam binding.  I wanted the  center of the bow to be a bit jazzy, so I made the pearl center myself.  I strung some loose pearls with beading wire and created the circle shape, then I used my hot glue gun to attach the pearl center to the bow.  I thought that the left corner seemed a bit bare, so I added a butterfly and gave it a rhinestone body.  To continue the pearls, I added two trio faux half-pearl lines to two different areas of the card.
Please join our challenge.  Let your creative spirit dictate your piece.  You never know, you could be our next 'winner'!  

Monday, June 6, 2011

HB: SSC206 & CQC #87

It's Monday! and that means another week has begun!  And what better way to start, than with a fun Birthday card? 
I need a Birthday card, for a wonderful young lady, but I also needed some inspiration.  Here is where I went:   I went to Stamping 411, for the layout.  I went to Colour Q for the colors.
So, this young lady is pretty wonderful, and hip, so I need something 'fun' and creative.  So, I used a 'teen' stamp set from Stampin' Up!, Grunge Rock.  I used some retired DSP paper: Razzleberry Lemonaide.  

Here is her Birthday card:

I used Pumpkin Pie as the card base.  Layered a piece of DSP on the base.  I added a strip of Crushed Curry with the fancy scallop trim border, with another piece of the DSP on that.  For the main image, I stamped the harlequin pattern in Crushed Curry classic ink along the left edge.  I did a 2nd generation stamp of the 'no.1' in Soft Suede classic ink.  I stamped the guitar with a home-made Melon Mambo craft ink and heat embossed with clear EP.  The whisper white looked too white, so I gave it a sprtiz of my home-made Pumpkin Pie shimmer mist.  Instead of adding a button, I made a paper flower with Crushed Curry cardstock.  I stamped the crown in Melon Mambo classic ink, and used a 1 1/4" circle punch.  The 'Happy Birthday' is done in Soft Suede classic ink onto a banner from the petal cone die.  I added some random rhinestone jewels to give the card some visual interest.  Viola!

*I made this card on Saturday, however, I didn't want to post it too soon, as the recipient might see it.  Well, the submission day/time has passed for Colour Q, so my card is not visible at their site.

Saturday, April 23, 2011

Happy Spring-time To You!

Good Morning All! And let me extend a warm welcome to my latest follower, Isbel. It is a pleasure to have someone new, and a delight to know that someone out there likes my work enough to 'follow' me. You have surely made my day! Thank you.
So, here is my latest card. Yes, its an Easel Card. The traditional take on this. No fancy-shamancy folds, twists, or turns. Just regular. I am entering this card in two different challenges. Our Creative Corner, is hosting a card type challenge. Make an Easel Card. No limits. How wonderful, and easy to work with. Color Q (cQc #81) color challenge is to use these wonderfully soft colors: Pink Pirouette, So Saffron, Old Olive, Soft Sky, and white. Now don't those colors say 'Easter or springtime' to you? They do to me. In theory, this card should have been a walk in the park. However, my park is still covered with some snow, if you know what I mean. I made about three different cards with different colors of card bases. I used different stamps for my image. I even tried using a wedding cake image. I struggled. Then, I found this left over image from Crafty Secrets I had laying on my crafting table. And Viola! It all started to flow.
The card base is Soft Sky. My stash of this retired cardstock is getting pretty low. So, there is no room for error. The first matted piece is actually Presto DSP. I just sponged Soft Sky classic ink onto it. I love that paper. I used the regular scallop trim border punch and punched some old DSP and stacked them together. I used some other really old retired DSP to make the heart. I used the Beautiful Wings embosslit to create my butterfly. I made my leaves with the leaves embosslit and cut them apart to have leaves poking out behind the heart in all directions. I used my Lots of Tags die to create my label for the inside and stamped one of the saying from the Blessed Mother stamp set in Old Olive classic ink. The final touches were simple: distress the edges with White craft ink and add a few rhinestone jewels to give the card some bling.
The thing that strikes me about my card, is that there is no ribbon or buttons. Believe me, I tried. But, I couldn't get those elements on, and still love the card.
Have a wonderful Easter weekend. Share this time with your family and friends. If you have a moment, share with me your favorite Easter activity. Mine, doing an Easter egg hunt with my grandchildren. I can still see my kids in their faces. God bless.

Monday, April 18, 2011

Friends

Here is a card that I made Sunday morning. I used two past challenges to create it. I know, you're suppose to create something to enter a current challenge. But, I really loved the layout of one challenge, and the color combo of another. So, I combined them, and this is what I made.
I used all Stampin' Up! products on this card. A little stamping, some laying, and viola!
I sponged some of the champagne shimmer mist on the tags, and flowers. You know, just to give them a translucent gold-ish metallic shimmer. The flourish is from Friends 24-7 stamp set. The friends is from With All My Heart stamp set. I used two different textured flowers, a paper flower and a crochet flower. Both were sponged with the shimmer paint. A neutral glimmer brad gave the crochet flower a nice balance, and helps hold the color combo in the card. I added some of the rhinestone jewels, to help give the card some polished bling.
Thank you for looking! Leave me a comment, and let me know what you think. Have a great week!

Saturday, April 2, 2011

Girl Power!

Good Morning! First, I have to tell you that I am the hostess this week over @ Our Creative Corner blog! Yahoo! It's super exciting! So, since I'm the hostess, I get to design the challenge. Doesn't that sound like sooo much fun? Well, I'm pretty happy! So, before we get to my card, let me first say that I work with some of the most fabulously talented ladies the paper crafting world has seen! They took the challenge and created some of the most beautiful things! Everything from an A2 card, to a wreath. How wonderful is that? So, pop on over and take a look. Then, grab your most girly, feminine paper crafting supplies and play along! The requirements: a hand-made paper flower, ribbon, and some bling! Super sweet, and pretty! I can't wait to see what you create!
Ok, now on to my card. My oldest granddaughter was my inspiration. Yes, she is a girly girl. She loves anything pink, princess, and glamorous! So, I used my girly supplies to create this card. The stamp is a wonderfully playful likeness of her. And the pink says it all!
Ok, this is another million product paper craft. I used paper from three different companies: Stampin' Up!, Basic Grey, and Wild Asparagus. The ribbon came from two different companies: Stampin' Up! and Paper Trey Ink. The bling came from one company: Stampin' Up! (glitter and rhinestones). I used the Birds & Blooms die to create the flowers. The pearl swirl was already formed. I just cut-off the larger half pearl, and substituted a medium Stampin' Up! rhinestone in its place. I used Stampin' Up! markers to color my stamped image: Pretty in Pink and Rose Red for her dress and shoes, and So Saffron for her hair. The buttons came from my Paper Trey Ink stash.
Thank you for visiting. Let me know what inspires you.

Thursday, January 20, 2011

Filled With Love


Here are the cards we made in my Filled with Love Valentine's Card Class this past Sunday. We used the Filled with Love Stamp Set (from the Stampin' Up! Holiday Mini 2010). Stampin' Up! 's current promotion is the Filled with Love Bundle. In this bundle you can select either wood mount or clear mount stamp set, a package of special DSP, and a container of clear Itty Bitty Buttons! So, I added some solid cardstock, and we created these lovely cards! How fun! They each have their own look and feel, so you will have a card on hand for all your Valentines!
I will be hosting another Valentine's Day card class at the end of the month. We will be making 3 different cards, using various Valentine's Day stamps. So, if you weren't able to attend, or pick up a kit, don't delay and sign up for my next Valentine's Day card class. (All non-attendee kits come with color photo directions, a supply list, and all materials to complete the cards.) The only product you will need to complete these cards, is your favorite adhesive.
Thank you for looking!

Wednesday, October 6, 2010

Stamping 411 meets Color Throw Down

Scroll down to 'Halloween Candy' post to enter your comment, to win some halloween themed blog candy.


Here is my card for two different challenges. Stamping 411 Saturday Sketch Challenge #171, & Color Throwdown #113
I wanted to make a card with my new stamp set 'Aviary' from Stampin' Up!, #120462. The colors for this challenge are perfect plum, early espresso, and very vanilla. I made my own craft ink with my perfect plum reinker. So the cages are heat embossed and then I stamped the birds. That way the birds look like they are in the cages, instead of just 'hangin' out'. :) My newest favorite thing, is the vintage wall paper embossing folder. I just love it! It gives any (and every) project a little pizzazz! I have to admit, I have fallen in love with this new width ribbon, too. At first I was like, what am I going to do with a ribbon that is only 1/8" wide? Come on, give me something to work with! But don't you just love it? It adds some texture to the card, without taking away from my beautiful cages! I also added some bling. Let's face it, a girl has to try real hard not to give her pretty card some sparkle!
Well, thanks for looking. As always, a comment really makes my day! But don't forget to post a comment on my 'Halloween Candy' entry and sign-up as a follower to enter the halloween blog candy give away!