Showing posts with label Notably Ornate. Show all posts

Tuesday, May 15, 2012

Bye-Bye Flower

I hope this Wednesday finds you well.  Me, I had a very productive day off.  So, I feel this new energy and I have found my creative spirit.  I need a day off from work, here and there to re-charge my batteries and get a chance to play 'catch-up' with chores.  So, I started my day-off, by creating this card.  I made some Candied Mix-Nut clusters, and several Pumpkin Cranberry Bread, for a Bake Sale at work, today.  I got some laundry done.  The kitchen is cleaned, as well as other house work.  I made a delicious home-cooked dinner.  And relaxed  during the evening, and watched some TV.  See, a day, to re-charge and take care of some chores!
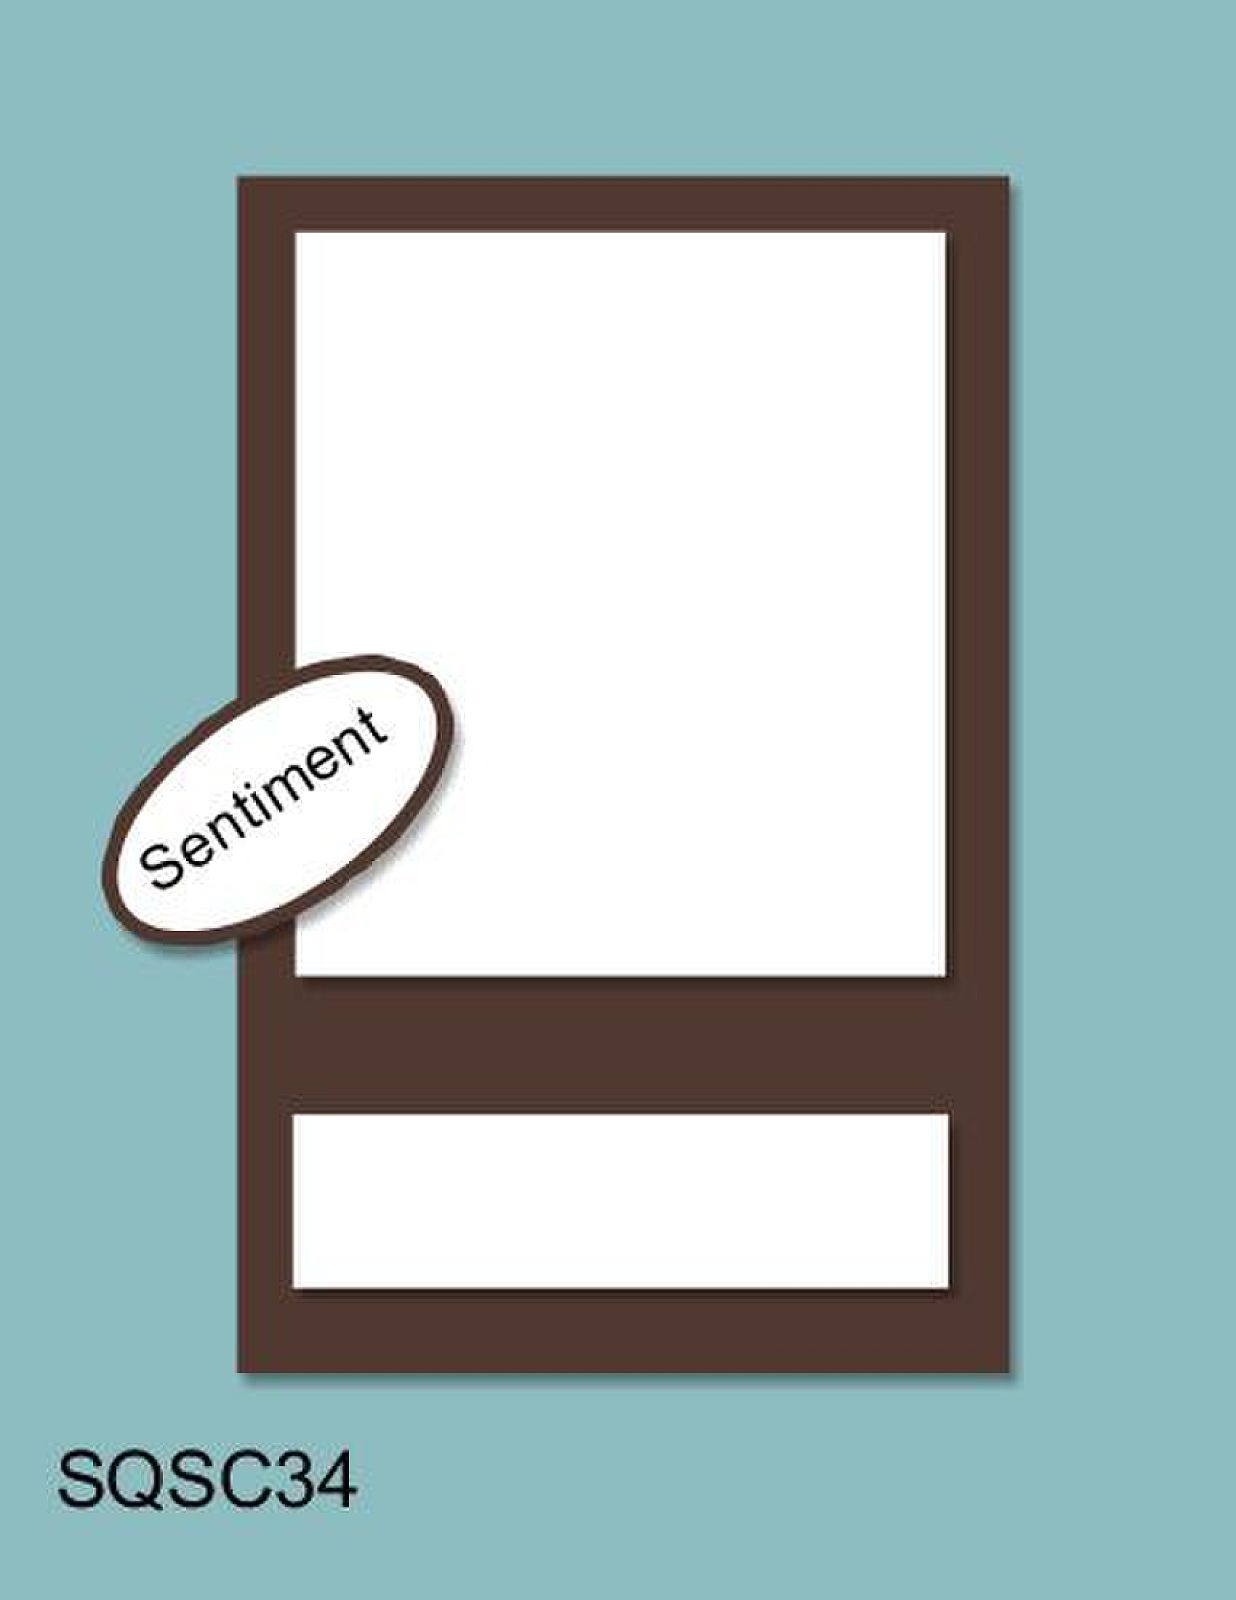
Now, for a little creativity!  The Design Team, over @ Stampin' Queens Sketch Challenge, have been busy creating some very inspirational cards for you!  So, why don't you join us in another wonderful week of creativity!
Here is this weeks sketch:


Here is my card:


It's May, and so there are quite a few products that are retiring from Stampin' Up!.  I just love this DSP!  We all had an opportunity to purchase the Everyday Enchantment DSP.  The stamp set that I used for this card, Notably Ornate, is on the retiring list, too.   I used the Top Note die to create the fancy rectangle piece.  I used the scallop circle die to create the 'flower'.  I used Pure Poppy card stock for the largest scallop circle.  I made an accordion flower using the First Edition DSP.  The smaller scallop circle was created with the Everyday Enchantment DSP.  I stamped the bird in Pool Party classic ink and fussy cut.  I punched two tiny flowers and added them to the bird, using a brown brad.  The sentiment was stamped in Soft Suede classic ink onto a piece of very vanilla card stock cut into a banner shape.
Thank you for looking.  I hope you have found some inspiration, and join us this week, in our sketch challenge @ Stampin' Queens Sketch Challenge.

Wednesday, April 11, 2012

Just Plum

This is week is especially busy, as I am getting things prepared for my daughters baby reveal shower.  But, I took time out of my busy schedule to play along with the talented ladies over @ Stampin' Queens Sketch Challenge.  The sketch this week, is super user friendly, and I encourage you to play along.  There is a lot of empty space, so you can fill it, or leave it CAS.  The possibilities are endless and your creative flair will add some fab to it!
Here is the sketch:


Here is my card:

See what I mean?  I turned the sketch on its side.  And here is what I did: I used a left over piece of the fabulous Mocha Morning DSP.  Isn't it just lovely?  I used one stamp set.  Yes, amazing achievement!  Notably Ornate.  I used two colors: soft suede and perfect plum.  Easy peasy!  I added some of the new perfect plum taffeta ribbon.  It is just so pretty.  I add to add the mini vintage tag and one tiny rhinestone jewel.  Not a lot of product, but its uniquely pretty.
Let's see what you create!

Friday, September 2, 2011

Take Note, it's Friday!

Yahoo! It's Friday!  The weekend is almost here, and the talented ladies over @ Sketch Frenzy Friday, have a sketch for you to try!  This week's sketch, is brought to us by Jennifer Weide.  And don't forget to stop by Tammy Baldwin's blog, to see what she has created!

Here is the sketch:

Here is my card:
So, I wanted to use the same package of DSP that I opened a few weeks ago.  The blue pattern paper, and the rooster pattern paper are from the Beau Chateau DSP package.  I used the vintage wall paper embossing folder on the blue pattern paper to give it some more texture.  I used the tag die to cut the rooster paper.  I stamped the large notebook flourish in black craft ink and used clear embossing powder, then I heat set it.  I stamped the words and the body form in soft suede classic ink.  I stamped the crown in marina mist classic ink.  I edged both pieces in Early Espresso classic ink.  I stamped the oval piece in early espresso classic ink, the crown in blushing bride classic ink, and the 'for you' in soft suede classic ink.  I crumpled the baja breeze seam binding to give it that worn-look.  I took a piece of vanilla seam binding and dyed it with pink pirouette classic ink.  I squished the two multi-bows under the vintage brad.  I wanted to give my card some sparkle.  So, I added three tiny rhinestones; 2 randomly and the third on the oval tag.
Thank you for taking a look at my card.  Now, with the inspiration you have received from the design team, make a card using our sketch and your Stampin' Up! products, and lets see what you make!

Friday, August 19, 2011

thanks

Hi! and thank you for stopping by this Friday!  So, the weekend is right around the corner, and Sketch Frenzy Friday has another challenge for us today.  The sketch was brought to us by Angela, and the sketch is pretty 'user-friendly', and your only requirement is to us Stampin' Up! products.  I decided to use all current products, so if you find some inspiration, you can purchase all these products today!  Don't forget to stop by Tammy B. 's blog to see what she has created.
Here is the sketch

Here is my card

For some reason, I have this urge to use this same color combo.  Sorry!  But, isn't it just beautiful!  Crumb Cake, Calypso Coral, Pink Pirouette, Peach Parfait, and Very Vanilla!  Before you say it, yes, that is Stampin' Up! seam binding.  I just dyed it!  First, I measured how much seam binding I needed  and cut that measurement.  I sprayed the seam binding with water, and then added several drops of Pink Pirouette classic re-inker.  Then used my heat gun to speed up the drying time.  I wadded up the seam binding to help create the crinkled look.  
The flower was made with circle punches.  I used peach parfait card stock, pink pirouette card stock and First Edition DSP.  I used a metal button brad to hold the card stock flower together.  I punched the leaves from a scrap piece of Beau Chateau DSP and First Edition DSP.  
I used three stamp sets: Clearly For You, Creative Elements, and Notably Ornate.  I used the Lots of Tags die to create the fancy tag design from Calypso Coral card stock.  I also stamped the 'take note' in Calypso Coral classic ink.  The 'for you' and 'thanks' were stamped in Soft Suede classic ink.  The scallop piece is made from the Tasteful Trim die.  I added a small faux half-pearl jewel to the tag to help give it a girly look.
Thank you for looking, and now go play with your paper crafting supplies, and join us in this sketch challenge!

Thursday, June 9, 2011

Just a Note

I have made ONE card for THREE challenges!  How efficient!  So, check them out!
Color Challenge:  Creative Sketches has a color challenge this week.  The colors are:  Real Red, Wild Wasabi, Soft Suede, & Whisper White!  These are beautiful together!  Please stop by and see what else the design team has created!  These are super talented ladies, and I am sure you will be inspired!
Sketch Challenge:  Just Us Girls, this week, it is sketch #87.  When you first look at their sketch, you think 'I can do that!' and you should!   I love user-friendly sketches.
Technique Challenge:  The Shabby Tea Room.  Week #65 - Embossing.  Wet or Dry.  See, how fun is that?
 Here are the inspiration boards:

   Creative Sketches - Color Challenge
 Just Us Girls - Sketch Challenge
 Shabby Tea Room - Technique Week

Here is my card:

close-up of the bird
close-up of the flower
Ok, alot is going on here, so grab another cup of coffee, (or other favorite beverage) and have a seat.  
The card base is Soft Suede.  I cut the main panel just slightly smaller than the card front.  Inked my Sanded background stamp in Soft Suede classic ink.  I then ran the stamped panel thru the Big Shot inside an embossing folder to give the main panel some interest.  And dry embossing!  Next, I made my tag.  I cut some Whisper White cardstock to an appropreiate size.  I first stamped the swirl in Soft Suede classic ink.  Then the flourish (Friends 24-7) in Wild Wasabi classic ink.  I sprayed the tag with Log Cabin Smooch spray, and one spritz of Gold Smooch.  I cut two circles from Wild Wasabi card stock and Wild Wasabi DSP, and used my Crop-a-Dile to create the hole and set my green eyelet.  I ran some Early Espresso Baker's twine thru the hole and tied a bow.  I made my flower with Real Red cardstock and used the Birds & Blooms die set.  I used some foam tape between the flower layers to seperate them.   I used the 2-step Bird punch and some Wild Wasabi DSP to make the leaves.  The bird  (Notably Ornate) is stamped in Soft Suede classic ink, and then again in Versa Mark, and heat embossed with clear EP.  I made the oval tag by coloring my stamp with both a Soft Suede and Wild Wasabi markers, and used the extra large oval punch.  My sentiment (Notably Ornate) is stamped in Soft Suede classic ink and I used the Modern Label punch to create the tag.  I lifted the tag off the card front with some foam tape.


Sunday, July 25, 2010

Convention Inspiration


I got in late last night from Utah. The Stampin' Up! convention was a blast! I found it very motivating, inspiring, and knowledgeable. I went with some of the ladies from the Nacho Average Stampers and we had a wonderful time!
For the top card, I did use a download I found on the Internet. I printed it on card stock. I liked the yellow in the bird and the green foliage. So, I Incorporated those colors in my card. I added some Daffodil Delight ribbon, yellow rhinestone brad, and some Certainly Celery stamped piece. I have a new 'love' for the music wheel!
For the second card, I tried a technique everyone has seen on the Internet, but with a twist. I made my flower from a polyester material and organza. However, I didn't use a flame to 'melt' the edges, I used my heat gun. It's a bit safer, and has better control over the 'melting' of the fabric.
Thanks for looking and please post a comment, they always make me smile!