Showing posts with label washi tape. Show all posts

Thursday, February 16, 2017

My Planner

Howdy, and good morning.  One of my new years resolutions, is to be more organized.  Can someone be 'more' organized? or is it simply 'organized'?  Well, I feel that I am pretty organized, per say.  But, I  also believe that there is always room for improvement.  So, I am working on being 'more' organized.  And to help me conquer this task, I purchased a planner to keep everything together at my finger tips.  {smile}
If you do a search for 'planner' on the internet, you will be bombarded with images, tutorials, and various manufacturers products.  A lot of eye candy!  So, during the last week of December, I headed to a local craft store, and picked up a few items.  And I finally did a little bit of crafting, and decorated the cover of my planner, and the inside cover of my planner.  {smile}


My planner is striped in a rose gold metallic and cream.  I really liked how these two colors looked together.  I started with a paper lace doily from Stampin' Up!.  I layered a scrap piece of cream and gold metallic lace, towards the bottom of the doily.  Then I added a piece of pink polka dot washi tape.  I purchased that big beautiful fabric blossom in the clearance isle of a craft store.  So, I hot glued the blossom, to the cover.  I die cut two leaf pieces and my initials from a scrap piece of glitter paper, that is pretty similar in 'gold' color on the cover.  I adhered the two leaf pieces to the upper left of the blossom, and adhered my initials to the right of the blossom.   I adhered the rose gold and rhinestone charm just under the blossom.  And the final touch was adding a trio of blush sequins, and a trio of flat-back 'pearls'.


I am pretty happy with how the cover is decorated.  I didn't want too much on the cover, as I use my planner daily.  It's kind of a ritual now a days.  I open it, and look at my various sections each morning, while I am drinking my coffee.  It helps me stay on track for projects, and I get to review my calendar, and make notes of different items of interest.  I am truly loving this whole process! {smile}  I also wanted to make a few additions for my planner, and to make the inside just as pretty!


I trimmed a Project Life card and re-rounded the corners to this beautiful metallic card:  'By being YOURSELF you put something WONDERFUL into the world that was not there before'.  I think all of us need reminders how special each of us are.  And that we should celebrate not being carbon copies of each other.  
I made 4 different but equally beautiful 'clips'.  I took large paper clips and simply added things I love!  Three are made out of paper, and one is another beautiful blossom.  {smile}  The sign, coffee cup, and mason jar are made from paper.  I added a little foam adhesive between the front and back piece of heavy card stock.  And hot glued the paper clip in place.  For the blossom, I simple tied a double bow to the paper clip and hot glued the pink paper blossom to the bow.  I backed it with a scrap piece of pink felt.  I added some small gold accent post-its, and two magnetic closures: a tiffany blue flag, and a gold metallic diamond shape.  I printed a calendar year onto heavy card stock and slipped that in the large pocket.  So, I can see the whole year in one view.  I also made a few notes for each month.  That is where I jot down large projects.  
Well, thank you for looking, and spending a little time with me, to see what I have been doing.  I hope you are still on track with your new years resolution(s), too.  Changing how you do things, and creating 'good' habits are hard.  It does take work, and discipline.  But, I know that I am happy with the changes I have made this year.  I am still exercising 3 times a week.  Running 2 days a week.  Making better, healthier choices of food.  And having time on my calendar to craft, really takes the stress away.  I don't fret about deadlines anymore, and I can get so many more things done in the day.  It makes me believe that my stress is reduced, which is good for my heart, and my family. {smile}  And I continue to work on my 'problem' areas each day.  So there are strides there.  And feeling like I am in control of those areas, is empowering!  Have a great day!


Monday, January 9, 2017

Be Kind

Howdy!  I wanted to share another shaker piece for my planner.  I stopped by a blog, that I frequent, Julee and saw this quote that she, the blog author saw on a billboard, and instantly fell in love!  It speaks volumes to me: to my heart!  Thank you Julee!


Here is how I did it:  I started with a Project Life pocket.  I layered my paper and adhered them together.  I printed my quote onto linen card stock by Paper trey Ink.  
I added a sequin mix and seed beads to the other side of the pocket, because the other side of the blue check pattern paper is super sweet!  I machine stitched the pocket closed.  I wanted to protect the end of the stitching, so I added a small piece of Washi Tape.  
The tab is at the top of the pocket, so, now I am thinking about where to attach this to my planner.  {frown}.  I may have created this in the wrong orientation.  {pout}

Thank you for stopping by.  Beautiful quote, right?


Friday, January 6, 2017

Planner

Howdy.  My new year, is off to a good, productive start.  I decided to help me get organized, and focus on tasks, I will start writing it down.  Wonderful idea, right?  Now, how to keep all of these tasks organized and keep me focused on these tasks.  umm.  a Planner!  I know that you have seen them.  Everyone is posting photos of their creative and beautiful planners.  Look @ Pintrest.  Paper crafting companies, like Prima and Simple Stories are producing collections.  Designers, like Frank Garcia and Heidi Swapp are developing embellishments, and creative ideas.  
So, I ventured out to a local big box crafting store and picked up some supplies to get me started.


Now, if you know me, you shouldn't be too surprised by my color scheme.  The gold metallic and ivory stripe planner was calling my name! and the pink, blue, and green washi tapes are just perfect.   
Now, I need to just dive in and get this started!  But, what do I want to keep track of?  
My running/races, my paper crafting projects, menus, my work schedule, and my budget.  So, let me dive in and start getting this started!  {smile}
I hope you are taking steps to help you keep your new year's resolutions, too!


Thursday, January 28, 2016

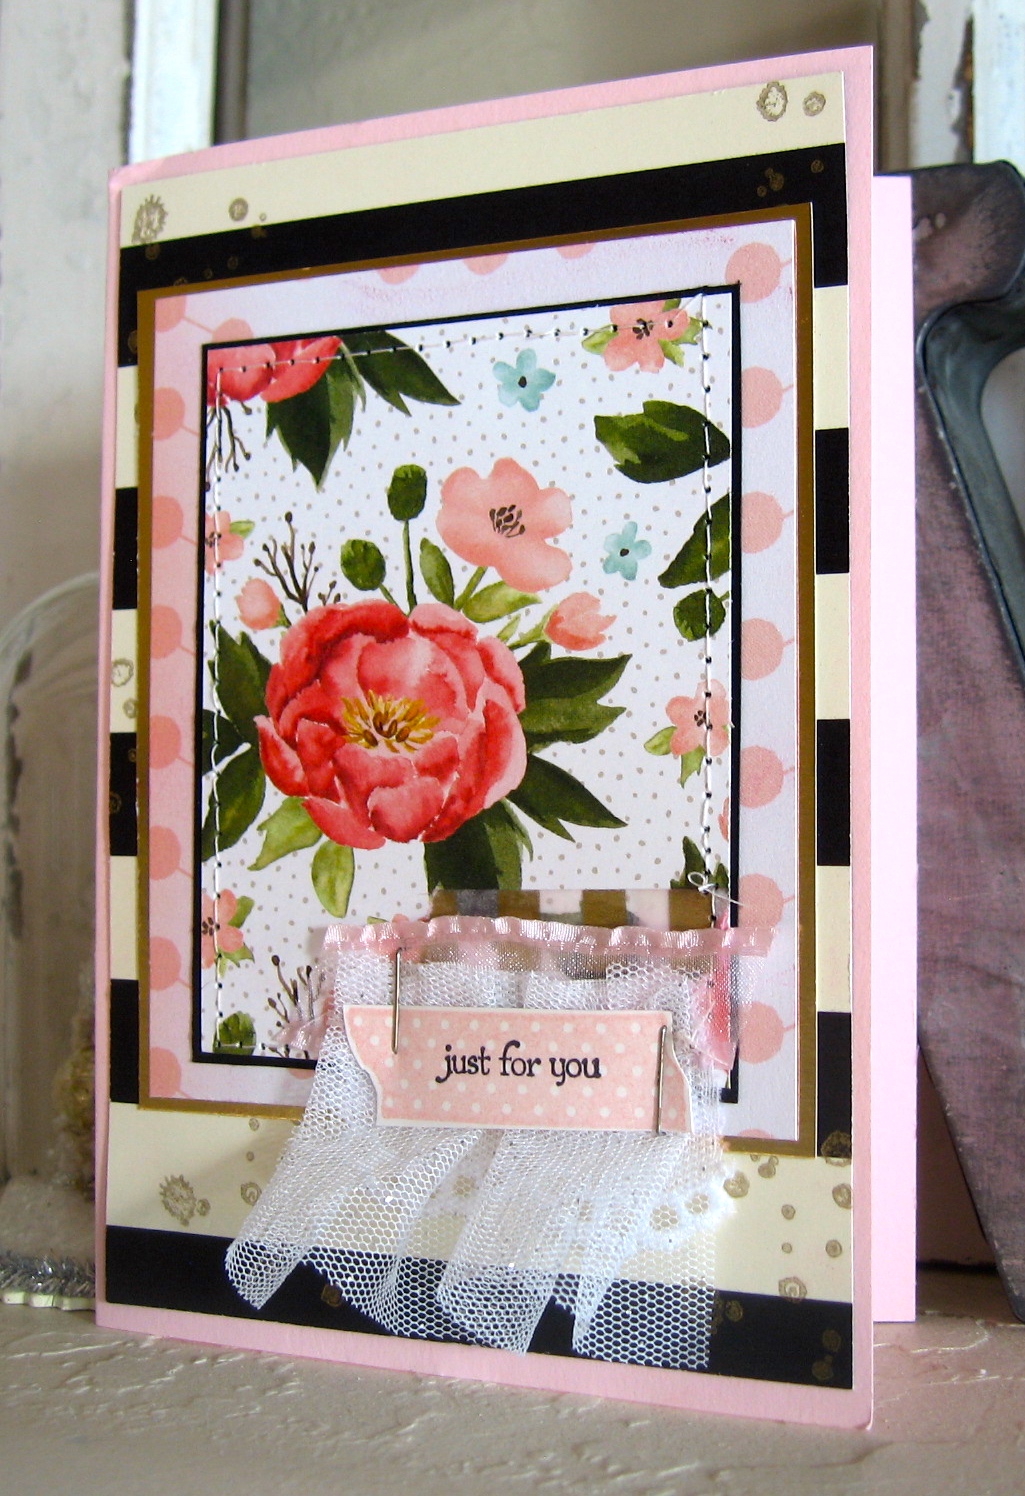
Modern Chic Card

Howdy!  I forgot to post this greeting card over the weekend.  {frown}  And the challenge has already closed.  Oh well.  I need to get a bit more organized.  But I still want to share it with you! {smile}


and a different view


I couldn't really decide which angle I liked best.  So, I'm sharing both with you!  This card is a bit 'flat' for my usual style, but I just thing it's perfect!
Recipe:  The card base is pink pirouette card stock, by Stampin' Up!  I just love this shade of soft pretty pink.  
The black and cream layer is a pattern paper from Stampin' Up! Timeless Elegance DSP.   I did add some gold stamping to this pattern paper.  I used a retired splatter stamp, randomly.
The pink polka dot pattern paper is a scrap piece I had left over from an earlier project.  So I don't remember who makes it.  I matted this pattern paper with gold foil card stock by Stampin' Up! as well.  
Next, I added a scrap piece of Birthday Bouquet DSP, by Stampin' Up!  Isn't this floral pattern paper just gorgeous!  I love it!  It is matted with basic black card stock, by Stampin' Up!  I added a simple border stitch with my sewing machine.  It holds all the layers together.  {smile}

Then, I added layers of embellishments!  First I added a piece of gold and white striped washi tape from Stampin' Up!.  A scrap piece of pink sheer ribbon, a piece of cotton eyelet trim, and a scrap piece of pleated tulle.  
I stamped the 'washi' tape in blushing bride classic ink, using another stamp set by Stampin' Up!  I stamped the sentiment from teeny tiny wishes stamp set, in basic black classic ink and fussy cut it out.  I stapled the sentiment right on top of the trim collection.  I used a gold sharpie to color the staples.  And Viola!
Thank you for stopping by!  I hope you have been inspired to create something pretty, even if it's just for yourself! {smile}


Friday, February 21, 2014

Trio of Card-Gift Combos

I have to say, making these Card-Gift Combo's, is a lot of fun! 
Whew, I have been busy making some paper crafts for my upcoming Spring Craft Fair @ Albuquerque Christian School, in March.  Ugh, next month.  So, as you can imagine, I'm crafting every chance I can.   One of the new items at my booth, are these adorable Card-Gift Combos.  I've featured several of these little beauties here, here, and here.  Not to mention the one I made this week.

If you are a new visitor, These little beauties, open like a card, but they store a drawer, that can potentially hold a gift.  The drawer has a lot of versatilities.  You can store hand-made embellishments, a necklace, a bracelet , a gift card, a set of movie tickets, event tickets, a hand-made ornament, etc.  See, a lot of potential {smile}.

I love to mix patterns and colors.

to celebrate almost any occasion 

another any occasion ticket
no sentiment, so you can add your own

I love to mix pattern papers, and to added different and interesting embellishments.  But, I have noticed through the years, that if I sit and make several of the same items, they all begin to look alike.  So, I am taking a break from making these little beauties.
Today, I will be working on some altered magnetic initials.  And yeah, I will be selling these, too.

Thank you for stopping by.  I hope you have found something you like, and maybe be inspired to create something, too!