Sunday, June 29, 2014

Packaging

~ photo heavy post ~

I have been a little busy with birthday parties for grandchildren and getting some Bunco prizes packaged.  And, I wanted to share a few 'prizes' with you today.
The first two Bunco prizes that I am sharing with you today, I have already shared how I made them, and all their particulars.  But I wanted to share how they will be packaged.  I like my package to match the 'prize' and to keep with a color scheme/theme.  I like everything to look like it belongs and the color scheme/theme be present throughout the event.  I think they refer to this lovingly as OCD.
For each bag, I have heat embossed my logo in white on a kraft gift bag.  I have also added a strip of the cream colored lace, and an altered clothes pin.  However, each bag is unique and coordinates with the 'prize' inside. {smile}
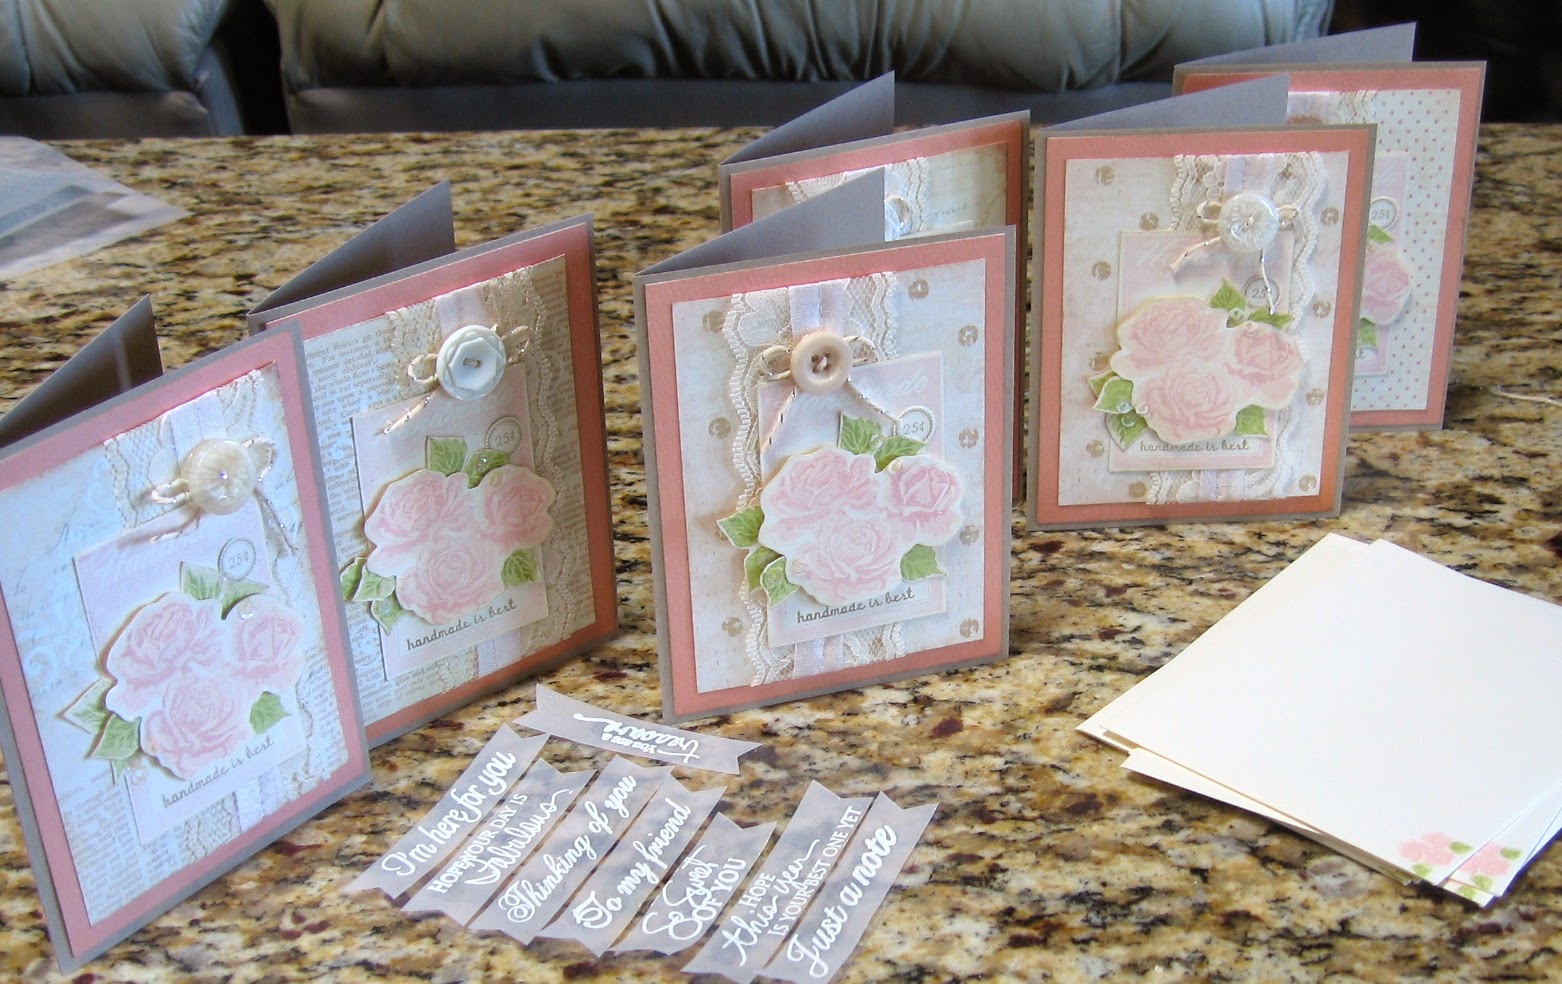
Ok, here is a card set I created earlier and this is the gift bag that I made to coordinated with the card set.  (See the original post for the card set HERE.)


This is an altered frame I created earlier, too.  My first attempt at quilting.  I'm no pro.   So, please look at my project with a kind eye.  (See the original post for my altered frame, HERE.)


Before I get to the new 'prize', I wanted to point something out.  See the altered clothes pin at the top of each bag?  I painted them with white home-made chalk paint, and hand-stamped the 'made with {heart}'.  I added a coordinated color of ink to the blossom petal tips, and then added some glitter, a bow, and a half pearl.  These clothes pins also make a wonderful message 'clip'.


Now, for the new item.  I am not a great sewer.  Actually, the most sewing I do is on paper.  I love the whole process.  The hum of the sewing machine, and the quite of my mind.  To make these quilted fabric coasters, I used material I already had on hand.  


I made a pair of fabric coasters.  I added a layer of batting to the center of each coaster, just to give them some more absorbing power of condensation.   And here is how I packaged them:


Whew.  Here is only three of my 'prizes'.  I have a total of 11 to make.  So, only 8 more {frown}.  I really wanted to have all of these completed by July 1st.  And I don't think I will make my own dead line.  So, let me get started on a few more.  I'll post soon.  Promise.
Thank you for stopping by!  Hope you have been inspired!


Thursday, June 26, 2014

Covered Composition Book

Sorry for the delay.  I have been busy getting things organized for two parties coming up.  
So, anyways. . . I saw these fabric covered composition books on . . . well, Pinterest, of course!  And I just had to try my hand at sewing one.  Now, I am not a sewer.  I sew on cards, because its super easy and there is no measuring or straight lines required.  
Here is my finished book cover.


I used this tutorial, and really enjoyed the whole process.  Thanks for looking.  I'll share more soon.


Sunday, June 15, 2014

Trio of Roses

close-up of the button card
Welcome.  And Happy Father's Day, to all the wonderful dads out there!  I know your job isn't the easiest, and we do appreciate all your efforts, commitment, and nurturing to our children.  {smile}   
I don't make my husband cards.  It's not that I don't love him enough, or that he isn't worth it.  I just can't.  To make a masculine card is like me trying to change the oil in my car.  I could if my life depended on it, but it won't be pretty, and the job will literally take me  a l l  d a y!

I am hosting Bunco next month, and I have been making some 'prizes'.  As promised, I will continue to post them here.  Not that my Bunco buddies don't love what I do, but I am pretty sure they don't 'follow me'.  Know what I mean?  So this is a safe venue to share.

This is a close-up of the focal point on a set of cards I made for one of the prizes.  Yeah, sorry, it's pretty girl-y.  But, I am trying to keep the crafts to follow the theme 'farmland'.  
I used the button boutique stamp set for the button card, and Life is Sweet, for the trio of roses.  It's one of those three-step stamps.  You stamp the main color first, then the petal base in another color, and then the outline in another color.  Sounds complicated, but really not.  The leaves are a two-step stamp.  The button card, trio of roses, and the leaves were all cut by hand, and the edges were sponged with crumb cake classic ink.  The trio of roses and one leaf were adhered with foam tape.  The iridescent sequins were glued-on by hand.
For the full-card:


I used crumb cake card stock for the card bases (6).  The rose colored paper is actually the back side of a green floral print paper I have had in my stash for almost 7 years.  Its from My Mind's Eye, their Tres Jolie collection, Ooh la la pattern line (Sunshine flowers paper).  The neutral pattern paper is a digital download (love them!).  The lace I purchased last year, or so ago.  I buy it in bulk, I believe this is a 25 yard roll.  It's about 2 1/2" wide.  Love it!  I machine stitched the pink pirouette seam binding and lace to the digital pattern paper and adhered to the rose colored paper.
I tied silver bakers twine to a cream vintage button and hot glued it on, just above the button card.  The 'handmade is best' and '25 cents' were stamped in crumb cake classic ink.
There is no sentiment, because I wanted to make a card set that allowed you to select your sentiment. I left a place across the card front, between the sequins for you to add the sentiment.  For those, I stamped them on vellum card stock and heat embossed them in white.  I cut a flag end to the banners, by hand.   I also stamped a tiny trio of roses in the same colors onto the cream envelopes.

6 card set.
I created the banners, in a way, so you just peel the one you want, off the piece of clear card stock, and place it on the card front.  The adhesive that holds the banners on the clear card stock, will also hold them to the card front.  Pretty clever, huh?  The neutral digital papers I selected are a mix of polka dots, text, and random designs in white, on a cream-colored background.  I wanted something with character, but not to distract the eye.

Thank you for stopping by.  Hope you have found some inspiration today {smile}.  


Wednesday, June 11, 2014

Blue Butterfly

Ok, don't fall out of your chair.  I know, what, Sharon has made two posts in the same week?  Yeah, I had a little alone time (thank goodness this time, it really recharges me) and sat down at my craft table, and just played {smile}.
I stalk follow some very inspirational blogs/websites, and just had to play along this week!  I went to My Favorite Things blog.  They have separate color and sketch challenges.  How fabulous is that? Anyways, I am playing along with the sketch challenge this week.  Here is their sketch:


I just love the layers and flag end banners {smile}.  Here is what I created:


I am currently working on two different parties, both with a country & western theme.  So, I imagine that is how the burlap print paper ended up on my card {smile}.  My youngest grandson will be turning one, so we are having a cowboy themed party for this little buck-a-roo.  And I am hosting Bunco in July, and my theme is 'farmland' (shabby chic style).
Ok, for this card:  I purchased some burlap pattern paper from a big box craft store earlier this year.  I felt that it grounded the card.  Gave it some visual interest without distracting your eye.
The blue pattern paper that is machine stitched to the burlap pattern paper, is actually a digital download.  (I use digital papers more and more.)  I purposefully ran a random/crooked stitch line.

close-up of the button-tag combo
The small text print is from My Mind's Eye, I believe it is from the Sweetest Things collection.  I created by own flag end with a pair of scissors.  The blue butterfly collage is another digital download.  (I print my digital papers on whisper white card stock by Stampin' Up!.  I love the how clean the colors come out of my printer, and I love the weight of their card stock).  I stamped the tag in going grey classic ink by Stampin' Up! , using the tiny tag stamp set by Paper Trey Ink.  The sentiment in the tag in basic black classic ink.  I fussy cut the tag out my hand.  Not hard, just follow the borders {smile}.  I used some linen thread by Stampin' Up! to tie the white vintage button from Paper Trey Ink, to the tiny tag.  I tied the linen thread into a simple bow after I tied the button to the tag.  

close-up of the sentiment banner
I created by sentiment using a new stamp set by Inspired by Stamping.  I stamped the sentiment in Basic Grey classic ink, by Stampin' Up!  I adhered the sentiment banner with foam tape to elevate it off the front of the card front.  All edges (yes, all) were sponged with crumb cake classic ink.  I also distressed the edge of the blue butterfly collage sheet with the blade of my scissors.

Thank you for looking.  Please, visit those blogs/websites that inspire you, and take some time to create something beautiful for you.  You deserve this creative time, and a little break from all of the hassles life throws at you.


Tuesday, June 10, 2014

Hand Crafted for a Friend


close-up of the tags

Howdy!  Thank you for stopping by to see what I have been crafting.  As some of you may know, I really enjoyed the whole experience of creating my own chicken wire message board.  I enjoyed it so much, I went out looking for another frame.  Well, my excitement got the best of me, and I cracked the frame during the chicken wire installation {frown}.  So, I am out searching for another.  It was kind of an expensive lesson to learn, but it has been learned.
Anyways, while I was altering that one, I also altered a smaller frame for a different project.  My poor husband, he must think I have lost my mind.  This new frame is a lot smaller than my message board frames.  But, it punches a lot of pizzazz!  The 'opening' of the frame measure 3" x 3".
I started with a silver frame (sorry, I forgot to take a picture of it), I spray painted it in Ivory Satin finish.  Let it dry for 24 hours.  Applied my antiquing glaze.  Let it dry for 24 hours.  Applied a sealant.  Let it dry for 24 hours.  And put it all back together.  During the various drying times, I worked on the insert, and accomplished other chores, including going to work, and participating in the swap meet last Sunday.

a Bunco prize
This creation was inspired by a very similar picture frame Tammy Roberts had done.  I actually read her specific blog post and followed her process.  Upon locating her blog post for this post, it appears that her blog is down. {frown}  So, I am not sure what has happened.  But Tammy R. is a very talented person, who shares what she knows and is very inspiring to me {smile}.

a different view to show the detail on the frame
Anyways, here how I put it all together:  Tammy recommended that you cut your fabric, batting, and chipboard 3 inches wider and longer than your photo frame opening.  (I did 2 inches.)  Stack your materials from the bottom up: chipboard, batting, and material right side up.  Sew a basic quilters square.  I don't quilt, so I did a basic diamond pattern.  I started on the two longest diagonals and filled in from there.
I cut a blossom shape out of felt.  I used a spiral blossom piece. (Tammy layered her blossom pieces.)  Tammy also stitched only the very edge of her petals.  I did the best stitching I could.  I am no pro at using a sewing machine, so you can't really see my stitching (its not so much at the edge {frown}).
Adhere a rhinestone to the center of your blossom.  Tammy did the same.  Now add whatever embellishments that catch your eye, tickle your fancy, and have fun!

While I was working on this picture frame, my goal, was to create a porcelain looking frame.  I just love that vintage look.  I applied the antiquing glaze to help showcase the detail on the frame.  Without that definition, the frame looked too flat.  And not from my type of paint, but rather the detail got lost.  
close-up of the butterfly stick pin
The fabric was purchased at a big box sewing store from the remnant bin.  The leaves were hand cut from cream burlap.  The ribbon was purchased at a small craft boutique during a recent trip to Phoenix, Arizona, when my oldest granddaughter had a dance competition.  The tiny clothes pin is from Stampin' Up!.  The tiny tags were made with a tiny tag stamp set and coordinating punch by Stampin' Up!  The kraft vintage button is from Paper Trey Ink, and the rhinestone is from Jolee.  The butterfly stick pin is from Maya Road.

Thank you for looking.  I hope you have found something of beauty and possibly have been inspired as well {smile}.


Saturday, June 7, 2014

Swap Meet


I am participating in the annual swap meet @ the Hen House Paperie in Albuquerque, New Mexico tomorrow JUNE 8th from noon to 3p.  I will be selling my gently used paper craft supplies (stamps, trim, rub-ons, paper, etc).  Please be advised that my Etsy shop will close  tomorrow at 10a, to allow me time to package and transport those items to the swap meet for sale.  If you are interested in any items in my Etsy shop, please make your purchase prior to the closing tomorrow, as I cannot guarantee that those items will return to my Etsy shop {smiling with fingers crossed).  I do have a coupon code for local delivery (free shipping - ABQ87).
I also have several items that I will be selling at the swap meet that have not made it into my Etsy shop, so a lot of 'new' items will be for sale.  
There is a fee for admission $1, as this is a charitable event.  Please bring cash, and I will have change.  Hope to see you there!


Tuesday, June 3, 2014

Bunco Reminder

Howdy!  Well, I have been a little busy getting stuff together for my turn to Host Bunco next month.  I know what you are thinking. . . next month, you have gobs of time.  Well, kinda no.  I have prizes to make, a menu to develop, clean the house, celebrate 4th of July, and everything else the rest of folks have to do (work, chores, raise children/grandchildren, and take care of ourselves).
I send out a reminder card, when it is my turn to  host.  And yeah, it fits my 'theme' {smile}.  This year's theme is 'farmland'.  I needed a sketch challenge, to help me get those creative juices moving.  So, I went to Retro Sketches.  They have some beautifully simple sketches, that allow you to really embellish, or keep it clean and simple, and everything in-between.  So, that's where I started!


See what I mean!  Simply beautiful and full of a lot of potentials.  And here is what I did!


The card base is crumb cake card stock by Stampin' Up!.  I love their card stock.  It is a nice heavy weight, that is perfect for card bases as well as another paper craft.
The wood-grain pattern paper is actually a digital download.  I just love the mix of wood-grain, florals, and text.  It's so pretty, country, and simply worn.  I matted this pattern paper onto a piece of Aqua Mist cards stock by Paper Trey Ink, and did a simple machine stitch along the four sides.
The pink gingham pattern paper is also a digital download.  I love this mix of patterns for the same reasons. {smile}
I wrapped a cream twill ribbon by Paper Trey Ink around these two matted pieces and machine stitched the ribbon to the card front.  I tied a simple bow.
The jar is stamped in crumb cake classic ink onto very vanilla card stock, both by Stampin' Up!  The jar is from Paper Trey Ink.  Then I stamped the polka dots onto the jar in Soft Sky classic ink, by Stampin' Up!.  I fussy cut the jar out, and wrapped some cram twine, by Paper Trey Ink, around the mouth of the jar.  I added a tag, by Paper Trey Ink.  I stamped the tag in Baked Brown Sugar classic ink, and the sentiment in the same color ink.  Fussy cut the tag out, and used a hand-held hole punch.  Tied the cream twine into a simple bow.
The burlap-lace ribbon is from a big-box craft store.  I thought it added a bit of country charm.   The sentiment banner is from a new stamp set I purchased from Inspired by Stamping.  I stamped the sentiment in Basic Grey classic ink and used a square punch to create the flagged ends.
I added two vintage buttons (white and aqua mist) to the right side of the jar, and a white paper blossom to the left side of the jar.  I distressed the paper blossom by brushed some picket dense distressing paint on the petal tips and added some dazzling diamond glitter to give it some sparkle.  The leaves were cut from a text paper.


Thank you for stopping by.  Hope you found some inspiration, or at least something pretty to look at!


Sunday, June 1, 2014

Just A Note

I was so excited when I finished my message board, that I just had to share it with you!  I used a taupe colored linen to line the back of the message board.  The message area is 20" x 16", to provide our family with space to post messages.  And I also crafted some message clips {smile}.  They are super cute. 


I used a neutral colored linen, to keep the focus on the messages and clips.  And yeah, it is already hanging in my kitchen.  
All four of the clips are painted with home-made white chalk paint.  I stamped a sentiment in staz-on ink.  Two clips have white paper flowers and pale blue bows, while the other two have pale blue paper flowers and cream bows.

Here is my message board without the backing.


I had a few folks ask if I was going to make more message boards to sell.  And after some thoughts, I decided to create another message board, to have for sale in my Etsy shop.