Showing posts with label picket fence distress ink. Show all posts

Friday, March 14, 2014

Stork Delivery

Oh my goodness.  Time just flies these days.  I have a craft fair tomorrow, and I feel like I haven't made a thing to sell.  {frown}   So, let me share with you a sweet baby boy card, and then I must head into my craft room and start creating! {smile}


I opened a delightful package of papers and embellishments from Melissa Frances the other day, and created some soft sweet cards, earlier this week.  Well, I just had to create one more.  Here it is!
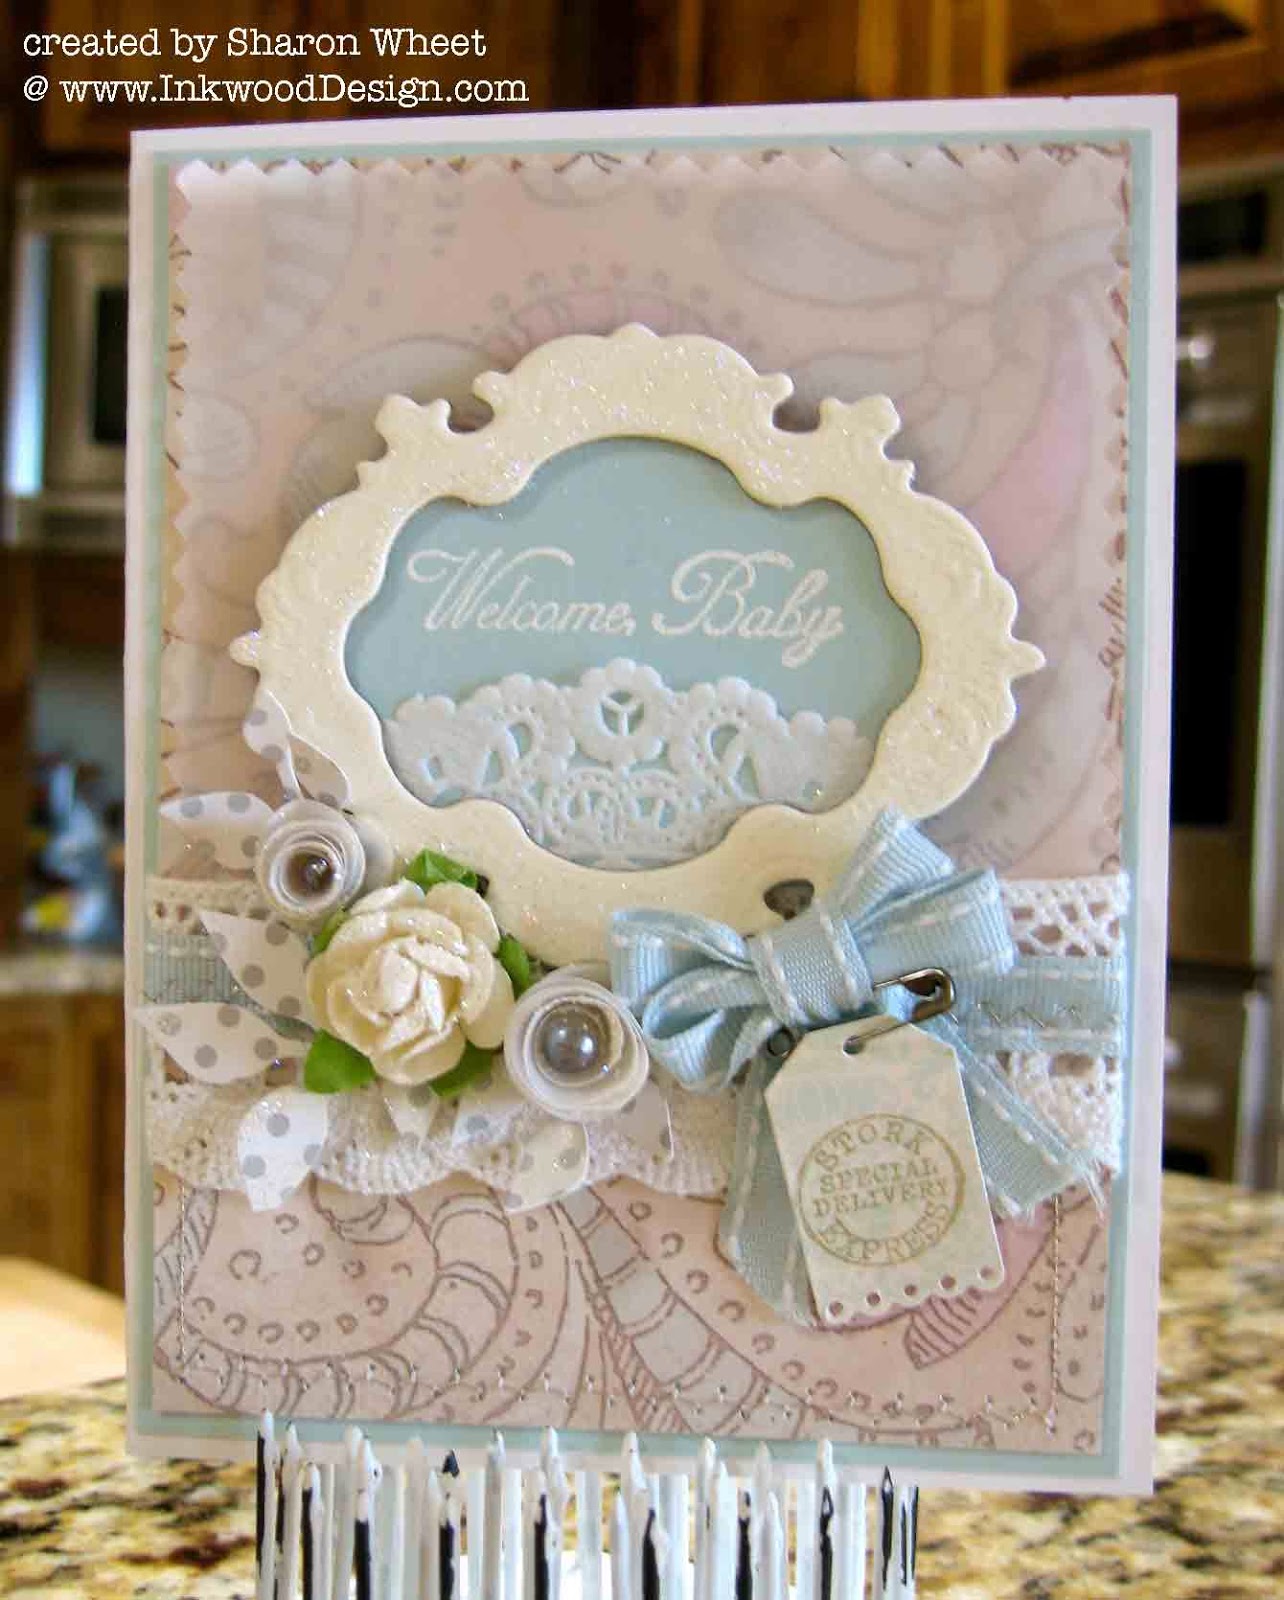

Ok, a quick overview and then I must get started on a few other crafts.  I wasn't too wild about this one particular pattern paper.  The colors are soft and pretty but the design is kind of abstract.  So, to soften the whole look, I added a piece of vellum over the pattern paper.  I hope that isn't rude.  To help add some visual interest to the card, I also added some machine stitching using this wonderful silver metallic thread in a zig zag pattern.

Ok, so I have a few of these retired Tattered Angels frames.  LOVE THEM!  I used my TH Picket Fence distress ink to add a bit of a whitewash over the manilla frame.  And while the ink was wet, I dunked it into a tub of dazzling diamond glitter. For the sentiment I stamped and heat embossed in glacier white detail, 'Welcome Baby', onto a scrap piece of pool party card stock.  I added a small piece of a doily to the bottom.
I made two rolled flowers from (2) 1 1/2" circle of vellum card stock.  I added a pearl center, from MF.
I used a die to create the leaf shapes from SU! Neutrals DSP, with the gray polka dot pattern.

I wrapped a piece of white crochet trim over the seam of the vellum card stock.  I added a piece of this gorgeous pool party stitched saddle trim.  To add a little homemade-ness, I used my silver metallic thread and some machine stitching.
I used the same sweet pool party saddle stitch ribbon to make a tiny double bow.
I cute a tiny tag shape from a scrap piece of a pale blue pattern paper.  Stamped the 'Stork Delivery' with an old Crafty Secrets stamp.  I attached the little tag with a tiny safety pin.  I thought it added a little sweetness.  So why not?!
Thank you so much for taking the time to stop by my little piece of blog-land and have a look around.
I will have todays card, and many more, available for sale at tomorrows Spring Craft Sale!  Hope to see you there!


Monday, May 27, 2013

a Splash of Daffodil Delight

I love creating.  Paper crafting, is the most accessible for me.  I have a 'ton' of paper crafting supplies, as I'm sure you all do too {smile}.  So, walking into my craft room and sitting at my desk, is as effortless as breathing, for me.  Creating, allows me to express myself, find joy, challenge myself, and it feeds my passion.   I love all kinds of creating; sewing, cooking, baking, cake decorating, paper crafting, and altering common items.   I also love sharing what I love doing.  So, that was the original push to creating this blog - an outlet to share what I make.  However, I don't share so much food, as I do crafting.
Today, I found out that I was last weeks winner @ the Shabby Tea Room, in their 'Open Window' challenge {smile}.  Thank you ladies for selecting my card.  Once I saw their challenge, I kinda already knew what products that I wanted to use.  I just needed to find an hour or so, to sit and create.  I have searched Lauren Meader's shop My Time Made Easy, and I'm narrowing down my choices.  And don't worry, I'll share my creation with you {smile}.
Today, I stumbled upon a different challenge site, Friday Mashup!, and they have a wonderfully creative challenge this week, called Hey, Get the Lead Out! with a wonderful twist: select a neutral with a splash of color, and use your pencil (#2).  Here is their inspiration board:
Here's your Mashup Challenge:
  1. Create a project using "your choice of a Neutral & a Splash of one Bright Color".
  2. Create a project "using a Pencil (regular graphite #2)".
  3. Or Mash it Up and create a project "using pencil & your choice of a neutral & a Splash of a Bright Color".
Ok, so if I told you that my neutral is crumb cake, you wouldn't be surprised, right?  And my splash of one bright color is Daffodil Delight.  And yeah, I used my #2 pencil {smile}.  The talented Lili over @ FM  also included a great tutorial, found here.  
here is what i made:


I used crumb cake card stock for the base of the card.  I had a scrap piece of this beautiful kraft and white floral pattern paper from Basic Grey, little black dress.  This scrap piece was a bit too small, so I matted it onto another piece of crumb cake card stock.  I distressed the edges with picket fence distress paint.  (I love this paint so much, I think I'm addicted.)  I added a strip of a yellow pattern paper from Teresa Collins.  I did a banner end, to give the card stock some pizzazz.  I wrapped a piece of daffodil seam binding around the top and tied a multi-loop bow.  I tied a yellow button distressed with picket fence paint and dazzling diamond glitter, with some cream twine.  I added some random swipes with the distress paint to the bow.  I made the flowers by hand, of course!  I used two different size scallop circles to create these little beauties.  I punched the scallop circles out of very vanilla cardstock and sponged daffodil delight along the scallops, and tightly wound.  I added a tiny floral punch piece from silver glimmer paper as their leaves.
I added some machine stitching around three sides of this card.  I think that little touch, adds a sense of 'home'.
I stamped my sentiment piece onto very vanilla card stock.  I used basic grey classic ink, and stamped off twice.  I used my #2 pencil to trace and shade.  I don't have one of those blending tools, so I used my finger.  I know its not precise, but it worked beautifully.  This technique reminds me so much of the chalkboard technique.  So, it was very comforting to try a new technique, and have a familiarity with it {smile}.
If you want to try your hand at this beautiful technique, please do.  It is rather pretty when you add just a splash of color, as with the challenge restrictions.  But, it isn't a restriction as so, but rather a venue to allow your pencilling to 'shine' and take center stage.  Add your pencil technique to the FM site.


love this card? purchase it here

Sunday, November 18, 2012

Vintage Zone

Today is my second craft fair.  So this past week, i have been busy working on re-stocking my paper crafts for sale.  Yesterday morning, I started working on decorating some paper bags.  I don't know if I had the right music playing, the 'perfect' papers out, or I was just 'in the zone', but either way I just LOVE what I created.  I really enjoy creating vintage/shabby chic paper crafts, and yesterday was a perfect day for me. Here are some photos of what I created:

This is a food-safe bag.  I stamped the polka dots in white craft ink.  I love how the polka dots resemble falling snow.  Very pretty.  I used a wheel to stamp the lace.  I inked the wheel in basic black classic ink.  
For the tag, I used a decorative die to cut the kraft card stock.  
I printed the digital collage tags on white card stock, to keep the colors true.  I matted the vintage tags onto pink pirouette card stock.  I love how pretty this pink is.  It is a light color, not too much grey, not too much blue.  This color of pink is a soft, light, cool-color of pink.
I used a scallop punch to create the scallop edge in silver glitter paper. I added the scallop trim to the side of the matted tag.
I dyed some white seam binding with spun sugar distress ink.  I crinkled the seam binding, made a multi-loop bow and attached the bow to the matted tag with a rhinestone brad.
I cut a star from some corrugated cardboard.  I painted the edges of the star with picket fence distress ink and dunked the painted star into a tub of dazzling diamond glitter.  I threaded the pink button with thin silver cord and tied a bow.  I attached the button to the star.
To attach the tag to the food bag, I included a wooden clothes pin.  To jazz-up the clothes pin, I painted the top with mod podge and dipped it in silver glitter.
I am planning on giving these bags out filled with home-made cookies, during a cookie exchange I am participating in next month.

I needed a few more paper gift bags for tomorrow's Arts and Crafts Fair, and this is what I set out to make.
For the gift bags.  I covered small paper bags with kraft card stock.  For the pattern paper, I used Market Street by Lost and Found 2. 
I added a decorated tag stamped with 'warm wishes' to help express the feeling of the season. 
I stamped the silhouette of the sledder in black pigment ink and used clear embossing powder to heat set this image.
I used the same corrugated cardboard to cut the snowflake.  I also did the same distressing technique with paint and glitter.  I attached a button to the center of the snowflake.  
I wrapped a piece of crochet trim around the pattern paper, to hide the seam of the two different papers.   I added a TH ticket just below the crochet trim.  I cut a small tag shape from silver glitter paper and used a pink Basic Grey brad to attach the tag to the front of the bag.  I tied some vanilla seam binding into a multi-loop bow and tied a button to the ribbon piece, with some linen thread.
To help hold the bag closed, I tied some kraft twill ribbon at the top.  I added a narrow tag, stamped with a holiday sentiment.

Here is my little dilemma, I just love adore this little gift bag so much, I don't want to sell it.  Have you ever done that?  Created something for your 'shop' or a friend, and then just can't part with it?  To correct this problem, I mass produced some of these gift bags to sell at the Arts and Crafts Fair, and have kept this original one for myself.

Happy Crafting!  hugs, Sharon W.