Showing posts with label scallop edge border punch. Show all posts

Friday, February 10, 2012

Wonderful You

Howdy!  I'm glad that you could stop by today and have a look around.  I really do love to paper craft, and being on different design teams actually gives me an excuse to be in my craft room.  I mean that I would already be in there, but now I have an legitimate reason. (smile)
The talented Jennifer, is the creator of this week's sketch over @ Sketch Frenzy Friday.  And this week's sketch is easy to work with.  I had fun making  this card.  Here is Jennifer's sketch:


I am a big fan of using what you have.  I'm also a fan of mix and match.  I believe all paper lines have potential to wow ya!  One of the requirements of playing along with Sketch Frenzy Friday, is that you use Stampin' Up!products.  So, in my usual fashion, I mix and matched different DSP collections.  I really loved the polka dot pattern paper from Berry Blossoms DSP.  And the loved the large yellow medions from the Flirtatious DSP.  So, I used scrap pieces of each.  There is a beautifully-font, word stamp set from the new occasions mini catalog: Loving Thoughts.  So, I combined the three and here is what I came up with:


I used some of the new bakers twine and tied a button to the bow.  I added a left over crochet flower and yellow rhinestone brad.  Elegantly simply.  Now, head over to Tammy F.'s blog, and continue with the blog hop. 

Wednesday, November 16, 2011

hand-crafted Thank You

Happy Wednesday!  It's hump day, and that means we are half-way thru the week!  So, do you have any plans?  Me, I'm crafting every chance I get.  I two craft fairs coming up this weekend.  And then 2 more right after Thanksgiving.  So, I'm paper crafting like a crazy person.
The wonderful ladies over @ Stampin' Queens Sketch Challenge, have another wonderful, user-friendly sketch for us to work with.  I encourage you to play along with us.  
This is week #13, and here is the sketch:


This sketch has alot of potential!  For the matts, you can use pattern paper, solid cardstock, or any variation in-between.  For the rectangle in the middle, I used a tag shape.  You can use a  rectangle/oval/tag, etc.  The possibilities are endless.  And the ribbon can be replaced with crochet trim, a strip of paper, or twine.  The sentiment doesn't have to be stamped right on  your paper piece.  As you will see, myself and at least one other design team member, made a little tag.  Now break out your Stampin' Up! supplies, and create something uniquely you!
Here is my card:


I used all scraps to make this card.  Now I figure no one is surprised that I used the Spice Cake DSP and the First Edition DSP, right?  These two pattern papers have got to be my all-time favorite!  And yeah, I'm almost out.  I used three different stamp sets; one for each sentiment.  The tag in the middle came from a scrappin' kit: tea time.  I used one of the tiny safety pins from the vintage trinckets to hold the tags together.  Both tags are adhered to the card with foam tape.   I used sahara sand and pool party texture cardstock for my matting.  The card base is soft suede.  The crochet trim is a 'poor man's bow'.  I also added some faux half-pearls to continue the feminine feel of the card. 
Thank you for looking.  Hope you play along.  :)

Saturday, October 8, 2011

Mojo meets Creative Corner

Happy Saturday to everyone!  This holiday weekend, should be productive.  Well, to get the creative juices turning, Lori has another fun challenge for us (yes, that means you, too!) over @ Our Creative Corner.  Lori has a color challenge.  Well, I needed a bit more inspiration, so I headed over to Mojo Monday #209 to see what they had.

Here are the colors:
Here is the sketch:

And, here is what I made!:

All supplies used are Stampin' Up!.  I used the spice cake DSP and the scallop trim punch and the pennant die.  The leaf I stamped the outline in chocolate chip craft and heat embossed with clear embossing powder.  I stamped the inside with Cajun Craze.  I fussy cut the leaf and sponged the edges.  I adhered the leaf with foam tape to lift it off the card.  The ribbon I cheated.  I had tied this bow a few weeks back, and it was still on my crafting table.  It was the perfect size :)
Thank you for stopping by! and enjoy Columbus Day weekend!

Saturday, June 4, 2011

the Bride & Her Room #60

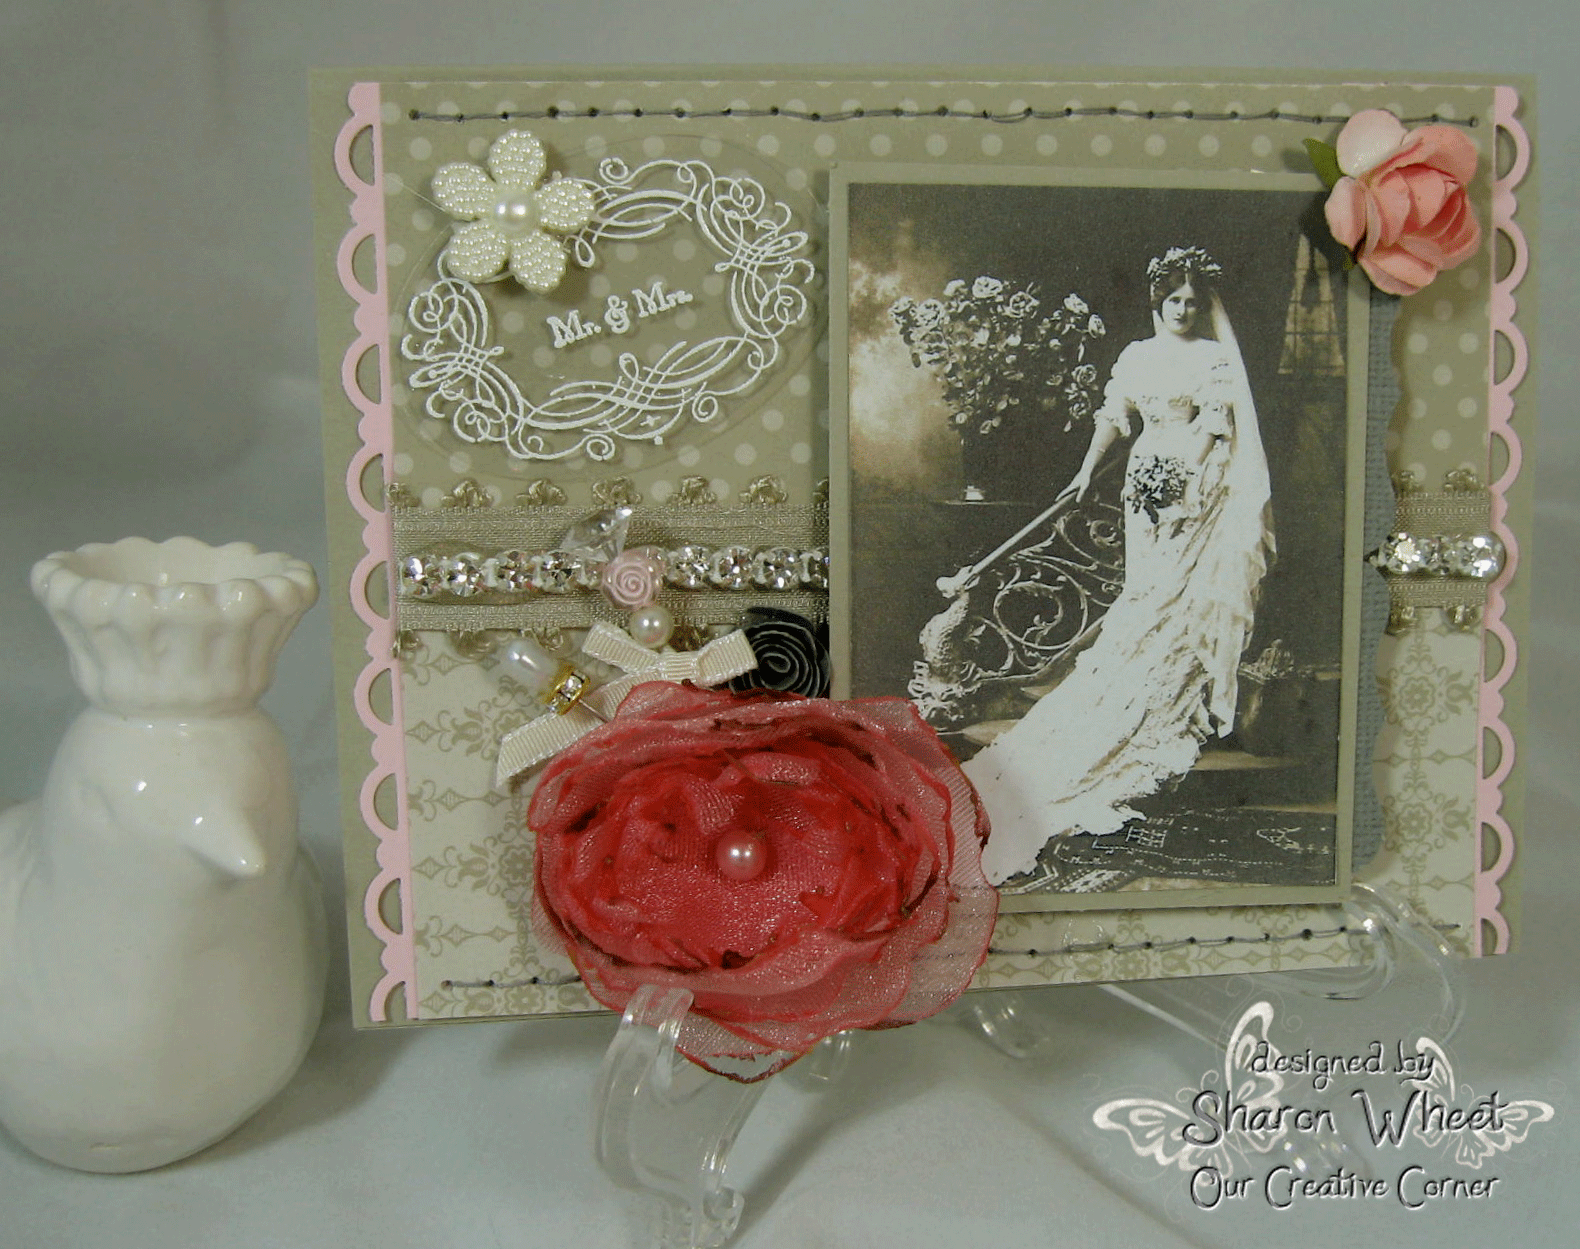
Well, I'm the hostess again this week, over @ Our Creative Corner challenge blog!  The theme this week, is weddings!  I figure its that time of year, and you probably need to crank-out a wonderfully hand-made card, layout, or altered 3-D item, so why not enter the challenge.  There are a few requirements, tho.  You'll need to add some sheer fabric (organza, tulle, etc.), some trim (lace, ribbon, bakers twine, etc.), a flower (hand-made, or purchased), a pearl (or two, or a swirl) and some stitching (faux, hand, or machine).  Whew!  Sounds like a long laundry list, but you'll be amazed at how easy it will all come together!

Here is my card:

For my card, I needed some color inspiration, so I went to the Color Room, to find some soft, pretty, elegant colors that I thought would work.  Here is the Inspiration Board, that I used.  This Color Room challenge is already closed, but aren't the colors just fabulous!


  Here is the Inspiration Board:
For the colors, I used:  Pink Pirouette, Going Grey, Peony, and Sahara Sand.  You will recognize the Stampin' Up! colors.  For those I used in cardstock.  The Peony, is actually the color name of the sheer fabric I used.  I used Sahara Sand as my card base.  I layered some Sahara Sand DSP together, added a strip of scallop trim borders in Pink Pirouette to two parallel edges.  The ribbon that hinds the seam is retired, Beachfront Ribbon Originals.  I added some of that wonderfully sparkly rhinestone trim.


For my three flowers: the large one is hand-made from Peony organza.  I cut 8 total circles.  (4 of 2 sizes).  I generally use a heat gun to melt the edges, but this time I used a lit tea light candle.  I melted each petal separately and then stacked them.  I threaded a pink pearl with some linen thread, and did a few quick stitches to hold it on.  I added two dressed-up corsage pins to this big beautiful flower.  I started with plain pins and just added small various beads I have in a stash.  Tied a thin Very Vanilla ribbon onto one pin.  The tiny grey flower is hand-made, I just used my hand-held scallop punch and hand-rolled it.  The other small pink flower I purchased a few years back.  


To make my tag at the upper left corner, I just stamped the 'Mr & Mrs' and frame in Whisper White craft ink, and used my Glacier ultra fine EP, and heat set them onto a scrap piece of clear card stock.  I added a flower-shaped pearl button to the upper edge of the tag, just to give it a 'finished' look.  The 'Bride' is actually a download from the Graphics Fairy.  They have some very nice free graphics.  I just did a search.  Easy peasy!  I hand-stitched the top and bottom borders of my card with some grey thread.  


Thank you for stopping by!  I hope that we, at Our Creative Corner,
have inspired you to create a wedding-theme paper craft and enter our challenge!  You never know, you could be our next top talent!