Showing posts with label crushed curry. Show all posts

Sunday, May 11, 2014

Happy Mother's Day

Today, holds a special meaning to all women who are mothers.  It's an exclusive 'club'.  The price of admission is becoming a mother.  You notice, that I didn't say, 'have a child'.  It's not that easy.  You need to be a mother; to nurture, care for, teach, love unconditionally, and give your whole heart away to the smallest of 'people'.  And not a mother to a chicken, a dog, a cat, a bird, or a tank full of fish.  A human baby.  A mother, to a human child.  
I am truly blessed to have two children.  They are both grown now.  And yes, they have children of their own.  My son has 3 children.  My daughter has 4 children.  (no, there was no contest)
And they have wonderful relationships with their children.  It makes my heart happy! {smile}
I got to spend some time with some of my grandchildren before this glorious day.  I thought about a 'gift' that they could give their mom, and I had (I think) a great idea.
Have each child make a picture.  Take a picture of the picture and make it the front of their Mother's Day card.


The picture 'canvas' is a 6" x 6" white heavy weight card stock.  I inked my granddaughters hand in Old Olive classic ink and had her place her hand on the paper.  These 'fingers' are the stems to flowers.  
I then inked her thumb in strawberry slush classic ink.  Her thumb 'prints' are the petals to flowers.  I inked her finger in crushed curry classic ink, to create the blossom center.  
I inked her thumb in old olive classic ink to create leave on the stems.
The random 'petal's are her doing.  I figured it gave her masterpiece an unique and original 'touch' [no pun intended {smile}].
The banner piece I found HERE.  It says, 'Mom, thank you for helping me grow'.  I thought it was perfect.  (There is also a download for teachers.)
So, mom has an original masterpiece to hang, and a matching card {smile}.
Thank you for looking.  I'm so happy that you had a chance to swing by.  Stay tuned for more creative crafts!  A little hint: I went to a home improvement store and I think I have a clever craft for you.


Wednesday, January 15, 2014

Fabrications Desk Top

Wow.  I didn't realize that it has been a whole week since I posted.  Ugh.  That's awful of me.  Sorry folks.  I wish I could say that I was super busy creating all these fabulous things in my craft room.  And well, that just isn't the case.  I have been busy with life: work, house work, laundry, taking care of my husbands dog, yada  yada yada.  Busy, like the rest of the world.
Anyways.  I did finish another desk top calendar.  This one is totally NOT my style.  It has bright, bold colors, with a minimalist take on the embellishing.  Perfect for a specific girl friend.

January, February, March, April, May, and June

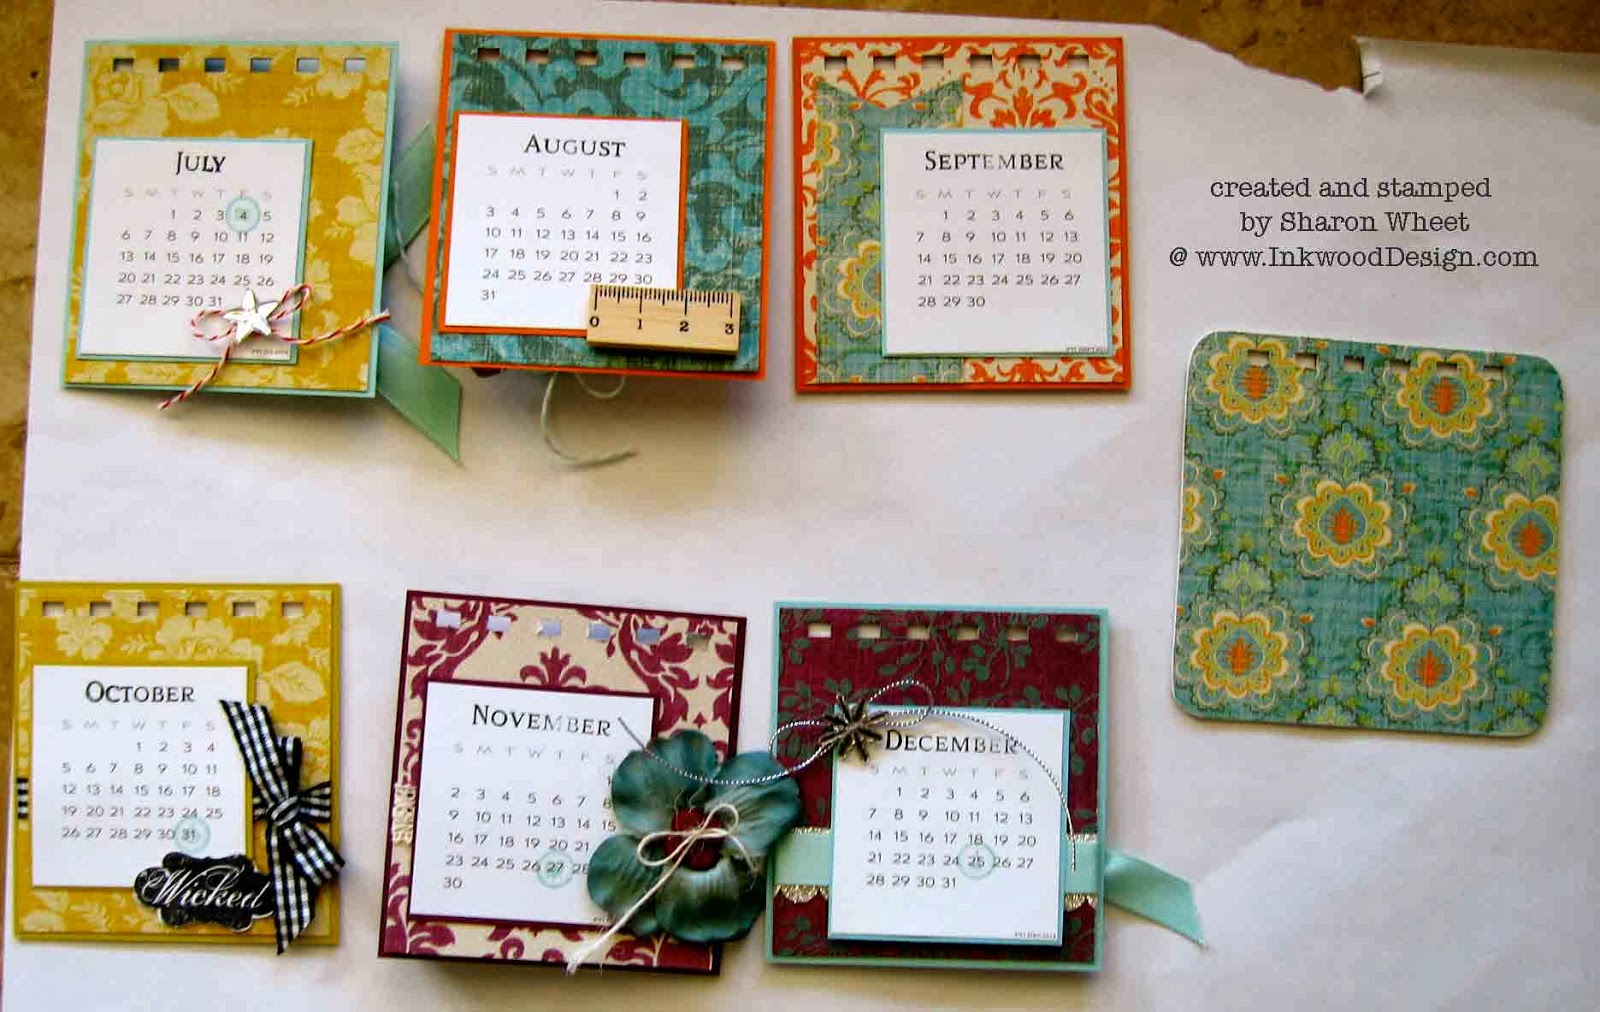
July, August, September, October, November, and December

The girl friend I created this calendar for, loves, and I mean loves bright, bold colors.  So, that is why I chose to work with these papers.  I'm also keeping on track with my new years resolution to 'use what I have'.  The paper line is from Teresa Collins, Fabrications.  I was a bit surprised by that.  Because I generally think of her stuff in more of a girl-y, glamorous, soft color type of product.  Surprise!  I used pattern paper from her collection, but the card stock and embellishments are a mish mosh of what I have in my craft room. Solid card stocks are from Stampin' Up!: crushed curry, rich razzleberry, pool party, and pumpkin pie.  The ribbons are from Paper Trey Ink: black gingham, aqua mist solid satin, and aqua mist polka dot.  All buttons are from Paper Trey Ink.  The bakers twine is retired Stampin' Up! in pool party and the Twinery  in red.  The thin silver cord and 'glass' snowflake are from a big box craft store.  The mini ruler, and butterfly pin are from Maya Road.  The 'glass' star is from Tim Holtz collection.  The blue rolled flower is from Refections.  And the large blue blossom on Feb. is from a floral pick.  That should cover all the supplies.


This is another 'half' calendar.  In this orientation, you will have the first half of the year.  The second have of the year is on the other side.  That way, you get to see both 'covers'. {smile}
I used my Bind-It-All, to put this together.  However, I am still new at this, and I am not totally happy with how the binding came out.  I followed the instructions, but I still don't like how it 'finished'.  Maybe I used too large of O-wire.  Of something.  If anyone has little tips or tricks that they would like to share with me, please do!  
Have a great week.  I am working on publishing a few more tutorials.  This one is on altering wood blocks and another is on altering an alarm clock.  Look for both of those publications by Feb.  My fingers are crossed. {smile}