Showing posts with label antique brads. Show all posts

Wednesday, May 23, 2012

French 'Thank You'

On this Wednesday, I think I have found my vintage soul.  I love the look of shabby chic things, but I don't think I have the skills to really show case this style.  Even tho I try!  But, practice makes perfect, they say.  And so, I have been practicing.  I spent some valuable time in my crafting room, playing.
The lovely ladies over @ Stampin' Queens Sketch Challenge have been hard at work, to create some beautiful cards, to help inspire you.  So, let's take a look at this week's sketch:


When I saw this sketch,  I saw: open space to create, embellish, or let a pretty piece of pattern paper take the center stage.  The diamond at the top, is a wonderful shape to add my sentiment or just 'pretty' it up.  And the bow is always a welcome sight!  I think I can create something just lovely.  
So, here is what I did:


I'm actually very happy with how my card turned out.  The pattern paper is Twitterpated DSP.  Yes, both pieces.  The subtle blue pattern on the card base, and the gray floral on the main panel.   I used Basic Gray card stock as my base.  I love the soft, smokey look of this card stock.  
I matted the floral piece on top of a Baja Breeze card stock.  The decorative label is from the Four Frames stamp set.  I stamped this polka dot frame in Cherry Cobbler classic ink.  The sentiment, is stamped in Basic Gray classic ink, onto a piece of very vanilla card stock, and then punched with an oval punch.  The Merci is a stamp, from the french version of Rue Des Fleurs: Grenier Victorien.  And yes, I own this stamp set in English and French.
The banner strip is cut from Baja Breeze card stock.  I made (another) multi-loop bow, and attached the bow to the banner piece with an Antique Brad.
Now, to get the worn, vintage look of this card, I distressed all the edges.  I used a thread cutter to wear the edges of the card stock.  I sponged all those edges with Crumb Cake classic ink and then Baja Breeze classic ink.  I then took a blank red rubber stamp and added some tea stain to various portions.  I had a small piece (2" x 2") of First Edition DSP.  So, I added pieces of my scrap piece to the holes made by my thread cutter.   For the top corner piece, I curled the edge with a stylus.
For the ribbon, I took the edge of my scissors and ran it under the seam binding ends, to help fray them.
Thank you for looking.  I hope you have an opportunity to play along with us @ Stampin' Queens Sketch Challenge.  


Note: I'm not French, but I do purchase some of my stamp sets in the French language version.  I just love the look of a foreign language on some of my cards.  I think it helps give them a romantic and 'worldly' look.

Saturday, May 5, 2012

Marvelo{US}

Howdy! I'm so happy you have stopped by.  For those who know me, this is a really late post.  I apologize.  When I was creating my project for this weeks Our Creative Corner challenge, I misunderstood, misread, something.  I created a project using yellow and grey.  Don't ask me how that happened, because I really don't know.  I had written my post last night while taking care of my dog (who is recovering from bi-lateral knee replacements).  When I went to upload my project, I found out I was wrong.  So, I had to delete the original post I wrote and work on another paper craft item.  It was late, and I'll confess, I was tired.   I got up early this morning to work on another paper craft, and came up with a card.
Here is the inspiration board, for this weeks challenge:


Anne Marie, is our hostess this month.  And just look at this fabulous board!  I love how she has included color swatches and an inspirational photo.  I created a card for this weeks challenge.  And I used scrap pieces from my scrap box.  (I'm a big fan of using what you have.)  I also used the sketch from Willow Sketchie Challenge.  Here is their current sketch:


Here is my card:


I used quite a bit of different products, so grab a cup of coffee, tea, a snack, something. {smile}  Here we go.  The card base is crumb cake.  The main layer is a pattern paper from Authentique - Blissful collection.  I love how the large print makes a great background piece.  The polka dot paper is from Authentique, also, but from the Delightful collection.  I matted the polka dots onto a piece of crumb cake card stock.  The 'label' piece and postage stamp are from Authentique, a sheet of different shapes and tags, called 'Tabloid'.  The postage stamp is adhered to the card front with foam tape, to lift it off the other 'label'.  I hand-stamped the sentiment in basic black classic ink.  The stamp set is from Stampin' Up!, called 'In A Word'.  This stamp set is retired, but I just love the different sentiments.  The fabric blossom I made from some scraps of flannel material.  I'm working with this material, along with others to create another rag quilt.  To create it, I cut 8 two-inch circles and folded them into quarters and layered them on top of each other.  The beautiful metal brad is from Spare Parts - antique brads.  The horizontal layer is pattern paper from Teresa Collins - Fabrications.  I wrapped a piece of crochet trim from Spare Parts crochet trim collection, around this horizontal piece.  I just love how it helps soften the card and give it some texture and movement.  I wrapped a piece of Paper Trey Ink twill ribbon in Kraft, over the crochet trim.  I tied a single bow and then tied a yellow button to the center of the bow.  The button is from Amuse Studios, 'not your grandmothers buttons' in buttercup.  I used cream twine from Paper Trey Ink to tie the button to the bow.  I tied the twine into a bow, too.  I just love this layered look.   
I hope that you get a chance to play along with us this week!  We would just love to see what wonderful paper project you create with Anne Marie's inspirational board.

Sunday, September 25, 2011

Spooky Black Bird

Thank you for taking the time out of your busy schedules to stop by and have a look around.  Today, I have a few photos of this cute little Halloween box I made.  I got the idea out of the Stampin' Up! Holiday Mini Catalog 2011-2012, pg.10.  I used all Stampin' Up! products (minus the bird and paper mache box) to create this adorable decoration.


Isn't he just adorable?  Before your mind starts going crazy...the paper mache box is upside down.  I attached the bird with a hot glue gun.  The Raven Lace is a retired product from last year.  But everything else I used is current and you can purchase them today!  


At first, I wanted to create this project as a Virtual Kit for October.  However, I have had a bear of a time finding the non-Stampin' Up! products (aka: paper mache box and bird).  So, I made just one.  I may make one for my daughter, as she just LOVES Halloween!  I think she likes it more than Christmas!  But, that wouldn't be surprising.  {For those folks who know me, know that I LOVE  St. Valentine's Day more than Christmas.}

I did use the Vanilla Smooch spray to give the finished project some random shimmer and gleam.  I left some of those hot glue strings on this project, as they kinda look like old spider web strings.
If I had to do it all over again, I'd change the hat.  In the mini catalog, the hat doesn't have a rim.  I thought it should have a rim, you know like a witches hat.  But, it was a bear to create.
Anyways, enjoy the rest of your weekend and thanks again for stopping by!
Products used: Pick Your Poison DSP (#124001) and Accents (#124263).  Piece of Poison stamp set (#123754).  First Edition DSP (#121878).  Mini Jingle Bells (#124116).  Mini Vintage Tags (#118763).   Antique Brads (#117273)  Linen Thread (#104199)

Tuesday, October 26, 2010

Card Change

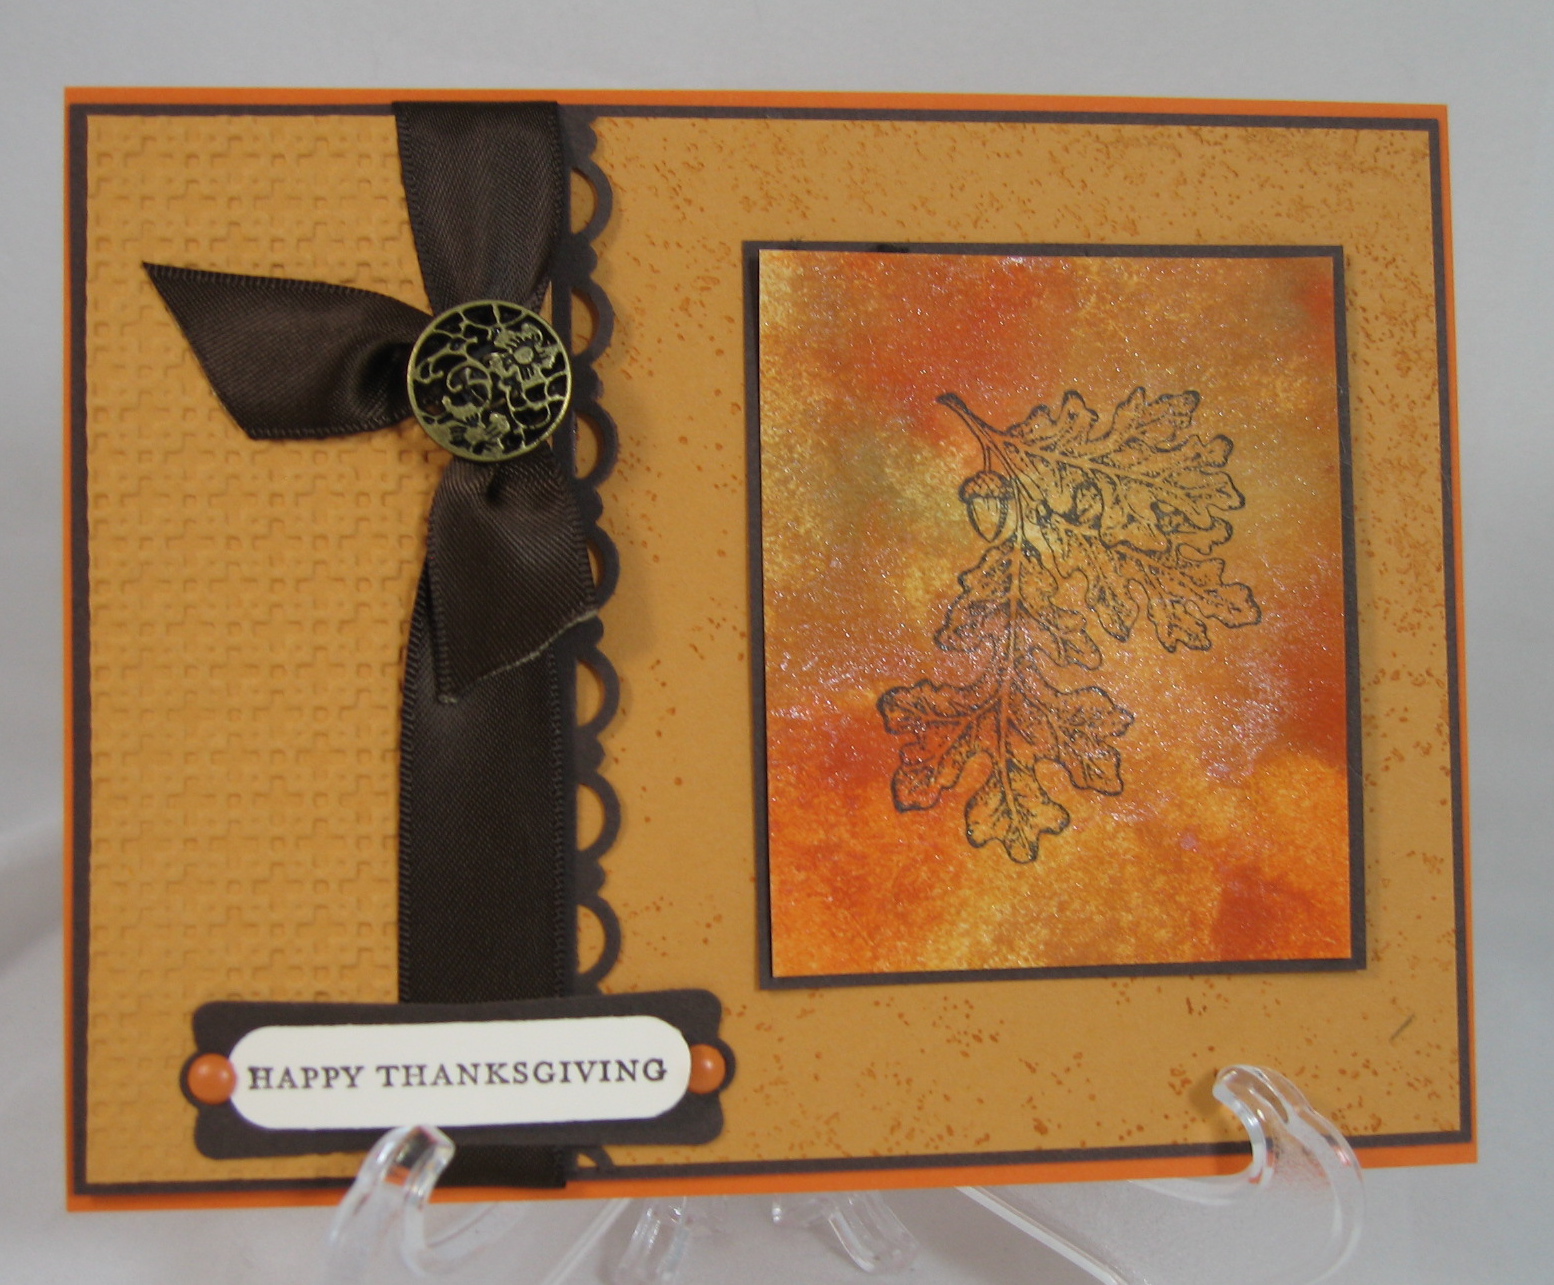
So yes, I changed the card. Betty had a wonderful idea of adding 3 of something to the upper corner, brads, jewels, something. If I had only read her comment before I started tearing the card apart. So, here is what the card finally looked like for card club. I used wonderfully worn background stamp in more mustard on the more mustard panel. I ran just a strip through the embossing folder. And added an early espresso decorative strip and moved the greeting. The technique is smach smooch. I stamped the leaf in jet black staz-on. So, I selected the early espresso because of its rich, deep color. When you place the early espresso matt with the jet black leafs, the colors look similar, so you can't really notice the contrast with the black and deep brown. Pretty good disguise, huh? All products used are Stampin' Up!