Monday, November 28, 2016

Cyber Monday

It's 'Cyber Monday' !  It's the virtual shopping holiday like Black Friday!  So, for all of those who prefer to shop on-line, here is my SALE @ my Etsy Shop.


all orders will be processed as soon as possible, because I am placing my shop on 'vacation' this Thursday thru the beginning of next week, to get prepared for my last craft show.  Happy shopping!


Vintage Chic Christmas Card

Welcome to my little piece of blog-land.  Grab a cup of coffee/tea, and scroll through my posts.  I have been busy crafting and posting what I have created.  I was browsing a local paper store, and stumbled upon this beautifully neutral pattern paper by Heidi Swap: Vintage Chic.  A beautiful collection of pattern papers in cream, black, grey, teal, and pink.  Amazing.   Now, if you scroll down a few posts, you will see that I have crafted two notebooks, a gift tote, and a few cards.  But, I am not done crafting with these beautiful pattern papers, yet! {smile}  
While surfing the web, I stopped by one of my favorite eastern European challenge sites: 
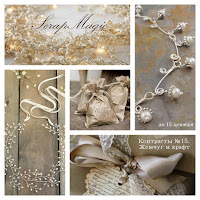
Scrap Magic.   Their current challenge is kraft & pearls, it is part of their 'contrast' challenge.  They also have a beautiful inspiration board.  And if you need a little more creative eye candy, please check out what the design team have created.  You will be pleasantly surprised {smile}.

*there is a translate button for this site

This challenge and my 'new' Vintage Chic pattern paper, are perfect together!
I also stopped by the Christmas Card Challenge.  I wanted to see what their new challenge is.  Their current challenge is Anything Goes.  Easy to work with {smile}.


and here is what i created:

*my mix of textures, and **my repeat of color

Recipe:  I used kraft card stock by Paper Trey Ink, for the card base.  I used mint macaroon card stock by Stampin' Up! for the matt.  I used 3 different pattern papers from the Vintage Chic collection by Heidi Swap: kraft & cream stripes, grey polka dots on cream, and ledger print on cream paper.  I sponged all the edges with crumb cake classic ink, by Stampin' Up!.  It's a soft kraft color ink.
I adhered the kraft & cream stripe paper onto the mint macaroon card stock, and sewn a simple border stitch on the main panel.  
I used my Tasteful Trim die to create the large scallop panel with the grey polka dot on cream pattern paper.  I wrapped a piece of mint macaroon taffeta ribbon around the large scallop die cut piece.  
I used one of my digital bingo cards and matted it on mint macaroon card stock.  I tucked it just under the large scallop piece.  
I used a mini banner punch by Stampin' Up! to create my trio of banners.  I sponged all the edges with crumb cake classic ink.  I used a scrap piece of mint macaroon card stock to matt each banner piece. I adhered them to the main panel, and then used my stapler to secure them to the card front.  (*I love mixing different textures: paper, fabric, metal, pearls/rhinestones, etc.)  I tied my bow upside down.  I like how the bow sat, upside down, better then right side up.  
I stamped my sentiment in baked brown sugar classic ink by Stampin' Up!, onto white card stock.  I wanted a soft, creamy, kraft color, and love how this color looked.  I used mint macaroon as my matt. I used foam tape to 'lift' the sentiment block off the card front.  
I used one of my Prima: Coffee Break fabric blossoms, to add a feminine touch to the card.  I just love the lace and pearl center.  So delicate and pretty.  
For my final touch, I added some kraft-colored, flat-back pearls, and some mint-colored, flat-back jewels in two clusters of three.  (**Kraft and Mint are the two main colors, and so I repeated these colors whenever I could.)
Thank You, for visiting my blog.  I hope you have found some inspiration.  And I hope you have the opportunity to play along with either of these challenges.  I know that they would love to see what you have created {smile}.


Sunday, November 27, 2016

Vintage Chic Cards & Bag

Howdy!  My crafting frenzy continues.  I needed a little inspiration and guidance, so I stopped by a few of my favorite challenges.  Ok, three {smile}.
I stopped by the Cupcake Inspirations to see their inspirational photo.  And their color combo, is perfect for this new-to-me Vintage Chic collection by Heidi Swap.  I know, it's not holiday themed, and I should be crafting for my last craft fair.  But these colors, are just perfect!
*my card was selected as a 'Sweet Six' winner!


To help with my 'direction' in crafting, I stopped by the ever easy-to-work-with sketch @ Retro Sketch Challenge.  These ladies have very adaptable sketches that will work with almost any style of paper crafting you create.  Here is their current sketch (they are having some issues with Link)

My final stop, was @ Brown Sugar Challenge.  This creative design team, has a current challenge: anything goes.  So, super easy to play along {smile}.

and here is my card:


Recipe:  I used kraft card stock by Paper Trey Ink for the card base.  I just love the heavy weight of this card stock.  I used mint macaroon card stock by Stampin' Up! for the matt.  I just love this color, and it helps highlight the mint color on the Vintage Chic collection, by Heidi Swap.
I used the steel polka dots on cream pattern paper as my 'band'.  I matted this pattern paper onto steel texture solid card stock.  I sponged all the edges with crumb cake classic ink.   
I added a quick and simple border stitch with my sewing machine.  When I reached the 'band' piece, I did a zig zag stitch.  I wanted to add some visual interest {smile}.
I wrapped my last remaining piece of steel gray silk ribbon around the card 'band'.  I tied it into a simple bow.  I added a rhinestone brad to the bottom of the bow.  I added a pale blue-mint paper blossom to the top of the bow.
I added a digital Bingo card in place of the tag.  I added a rhinestone 'blossom' to the lower right corner of the bingo card.  
I hand-stamped my sentiment in early espresso classic ink, by Stampin' Up!.  I stamped the sentiment on cream linen card stock, by Paper Trey Ink.  I hand-cut the banner ends, and sponged the edges with crumb cake classic ink.  I matted the sentiment banner with early espresso card stock by Stampin' Up!.
I had so much fun and creativity flowing when I was creating this card, I made another.  But I turned it 90 degrees. 


and I also made a gift tote:


I really enjoyed working with this paper collection: Vintage Chic.  The soft neutrals gave my projects a soft feminine look.  The extra card and gift tote, have gold satin ribbon.  I added little pieces of mint toned embellishments to help pull it all together.  I used a 'gift tangle' on the tote.  It's the crystal-like dangle from the taupe dot lace trim.  {smile}
I hope you have been inspired to play along with any of these challenges.   I am off to the grocery store.  I am making a pumpkin pie, and need a few baking items.  And then the crafting will continue!


Vintage Chic

Howdy & welcome to my little slice of blog-land.  I am still crafting {smile}.  I am preparing for my last craft fair next weekend.  Saturday, to be exact.  But I wanted to share with you a new decorated notebook.  I went to our local scrapbook store, and stumbled upon this beautiful pattern paper collection by Heidi Swapp - Vintage Chic.  It is basically all neutrals with a teal blue shade.  So, I pick up a few sheets of this beautiful (to me) pattern paper and headed home!
here is what I came up with:


Now, I have a lot of paper crafting supplies, so the pattern paper is all I had to purchase (at this time).   I selected embellishments that were sweet, rustic, french, and/or simple pretty!
Recipe:  I used mint macaroon card stock by Stampin; Up! for the matt.  

I cut strips of each of the pattern papers in the Vintage Chic collection.  I sponged all the edges with crumb cake classic ink by Stampin' Up!.  I cut a 4" burlap doily in half, and adhered it to the right side.  I added a simple border stitch around the front panel.  I did  a zig zag stitch at each pattern paper seam.  I tucked a black and white French tag in behind the doily.  I added a bingo card.  I hand-stamped my sentiment.  I hand cut the banner.  I sponged the edges to help give the sentiment banner some definition.  The 'vintage chic' sentiment tag is actually the pattern paper label.  I adhered it to the front of the notebook with foam tape.  I added a scrap length of teal velvet ribbon to a rhinestone heart ribbon slide, just below the vintage chic label.  I added a Prima holiday paper blossom.   I added a white resin floral garland.  I wrapped some cream crochet trim around the notebook cover, and looped it through the metal word bar.  I used black pearl brads to secure the ends.
I am super happy with how beautiful (to me) this decorated notebook turned out.  So, I made a matching gift tote.  {smile}  I had so much fun creating this notebook, that I made another.  I used some of the same pattern papers, and added pink as my accent color.  Stay tuned for photos of my other creations!


Saturday, November 26, 2016

Season of Peace & Joy Combo

Howdy! and the holiday crafting keeps keeping-on! {smile}  I needed a new focus (aka layout) so I headed to an old favorite: Mojo Monday Sketch Challenge.  They always have some easy-to-work-with sketches, so it was a no-brainer!

and, see what I mean?  easy-to-work-with sketch!
and here is what I made:

matching card and gift tote
I made a matching card (blank on the inside) and gift tote, using Mojo Monday current sketch!  Once I saw their sketch, it did not take me long to whip this up!  When I started with this sketch, I created the card first, so let's start there!


Recipe for the card: for the card base, I used Mossy Meadow card stock by Stampin' Up!.  Its this rich deep green, that is just gorgeous in real life!
The pattern papers I selected are old.  Probably 5 years old.  The main deep red, and the sentiment block are both Basic Grey.  The striped paper and the blue polka dot paper are Bo Bunny.  I matted the striped paper onto Marina Mist card stock by Stampin' Up!.  Did a quick and easy single border stitch with my sewing machine.  I also sewn the cream cotton trim and green seam binding to the pale blue polka dot pattern paper.  
I hand-stamped my sentiment onto a journalling block.  I used early espresso embossing powder to give the sentiment a presence.  The stamp is another old-y.  It is an Anna Griffin from 10/+ yrs ago.  I matted the journalling block with a scrap piece of the mossy meadow card stock by Stampin' Up!.  I adhered the journalling block to the card front with foam tape.
I kept the snowflake embellishment from the sketch, and used a wooden snowflake from Stampin' Up!.  I believe it is 2 years ago.  I also included a retired Stampin' Up! brad, from their Occasions catalog (4/5 years ago).  I didn't add any adhesive to the snowflake.  The brad is what secures it to the card front.  (That way the snowflake will turn.)  And viola!


Recipe for the tote:  I wanted these two items to match, so I used Mossy Meadows card stock by Stampin' Up!.  I had a large enough scrap piece of the same papers, so I used them.  
I ran out of thread, so I could not do any machine stitching on the stripe pattern paper.  (We live 28 miles outside of town in the mountains.  So I did not jump in my car and drive into town for thread.  Especially on Black Friday with all the crowds.  Sorry.)
I matted the stripe paper onto Marina Mist card stock by Stampin' Up!.  I just love how this blue highlights the blue in the striped pattern paper.
I cut a wider strip from the pale blue polka dot pattern paper.  This time, I didn't add the green seam binding.  Instead, I used Ocean Tides polka dot ribbon, by PaperTreyInk.  I flipped the ribbon over, and used the solid side.  I like how this 'softer' side of the ribbon matched the blue polka dot pattern paper.  This ribbon wraps all the way around the tote, and ends on the side at the banner's end.   (and yes, I have too much ribbon.  And no, I am not a hoarder.  I am a collector {smile}.)
I used the same journalling block for my sentiment piece.  I hand-stamped the sentiment and heat embossed it with early espresso embossing powder.  I matted the journalling block with a scrap piece of mossy meadow card stock by Stampin' Up!.  I adhered the journalling block to the front of the tote with foam tape.
I added another large wooden snowflake by Stampin' Up!.  and secured it to the front of my tote with a retired brad by Stampin' Up!.  
Thank you for looking.  I have a few more projects to complete for my last upcoming craft fair!  And yes, I am getting more and more comfortable with my new upgraded photo editing software.  {smile}


Friday, November 25, 2016

Final Craft Fair

Howdy!  this is my final craft fair, this holiday season.  I have reduced the price on everything!  I don't want to take anything home.  Remember to shop early for the best selection.  I will still take special orders.  


I have gift bags, gift card holders, cards (holiday and other) tiny wooden houses, mini christmas trees in salt shakers, magnetic monograms, dry snow globe jar toppers, my fabric wreaths and banners, and so much more!  I am in B hall. Please stop by, take a look, and say 'hello'.  

Thursday, November 24, 2016

Birthday Tag Card

Howdy!  I had such a good time making my last Thank You card, that I decided to make a few more cards with more of my tags and sentiment blocks.  I made a holiday card, and a birthday card.    The trick for me, was to keep the cards looking fresh, and not a carbon copy of the previous.  I hope you like these!

the birthday card:


and the holiday card:


Recipe:  I used kraft card stock by PaperTreyInk for the card bases.  I used a neutral background digital paper for the main piece.  I printed the digital pieces (background pattern paper, tags, and sentiment blocks) on white linen card stock, by PaperTreyInk.  All of the edges of the papers (printed and otherwise) were sponged with crumb cake classic ink, by Stampin' Up!.  
I did a simple border stitch around the top portion of each card.  I included the doily in the stitching.  I made simple random pleats with the cream cotton trims.  I even machine stitched the ribbon to the card fronts.  (I do this, so I don't have to add adhesive to my ribbons/trims.  I also think it adds a homespun touch/feeling to my cards.)
The sentiment blocks are adhered to the card fronts with foam tape.  To help give the card some dimension, and not look so 'flat'.  
For the birthday card: I added a scrap piece of lace and tied a button to the tag.  I added a 'splash' of flat back pears, and a paper blossom to the card. 
For the holiday card: I added a large rhinestone clip.   
Thank you for looking.  Now, it's time for turkey and pie!  I hope this day is spent with those who truly mean the most to you!  And remember to reflect on your blessings.  {smile}


Thanksgiving Thank You Card

Howdy.   I am still crafting for my last holiday craft fair.  December 3rd, @ La Cueva High School, in Albuquerque, New Mexico.  But, I did stop for an evening to bake some pies that were ordered for today, and of course I had to make a Thank You card to go with them!
Typically, my baked goods are hand-held, aka small.  But a wonderful co-worker asked for 2 slab pies.  A slab pie, is a pie made in a jelly roll pan.  So, it has the ease of a sheet cake, but it's pie!  When we have pot lucks at work, and I am asked to bring dessert, I bring either cupcakes or slab pie.
I made my version of SummerTime Harvest Pie.  This pie has strawberries, blackberries, blueberries, red raspberries, green apples, and peaches.  I omit the top crust for a sour cream topping that is baked.  I feel that this keeps it 'light and sweet'!
here is the card:


When I was photographing this card @ 5a yesterday (no sunshine or full moon light available) I just loved how my white sweater Starbucks coffee-to-go ornament looked sitting next to the card, so I didn't edit it out.  I'm happy I left it.  I think it helps add some warmth to my photo.  {smile}
Recipe:  I used kraft card stock for the card base.  The heavy weight card stock is from Paper Trey Ink.   The polka dot pattern paper, is actually a digital paper that is printed on Linen card stock, by Paper Trey Ink.  
I sponged crumb cake classic ink, by Stampin' Up! to the edges of all the papers and the doily.  I printed a sheet of floral tags (digital), and sentiment cards (digital) onto whisper white card stock, by Stampin' Up!  I layered the sentiment card on top of the floral tag, but left the blossom at the bottom showing, along with the text at the top of the tag.
I added a simple, single border stitch with my sewing machine around the top portion of the card.
I sewn a 'messy' pleat with a 2-inch wide cream cotton embroidered trim.  I then sewn a scrap piece of this pale pink seam binding over the cotton trim.  I didn't wrap the cotton trim or the seam binding around the card.  I wanted it left 'messy' with unfinished edges.
I tied a triple bow with the same pale pink seam binding.  I tied a snowflake dangle embellishment with kraft twine around the seam binding bow.  This 'bow' is adhered to the card front with hot glue.
Viola! done.  Not a ton of embellishments, and not a lot of 'stuff', and my card is done.  A 'quick' (for me) card that was completed in just under an hour.  
I tied each pie with a pink ribbon, and added a tag from the same sheet of tags I printed for this card.  That way, it all looks like it belongs together.  {smile}


Sunday, November 20, 2016

Vintage Noel in Paris Card

Howdy.  I haven't stopped Christmas crafting yet!  I have just been side railed with a few other obligations.  I was baking individual size Lemon Cream Coffee Cakes, 3-inch Traditional French Apple Tarts, and a few dozen Boston Cream Cupcakes.  And  yeah, I had to make pretty gift cards to go with them {smile}.
But, I did find time to make some holiday cards and a few gift bags to match {smile}.
I am playing along with two different paper crafting challenges:  Mix It Up Challenge and Brown Sugar Challenge
So, let's start with Mix It Up Challenge.  They have a sketch and an inspirational photo.  You can use either or both.  How sweet is that?  I used the inspirational photo!


I was inspired by the red and green colors of the holiday photo, along with the holiday theme.
The other challenge I am entering is Brown Sugar Challenge.  These talented ladies have an Anything Goes theme.  Always great ideas from the design team.  They use items from the current sponsor and create some of the most beautiful paper crafts!
here is the card that I made:


Recipe:  I used real red card stock from Stampin' Up!  I just llove the heavy weight.  The pattern paper I used is from a few years ago.  I don't remember who made it, but that is all I have left {frown}.  The green gingham pattern is the reverse side of the holy/polka dot pattern.  
I machine stitched a piece of cream cotton trim and red gingham ribbon to the card front.  Tied a double bow with the ribbon.  I tied a larger double bow with kraft twine and tied a silver Tim Holtz pinecone to the twine.  Then layered my trims:  rat twine and red ribbon.  
I added a dark green glittered paper blossom to the top of the bows.
My focal piece is actually a digital download.  I printed the image on white linen card stock by Paper Trey Ink.  I originally purchased the digital image to print on kraft card stock.  I haven't given up on the idea.  {smile}   I thought this image would look better on white.  To help accent the white polka dots (aka snow falling)

Thank you for looking!  I hope your weekend is wonderful! and creative!


Tuesday, November 15, 2016

Thankful for You Card

Howdy.  The holiday crafting continues.  But, I took a break from Christmas trees, and wrapped presents, and made a card for a customer {smile}.  I knew that I wanted to use some of my 'Sewing' themed pattern paper, and a mini post card.  I just needed a little direction.  So, I headed over to Mojo Monday to take a look at their current sketch, and yeah, I made it work {smile}.


and here is what I made:


Before I get to the recipe of my card, I just have to say, that I am still trying to hang of this new and improved photo editing program.  Today's edit went a lot smoother.  But, I don't feel like I am truly proficient at it, yet.  {smile}
Recipe:  I started with Blush Blossom card stock, by Stampin' Up!.  This solid card stock has been retired for almost a decade.  So, I hoard it like gold!  It's a soft, and creamy pale pink color.  Not quite pink, and not quite peach.  And I love the heavy weight of it!
The yard stick,  the pink polka dots, and the scissor pattern papers are from Carta Bella, their Sew Lovely collection.  The yard stick pattern paper is 4" x 5 1/4".  I sponged the edges with crumb cake classic ink.  The pink polka dot and scissor pattern papers are 3 1/2" x 2 1/2".  I adhered them together with a small overlap, so that their finished size is 3 1/2" x 4 3/4".  I added a double border with my sewing machine.  (I just love this look.)
I layered a scrap piece of cream embroidered trim and a mauve pink scallop trim, at the top of the card.  I secured these two trims to the card front with my sewing machine, too.  I tied a small piece of pink sequin trim to a white button with gold bakers twine.  I adhered the button to the card front with my hot glue gun.
I cut my mini post card down, and sponged the edges with crumb cake classic ink.  I hand-stamped my sentiment directly on the mini post card.  I used baked brown sugar classic ink.  I wanted my sentiment to look faded and vintage.  I adhered it to the card front with foam tape.  And viola!
I am pretty happy with how my card came out.  Thank you for visiting!  And I hope you have been inspired to play along with this super talented group over @ Mojo Monday.   {smile}


Friday, November 11, 2016

Holiday Craft Fair

Howdy!  Well, today was my first day of the holiday arts and craft fairs.  And, it was a lot of fun!  I got to chat with some return customers, and meet some new customers {smile}.  Very great!  Folks loved my tiny wooden houses and my holiday dry snow globes.   I will be at Tramway Community Church Saturday from 9a to 4p.


If Saturday doesn't work for you, I will be at the Albuquerque Balloon Fiesta Museum in Albuquerque on Sunday 10a - 5p.

Thank you so much for stopping by.  And if you are in the Albuquerque area, please stop by any craft fair that I am participating in {smile}.


Wednesday, November 9, 2016

Festive Reindeer Christmas Card


Howdy.  The crafting continues.  But, I did stop for a few minutes to take a few photos {smiles}.  I am really loving this sketch @ Mojo Monday  This sketch has given me a 'new' look at some of the pattern papers and digital images I have laying around my crafting space.  Let's take a look at their sketch:

The first few things I notice about the sketch, is the space.  The large rectangle can easily accommodate a stamped image, a tag, or any focal piece.  The oval, can be your sentiment piece, a floral cluster, a group of snowflakes, . . .  you get the picture.  And the long narrow rectangle, can be a scrap piece of ribbon, a coordinating piece of pattern paper, or any 'anchoring' piece/embellishment.
here is what I created:


and


Recipe:  I started with Garden Green card stock by Stampin' Up!  Love the heavy weight!  I used a pattern paper from Stampin' Up! that is retired from last year.  But, I just love the houses in snow.  
I machine stitched a burlap ribbon and mint macaroon dot trim/ribbon to the lower portion of the card.
The mini post cards are digital images that I printed on linen card stock (by Paper Trey Ink) and were matted on a piece of mint macaroon card stock.  I wanted to repeat the colors from the snowy scene (green and mint).  
I stamped my sentiment in mint macaroon classic ink, onto cream linen card stock.  I matted the tags with mint macaroon, too.  I wanted to add a pop of color (aka contrast), so I tied a 1/4" red silk ribbon to the tag.  But I wanted to add a 'vintage' piece, so I added these vintage Christmas bulbs.  The bulbs were a bit heavy for the delicate ribbon, so I 'anchored' them with a dab of hot glue.
I also made a matching pair of gift totes.  I'm getting excited for my craft fairs.  {smile}  My first craft fair is this FRIDAY, yeah, November 11th, @ the Tramway Community Church, in Albuquerque, New Mexico.  I hope to see you there!  and remember, if you see anything you just can't live without, I do take special orders!  Just convo me via email or @ Etsy.  The best part of Etsy, is that we can message each other, I can upload photos, and you can make your purchase with a credit card, paypal, or an Etsy gift card.  It's super easy!  Have a great day!


Tuesday, November 8, 2016

A Charming Country Christmas

Howdy!  I wanted to share a card, (ok, I made a series of cards) I made using the inspirational photo from talented paper crafter that I follow:  LeAnne.  I was surfing the web and saw this beautiful card she created for a (new-to-me) challenge site:  Inspired by All the Little Things.  Their current challenge is this inspirational photo, that is just so gorgeous!  It is such a sweet, traditional christmas photo! and what LeAnne had done with that inspiration, made me head into my craft room and craft!


See what I mean!  how sweet! how traditional! how simply gorgeous!  So, I grabbed some (retired) Stampin' Up! products that are just perfect, and a digital download (from last year, too!) and set-out to make a pretty Christmas card.  Now, don't get me wrong.  I love traditional.  But, I live out in the country, and so I added my own country twist to this great challenge.
Here is what I made:

still trying to work out the bugs with my new photo editing software.
*my card was selected as 'inspiring Stand Out'
Recipe:  I used Riding Hood Red card stock (retired) for the card base.  I just love this faded, vintage color of red.  I took a scrap piece of this beautiful music sheet, from a christmas collection from Stampin' Up! (yeah, retired too).  I just love this paper, so I have hoarded collected a few packages!  *I sponged all the edges of all the papers with crumb cake classic ink.
I sat down at my sewing machine to stitch three layers of trim together:  a burlap/linen piece (from a big box craft store), a strip of cool cucumber dot trim (by Stampin' Up!), and a rustic red gingham ribbon (from the same big box store).  
I printed my mini post card onto white linen card stock by Paper Trey Ink.  I adhered this/these mini post card(s) with foam tape.  I cut the tiny tag(s) out of the vintage cream linen card stock.  I used my Friendship Jar Holiday Fillers stamp set to create the sentiment, and inked the stamp with real red classic ink.  I adhered the tiny tag to the mini post card with one foam dot.  I tied a tiny copper-finish mini pinecone, from Stampin' Up! to the tiny tag with kraft twine by Paper Trey Ink.
Viola!  I made 6 of these cards.  Each card has a different mini post card.  And two of the mini post cards has blue colors, instead of green, so I added mint macaroon dot trim to those cards.  I have a photo on my Facebook page, please take a look.  I'm pretty happy with how they all turned out.  Well, I hope that I have inspired you to play along with this (new-to-me) challenge site!  I am heading back into my craft room, to create a bag with the same supplies!


Tiny Shabby Wooden Houses

Howdy! I wanted to share a photo or two, of a few more sweet, tiny, wooden houses.  These houses are tiny.  They aren't larger than 3 inches wide or tall.  So, they take all those tiny embellishments and thin ribbons.  
Tiny = Sweet


and


I painted each wooden house with white chalk paint.  Once dry, I used a sanding block to smooth out the painted surface and distress the edges.  {smile}
I used each 'house' shape as a template to cut the pattern paper.  I also rounded the corners, to keep with the 'shape'.  Both pattern papers are from Maja Designs : Vintage Frost Basics.  I used the small pattern paper pad.  I wanted my images to be small scale.  I used 'Paper It' to adhere the paper to the wooden blocks.  I also used a cream sealant to help 'keep' this finished look.
I used various ribbons, and embellishments to create these soft, sweet, little shabby chic houses.  They will be for sale at my craft fairs {smile}.  Thank you for stopping by!


Sunday, November 6, 2016

Pretty Pink Christmas Card

Howdy.  Welcome.  and yeah, I'm still crafting for my craft fairs {smile}.  I have been working on several more clear box totes.  But, I took a quick break and created an A2 card with more shabby chic pretty pattern papers from the Sweet Peppermint collection by Prima.  I also inked a new stamp set that arrived in the mail, yesterday.  
I am entering this card in three card challenge sites:  Brown Sugar Challenge, Word Art Wednesday, and Stampin' Royality.
The first challenge, I am entering is Brown Sugar Challenge .  Their current challenge is Anything Goes.  I am sure that you will be inspired by this creative design team.
The second challenge, I am entering is Word Art Wednesday.  Their current challenge is Anything Goes.  This is a faith based challenge site.  You are not required to use the scripture, but I am sure you will be happy to do so {smile}.
The final challenge, that I am entering is Stampin' Royalty.  The design team uses Stampin' Up! products, but you are not required to.  Their current challenge is All That Glitters - use glitter somewhere on your project.  Easy peasy.  And who doesn't like glitter? {smile}
*my card was selected as one of the 'top picks' for this challenge!  Thank You!
here is what I made:


Recipe:  The card base is made with the Crumb Cake card stock by Stampin' Up!  I just love the heavy weight of their card stock.  And the color is so darn beautiful!
The pattern paper is Sweet Peppermint by Prima.  I just love both os these patterns:  the soft pastel colored polka dots with some random sheet music print.  And the white snowflakes and white polka dots on a mint colored background is so pretty and sweet {smile}.  I added a quick and simple border stitch with my sewing machine to help convey a homespun look.  
I added a rose pink cotton scallop trim and a kraft-dyed seam binding across the bottom third of my card.  I just love the softness of these two colors together {smile}.  I crinkled the seam binding, to help give it a 'worn' look.  I created a multi-loop bow with the crinkled, kraft-dyed seam binding.  
I used a medium snowflake die by Paper Trey Ink and silver glimmer paper (aka glitter paper) by Stampin' Up! to create the snowflake focal piece.  
I made a little tag, for my sentiment.  I used a scrap piece of linen white card stock by Paper Trey Ink.  I inked up a new stamp set I received in the mail: Rustic Wreath by Paper Trey Ink.  I inked the stamp set with Baked Brown Sugar classic ink, by Stampin' Up!.  I just love the soft pale brown ink color.  I tied a scrap piece of pink sequin trim to the tiny tag, with a length of candy pink bakers twine.  
My card is pretty plain, but pretty {smile}!  Thank you for stopping by!  I have finished a few more little wooden houses, so I'll share a few photos soon.  {smile}


Thursday, November 3, 2016

Arts & Craft Fair Schedule

Howdy!  The holiday craft fair season is quickly approaching!  And so, I have been busy crafting, but also making my craft fair 'schedule' notification fun, festive, and special!  In the past I have mailed out post cards announcing my locations.  But, I wanted to change it up a bit this year.  So, I made my own.  No, I didn't sew on postcards.  Instead, I made these cute 'tags'.  That way, my schedule 'tags' won't hog a lot of real estate on your refrigerator, or clutter your message board {smile}.  


There are several folks that I always mail these out to.  But, if you want one, and/or aren't sure if you are on my mailing list, please email me @ sharon_wheet@yahoo.com, and I will drop one in your snail mail {smile}.    
Thank you for stopping by my little piece of blog-land.  I hope you have been inspired to create something beautiful!