Monday, February 29, 2016

Favorite Teacher

Howdy, and welcome.  I wanted to pay a little attention to one of my favorite teachers.  No, I'm not a student.  Just a very dear friend to a teacher.  {smile}
This wonderful woman is a high school teacher @ El Dorado High School, in Albuquerque, NM.  
I created a virtual KEEP Collective bracelet just for her.  But you can create and purchase your own HERE!  Remember, the leather bracelets are reversible!  (leather bracelet shown: Lavender/Steel Grey)

These bracelets, pendants, and tags make wonderful gifts for bridesmaids, friends, mothers, sisters, wives, and anyone else who is simply precious to you!  Have a busy life? Why not host a party on social media, or have a catalog party with the ladies at work, school, church, etc.?  Your family and friends can create their own one-of-a-kind jewelry piece, and with your hostess awards, you can create your own one-of-a-kind jewelry piece free!  Just ask me how! Book your 'party' in March, reach $300 in sales, and receive a free key! ($9 value) 


Sunday, February 28, 2016

Congratulations Cake: Card

Howdy!  I hope your weekend is going well.  Me, I've been busy, cleaning, and getting stuff ready for tomorrow - the beginning of the work week.  {grimace}  And, I came upon a card I forgot to post last week.  UGH!  But, have no fear!  I am posting it here! (cute little rhyme)
I am entering this card into two challenges, so without further ado, here we go!
My first stop is at this wonderfully creative Russian challenge site: Scrap Magic.  They publish Inspiration Boards, give you a few requirements, and then let your mojo run free!
Here is the inspiration board:
For this current inspiration board, you are required to use turquoise and pink colors.  And you need to add a cake/rose to your project.  Their design team is very creative and I am sure that you will find more than enough inspiration from their projects, and their wonderful inspiration boards.  Their challenge site is in Russian, but they have a 'translate' button.  It's super easy to play along.  
My next stop is Really Reasonable Ribbon Challenge #135.  Their current theme is: Celebrate.  This can be any type of celebration: birthday, wedding, baby, etc.  Their design team is clever and creative!  You will find a lot of inspiration regardless of your paper crafting style!
my card was selected as a 'Top Three' @ Really Reasonable Ribbon Challenge #135! Yahoo! and thank you ladies!  Look for my 'badge' on my AWARDS page.
here is my card:

Recipe:  This card is a A-6 size card (4 1/4" x 6").  The card base is Soft Sky by Stampin' Up!  I just love the soft, pale, blue color.  Very pretty, and a bit shabbylicious!  The pattern papers are from Tilda. (I used three different, but beautiful collections.)  I used my sewing machine to add a simple border stitch to the card front.  Yeah, the thread is a silver metallic.  I thought it added a homespun feel with some sparkle! {smile}
The journal card is actually a digital download.  I just love the stripes and floral images with the blue french as an overlay.  Super pretty!   The 'cake' is from Tilda, also.  I adhered the cake to the journaling card with foam tape.  I just love the stripes on the cake.  It looks yummy and beautifully stunning at the same time.

The lace trim is a scrap, and I can't remember where I purchased it.  But, I'll need to buy more, I only have about 6inches left. {frown}  The seam binding is Soft Sky, by Stampin' Up!.  But I fear this may be a retired color.  And I used the last of what I had stashed.  {frown}  Ugh, this is dreadful!  I just love working with seam binding.  It is easy to manipulate and easy to color!
I tied a multi-loop bow with the seam binding, and then added my extras.  {smile}  I used some thin silver cord, to tie on a aqua mist vintage button, (by Paper Trey Ink) then tied on the key, and finally created a large loop bow behind the seam binding bow.  I adhered the bow piece onto the card front with my hot glue gun.
I added the key to the bow, because I think it signifies so many things to different people: the key to knowledge, the key to happiness, you hold the key to my heart, the key is the future, and so many other thoughts.
I made two trio clusters with some sequins (marshmallow, and pink blush) and one lone aqua mist vintage button to the card front.  I think it adds of bit of 'interest' to the card.
I stamped my sentiment in Going Gray classic ink, by Stampin' Up! using the Timeless Love stamp set.
Thank you for stopping by.  I do hope that you get a chance to play along in a challenge this weekend.  It is really great to see how others interrupt the sketches, inspirational boards, and such.  Ok, I am off to clean some floors.  WOW! sounds fun, huh?  But before I go, I want to remind you don't forget to stop back by on Tuesday, for my Triple T Tuesday segment.  {smile}


Tuesday, February 23, 2016

Spring Macaroon: Card

Howdy/Welcome.  I created a card earlier today, to show how to add machine stitching to your card, without the stitches seen on the inside of card, HERE.  Anyways, I stopped by some favorite (new and old) challenge sites, to give me a starting point, and I have to say, I'm pretty happy with how my card turned out!  
The first challenge site I visited was, Scrap Magic [No.16 Spring].  This is an old favorite.  I don't always play along in their challenges, but I just love looking at what the design team creates.  Very inspirational, and very creative!   This challenge site, creates a mood board, they give you primary colors and mandatory elements.

The primary colors: Turquoise and Pink.  Mandatory elements: rose/dessert, and delicate work.  Please be aware that this challenge site is in Russian.  They do provide a translate button.
The second challenge site that I visited was Retro Sketch Challenge [#203].  This is another 'old' favorite.  I just love their sketches!  They are super easy to work with, and the design team is sure to inspire you to play along.
My card was selected as the Retro Sketch Challenge Rock Star!  Super happy and excited!  I'll be posting my 'award' on my Awards page {smile}  I just can't stop smiling!

And finally, a 'new' favorite challenge site: Really Reasonable Ribbon Challenge [#135 - Celebrate]. I had stumbled upon this challenge site while visiting a blog.  And I was intrigued as to what this site was about.  And well, I think you can figure it out too - Ribbon.  And I love ribbon! so I played along in one of their past recent challenges, and stopped by again, yesterday.  You will be inspired by their design team, and their wonderfully creative challenges.  Their current challenge: Celebrate!  Create a paper craft or project showcasing this theme (birthday, anniversary, wedding, baby, etc) and make sure you use ribbon or trim on your craft!
here is what I made:


Recipe:  I used Lagoon card stock by Stampin' Up! for the card base.  And this card is a bit 'large'.  It measures 4 1/4" x 6".  I believe it is considered a A6 size card.  I am really loving this larger size.  The first matt is Mint Macaroon card stock by Stampin' Up!.  I just love how those two colors match the two shades of turquoise macaroons on the pattern paper!  
I took a piece (3 3/4" x 5 1/2") of whisper white card stock by Stampin' Up! to use as my 'base' for the focal piece.  I cut two strips (1" x 12") of different pattern paper by Authentique, Infused.  I selected the floral pattern paper and the macaron pattern paper.  I tore the ends of the pattern paper strips to add 'interest'.   
I hand stamped the sentiment in Soft Suede classic ink by Stampin' Up!.  I used a new stamp set: Birthday Blossoms.  I just love the simple, cursive font of this sentiment.
I added a bright pink seam binding, and fancy, white crochet trim.  I did a simple machine stitch to attach the seam binding and crochet trim to the front of the card.  And then, I added a simple border stitch around the top of the card.  
I added a journalling card to a different piece of pattern paper (mint stripe) from the Infused collection by Authentique.  I added foam tape to the back of this journalling card.
I tied a triple loop bow with the bright pink seam binding, and adhered it to the front of the card with hot glue.
I added a collection of marshmallow sequins to the bottom of the card.  I didn't want to distract the eye from the beauty of this card, celebrating a birthday!


3T Tuesday: Sew Clean

Howdy! and welcome to another edition of Triple T Tuesday.  This is my forum to provide you with various Tips, Tricks & Techniques.  So far, I have focused on paper crafting, but I also add some cooking and sewing posts.  {smile}

Todays title is Sew Clean.  I love adding machine stitching to my greeting cards.  But, as you know machine stitching sews on both sides of fabric and paper.  And, I think if you see the stitching inside a card, it looks sloppy, and not 'clean'.  
So, here is my TIP: when you add machine stitching to your paper crafting, only put that layer thru your sewing machine, and use very strong adhesive to attach the sewn piece to your paper craft.
photos, of course:

When layering your papers, use minimal adhesive toward the center of your papers.  You just want to adhesive to help 'hold' the papers/trims in place while sewing. 


See how 'ugly' the backside looks?  You wouldn't want THAT on the inside of your card.  So add your strong adhesive over the machine stitching.  This will hold the paper pieces together, and will also bind the machine stitching to the card.  Holding the pieces together, and keeping the stitches from coming undone!


The inside of the card, looks Clean and Crisp.  Perfectly beautiful!  All your machine stitching is hidden, out of sight, and not inside the card!
I hope you found this TIP helpful!  


Saturday, February 20, 2016

Inspiration

Good Morning.  Yeah, I know it's early.  But, I just love the quiet at this time of day.  No one awake.  No one moving around.  Just me, and my coffee.  Love this time of day! {smile}
My brain is moving in different directions, my thoughts are going every which direction.  But, I'm sure most of you can relate to that.  Todays frenzy is about jewelry.  I know, how crazy is that for me. But, I want to share with you, my first show.  I signed up to be a jewelry designer for a new (to me) company:  KEEP Collective.  They sell bracelets, pendants, and key fobs (keepers), and some very beautiful and unique charms (keys).  So, you can create your very own one-of-a-kind inspirational jewelry piece: spell out what moves you, or add your monogram, or anything your heart desires!
Their bracelets (keepers) are reversible, so you can get two different looks and their charms (keys) are removable and repositional, so you can change the look easily!

Get 8 looks with one keeper and 2 keys. 

Anyways, today is my very first 'showing'.  My sweet daughter is throwing a party, so she is the hostess.  {She is just the best!}  So, I have invited some of my friends, and some of her friends, to share this 'new' company with.  I know it will be a success, because these pieces are top quality! and simply gorgeous in real life!
I just wanted to share with you my good news.  But, if you just love this, or are simply courteous, stop by her house today 1130a -2p, and 'play' with some pieces.  You can place an order with me at her house, or on-line.  Either way you will love what you create!
Here are some beautiful pieces you can make:
spell out your destination


add words/letters/symbols that are important to you
add a time piece, or add a word, or spell it out!
make it a monogram
make your own custom set (rose gold and rose quartz)

The look, the design: is all YOU!  Use your favorite metals (silver, gold, rose gold), your favorite materials (leather, metal mesh), and add what YOU love (words, letters, stones, symbols).  Create your own one-of-a-kind jewelry piece or collection!  Buy a few pieces to start, and create your custom look over time.  Let your family and friends know how much you love KEEP Collective, and they can give you gift certificates so you can add to your collection, or simply start your own!

Well, I'm off to get my stuff together, get some breakfast, and do a quick run before I head into town!


Tuesday, February 16, 2016

Tag of Faith Card

Howdy!  This is my second post for today.  [previous post is my Tuesday tutorial segment HERE].   Today's tutorial was on a technique called water color wash.  I showed how to do this technique with a tag.  And well, I added the tag to a hand made, machine stitched greeting card. {smile}
I am entering this card in two challenges: a scripture theme challenge, and an element theme challenge.
Let's start with a one of my favorite challenge sites:  Word Art Wednesday #219.  This challenge site is faith based - this means that they provide you with a scripture for inspiration.  The lovely ladies on their design team, will certainly inspire you with their creativity!   The theme for this current challenge is 'anything goes', just make sure your entry is family friendly.

The other challenge site I am playing with has been one of my favorites for several years.  I have been playing along since I started my blog.  {smile}  Just Us GirlS Challenge #330.  Their current challenge is  trend week - tag.  And who doesn't love tags?  Their design team will inspire you, that's a guarantee!  

so without further ado, here is my card:


I just love the angle of this photograph!  The closeness, shows the machine stitching and the delicate mint lace trim.  The tag was color washed with liquid re-inkers.  [tutorial HERE]
a different shot:

Recipe:  I used Crisp Cantaloupe card stock, by Stampin' Up! for the card base.  I just love the soft coral color.  {smile}  I matted this beautiful vintage looking floral pattern paper by Authentique onto Mint Macaroon card stock, by Stampin' Up!.  I machine stitched the floral pattern paper and mint card stock together.  I did a purposeful sloppy double border with my sewing machine.  
I machine stitched the tea stained cotton trim and mint lace trim to the card front.  Then I machine stitched the vanilla seam binding to the card front.  
I tied some coral-colored ribbon and thin crochet trim to the top of the tag, that I washed with water colors.   The tag is adhered to the card front with foam tape.
I tied a double loop bow with the vanilla seam binding, and adhered to the front of the card.  I tucked-in a aqua mist vintage button, to help repeat the mint color.

I hope you have found some inspiration to play along with both of these challenges:  Just Us GirlS, and Word Art Wednesday.  It will be fun!


3T Tuesday : Water Color Wash

~ photo heavy post ~

Howdy, and welcome to my little piece of blog-land.  Today is Tuesday! And on Tuesdays, I share a segment I call: Triple T Tuesday.  The triple T = tips, tricks, and techniques.  These little tutorials currently are for paper crafting, eventually, I will share some baking tips. {smile}
Todays tutorial is on water coloring.  It's called water color wash.  It's a way to add some color that looks random, and artsy.

One of the most important pieces of information on this tutorial, is the paper you need.  You can NOT use typical card stock.  You MUST  use a 'sealed' card stock.  White Shimmer card stock by Stampin' Up! is the perfect card stock for this technique.  Not only will this card stock allow you to watercolor with saturating the paper, but it also adds a wonderful bit of shimmer {smile}.
The other important piece is the ink you use.  You MUST use a water-proof ink: archival,  or solvent. You can always heat emboss your sentiment or image using embossing powder.  This will work, too, and allow you to use a wider range of colors and metallics.


The supplies for this technique are minimal.  
1. sealed card stock (white shimmer card stock)  
2. a fine-mist water bottle
3. an aqua painter
4. liquid re-inkers
(so saffron, crisp cantaloupe, and pool party)
5. paper towel(s)

1.  stamp, heat emboss, or print your sentiment or image onto shimmer white card stock.

*my sentiment was printed onto the shimmer card stock with my home printer

2.  spray the card stock with water until the card stock is wet.

3.  dip the wet brush tip into the liquid re-inker

* always start with a little amount of color.  You can add more, but it is very difficult to remove.


4.  keep adding colors


the wet color will move/blend where there is water.

Once you are satisfied with the final 'coloring' set piece aside to dry.  Or you can use a heat tool to speed up the drying time.  Once dry, add this beautiful watercolored piece to any project!


This technique can also be used with water-color paper.  You would simply 'color' you paper with water, using your wet paint brush.  
I hope you found some useful information today, and you create something beautiful and unique!


Sunday, February 14, 2016

Mint Sew Pretty; Card

Howdy.  And welcome.  I took out some vintage silk fabric the other day, and wanted to craft something pretty with it, and so I decided to make another fabric strip banner.  And the color combination was just so beautiful and inspirational: mint green, black, and cream! These colors really spoke to me, so I also crafted a card.  (I'll share the banner soon.)
I headed over to one of my favorite international craft sites for a beautiful sketch, and I Love Scrap has a wonderful sketch for you to work with.   Here is their sketch


*Their challenge is two part, use the sketch, or the image requirement, or both.  
Their image requirement is a forrest creature (fox, deer, fairy, etc)

Here is what I made:

I only used the sketch

I only used the sketch for their challenge.  I was originally thinking of a sweet nursery creature that can be found in the forest.  But, like I said earlier, I fell in love with this color combination: mint, cream, and black. {smile}
Recipe:  The card measures: 4 1/4" x 6".  The card base is True Black by Paper Trey Ink.   Love the heavy weight of this card stock.  See how tall and straight my card stands up, even with the large metal embellishment?  Beautifully thick card stock.
I used three pattern papers from Carta Bella, Sew Lovely by Carina Gardner: the mint green yard stick pattern paper, the cream and black scissor pattern paper, and the sewing machine journalling card.
I matted the cream and black scissor pattern paper onto a beautifully black and cream striped pattern paper by Stampin' Up!: Always Elegant.  I love how it makes that pattern paper pop, and brings some 'interest' to the card.  I added a simple machine sewn border to help convey the sewing theme, and give my card that home-spun touch.  {smile}
I adhered the sewing machine journalling card to the front of the card, slightly above center.  I did that to make room for my trims.  

close-up
I made my own sentiment tag with a word document on my computer.  I don't have any sentiment stamps with a sewing theme.  [shocking that I don't have something]  I used three different fonts.  And assembled them creatively.  I used peeking sheers to give the ends of the sentiment piece some interest, and keeping with the sewing theme.  And I added some machine stitching along the ends to replicate a 'label'.      I did a light tea staining on my white seam binding, to help give it a vintage look and feel.  [the white was just too white].  I machine stitched the seam binding and crochet trim to the front of the card.  I tied a multi-loop bow with some of the tea stained seam binding, and tied a button to the bow, and around a pair of faux scissors with cream twine.  The faux scissors are adhered to the card front.  I die cut and stamped a thread card.  I used the Hanging by a Thread stamp set and matching die set, by Paper Trey Ink, to create the thread card.  I stamped the image in Mint Macaroon classic ink onto very vanilla card stock, both by Stampin' Up!.  I wrapped some baker's twine around the thread card.  This baker's twine has cream, black, and silver threads in it.  To complete the thread card, I added a black and silver button by Bo Bunny, and tied the button with silver thread.
Thank you for stopping by.  Stay tuned for the fabric scrap banner I made using the same colors.  Hint: it is in the back-ground of this card.  I'm in love with it!  But, it will be posted in my Etsy shop, as will this card.
Also, don't forget, I have a new segment to my blog: Triple T Tuesday.  I share tips, tricks, and techniques in this segment.  And this Tuesday, I am going to do a water coloring technique, so please come back!


Tuesday, February 9, 2016

3T Tuesday : Tea Stained

~ photo heavy post ~

Howdy, and welcome to a new series I am working on.   I always have tips, tricks, and techniques up my sleeve.  And, now, I have a platform to share them with you! {smile}  I am calling this series: Triple T Tuesday!  I will be sharing tips, tricks, and techniques for paper crafting, and baking; my two passions.  {smile}
For my first edition of triple T, I am sharing a tea stain technique.  Let's get started!
When 'color'ing or staining, please keep safety first.  Use pot holders for hot pots, allow hot tea to drain off embellishments on a paper towel on top of a paper plate.  Use tongs or a fork to remove items from hot tea.  And remember to keep children and pets away from the stove when working with hot liquids.

1.  Grab your supplies: pot to boil water in, tea bags (I use 5 regular size), and then the embellishments you want to tea stain: cotton trim, lace, seam binding, and clothes pins.
wooden clothes pins, cotton trim, cotton lace, and seam binding
  

2.  Boil your pot of water, and add the tea bags.

allow the pot to boil for a minute or two.

3.  add your embellishments:

4.  watch the pot.  Different materials take-on the color differently.
When working with wooden clothes pins, they will cause your pot of tea to foam, but don't worry, the foam subsides in a minute.
Boil wooden clothes pins for 5 minutes, and then turn the heat off, leaving the clothes pins in the hot pot.

5.  use tongs, or a fork to remove your embellishments:
Remember, that fabrics have a washed color pattern from the tea staining, but it makes the fabric look antique, or vintage. {smile}
I took the lace and cotton trim out after 2 minutes in the boiling tea.  I wanted a light kraft color.
I allowed the seam binding to boil a bit longer.  For some reason, seam binding, can be stubborn about taking on color.  Always remember, *the longer you leave the embellishment in the boiling tea, the darker the staining.  
Wooden clothes pins take quite a bit longer.  I left the clothes pins for 2 hours.  But, remember, check them periodically.  
To speed up the drying process of my fabrics, I dried my materials with a heat tool.  {smile}  I couldn't wait!  But remember, your heat tool is hotter than a hair dryer, so be careful!

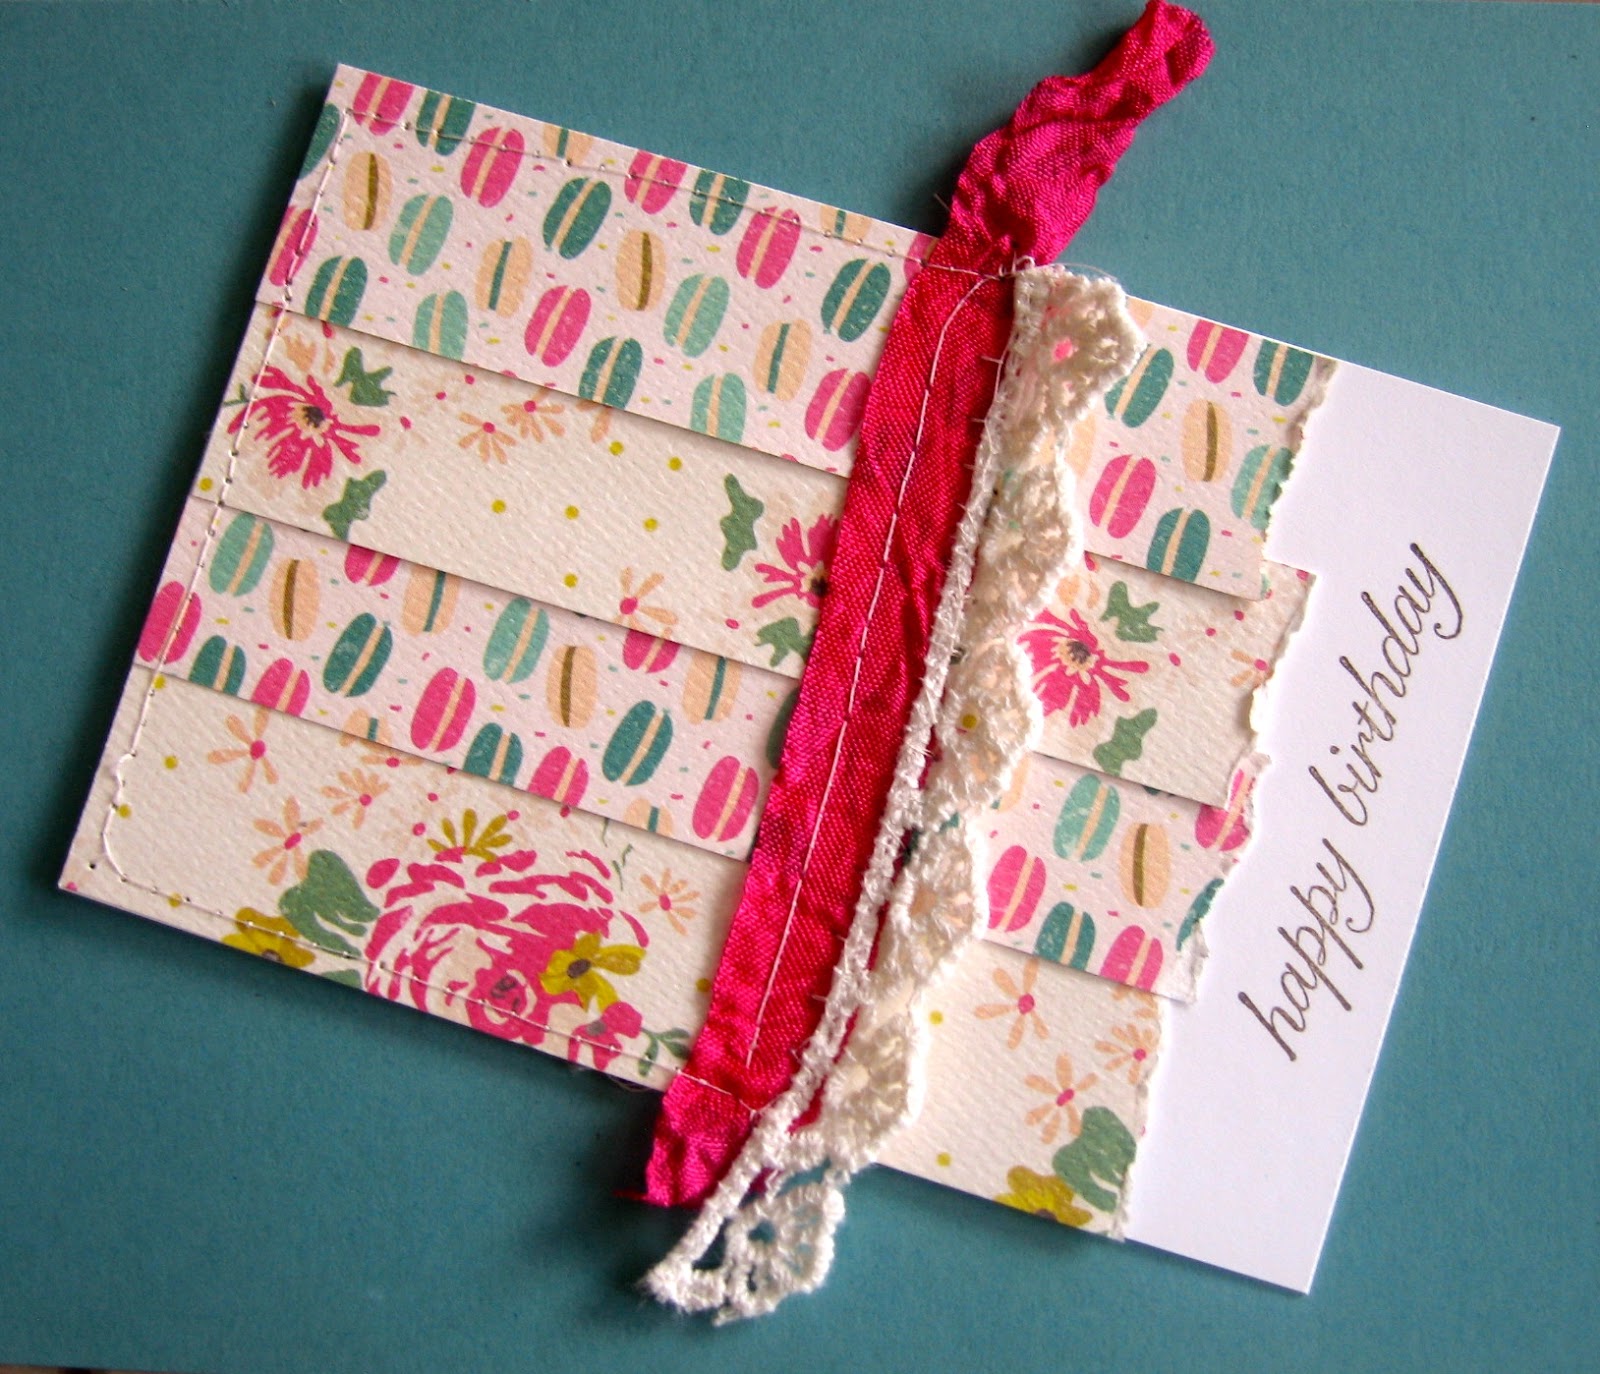
6.  After drying, look at how pretty my materials look with their new antique 'color'.  {smile}

 Thank you for stopping by!  I hope this was helpful!  And remember, if you are tea staining, always use more material than your project calls for.  That way, you aren't tea staining on a daily basis {smile}.  I always tea stain trims in one foot lengths, and seam binding in one yard length.  I only needed a couple of clothes pins, so I added a few more in the pot.  


Sunday, February 7, 2016

This & That, Photo, and Valentine; Card

Howdy.  I am sharing with you a card I made last night.  And I didn't get a chance to photograph it, until this morning.  I am using some new pattern paper from Echo Park.  These pattern papers are not Valentine Day themed, but I thought they worked very well for this card.  {smile}
I am entering three different creative challenges with this card.  Please check out the challenge host sites for a ton of inspiration!
My first stop was Really Reasonable Ribbon Challenge #134 - anything goes.  These lovely ladies use ribbon on everything!  How fabulous is that!  And I am a sucker for some beautiful ribbon, and it is one of my 'standards' on a paper craft.  
My next stop was Just Us GirlS Challenge - WORD week: Valentine.  They ask that you keep it nice and simple.  I love this challenge blog, because the design team has so much inspiration, that they will entice all crafters to play along.  Now, if you know me, I don't really do 'simple'.  But this card is pretty 'simple' for me {smile}.   this card was selected as the winner,  for their word week challenge #329.

And finally, my last stop was Mojo Monday Sketch Challenge #433 - Contest Week.  Because lets just face it, they have some very user friendly sketches!


Ok, without further ado, here is my entry:


Recipe:  I used Basic Grey card stock by Stampin' Up! for the card base.  As you know, they make some wonderfully sturdy card stock for this type of project. {smile}
I used a solid paper from Echo Park for the main matt.  I wanted a color that matched perfectly, and didn't want to spend time trying to match or getting close to a match, so I purchased the solid color.
The two floral pattern papers are from the same collection 'Photo' from Jenni Bowlin Studio @ Echo Park.  I just love the blossoms, and polka dots, the pinks, and reds, and dark grey.  Beautiful.  
The ruler pattern paper is from the collection 'This & That' from Lori Whitlock designs @ Echo Park.  I just love the mix of fonts and colors of the rulers.  I matted this piece onto a light weight pale pink card stock by Amuse Studios.  
I added a simple machine stitch border.  I just love the look of hand made cards with a bit of machine sewing on them.  
I wrapped this country red gingham ribbon around the front of the card  and added some machine stitching to help hold it in place.  Then I tied the ribbon into a simple bow.
I took at journal card from the Photo collection and cut it down to 2-inch square and matted it with basic grey card stock.  I adhered this piece to the front of the card.  I then used the same reddish solid paper from Echo Park and cut a scalloped edge heart.  I then used a different journalling card from the Photo collection and punched a heart shape.  I adhered the heart to the scallop heart with foam tape.  To help give it some dimension.
I added a deep red paper blossom at the bow, and tied a silver tone key to the bow with some beautiful cream, charcoal, and silver bakers twine.  
My sentiment I hand stamped onto a scrap piece of very vanilla card stock, in Basic Grey classic ink, using the Teeny Tiny Wishes stamp set by Stampin' Up!.  I used a small square punch to create the banner ends, and adhered it to the heart, off center.  
Thank you for looking!  I hope you have been inspired to play along with these challenges!


Thank You

A huge Thank You to my followers who have stuck it out with me.  I have been slacking lately on blogging, and I don't really have an excuse other than life has gotten in the way.  But, I imagine all of you are in the same boat.  Life, just gets busy.  And we, as women, have a long list of responsibilities, and very few minutes of the day, to call our own.  
I started a new exercise program in January.  New Year, New You.  It occupies 3 evenings of my free time.  It is also running season for me, and that occupies 3 evenings of my free time.  I still work full time, and still attend various functions for my grandchildren, and spend time with them baking, doing art projects, talking, reading, and well, you get the idea.  I also try to add new products to my Etsy shop weekly.  I am a demonstrator for Stampin' Up! and a jewelry designer for KEEP Collective.  So, when I say that I have just a few minutes, I have just a few minutes to myself.
I am NOT using all of this as my excuse, I'm just explaining my commitments.  I love crafting.  I love baking.  And I love sharing.  So, one of this New Year's resolutions, is to have a better grip on time management.  PLEASE bear with me.  I can say with whole hearted honesty, that I will post two times a week here.  (You can also see/read what I'm doing on Facebook, InstaGram, and Twitter.)   There may be weeks when I post more.  But not everything will be paper crafting.  I want to share cooking/baking, running, and various crafting with you.  One of the new things I want to start posting is what I'm calling 'triple T'.   It will be a post on Tuesdays that will have a Tip, Trick, or Technique.  That way, I can also share with you what I do.  I hope that you stay for the ride.
Thank you for your continued support, your devotion, and your interest.  Now, let's craft something!