Friday, December 31, 2010

January SU! Virtual Class - Magnetic Calendars


Here they are! I know I'm a day early, but really, is anyone keeping track? There are alot of things I want to share with my stamping pals, and hosting a virtual class seems the easiest. It also allows me to 'reach' my out of town/state friends. I am going to try to do a virtual class each month.
I live in the east mountains of New Mexico, and the weather doesn't always corporate. People have busy lives, other obligations, work, school, families, the list is almost never ending. So, that is why I have decided to try a virtual class. It's really easy. Purchase a kit, and complete the 'class' at your own leisure and on your own time schedule. It really can't get any easier.
January's SU! Virtual Magnetic Calendar Class costs $6.75. The magnetic calendar class kit will contain Stampin' Up! materials to complete two different sizes and styles of magnetic calendars. The top calendar measures 4" x 4". The second calendar measures 4" x 6". You can post these calendars anywhere that will accept a magnet; like your refrigerator, a metal core door, a magnetic board, etc. Class kit includes: instructional PDF, shipping, and most supplies. [I won't supply sticky strip, E6000 glue, tape runner, glue stick, glue dots, needle, or linen thread.] You can pay for the class two different ways; paypal* or mail me a check. (Kits will be mailed once payment is received.)
[*paypal - e-mail: sharon_wheet@yahoo.com]
There is a limited number of kits. So order yours today! Once the kits sell out, they are gone.
Also, please note that all Stampin' Up! products used are 'current' at the time of the class.

Thursday, December 30, 2010

1st Instructional PDF - Altered Notebook

Ok, here it is! My first instructional PDF is now available for purchase! The cost? $3.50. Purchase through paypal; www.bachnucmed@excite.com (Sharon Wheet). When you purchase this PDF, you will get 5 pages of step-by-step instructions, as well as color photos to illustrate the instructions. (The instructional PDF will arrive as an attachment to your email.) At the end of the instructions, I have also provided a few different varients. That way, this will work for any size notebook, any designer pattern paper you have, as well as any embellishments you would like to add, and any size text box! Make the sample and take the information to continue to create wonderfully creative altered notebooks!

Wednesday, December 29, 2010

Altered Butterfly

Hello! My, Christmas took the wind out of my sails, so to speak. I'm tired. Well, I am still 'working' on opening my virtual shop this weekend. How exciting! I have made some cards to put in the shop for sale. And, I have decided that when I enter a challenge, I'll post that card for sale in my shop, too. Along with other little things I make. So, if you see something posted after Thursday, that you would like to have, I'll have a link to my shop and you can purchase it. I have also completed my first PDF instructions on an altered notebook. Good golly, those take a bit of time to do. Between stopping to photograph and then to write all the instructions and add photos; its a little bit of work! But, I'll have that posted here real soon, too.
Now, onto my card. I made this card, back in October. I was tinkering around in my craft room and I wanted to do a card in one of my card clubs using the 'cracked glass' technique. I really liked this card, but was a bit unsure, because there are alot of steps for this one. It also uses the 'emboss resist' technique to 'color' the butterfly. The big shot to cut out the butterfly. And that cute little flower, is fun to make. So, see, there are like a million steps! And then I thought that I could send this card out as a Birthday card. But, it doesn't say that. And I couldn't bring myself to throw it away. (Yes, some of my creations end up in the trash.) How daunting is that? Well, I added some of the little pearls that Stampin' Up! has come out with, and I think it gives my card a feminine touch.
Let me know what you think, and Thank You for looking! Enjoy the last of 2010!

Saturday, December 25, 2010

Merry Christmas

I want to wish everyone a very Merry Christmas! Take this time and spend it with those who mean the most to you. Take a break from your busy lives to slow down, and enjoy the company of those who have filled your life with love. I know first hand, how you can be totally consumed by other aspects of our lives that we start to take those who are dear and precious to us for granite. So, today, relish in their company, take the time to listen, and fall in love all over again.
Thank you for looking, and for your support! Merry Christmas!

Friday, December 24, 2010

Coffee Cuff


As many of you know, I don't know how to sew. But, I have seen some beautiful items on the internet that require a bit of sewing. :( Now, I can sew on a button, and darn a sock. But, that, my friend, is the extent of my sewing ability.
I have a girl friend, Patricia T. who has 4 daughters. Wow!, huh? You have got to give props to her husband, Greg. And their daughters are all beautiful women. Beautiful on the inside and out. Patricia and Greg have done a wonderful job raising responsible, caring young ladies. These lovely ladies love Starbucks! Ok, I don't know more than 2/3 people who don't like Starbucks. I do! And if you didn't know, I love them soo much, I have my own 'super-automatic' espresso machine. ['super', means that it has 2 boilers, so you can make an espresso and froth your milk at the same time. 'automatic' means that all you have to do to make an espresso is push a button. The machine grinds the beans, and tamps the grounds. All you have to do is put in a half bag of beans and fill the water tank. Viola!]
I wanted to make Patricia a special gift. We are both in the same Bunco group, and at Christmas time we draw names, and do a gift exchange. This year, I drew Patricia's name. I had seen these coffee cuffs on the internet and I really wanted to make one. But, I don't own a sewing machine. I don't sew! And I didn't have to! Stampin' Up! makes this adhesive sheet, that you use with material, so you don't have to sew! How wonderful is that?
The coffee cuff uses Velcro to hold the cuff together. I used felted wool, my favorite! I attached the flowers on with brads, and did a few quick stitches to sew the buttons on. I used the adhesive sheet to hold the two layers of felted wool together (so you don't see the brads or stitches on the other side). And, the cup is porcelain, so it is re-usable! I also put a Starbucks gift card inside. Merry Christmas Patricia!

Wednesday, December 22, 2010

NucMed Christmas

As some of you already know, my 'regular' full-time job is Nuclear Medicine. I work with a great group of people, and I am grateful to have work. This is the card that I made everyone in the department. I tucked a $10 Starbucks gift card inside each of them. Our department is only open 8a-4p, but someone is on-call 24hrs a day. So, sometimes the ER can keep you running, and so a little java is good for the body on those days. :)
I saw the glitter technique on the Just Us Girls blog. They call it, 'sparkly stained glass', Jugs #63 - Technique Challenge. Well, I just loved the technique and the design team did a wonderful job with their submissions to give us some inspiration. I got my inspiration from Dana's card. I just fell in love with her card, so much so, that I kinda copied it!
I just love the doily. The one I used is a Martha Stewart product. I really like the quality of her stamp/scrapbook supplies. I have to say that her fine glitter is a dream to work with, too. Anyways, back to my card. I know that I didn't use 'traditional' Christmas colors on it, but sometimes, you just have to go out on a limb and try something different.
Thank you for taking a moment to stop by. I know that this time of year, you probably have a thousand other things that need to be done, and I appreciate the time. Let me know what you think of my card.

Monday, December 20, 2010

Happy Birthday Lynn

I have met a lady, named Lynn through my daughter. And she is quite crafty! Well, Lynn and her daughter have joined one of my card clubs, and they are both very talented and creative. Lynn celebrated her 40th Birthday this month. We were invited to her party, and it was tons of fun! I wanted to make her a card that had a little pizzazz and not so cutesy. So, here is what I came up with. I used Sweet and Sour DSP. I used some of the scraps that I had to create the 'shopping bags'. I used Stampin' Up!s hemp twine to create the 'handles'. I used Rose Red card stock and Pretty in Pink ribbon.
Thank you for looking. Tomorrow, I will post the card that I created for my co-workers.

Sunday, December 19, 2010

Paper Crafters Holiday Gift Exchange

So, for our Nacho Average Stamper holiday gift exchange, we were to make/create something using Stampin' Up! products. The price range is $5-$10. So, nothing too expensive and nothing too cheap. So, here is what I made!
I printed the template for the paper tote onto Chocolate Chip cardstock. I used the Greenhouse Gala DSP to add some color. I did the trim in Baja Breeze, to help bring out the blues in the tiny flowers. I stamped the definition 'inspire' in Baja Breeze. I chose that definition, because it is one of the home decor elements. And, I love it! I think that as demonstrators, not only do we create, but we also inspire our customers (and blog followers) to create something out of paper, or to use a product in a new way. I had to add the rhinestones! What girl doesn't like bling?
I covered a notebook with the same supplies. The stamp set I used for the flower is Greenhouse Gala, and the 'take note' is from Notable Ornate. I colored the floral image with markers (Baja Breeze and Certainly Celery). And I also created a cover, for a Stampin' Up! notepad. If nothing else, she can use the products in a workshop to jot down notes, names, ideas for workshops, etc. And, she can reproduce the items for hostess gifts! Functional, creative, and inspirational!
I will have the PDF for the covered notepad available for sale in Jan. 2011. I will repost that when it is available.
Thank you for looking. And, if you don't make it back here before Saturday, Merry Christmas!

Saturday, December 18, 2010

My MAC is back!


One of my latest projects has been altering notebooks. But, just a notebook isn't enough. So, I also made a matching card! How fun! I altered a few notebooks for some girl friends, and they were such a big hit, that I decided to alter some notebooks for my last craft fair (yesterday). So, here are my latest creations. I made 2 of each design. And they sold like hot cakes!
I used various products for each of these. So, if you would like a product list, please contact me. Thank you for looking, and thank you for coming back! I have enough photos to post everyday this upcoming week! So check back frequently. Hugs, s.

Monday, December 13, 2010

under consruction

As some of you know, I have a mac. And I love my mac. But, it wouldn't turn-on last night. My husband had to send it in and so I will be mac-less for 7/+ days :(
I will try to keep you all posted, but I most likely will not have any photos.
Thank you for your patience and understanding.

Friday, December 10, 2010

Christmas Shopping

I am having a home shopping party next week, Tuesday December, 14th, 2010. Ashley is going to show us the beautiful jewelry from Premier Designs. So, this invite goes out to my followers local and not-so-close: if you need something stunning, glamorous, and not too expensive, take a look at some of the absolutely beautiful jewelry Premier Designs has. Premier Designs Jewelry is the perfect gift for your girlfriend, mother, sister, or any other special woman in your life! You can place your order with me, or with Ashley (ashleyshainin@gmail.com), please remember to give Ashley your payment option, and don't forget to mention me as the hostess!
The jewelry Fashion Party starts @ 6:30p. I will have some home-made goodies to nibble on, and other refreshments. You can join the party in Albuquerque, New Mexico.
Enjoy your weekend!

Thursday, December 9, 2010

Bragging Rights

I had posted this card on the Stampin' Celebration challenge site, and my card was selected as one of their top 3! SCIC29 Top 3. I originally created this card for my cousin Heather, for your birthday. Heather has continued to post wonderfully kind comments about my cards, and so I really wanted to make her birthday card extra special.

Merry Christmas Ronda


Ronda, is our teacher for our scrap booking class. She is a super lady! She is creative, supportive, smart, and brilliant at all paper crafting!
Tonight's class was our last class of the year, and our holiday pot-luck party! We made these super wonderful Basic Grey double-page scrapbook layout. Ronda, 'cleans-out' her personal scrapbook stash and does 'white-elephant' gifts to us. I appreciate everything she does. She takes the time to help each class member. And she comes up with creative ways to help your page layout. And she is super generous during the holidays.
I have been having a good time altering these little notebooks, and I wanted to make one just for Ronda. A 'one-of-a-kind' original. She teaches a Basic Grey class, so that is the pattern paper I used. She loves Stampin' Up! products, and so that is what I used.
Thank you for looking. Have a wonderful weekend, and a safe holiday. Remember, the most precious gifts cannot be bought, or purchased. You can only find them in your heart.

Wednesday, December 8, 2010

Stamping 411 Sketch #180 + CTD #121

Here is my entry to the Saturday Sketch Challenge #180& Color Throwdown #121 I combined the two challenges to make this one card.
I used my favorite background stamp en Francais on the main card panel. I added a little visual interest by stamping my other all time favorite stamp Friends 24-7 flourish along one side. I have the level 2 hostess set, and really wanted to use it. So, I stamped the outline of the flowers in chocolate chip and stamped the inside of the flowers in marina mist. Added a little sentiment and a scrap piece of chocolate chip ribbon, and viola!
Thanks for looking!

Sunday, December 5, 2010

Vintage Journal

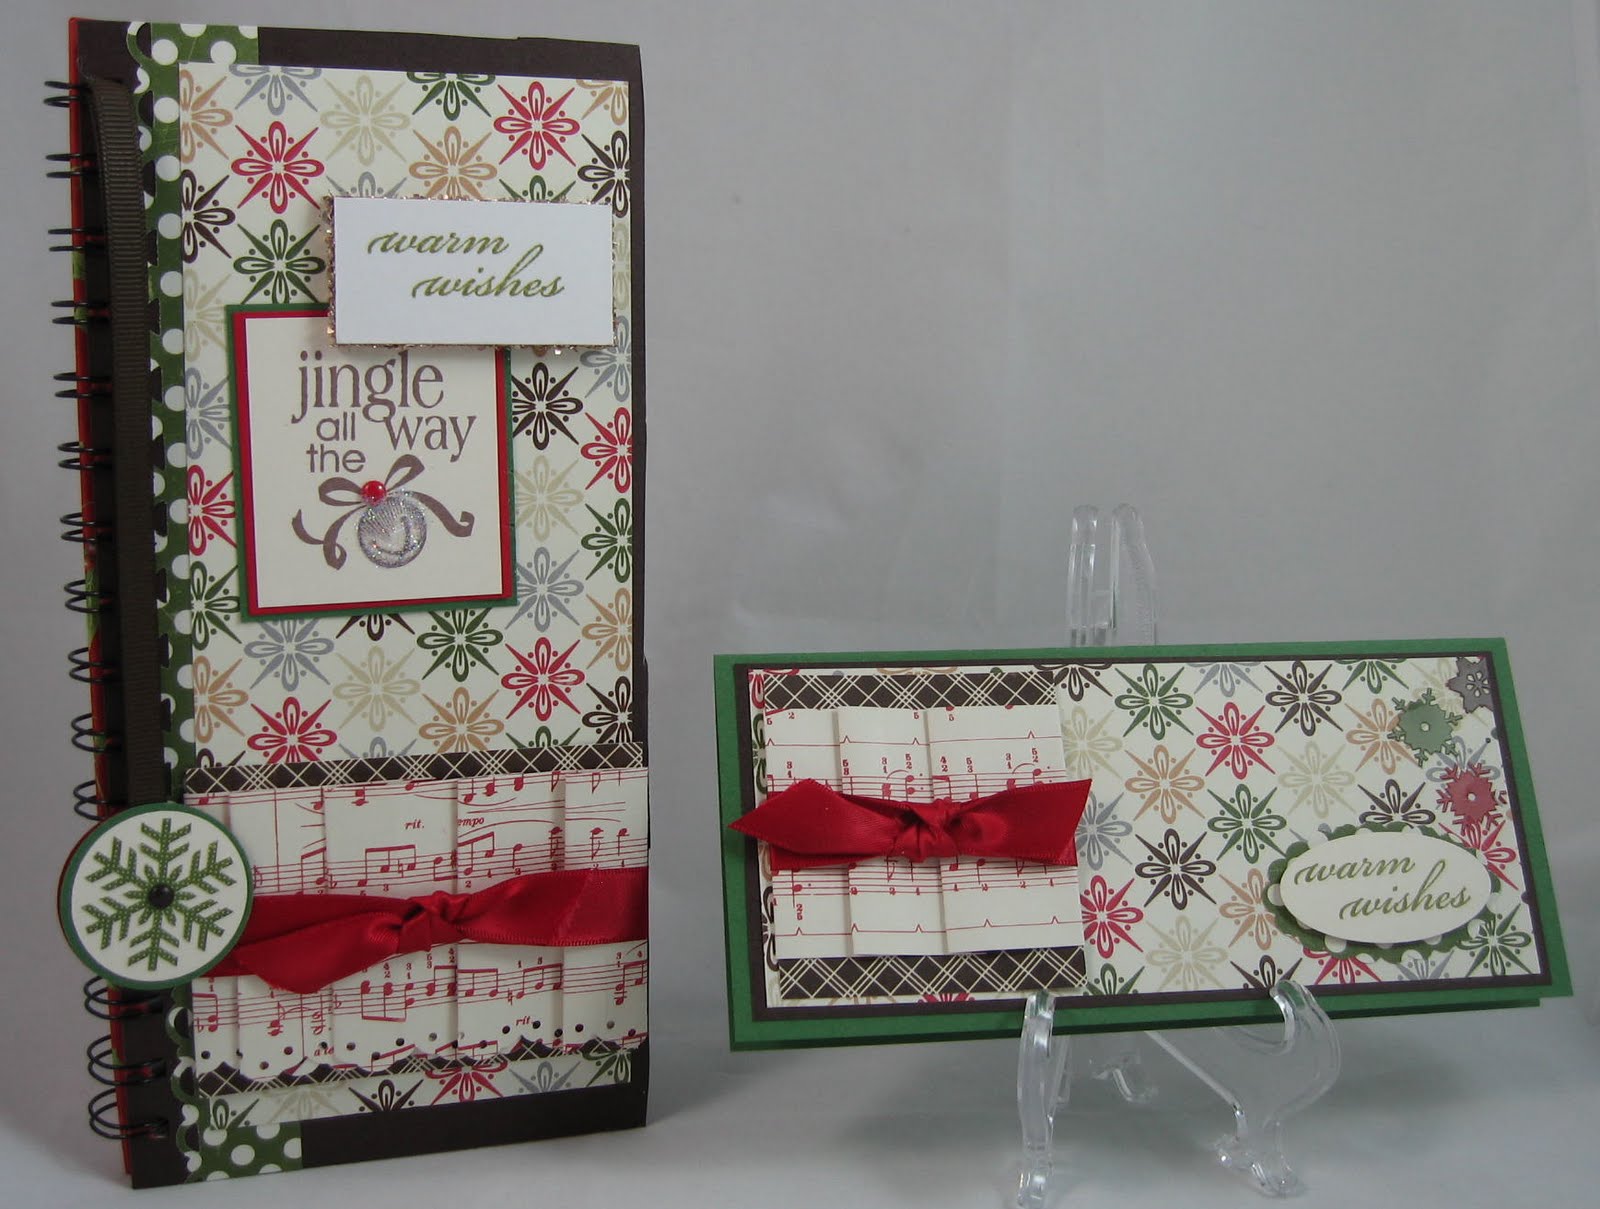
I have been altering various items for a while now. And, I really love it. It all started last year, when I found a web-site that challenged its followers to recycle a household item. Well, I altered a can and had fun doing it. So, I posed the challenge to my card club members last year. They came up with some really creative items. One of the items that I am selling at the craft fairs that I am selling at, are altered notebooks. Its a larger 'canvas' than a typical A2 card, and so it allows me to expand my creativity.
I started working on this notebook, and well, I guess you can figure out what happened at the end. Yeah, I loved it so much, it is now either mine or someone I know who's name starts with an 'S'. :)
For those who have been following me for awhile or know me personally, know that I love wonderful, beautiful, and unique papercraft items. I love alot of products from Stampin' Up!, but there are some other beautifully created items out there, too. So, this notebook is a mish-mash of everyone.
Let me start with the paper. The pattern paper is a holiday paper from Basic Grey. I don't remember the name, because all I had were some scraps. But, I think its simply wonderful. I used solid card stock from Stampin' Up! They make some wonderful heavy cardstock, and their inks are a dream to work with. There stamps are a pleasure to ink with, and are simply beautiful. The red rubber Stampin' Up! uses takes ink wonderfully regardless if you are using pigment, or water-based inks. I used a variety of different stamps for this notebook, some retired, and some current.
I also like to work with different mediums. I think the variety of textures add interest and depth to your project. Stampin' Up! has come out with some beautiful fabrics that are so easy to work with. You can sew with them, use them with a die cut, or tie them around your paper. The close-up below shows their fabric with a few others. I wanted the flower center to be soft, so I used some felted wool. I have fallen in love with Stampin' Up!s hardware, too. The brad that holds the flower together is in River Rock, and I added some half pearls to keep a feminine touch.
Stampin' Up! also also expanded their ribbon. They came out with this wonderfully shaping ribbon they refer to as 'seam binding'. If you sew, you know that this really isn't seam binding, as it doesn't fold onto its self. But, like their other wonderful products, its a dream to work with. I made the big bow with their Very Vanilla seam binding. I added a random pearl button for the center, and a small key tied to the bow with some super thin silver cord. The flourishes were stamped in Chocolate Chip craft ink and heat embossed with clear embossing powder.

Crafting gives me peace. It allows me to relax and not worry about some of life's difficulties. I know some people like to clean their house, or other chores to relax. Me, I do something for me. I know that, that sounds rather selfish. But, here is how I look at it, if you are important enough to take care of yourself, others will see you as important enough to take care, too. And sometimes, I share my creative works with others. So, remember to take time out of your busy day to relax and take care of yourself.
Starting next month, I will be making a PDF for everything I post on my blog. So, if you see something you like, just contact me to purchase a PDF for that item. Take care, and thank you for looking!

Saturday, December 4, 2010

Girly Party Favor

With craft fairs in the last two days, I haven't had a bit of time to post anything, my deepest apologies. So, I hope that this little cutie makes up for my failure.
I wanted to show fellow Stampin' Up! crafters what they can do with their supplies besides cards and scrapbook pages. Not that cards and scrapbook pages aren't absolutely beautiful! But, if you can get your supplies to go further, then don't they become more economical? So, you can get 'more bang for your buck'.
One of my girl friends, Lynn A. is having a birthday next weekend, and the party theme is 'girly'. I just had to make one of these to see just how cute they really are!
These little party favors are just sooo cute! There is a pocket inside that can hold chapstick, or lip gloss, a pair of earrings, a fun-size candy bar, or just any small token.
Thank you for looking. And if you're in the Albuquerque, New Mexico area on Dec. 17th, I will be sellings these little cuties at my last craft fair of the holiday season. The craft fair is being held inside the Kaseman Presbyterian Hospital on Wyoming and Constitution @ the cafeteria from 7a-4p. Stop in, and see what else I have made.
Post a comment, and let me know if you like these little cuties.

Wednesday, December 1, 2010

Hoot's Got Stamps? Journal

I have a few demonstrators who signed up under me, and I have a 'group'. The name I selected is 'Hoot's Got Stamps?'. We meet once a month to discuss business and to get some feedback from me and the other ladies. December is a super busy month for all of us, so we moved our normal meeting from the 2nd Wednesday of the month, to the 1st Wednesday of the month. That's today! and we also through in our holiday party at the same time!

Here is one of the journals I altered for each of my ladies. I monogrammed each of them, to make this simple gift a little sweeter :) This one is for Caitlin W. The 'C' monogram also works as a book mark. Pretty clever, huh? Well, ok, I didn't invent that, but I remembered to add it. Doesn't that count for something?
I used some Greenhouse Gala DSP, Marina Mist, Chocolate Chip, Very Vanilla, and Pear Pizzazz card stock. The 'create' stamp is from 'Define Your Life' stamp set, and the 'take note' is from 'Notable Ornate' stamp set. Sometimes, simple is just beautiful. Thank you for looking, and let me know what you think about their altered journal notebooks.